标签:cto pac hello mat 入参 apple 装箱 erro springioc
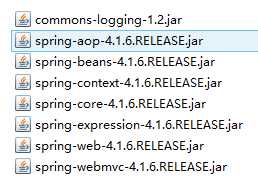
1.首先,导入SpringMVC需要的jar包。

  <!--configure the setting of springmvcDispatcherServlet and configure the mapping-->
  <servlet>
      <servlet-name>springmvc</servlet-name>
      <servlet-class>org.springframework.web.servlet.DispatcherServlet</servlet-class>
      <init-param>
            <param-name>contextConfigLocation</param-name>
            <param-value>classpath:springmvc-servlet.xml</param-value>
        </init-param>
        <!-- <load-on-startup>1</load-on-startup> -->
  </servlet>

  <servlet-mapping>
      <servlet-name>springmvc</servlet-name>
      <url-pattern>/</url-pattern>
  </servlet-mapping>
3.在src下添加springmvc-servlet.xml配置文件
<?xml version="1.0" encoding="UTF-8"?>
<beans xmlns="http://www.springframework.org/schema/beans"
    xmlns:xsi="http://www.w3.org/2001/XMLSchema-instance"
    xmlns:context="http://www.springframework.org/schema/context"
    xmlns:mvc="http://www.springframework.org/schema/mvc"
    xsi:schemaLocation="http://www.springframework.org/schema/beans http://www.springframework.org/schema/beans/spring-beans.xsd
        http://www.springframework.org/schema/context http://www.springframework.org/schema/context/spring-context-4.1.xsd
        http://www.springframework.org/schema/mvc http://www.springframework.org/schema/mvc/spring-mvc-4.1.xsd">

    <!-- scan the package and the sub package -->
    <context:component-scan base-package="test.SpringMVC"/>

    <!-- don‘t handle the static resource -->
    <mvc:default-servlet-handler />

    <!-- if you use annotation you must configure following setting -->
    <mvc:annotation-driven />

    <!-- configure the InternalResourceViewResolver -->
    <bean class="org.springframework.web.servlet.view.InternalResourceViewResolver"
            id="internalResourceViewResolver">
        <!-- 前缀 -->
        <property name="prefix" value="/WEB-INF/jsp/" />
        <!-- 后缀 -->
        <property name="suffix" value=".jsp" />
    </bean>
</beans>
4.在WEB-INF文件夹下创建名为jsp的文件夹,用来存放jsp视图。创建一个hello.jsp,在body中添加“Hello World”。
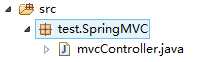
5.建立包及Controller,如下所示
6.编写Controller代码
@Controller
@RequestMapping("/mvc")
public class mvcController {

    @RequestMapping("/hello")
    public String hello(){
        return "hello";
    }
}
7.启动服务器,键入 http://localhost:8080/项目名/mvc/hello
1.Dispatcherservlet
DispatcherServlet是前置控制器,配置在web.xml文件中的。拦截匹配的请求,Servlet拦截匹配规则要自已定义,把拦截下来的请求,依据相应的规则分发到目标Controller来处理,是配置spring MVC的第一步。
2.InternalResourceViewResolver
视图名称解析器
3.以上出现的注解
@Controller 负责注册一个bean 到spring 上下文中
@RequestMapping 注解为控制器指定可以处理哪些 URL 请求
@Controller
负责注册一个bean 到spring 上下文中
@RequestMapping
注解为控制器指定可以处理哪些 URL 请求
@RequestBody
该注解用于读取Request请求的body部分数据,使用系统默认配置的HttpMessageConverter进行解析,然后把相应的数据绑定到要返回的对象上 ,再把HttpMessageConverter返回的对象数据绑定到 controller中方法的参数上
@ResponseBody
该注解用于将Controller的方法返回的对象,通过适当的HttpMessageConverter转换为指定格式后,写入到Response对象的body数据区
@ModelAttribute
在方法定义上使用 @ModelAttribute 注解:Spring MVC 在调用目标处理方法前,会先逐个调用在方法级上标注了@ModelAttribute 的方法
在方法的入参前使用 @ModelAttribute 注解:可以从隐含对象中获取隐含的模型数据中获取对象,再将请求参数 –绑定到对象中,再传入入参将方法入参对象添加到模型中
@RequestParam
在处理方法入参处使用 @RequestParam 可以把请求参 数传递给请求方法
@PathVariable
绑定 URL 占位符到入参
@ExceptionHandler
注解到方法上,出现异常时会执行该方法
@ControllerAdvice
使一个Contoller成为全局的异常处理类,类中用@ExceptionHandler方法注解的方法可以处理所有Controller发生的异常
    //match automatically
    @RequestMapping("/person")
    public String toPerson(String name,double age){
        System.out.println(name+" "+age);
        return "hello";
    }
1.编写一个Person实体类
package test.SpringMVC.model;

public class Person {
    public String getName() {
        return name;
    }
    public void setName(String name) {
        this.name = name;
    }
    public int getAge() {
        return age;
    }
    public void setAge(int age) {
        this.age = age;
    }
    private String name;
    private int age;

}
2.在Controller里编写方法
    //boxing automatically
    @RequestMapping("/person1")
    public String toPerson(Person p){
        System.out.println(p.getName()+" "+p.getAge());
        return "hello";
    }
    //the parameter was converted in initBinder
    @RequestMapping("/date")
    public String date(Date date){
        System.out.println(date);
        return "hello";
    }

    //At the time of initialization,convert the type "String" to type "date"
    @InitBinder
    public void initBinder(ServletRequestDataBinder binder){
        binder.registerCustomEditor(Date.class, new CustomDateEditor(new SimpleDateFormat("yyyy-MM-dd"),
                true));
    }
    //pass the parameters to front-end
    @RequestMapping("/show")
    public String showPerson(Map<String,Object> map){
        Person p =new Person();
        map.put("p", p);
        p.setAge(20);
        p.setName("jayjay");
        return "show";
    }
前台可在Request域中取到"p"
    //pass the parameters to front-end using ajax
    @RequestMapping("/getPerson")
    public void getPerson(String name,PrintWriter pw){
        pw.write("hello,"+name);
    }
    @RequestMapping("/name")
    public String sayHello(){
        return "name";
    }
前台用下面的Jquery代码调用
          $(function(){
              $("#btn").click(function(){
                  $.post("mvc/getPerson",{name:$("#name").val()},function(data){
                      alert(data);
                  });
              });
          });
    //redirect
    @RequestMapping("/redirect")
    public String redirect(){
        return "redirect:hello";
    }
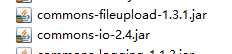
1.需要导入两个jar包
2.在SpringMVC配置文件中加入
    <!-- upload settings -->
    <bean id="multipartResolver"  class="org.springframework.web.multipart.commons.CommonsMultipartResolver">
        <property name="maxUploadSize" value="102400000"></property>
    </bean>
3.方法代码
    @RequestMapping(value="/upload",method=RequestMethod.POST)
    public String upload(HttpServletRequest req) throws Exception{
        MultipartHttpServletRequest mreq = (MultipartHttpServletRequest)req;
        MultipartFile file = mreq.getFile("file");
        String fileName = file.getOriginalFilename();
        SimpleDateFormat sdf = new SimpleDateFormat("yyyyMMddHHmmss");
        FileOutputStream fos = new FileOutputStream(req.getSession().getServletContext().getRealPath("/")+
                "upload/"+sdf.format(new Date())+fileName.substring(fileName.lastIndexOf(‘.‘)));
        fos.write(file.getBytes());
        fos.flush();
        fos.close();

        return "hello";
    }
4.前台form表单
      <form action="mvc/upload" method="post" enctype="multipart/form-data">
          <input type="file" name="file"><br>
          <input type="submit" value="submit">
      </form>
@Controller
@RequestMapping("/test")
public class mvcController1 {
    @RequestMapping(value="/param")
    public String testRequestParam(@RequestParam(value="id") Integer id,
            @RequestParam(value="name")String name){
        System.out.println(id+" "+name);
        return "/hello";
    }
}
1.RestController
@Controller
@RequestMapping("/rest")
public class RestController {
    @RequestMapping(value="/user/{id}",method=RequestMethod.GET)
    public String get(@PathVariable("id") Integer id){
        System.out.println("get"+id);
        return "/hello";
    }

    @RequestMapping(value="/user/{id}",method=RequestMethod.POST)
    public String post(@PathVariable("id") Integer id){
        System.out.println("post"+id);
        return "/hello";
    }

    @RequestMapping(value="/user/{id}",method=RequestMethod.PUT)
    public String put(@PathVariable("id") Integer id){
        System.out.println("put"+id);
        return "/hello";
    }

    @RequestMapping(value="/user/{id}",method=RequestMethod.DELETE)
    public String delete(@PathVariable("id") Integer id){
        System.out.println("delete"+id);
        return "/hello";
    }

}
2.form表单发送put和delete请求
在web.xml中配置
  <!-- configure the HiddenHttpMethodFilter,convert the post method to put or delete -->
  <filter>
      <filter-name>HiddenHttpMethodFilter</filter-name>
      <filter-class>org.springframework.web.filter.HiddenHttpMethodFilter</filter-class>
  </filter>
  <filter-mapping>
      <filter-name>HiddenHttpMethodFilter</filter-name>
      <url-pattern>/*</url-pattern>
  </filter-mapping>
在前台可以用以下代码产生请求
    <form action="rest/user/1" method="post">
        <input type="hidden" name="_method" value="PUT">
        <input type="submit" value="put">
    </form>

    <form action="rest/user/1" method="post">
        <input type="submit" value="post">
    </form>

    <form action="rest/user/1" method="get">
        <input type="submit" value="get">
    </form>

    <form action="rest/user/1" method="post">
        <input type="hidden" name="_method" value="DELETE">
        <input type="submit" value="delete">
    </form>
1.导入以下jar包

2.方法代码
@Controller
@RequestMapping("/json")
public class jsonController {

    @ResponseBody
    @RequestMapping("/user")
    public  User get(){
        User u = new User();
        u.setId(1);
        u.setName("jayjay");
        u.setBirth(new Date());
        return u;
    }
}
1.处理局部异常(Controller内)
    @ExceptionHandler
    public ModelAndView exceptionHandler(Exception ex){
        ModelAndView mv = new ModelAndView("error");
        mv.addObject("exception", ex);
        System.out.println("in testExceptionHandler");
        return mv;
    }

    @RequestMapping("/error")
    public String error(){
        int i = 5/0;
        return "hello";
    }
2.处理全局异常(所有Controller)
@ControllerAdvice
public class testControllerAdvice {
    @ExceptionHandler
    public ModelAndView exceptionHandler(Exception ex){
        ModelAndView mv = new ModelAndView("error");
        mv.addObject("exception", ex);
        System.out.println("in testControllerAdvice");
        return mv;
    }
}
3.另一种处理全局异常的方法
在SpringMVC配置文件中配置
    <!-- configure SimpleMappingExceptionResolver -->
    <bean class="org.springframework.web.servlet.handler.SimpleMappingExceptionResolver">
        <property name="exceptionMappings">
            <props>
                <prop key="java.lang.ArithmeticException">error</prop>
            </props>
        </property>
    </bean>
error是出错页面
1.创建一个MyInterceptor类,并实现HandlerInterceptor接口
public class MyInterceptor implements HandlerInterceptor {

    @Override
    public void afterCompletion(HttpServletRequest arg0,
            HttpServletResponse arg1, Object arg2, Exception arg3)
            throws Exception {
        System.out.println("afterCompletion");
    }

    @Override
    public void postHandle(HttpServletRequest arg0, HttpServletResponse arg1,
            Object arg2, ModelAndView arg3) throws Exception {
        System.out.println("postHandle");
    }

    @Override
    public boolean preHandle(HttpServletRequest arg0, HttpServletResponse arg1,
            Object arg2) throws Exception {
        System.out.println("preHandle");
        return true;
    }

}
2.在SpringMVC的配置文件中配置
    <!-- interceptor setting -->
    <mvc:interceptors>
        <mvc:interceptor>
            <mvc:mapping path="/mvc/**"/>
            <bean class="test.SpringMVC.Interceptor.MyInterceptor"></bean>
        </mvc:interceptor>
    </mvc:interceptors>
3.拦截器执行顺序

1.导入Hibernate-validate需要的jar包
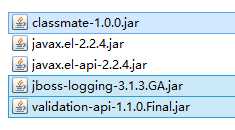 (未选中不用导入)

2.编写实体类User并加上验证注解
public class User {
    public int getId() {
        return id;
    }
    public void setId(int id) {
        this.id = id;
    }
    public String getName() {
        return name;
    }
    public void setName(String name) {
        this.name = name;
    }
    public Date getBirth() {
        return birth;
    }
    public void setBirth(Date birth) {
        this.birth = birth;
    }
    @Override
    public String toString() {
        return "User [id=" + id + ", name=" + name + ", birth=" + birth + "]";
    }
    private int id;
    @NotEmpty
    private String name;

    @Past
    @DateTimeFormat(pattern="yyyy-MM-dd")
    private Date birth;
}
ps:@Past表示时间必须是一个过去值
3.在jsp中使用SpringMVC的form表单
    <form:form action="form/add" method="post" modelAttribute="user">
        id:<form:input path="id"/><form:errors path="id"/><br>
        name:<form:input path="name"/><form:errors path="name"/><br>
        birth:<form:input path="birth"/><form:errors path="birth"/>
        <input type="submit" value="submit">
    </form:form>
ps:path对应name
4.Controller中代码
@Controller
@RequestMapping("/form")
public class formController {
    @RequestMapping(value="/add",method=RequestMethod.POST)
    public String add(@Valid User u,BindingResult br){
        if(br.getErrorCount()>0){
            return "addUser";
        }
        return "showUser";
    }

    @RequestMapping(value="/add",method=RequestMethod.GET)
    public String add(Map<String,Object> map){
        map.put("user",new User());
        return "addUser";
    }
}
ps:
1.因为jsp中使用了modelAttribute属性,所以必须在request域中有一个"user".
2.@Valid 表示按照在实体上标记的注解验证参数
3.返回到原页面错误信息回回显,表单也会回显
5.错误信息自定义
在src目录下添加locale.properties
NotEmpty.user.name=name can‘t not be empty
Past.user.birth=birth should be a past value
DateTimeFormat.user.birth=the format of input is wrong
typeMismatch.user.birth=the format of input is wrong
typeMismatch.user.id=the format of input is wrong
在SpringMVC配置文件中配置
    <!-- configure the locale resource -->
    <bean id="messageSource" class="org.springframework.context.support.ResourceBundleMessageSource">
        <property name="basename" value="locale"></property>
    </bean>
6.国际化显示
在src下添加locale_zh_CN.properties
username=账号
password=密码
locale.properties中添加
username=user name
password=password
创建一个locale.jsp
  <body>
    <fmt:message key="username"></fmt:message>
    <fmt:message key="password"></fmt:message>
  </body>
在SpringMVC中配置
    <!-- make the jsp page can be visited -->
    <mvc:view-controller path="/locale" view-name="locale"/>
让locale.jsp在WEB-INF下也能直接访问
最后,访问locale.jsp,切换浏览器语言,能看到账号和密码的语言也切换了
1.创建一个test.SpringMVC.integrate的包用来演示整合,并创建各类
2.User实体类
public class User {
    public int getId() {
        return id;
    }
    public void setId(int id) {
        this.id = id;
    }
    public String getName() {
        return name;
    }
    public void setName(String name) {
        this.name = name;
    }
    public Date getBirth() {
        return birth;
    }
    public void setBirth(Date birth) {
        this.birth = birth;
    }
    @Override
    public String toString() {
        return "User [id=" + id + ", name=" + name + ", birth=" + birth + "]";
    }
    private int id;
    @NotEmpty
    private String name;

    @Past
    @DateTimeFormat(pattern="yyyy-MM-dd")
    private Date birth;
}
3.UserService类
@Component
public class UserService {
    public UserService(){
        System.out.println("UserService Constructor...\n\n\n\n\n\n");
    }

    public void save(){
        System.out.println("save");
    }
}
4.UserController
@Controller
@RequestMapping("/integrate")
public class UserController {
    @Autowired
    private UserService userService;

    @RequestMapping("/user")
    public String saveUser(@RequestBody @ModelAttribute User u){
        System.out.println(u);
        userService.save();
        return "hello";
    }
}
5.Spring配置文件
在src目录下创建SpringIOC的配置文件applicationContext.xml
<?xml version="1.0" encoding="UTF-8"?>
<beans xmlns="http://www.springframework.org/schema/beans"
    xmlns:xsi="http://www.w3.org/2001/XMLSchema-instance"
    xsi:schemaLocation="http://www.springframework.org/schema/beans
        http://www.springframework.org/schema/beans/spring-beans.xsd
        http://www.springframework.org/schema/util
        http://www.springframework.org/schema/util/spring-util-4.0.xsd
        http://www.springframework.org/schema/context
        http://www.springframework.org/schema/context/spring-context.xsd
        "
        xmlns:util="http://www.springframework.org/schema/util"
        xmlns:p="http://www.springframework.org/schema/p"
        xmlns:context="http://www.springframework.org/schema/context"
        >
    <context:component-scan base-package="test.SpringMVC.integrate">
        <context:exclude-filter type="annotation"
            expression="org.springframework.stereotype.Controller"/>
        <context:exclude-filter type="annotation"
            expression="org.springframework.web.bind.annotation.ControllerAdvice"/>
    </context:component-scan>

</beans>
在Web.xml中添加配置
  <!-- configure the springIOC -->
  <listener>
      <listener-class>org.springframework.web.context.ContextLoaderListener</listener-class>
  </listener>
  <context-param>
    <param-name>contextConfigLocation</param-name>
    <param-value>classpath:applicationContext.xml</param-value>
  </context-param>
6.在SpringMVC中进行一些配置,防止SpringMVC和SpringIOC对同一个对象的管理重合
<!-- scan the package and the sub package -->
    <context:component-scan base-package="test.SpringMVC.integrate">
        <context:include-filter type="annotation"
            expression="org.springframework.stereotype.Controller"/>
        <context:include-filter type="annotation"
            expression="org.springframework.web.bind.annotation.ControllerAdvice"/>
    </context:component-scan>
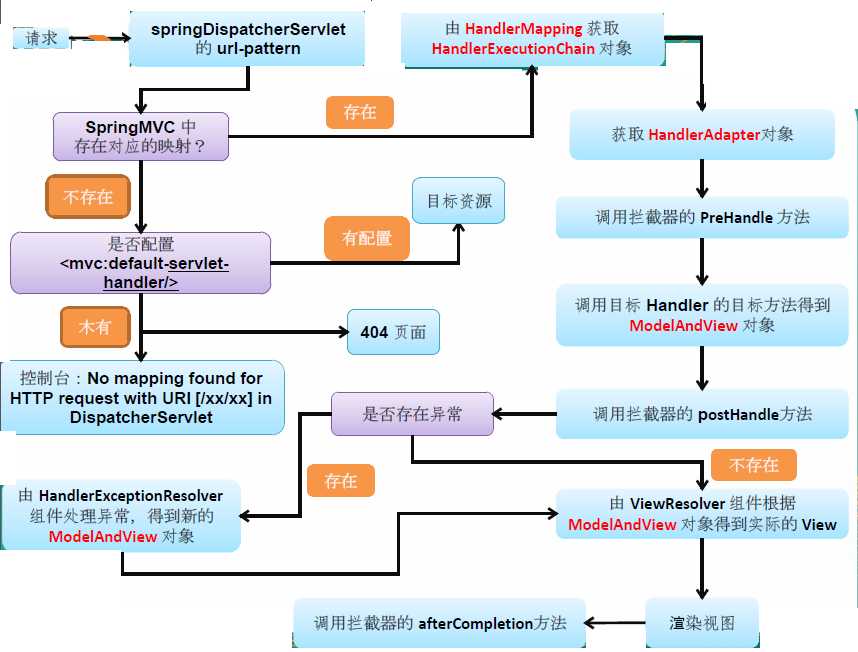
1. 客户端请求提交到DispatcherServlet
2. 由DispatcherServlet控制器查询一个或多个HandlerMapping,找到处理请求的Controller
3. DispatcherServlet将请求提交到Controller
4. Controller调用业务逻辑处理后,返回ModelAndView
5. DispatcherServlet查询一个或多个ViewResoler视图解析器,找到ModelAndView指定的视图
6. 视图负责将结果显示到客户端
1、springmvc基于方法开发的,struts2基于类开发的。springmvc将url和controller里的方法映射。映射成功后springmvc生成一个Handler对象,对象中只包括了一个method。方法执行结束,形参数据销毁。springmvc的controller开发类似web service开发。
2、springmvc可以进行单例开发,并且建议使用单例开发,struts2通过类的成员变量接收参数,无法使用单例,只能使用多例。
3、经过实际测试,struts2速度慢,在于使用struts标签,如果使用struts建议使用jstl。
标签:cto pac hello mat 入参 apple 装箱 erro springioc
原文地址:http://www.cnblogs.com/lizggo/p/6900133.html