标签:加载 resources height web top 成功 png get artifact
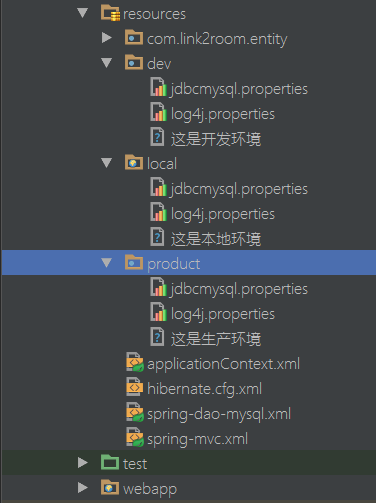
项目有三种环境:
1.本地开发环境(local)
2.开发测试环境(dev)
3.线上生产环境(product)
不同的环境有不同的配置,比如数据库连接什么的....maven打包时默认去resources文件夹下打包这些配置文件,放在WEB-INF/classes下,然后再打成war包,就能用了...现在通过修改pom.xml文件,增加三种配置,让maven打包时选择打包不同文件夹下的配置文件到WEB-INF/classes下,这样就省事儿了....
如图所示,resources下dev,local,product三个文件夹,分别对应三种环境。
下面是pom.xml主要修改:
<!--配置参数-->
<profiles>
    <profile>
        <id>local</id>
        <properties>
            <package.environment>local</package.environment>
        </properties>
        <activation>
            <activeByDefault>true</activeByDefault>
        </activation>
    </profile>
    <profile>
        <id>product</id>
        <properties>
            <package.environment>product</package.environment>
        </properties>
    </profile>
    <profile>
        <id>dev</id>