标签:输入 arc jpeg 验证码生成 attribute sys struct 阴影 servlet
原文:http://www.kailing.pub/article/index/arcid/92.html
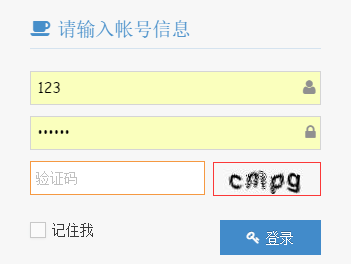
kaptcha 是谷歌开源的非常实用的验证码生成工具,基于SimpleCaptcha的开源项目。使用Kaptcha 生成验证码十分简单并且参数可以进行自定义。只需添加jar包配置下就可以使用,通过配置,可以自己定义验证码大小、颜色、显示的字符等等。下面就来讲一下如何使用kaptcha生成验证码以及在服务器端取出验证码进行校验。
1.首先要项目使用Kaptcha肯定要依赖kaptcha的jar,maven项目的话直接加入如下依赖,非maven项目就自己下载jar包吧
<dependency>
<groupId>com.github.axet</groupId>
<artifactId>kaptcha</artifactId>
<version>0.0.9</version>
</dependency>
官方下载链接:https://code.google.com/archive/p/kaptcha/downloads,当然你得FQ哈
2.配置kaptcha
以项目使用spring为例,配置一个默认的Kaptcha的bean,如下
	<bean id="captchaProducer" class="com.google.code.kaptcha.impl.DefaultKaptcha" scope="singleton">
	    <property name="config">
	        <bean class="com.google.code.kaptcha.util.Config">
	            <constructor-arg>
	                <props>
	                	<prop key="kaptcha.session.key">kaptcha.code</prop>
	                	<!-- 无边框 -->
	                    <prop key="kaptcha.border">no</prop>
	                    <prop key="kaptcha.textproducer.font.color">black</prop>
	                    <!-- 渲染效果:水纹:WaterRipple;鱼眼:FishEyeGimpy;阴影:ShadowGimpy -->
	                    <prop key="kaptcha.obscurificator.impl">com.google.code.kaptcha.impl.WaterRipple</prop>
	                    <!-- 不要噪点 -->
	                    <prop key="kaptcha.noise.impl">com.google.code.kaptcha.impl.NoNoise</prop>
	                    <prop key="kaptcha.image.width">90</prop>
	                    <prop key="kaptcha.image.height">33</prop>
	                    <prop key="kaptcha.textproducer.font.size">25</prop>
	                    <prop key="kaptcha.textproducer.char.length">4</prop>
	                    <prop key="kaptcha.textproducer.char.space">5</prop>
	                    <!-- 和登录框背景颜色一致 -->
	                    <prop key="kaptcha.background.clear.from">247,247,247</prop>
	                    <prop key="kaptcha.background.clear.to">247,247,247</prop>
	                </props>
	            </constructor-arg>
	        </bean>
	    </property>
	</bean>
3.将生成的验证码保存进session中,并输出由验证码生成的图片流到页面
        @Autowired
	private Producer captchaProducer;
	@RequestMapping(value = "/kaptchaImage", method = RequestMethod.GET)
    public void kaptcha(HttpServletRequest req, HttpServletResponse rsp) {
		ServletOutputStream out = null;
		try {
	        HttpSession session = req.getSession();
	        rsp.setDateHeader("Expires", 0);
	        rsp.setHeader("Cache-Control", "no-store, no-cache, must-revalidate");
	        rsp.addHeader("Cache-Control", "post-check=0, pre-check=0");
	        rsp.setHeader("Pragma", "no-cache");
	        rsp.setContentType("image/jpeg");
	        String capText = captchaProducer.createText();
	        session.setAttribute(Constants.KAPTCHA_SESSION_KEY, capText);
	        BufferedImage image = captchaProducer.createImage(capText);
	        out = rsp.getOutputStream();
	        ImageIO.write(image, "jpg", out);
	        out.flush();
        }catch(IOException e)
		{
			throw new SystemException(e);
		} finally {
            try {
				out.close();
			} catch (IOException e) {
				throw new SystemException(e);
			}
        }
    }
4.校验用户输入的验证码和保存进session的是否一直,达到验证目的
@RequestMapping(value = "/login", method = RequestMethod.POST, produces = "text/html; charset=utf-8")
	public String userLogin(String accountName, String password, String captcha, Boolean rememberMe, HttpServletRequest request) {
		 //从session中取出kaptcha生成的验证码text值
	        String expected = (String) request.getSession().getAttribute(Constants.KAPTCHA_SESSION_KEY);
	        //获取用户页面输入的验证码
	        if(!captcha.equalsIgnoreCase(expected))
	        {
	        	request.setAttribute("error", "验证码错误!");
				return "/login";
	        }else
	        {
                    xxxx验证码后的后续逻辑
                 }
}
标签:输入 arc jpeg 验证码生成 attribute sys struct 阴影 servlet
原文地址:http://www.cnblogs.com/shihaiming/p/6993687.html