标签:通过 lob util remove span ima emc nload group
1、下载安装
cd /usr/local/src
sudo wget http://www.igniterealtime.org/downloadServlet?filename=openfire/openfire_4_1_0.tar.gz -O openfire_4_1_0.tar.gz
sudo tar -zvxf openfire_4_1_0.tar.gz
sudo mv openfire /tpc/
2、修改配置文件:
sudo vi /tpc/openfire/conf/openfire.xml
修改conf 目录下openfire.xml 文件里的数据库连接池, 在<local>en</local> 后添加
<connectionProvider>
<className>org.jivesoftware.database.DefaultConnectionProvider</className>
</connectionProvider>
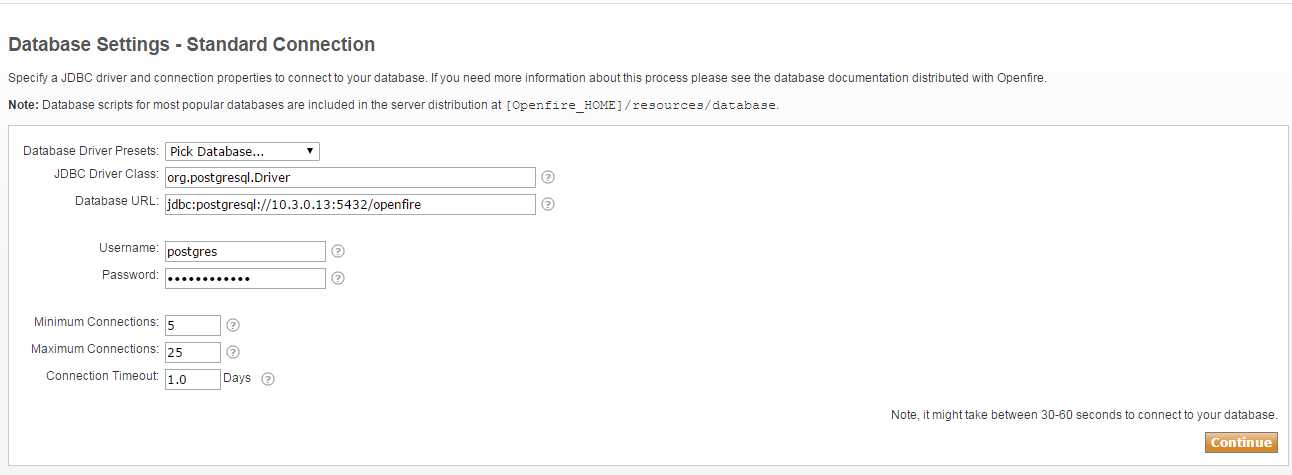
<database>
<defaultProvider>
<driver>org.postgresql.Driver</driver>
<serverURL>jdbc:postgresql://10.3.0.13:5432/openfire</serverURL>
<username encrypted="false">postgres</username>
<password encrypted="false">mypassword</password>
<testSQL>select 1</testSQL>
<testBeforeUse>false</testBeforeUse>
<testAfterUse>false</testAfterUse>
<minConnections>5</minConnections>
<maxConnections>25</maxConnections>
<connectionTimeout>1.0</connectionTimeout>
</defaultProvider>
</database>
<setup>false</setup>
修改Java_home
sudo vi /tpc/openfire/bin/openfire
INSTALL4J_JAVA_HOME_OVERRIDE=/tpc/jdk1.8
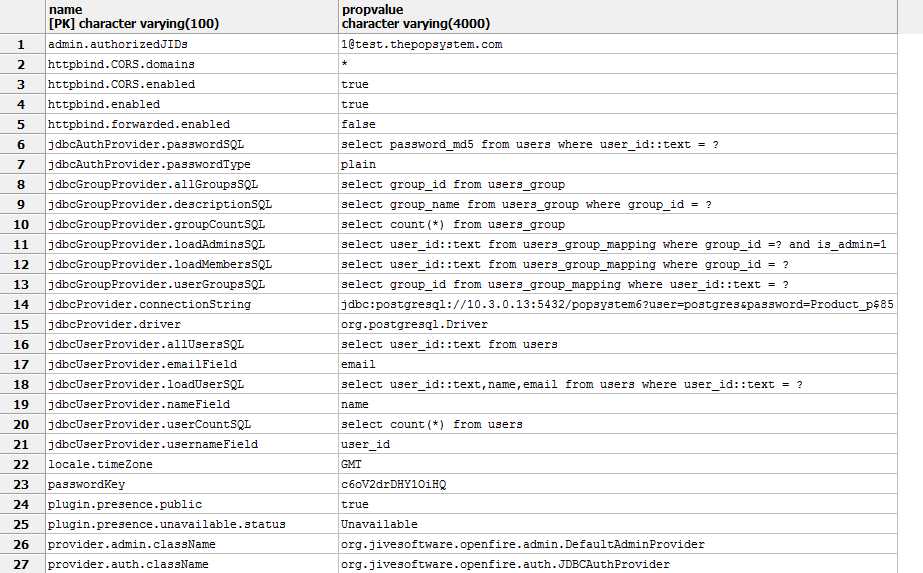
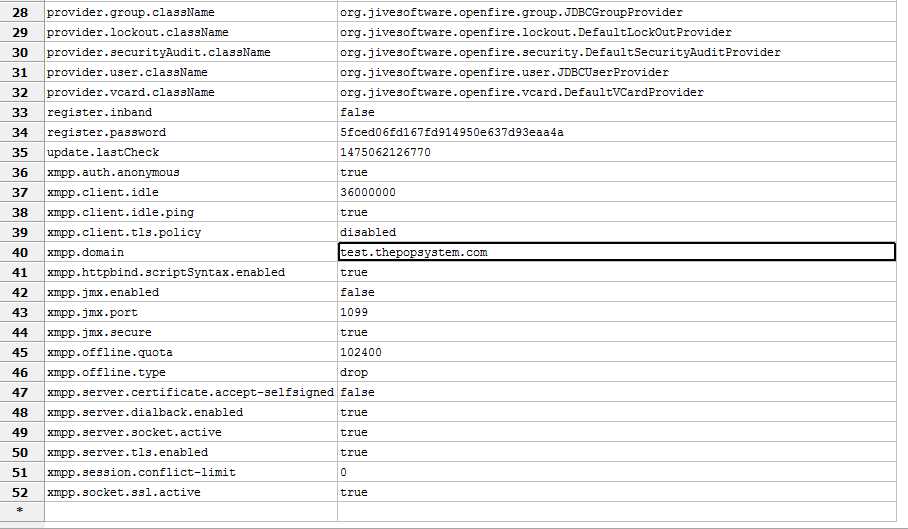
修改openfire 数据库里 ofproperty 的几条记录
"admin.authorizedJIDs" "1@www.thepopsystem.com"
"jdbcProvider.connectionString" "jdbc:postgresql://10.3.0.13:5432/popsystem6?user=postgres&password=xxxxx"
"xmpp.domain" " www.thepopsystem.com"
"provider.auth.className";"org.jivesoftware.openfire.auth.JDBCAuthProvider"
"provider.group.className";"org.jivesoftware.openfire.group.JDBCGroupProvider"
"provider.user.className";"org.jivesoftware.openfire.user.JDBCUserProvider"
具体配置如下:
重新启动openfire
sudo /tpc/openfire/bin/openfire start
如果报找不到openfireHome
Vi /etc/profile
添加 export openfireHome=/tpc/openfire
9090 仅对TPC开放
打开 5222 9090 端口。
sudo ufw allow 5222
sudo ufw allow 5223
sudo ufw allow 7070
sudo ufw allow 1099
sudo ufw allow 9090
修改Apache的mod_jk
添加JHB映射
JkMount /JHB/ workersystem6
如果过几秒就出现如下的信息,原因是Ubuntu 本机没有解析到 www.thepopsystem.com
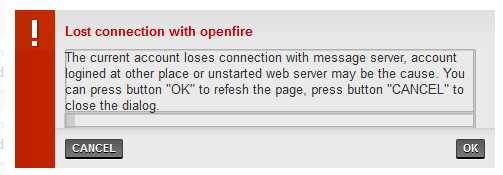
解决方法:
sudo vi /etc/hosts
添加 10.3.0.13 www.thepopsystem.com 然后重启机器
也有可能 \WebRoot\resources\js\utils\UtilsMerger.js 最后几行
把openfire IP 或者域名不对,需要配置成 www.thepopsystem.com
进入管理界面
http://10.3.0.11:9090/
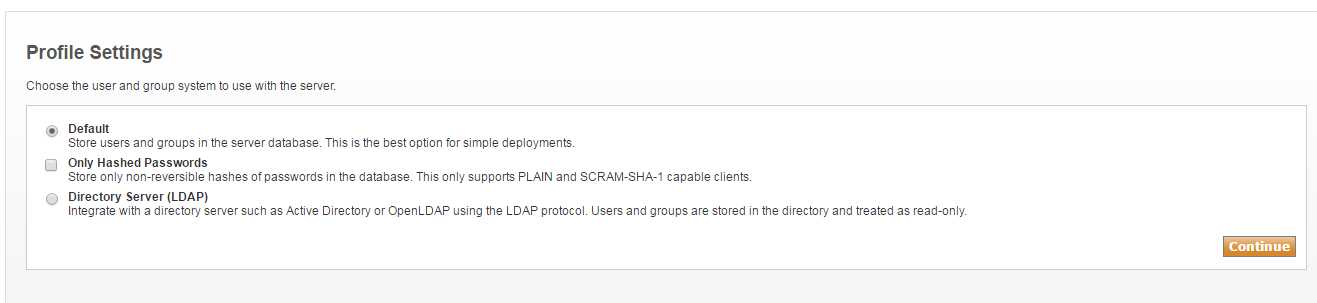
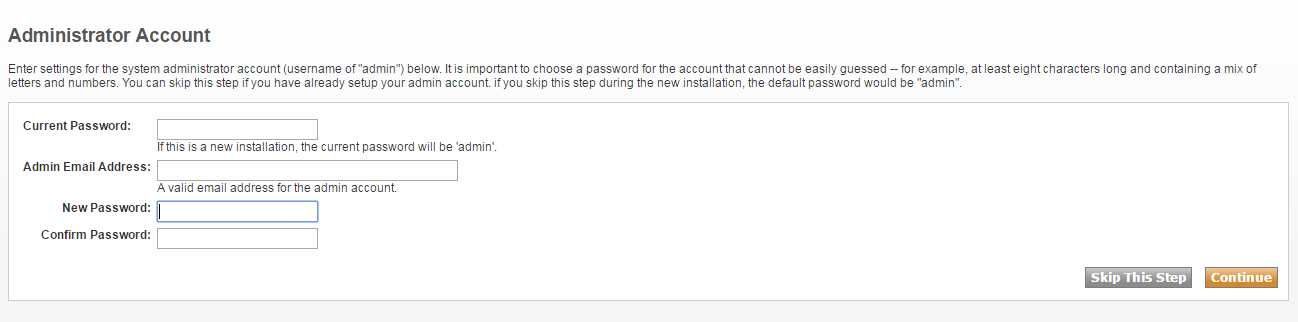
可以跳过设置密码的这一步.
SKIP This STEP, 必须重新启动Openfire, 否则报用户名密码错误!!!!
用户名 admin 密码 admin
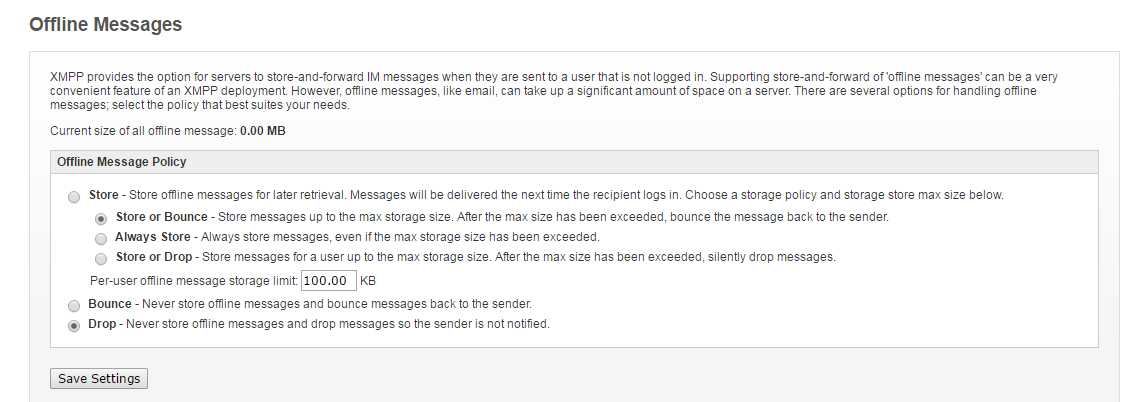
直接丢弃脱机消息,因为TPC已经实现了这部分功能
如果在servermanager 界面 Server Name: system6.thepopcompany.com 出现感叹号。
需要在”Server settings”—>“删除已有的证书”, 重启服务器,然后登陆,直接点击更新证书即可。
3、设置开机自动启动,关机自动关闭
sudo vi /etc/rc.local
添加
/tpc/openfire/bin/openfire start
4、启动Openfire:
sudo /tpc/openfire/bin/openfire start
5. Support HTTPS
因为走得是内网, 因而Openfire 无需加密,哪怕是在 https://www.thepopsystem.com 的域名内。不会报不安全的错误。
Finally ................................
如果通过各种方法后, 还存在 Lost Connection with openfire, 那就是重新恢复openfire数据库, 修改对应的domain name 和 admin account后,重启Openfire,问题解决.
sudo /tpc/openfire/bin/openfire stop
sudo systemctl stop postgresql -- kill all the connections of openfire
sudo systemctl start postgresql
user pgadmin delete the existing openfire database and create empty openfiredatabase
sudo -u postgres pg_restore -h 127.0.0.1 -U postgres -d openfire /tpc/tempfiles/openfire_2016-09-20.backup
修改数据库Openfire ofproperty 库里的这两条数据
"admin.authorizedJIDs" "1@www.thepopsystem.com"
"xmpp.domain" " www.thepopsystem.com"
sudo /tpc/openfire/bin/openfire start
6 . Restart Openfire
sudo /tpc/openfire/bin/openfire stop
sudo rm /tpc/openfire/logs/*.*
sudo /tpc/openfire/bin/openfire start
sudo more /tpc/openfire/logs/all.log
----------------------------------------------------------------------------- 下面仅供参考,没有测试通过 -------------------------------------------------------------------------------------------
https://community.igniterealtime.org/thread/54027
http://download.igniterealtime.org/openfire/docs/latest/documentation/ssl-guide.html
A. First change certificate from perm to X509 pem type
C:\openssl\bin>openssl x509 -outform der -in www.thepopsystem.cer -out www.thepopsystem.com.pem
B. Import server certificates, the default password of keystore is changeit
sudo /tpc/jdk1.8/bin/keytool -import -keystore /tpc/openfire/resources/security/keystore -alias www.thepopsystem.com -file /tpc/apache2.4/conf/ssl2017/www.thepopsystem.com.pem
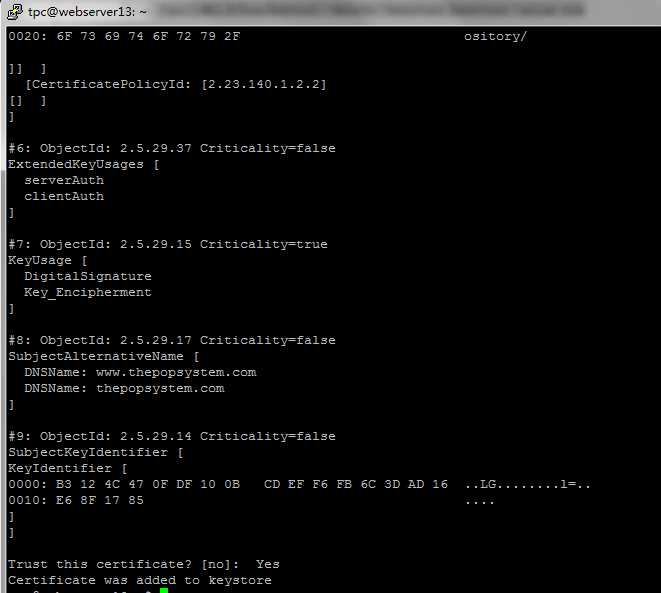
type Yes.
C. Remove default certificates
After importing your certificate you must remove the default certificates using the keytool.
First list all the certificates in this store
sudo /tpc/jdk1.8/bin/keytool -list -keystore /tpc/openfire/resources/security/keystore
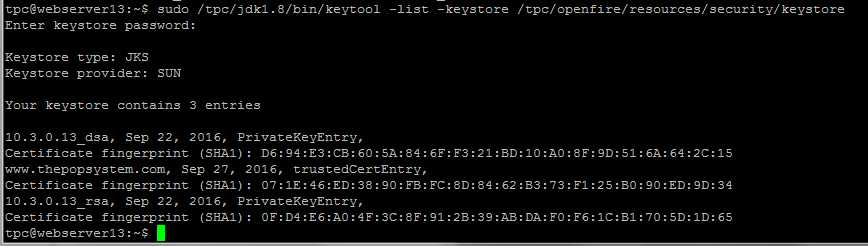
sudo /tpc/jdk1.8/bin/keytool -delete -keystore /tpc/openfire/resources/security/keystore -alias 10.3.0.13_rsa
sudo /tpc/jdk1.8/bin/keytool -delete -keystore /tpc/openfire/resources/security/keystore -alias 10.3.0.13_dsa
http://stackoverflow.com/questions/906402/importing-an-existing-x509-certificate-and-private-key-in-java-keystore-to-use-i/8224863#8224863
Step one: Convert x509 Cert and Key to a pkcs12 file
openssl pkcs12 -export -in server.crt -inkey server.key -out server.p12 -name [some-alias] -CAfile ca.crt -caname rootNote: Make sure you put a password on the p12 file - otherwise you‘ll get a null reference exception when you try to import it. (In case anyone else had this headache). (Thanks jocull!)
Note 2: You might want to add the -chainoption to preserve the full certificate chain. (Thanks Mafuba)
openssl pkcs12 -export -in server.crt -inkey server.key -out server.p12 -name [some-alias] ca.crt -caname root
sudo /tpc/jdk1.8/bin/keytool -storepasswd -keystore /tpc/openfire/resources/security/keystoreopenssl pkcs12 -export -in www.thepopsystem.cer -inkey www.thepopsystem.com.key -out testkeystorethepopsystem.p12 -name www.thepopsystem.com-CAfileglobalsign.crt-caname globalsign
Step two: Convert the pkcs12 file to a java keystore
keytool -importkeystore -deststorepass [changeit] -destkeypass [changeit] -destkeystore server.keystore -srckeystore server.p12 -srcstoretype PKCS12 -srcstorepass some-password -alias [some-alias]
sudo /tpc/jdk1.8/bin/keytool -importkeystore-deststorepass changeit -destkeypass changeit -destkeystore/tpc/openfire/resources/security/keystore-srckeystore /tpc/apache2.4/conf/ssl2017/testkeystorethepopsystem.p12-srcstoretype PKCS12 -srcstorepass changeit -alias www.thepopsystem.com
D. Configure Openfire
Open the Openfire Admin Console in your favorite browser and add or change the following system properties:
E. Restart Openfire
sudo /tpc/openfire/bin/openfire stop
sudo rm /tpc/openfire/logs/*.*
sudo /tpc/openfire/bin/openfire start
sudo more /tpc/openfire/logs/all.log
标签:通过 lob util remove span ima emc nload group
原文地址:http://www.cnblogs.com/shadowzhang/p/Openfire_ubuntu.html