标签:nal over 进程 alt ges cas 播放 message extra
Notification的作用
Notification是一种全局效果的通知,在系统的通知栏中显示。既然作为通知,其基本作用有:
Notification的基本操作:
Notification的基本操作主要有创建、更新和取消三种。一个Notification的必要属性有三项,如果不设置的话在运行时会抛出异常:
除了以上三项,其他均为可选项,不过一般而言,通知需要有交互的功能,所以一般Notification具有Action属性,这样就能跳转到App的某一个Activity、启动一个service或者发送一个Broadcast。
当系统受到通知时,可以通过震动、铃声、呼吸灯等多种方式进行提醒。
下面就从Notification的基本操作逐条介绍:
Notification的创建过程主要涉及到Notification.Builder、Notification、NotificationManager
Notification.Builder:
使用建造者模式构建Notification对象。由于Notification.Builder仅支持Android4.1及之后的版本,为了解决兼容性的问题,使用V4兼容库中的NotifivationCompat.Builder类。
Notification:通知对应类,保存通知相关的数据。NotificationManager向系统发送通知时会用到。
NotificationManager:通知管理类,调用NotificationManager的notify方法可以向系统发送通知。
获取 NotificationManager 对象:
NotificationManager notificationManager = (NotificationManager) getSystemService(Context.NOTIFICATION_SERVICE);
前面讲到,Notification有三个必要属性以及一个很有必要的属性Action。下面我们就创建一个简单的Notification,主要有以下三步:

private void sendNotification(){

    Intent intent = new Intent(this,SettingsActivity.class);

    PendingIntent mPendingIntent = PendingIntent.getActivity(this,0,intent,PendingIntent.FLAG_ONE_SHOT);

    NotificationManager notificationManager = (NotificationManager) getSystemService(Context.NOTIFICATION_SERVICE);

    NotificationCompat.Builder builder = (NotificationCompat.Builder) new NotificationCompat.Builder(this)

            //设置小图标

            .setSmallIcon(R.mipmap.ic_launcher)

            //点击后自动清除

            .setAutoCancel(true)

            //设置通知标题

            .setContentTitle("最简单的通知")

            //设置通知内容

            .setContentText("真的很简单很简单很简单")

            //设置通知的动作

            .setContentIntent(mPendingIntent)

            //设置通知时间,默认为系统发出通知的时间

            .setWhen(System.currentTimeMillis());

            //第一个参数为Notification的id

    notificationManager.notify(2,builder.build());

}
其中为了实现Action属性,我们需要创建Intent、PendingIntent和setContentIntent()这几步。
不难发现,其中的PendingIntent的设置才是其中的关键。
PendingIntent支持三种待定的意图:启动Activity,启动Service和发送Broadcast。对应于它的三个接口方法。
|
static PendingIntent |
getActivity(Context context,int requestCode,Intent intent,int flags) 获取一个PendingIntent,该意图发生时,相当于Context.startActivity(Intent) |
|
static PendingIntent |
getService (Context context,int requestCode,Intent intent,int flags) 获取一个PendingIntent,该意图发生时,相当于Context.startService (Intent) |
|
static PendingIntent |
getBroadcast(Context context,int requestCode,Intent intent,int flags) 获取一个PendingIntent,该意图发生时,相当于Context.sendBroadcast(Intent) |
其中context和intent不需要讲,主要说一下requestCode和flags。其中requestCode是PendingIntent发送发的请求码,多数情况下设置为0即可,requestCode会影响到flags的效果。
PendingIntent相同:Intent相同且requestCode也相同。(Intent相同需要ComponentName和intent-filter相同)
flags的常见类型有:
FLAG_ONE_SHOT:只能被使用一次,然后就会被自动cancel,如果后续还有相同的PendingIntent。那么他们的send方法就会调用失败。
FLAG_NO_CREATE:如果当前系统中不存在相同的PendingIntent对象,系统不会创建该PendingIntent对象,而是直接返回null。(很少使用)
FLAG_CANCEL_CURRENT:如果当前系统中已经存在一个相同的 PendingIntent 对象,那么就将先将已有的 PendingIntent 取消,然后重新生成一个 PendingIntent 对象。
FLAG_UPDATE_CURRENT:当前描述的PendingIntent如果已经存在,那么它们会被更新,即Intent中的Extras会被替换到最新的。
更新通知的操作很简单,只需要再次发送一次相同ID的通知即可,如果之前的通知还没有被取消,则会直接更新该通知相关的属性;如果之前的通知已经被取消,则会重新创建一个新的通知。
更新通知和发送通知采用同样的方法。
取消通知的方式主要有以下5种:
如果是通过NotificationManager.notify(String tag, int id, Notification notify) 方法创建的通知,那么只能通过 NotificationManager.cancel(String tag, int id) 或cancelAll()方法才能清除对应的通知,调用NotificationManager.cancel(int id) 无效。
前面提到了Notification的通知效果,有了通知效果更能提醒用户去查看Notification。
Notification的通知效果有震动、呼吸灯、铃声三种,可以通过builder中的setDefaults(int defaults)方法来设置,属性有以下四种,一旦设置了默认效果,自定义效果就会失效。
//添加默认震动效果,需要申请震动权限

//<uses-permission android:name="android.permission.VIBRATE" />

Notification.DEFAULT_VIBRATE

//添加系统默认声音效果,设置此值后,调用setSound()设置自定义声音无效

Notification.DEFAULT_SOUND

//添加默认呼吸灯效果,使用时须与 Notification.FLAG_SHOW_LIGHTS 结合使用,否则无效

Notification.DEFAULT_LIGHTS

//添加上述三种默认提醒效果

Notification.DEFAULT_ALL
铃声:
//调用系统默认响铃,设置此属性后setSound()会无效

//.setDefaults(Notification.DEFAULT_SOUND)

//调用系统多媒体裤内的铃声

//.setSound(Uri.withAppendedPath(MediaStore.Audio.Media.INTERNAL_CONTENT_URI,"2"));

//调用自己提供的铃声,位于 /res/values/raw 目录下

.setSound(Uri.parse("android.resource://com.littlejie.notification/" + R.raw.sound))
震动:
long[] vibrate = new long[]{0, 500, 1000, 1500};


//使用系统默认的震动参数,会与自定义的冲突

//.setDefaults(Notification.DEFAULT_VIBRATE)

//自定义震动效果

.setVibrate(vibrate);
呼吸灯
//ledARGB 表示灯光颜色、 ledOnMS 亮持续时间、ledOffMS 暗的时间

.setLights(0xFF0000, 3000, 3000);
另一种方式:
Notification notification = builder.build();

//只有在设置了标志符Flags为Notification.FLAG_SHOW_LIGHTS的时候,才支持呼吸灯提醒。

notify.flags = Notification.FLAG_SHOW_LIGHTS;

//设置lights参数的另一种方式

//notify.ledARGB = 0xFF0000;

//notify.ledOnMS = 500;

//notify.ledOffMS = 5000;
还可以通过以下几种Flag来设置通知效果
 //提醒效果常用 Flag
//三色灯提醒,在使用三色灯提醒时候必须加该标志符

        Notification.FLAG_SHOW_LIGHTS

//发起正在运行事件(活动中)

        Notification.FLAG_ONGOING_EVENT

//让声音、振动无限循环,直到用户响应 (取消或者打开)

        Notification.FLAG_INSISTENT


//发起Notification后,铃声和震动均只执行一次

        Notification.FLAG_ONLY_ALERT_ONCE

//用户单击通知后自动消失

        Notification.FLAG_AUTO_CANCEL


//只有调用NotificationManager.cancel()时才会清除

        Notification.FLAG_NO_CLEAR

//表示正在运行的服务

        Notification.FLAG_FOREGROUND_SERVICE
上面讲到的Notification的布局都是系统默认的,当然有时候处于需求,我们可能需要自定义Notification的布局。
那如何实现Notification的自定义布局呢?
这里就需要提出一个新的知识点RemoteView,望文生义,即远程View。
RemoteView表示的是一种View结构,它可以在其他进程中显示(具体来讲是SystemServer进程),由于它是在其他进程中显示,为了更新它的界面,我们不能简单地使用普通View的那一套方法,RemoteView提供了一系列Set方法用于更新界面。
下面就是一个简单的示例;
package com.pignet.remoteviewtest;

import android.app.Notification;

import android.app.NotificationManager;

import android.app.PendingIntent;

import android.content.Context;

import android.content.Intent;

import android.support.v7.app.AppCompatActivity;

import android.os.Bundle;

import android.view.View;

import android.widget.Button;

import android.widget.RemoteViews;

public class MainActivity extends AppCompatActivity {


    @Override

    protected void onCreate(Bundle savedInstanceState) {

        super.onCreate(savedInstanceState);

        setContentView(R.layout.activity_main);

        Button btnNotification = (Button) findViewById(R.id.btn_notification);

        btnNotification.setOnClickListener(new View.OnClickListener() {

            @Override

            public void onClick(View v) {

                sendNotification();

            }

        });

    }

    private void sendNotification(){

        NotificationManager notificationManager = (NotificationManager) getSystemService(Context.NOTIFICATION_SERVICE);

        Notification notification =new Notification();

        notification.icon=R.mipmap.ic_launcher;

        notification.when=System.currentTimeMillis();

        notification.flags=Notification.FLAG_AUTO_CANCEL;

        //跳转意图

        Intent intent = new Intent(this,SettingsActivity.class);

        //建立一个RemoteView的布局,并通过RemoteView加载这个布局

        RemoteViews remoteViews = new RemoteViews(getPackageName(),R.layout.layout_notification);

        //为remoteView设置图片和文本

        remoteViews.setTextViewText(R.id.message,"第一条通知");

        remoteViews.setImageViewResource(R.id.image,R.mipmap.ic_launcher_round);

        //设置PendingIntent

        PendingIntent pendingIntent = PendingIntent.getActivity(this,0,intent,PendingIntent.FLAG_UPDATE_CURRENT);

        //为id为openActivity的view设置单击事件

        remoteViews.setOnClickPendingIntent(R.id.openActivity,pendingIntent);

        //将RemoteView作为Notification的布局

        notification.contentView =remoteViews;

        //将pendingIntent作为Notification的intent,这样当点击其他部分时,也能实现跳转

        notification.contentIntent=pendingIntent;

        notificationManager.notify(1,notification);

    }

}
有图:
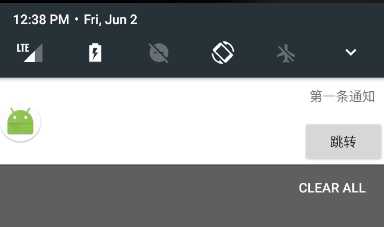
Notification的基本用法以及使用RemoteView实现自定义布局
标签:nal over 进程 alt ges cas 播放 message extra
原文地址:http://www.cnblogs.com/zhangyingai/p/7087377.html