标签:下载图片 好玩的 .com text net lis url move 时间
前段时间,在对H5的回顾中突然对canvas有了感觉,闲来无事便对其进行了一些捯饬。这不,上周我还做了一个好玩的画板呢,废话不多说,直接上代码(PS:翠花,上代码~):
HTML部分:
<!DOCTYPE html>
<html lang="en">
<head>
    <meta charset="UTF-8">
    <title>Canvas 制作画板</title>
    <style>
        h1{
            text-align: center;
            margin: 0 auto;
            -webkit-touch-callout: none;
            -webkit-user-select: none;
            -khtml-user-select: none;
            -moz-user-select: none;
            -ms-user-select: none;
            user-select: none;
        }
        .drawBox{
            width: 830px;
            height: auto;
            margin: auto;
            background: #999;
            border-radius: 10px;
        }
        #myCanvas{
            padding: 0;
            background: #fff;
            display: block;
            cursor: pointer;
            border-radius: 10px;
            border: 15px solid #999;
        }
        .btnBox{
            color: #fff;
        }
        .btnBox>a{
            color:#fff;
            width: 85px;
            line-height: 40px;
            text-align: center;
            text-decoration: none;
            display: inline-block;
            background: #666;
            border-radius: 10px;
        }
        .btnBox>a:first-child{
            margin: 0 0 12px 15px;
        }
        .btnBox>a#toolBtn{
            width: 50px;
        }
        .btnBox>input#color{
            width: 22px;
            height: 25px;
            cursor: pointer;
            outline: none;
            border-radius: 50%;
            margin: auto 10px;
        }
        .btnBox>input#thick{
            outline: none;
            width: 20px;
            padding: 3px;
            border-radius: 5px;
        }
        .btnBox>input#range{
            outline: none;
            position: relative;
            top: 5px;
        }
    </style>
</head>
<body>
<h1>Canvas 制作画板</h1>
<div class="drawBox">
    <canvas id="myCanvas" width="800" height="600">
        对不起,您的浏览器不兼容canvas标签!
    </canvas>
    <div class="btnBox">
        <a href="javascript:;" id="toolBtn" title="选择橡皮">橡皮</a>
        <a href="javascript:;" id="clearBtn" title="清除画板">清除画板</a>
        <a href="javascript:;" id="downLoad" title="点击下载">下载图片</a>
        <input type="color" id="color" title="选择画笔颜色"/>
        <input type="text" id="thick" value="1" title="请输入画笔粗细值"/>
        细 <input type="range" name="range" id="range" title="画笔粗细调整" value="1" min="1" max="50"/> 粗
    </div>
</div>
</body>
</html>
HTML页面准备就绪,Javascript部分:
document.onload=function(){
    var can = document.getElementById(‘myCanvas‘),
        downBtn = document.getElementById(‘downLoad‘),
        clearBtn = document.getElementById(‘clearBtn‘),
        colorBtn = document.getElementById(‘color‘),
        rangeBtn = document.getElementById(‘range‘),
        toolBtn = document.getElementById(‘toolBtn‘),
        thick = document.getElementById(‘thick‘);// 获取按钮等元素
    var ctx = can.getContext(‘2d‘);// 定义一个canvas画布

    colorBtn.addEventListener(‘change‘,function () {
        ctx.strokeStyle=this.value;
    });// 颜色改变
    rangeBtn.addEventListener(‘change‘,function () {
        ctx.lineWidth=this.value;
        thick.value=this.value;
    });// 笔画粗细(拖拽)
    thick.addEventListener(‘blur‘,function () {
        ctx.lineWidth=this.value;
        rangeBtn.value=this.value;
    });// 笔画粗细(数值输入)

    toolBtn.addEventListener(‘click‘,function () {
        if(this.text==‘橡皮‘){
            this.text=‘画笔‘;
            ctx.strokeStyle=‘#fff‘;
            ctx.lineWidth=20;
        }else{
            this.text=‘橡皮‘;
            ctx.strokeStyle=‘#000‘;
            ctx.lineWidth=rangeBtn.value;
        }
    });// 橡皮与画笔的一个转换

    // 开始绘制
    can.addEventListener(‘mousedown‘,function (from) {
        // 绘制
        var formX=from.clientX-can.offsetLeft-13,
            formY=from.clientY-can.offsetTop-13;
        ctx.beginPath();
        ctx.moveTo(formX,formY);

        // 画笔移动
        function move(to) {
            var toX=to.clientX-can.offsetLeft-13,
                toY=to.clientY-can.offsetTop-13;
            ctx.lineTo(toX,toY);
            ctx.stroke();
        };
        can.addEventListener(‘mousemove‘,move);

        // 停止绘制
        document.addEventListener(‘mouseup‘,function () {
            can.removeEventListener(‘mousemove‘,move,false);
        });
    });

    // 下载图片按钮
    downBtn.addEventListener(‘click‘,function () {
        this.href=can.toDataURL(‘image/png‘);
        this.setAttribute(‘download‘,‘picture.png‘);
    });

    // 清除画板按钮-画布情况
    clearBtn.addEventListener(‘click‘,function () {
        ctx.clearRect(0,0,can.width,can.height);
    });
}
在此,我对橡皮的处理可能不够理想,因为如果下载的是透明的,那么会看见橡皮的痕迹,在此我就不对此给出解决的办法,欢迎大家积极探索吧。好的,这一切就绪后,再来一个效果图:
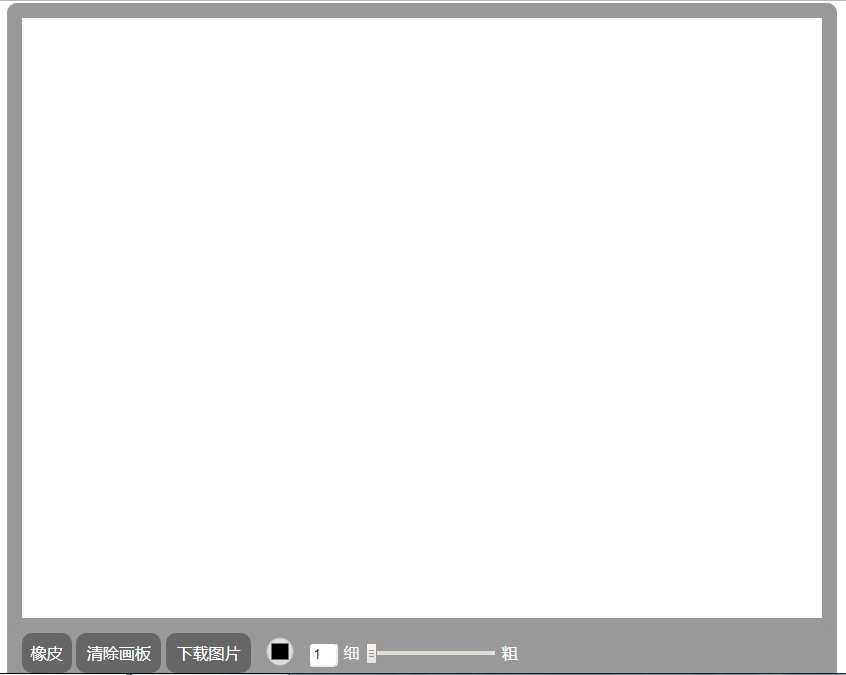
一个基本画板,有兴趣的朋友可以再对细节进行处理以及一些功能的扩展~
标签:下载图片 好玩的 .com text net lis url move 时间
原文地址:http://www.cnblogs.com/Lxb98117/p/canvas.html