标签:schedule create turn rri cloud details suspend emc inf
 一、kvm环境准备
KVM是Kernel Virtual Machine的简写,目前Red Hat只支持在64位的RHEL5.4及以上的系统运行KVM,同时硬件需要支持VT技术。KVM的前身是QEMU,2008年被Red Hat公司收购并获得一项hypervisor技术,不过Red Hat的KVM被认为是将成为未来Linux hypervisor的主流,准确来说,KVM仅仅是Linux内核的一个模块。管理和创建完整的KVM虚拟机,需要更多的辅助工具。
QEMU是一套由法布里斯·贝拉(Fabrice Bellard)所编写的以GPL许可证分发源码的模拟处理器,在GNU/Linux平台上使用广泛。Bochs,PearPC等与其类似,但不具备其许多特性,比如高速度及跨平台的特性,通过KQEMU这个闭源的加速器,QEMU能模拟至接近真实电脑的速度。
目前,0.9.1及之前版本的qemu可以使用kqemu加速器。在qemu1.0之后的版本,都无法使用kqemu,主要利用qemu-kvm加速模块,并且加速效果以及稳定性明显好于kqemu
# yum install qemu-kvm qemu-kvm-tools virt-manager libvirt virt-install -y
# grep -E ‘vmx|svm‘ /proc/cpuinfo
flags           : fpu vme de pse tsc msr pae mce cx8 apic sep mtrr pge mca cmov pat pse36
clflush dts mmx fxsr sse sse2 ss syscall nx pdpe1gb rdtscp lm constant_tsc arch_perfmon pebs
bts nopl xtopology tsc_reliable nonstop_tsc aperfmperf eagerfpu pni pclmulqdq vmx ssse3 fma cx16
pcid sse4_1 sse4_2 x2apic
movbe popcnt tsc_deadline_timer aes xsave avx f16c rdrand hypervisor lahf_lm abm ida arat epb pln pts dtherm tpr_shadow vnmi ept vpid fsgsbase tsc_adjust bmi1 avx2 smep bmi2 invpcid xsaveopt
-f指定镜像创建的格式
# qemu-img create -f raw /opt/CentOS-7.2-x86_64.raw 10G

Formatting ‘/opt/CentOS-7.2-x86_64.raw‘, fmt=raw size=10737418240
验证
# lsmod |grep kvm

kvm_intel             162153  0

kvm                   525259  1 kvm_intel
开启libvirtd
[root@localhost ~]# systemctl enable libvirtd

Created symlink from /etc/systemd/system/sockets.target.wants/virtlockd.socket to /usr/lib/systemd/system/virtlockd.socket.

[root@localhost ~]# systemctl start libvirtd

[root@localhost ~]# systemctl status libvirtd
# dd if=/dev/cdrom of=/opt/CentOS-7.2.iso

8456192+0 records in

8456192+0 records out

4329570304 bytes (4.3 GB) copied, 200.903 s, 21.6 MB/s
# virt-install --help

# virt-install --name CentOS-7.1-x86_64 --virt-type kvm --ram 1024 --cdrom=/opt/CentOS-7.2.iso --disk path=/opt/CentOS-7.2-x86_64.raw --network=default --graphics vnc,listen=0.0.0.0 --noautoconsole


Starting install...

Domain installation still in progress. You can reconnect to

the console to complete the installation process.
# virsh undefine CentOS-7.1-x86_64
然后再执行 安装
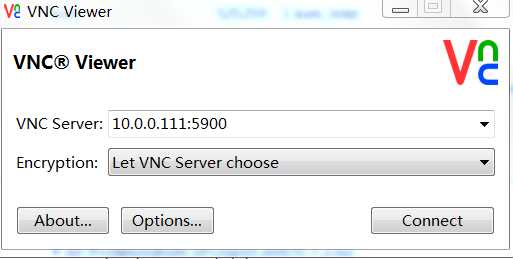
登录vnc
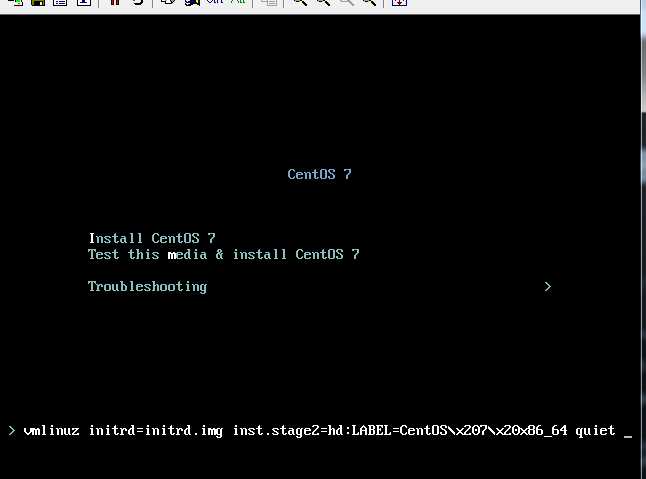
使用tab键编写内核参数 修改网卡名为eth0
net.ifnames=0 biosdevname=0
修改完回车
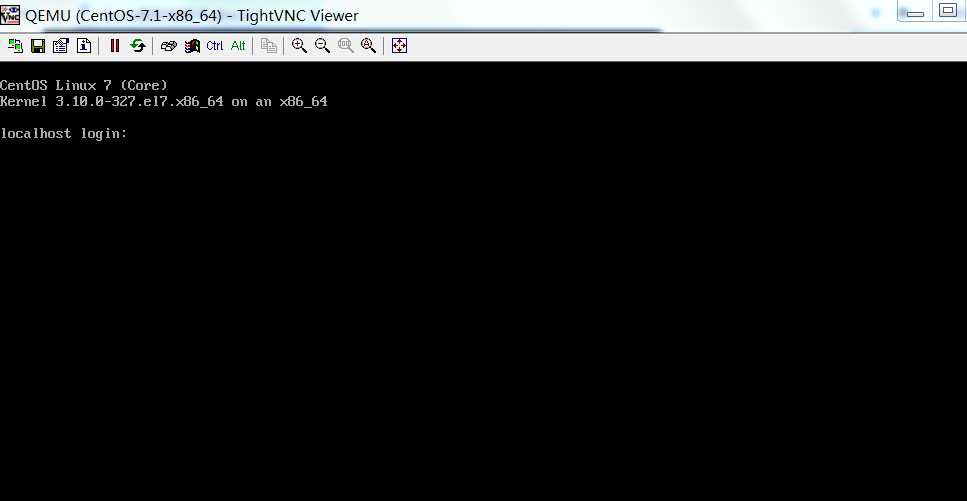
安装结束reboot virt就会被关闭
[root@localhost ~]# virsh list --all

 Id    Name                           State

----------------------------------------------------

 -     CentOS-7.1-x86_64              shut off
[root@localhost ~]# virsh start CentOS-7.1-x86_64

Domain CentOS-7.1-x86_64 started
再用vnc连接
在vnc里修改eth0网卡配置文件
ONBOOT=yes
重启网卡
# systemctl restart network
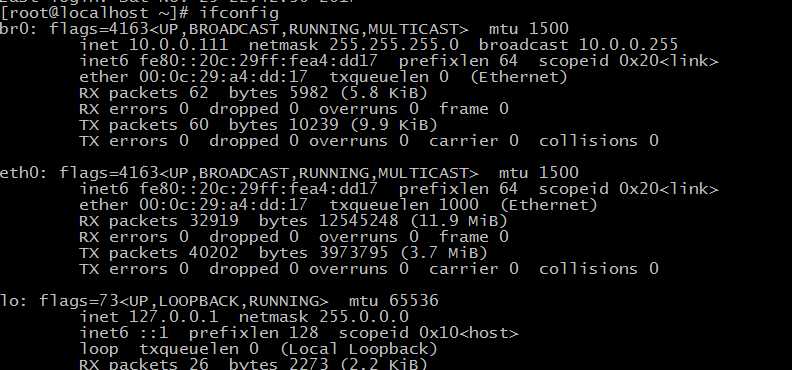
查看网卡
# ip ad li

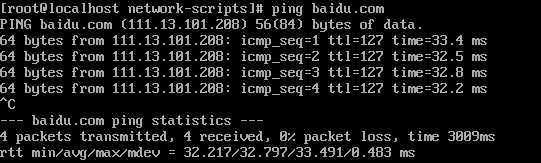
测试是否能连接外网
给虚拟机装上 ifconfig命令
# yum install -y net-tools
法一:通过修改xml文件来生成
如果已经安装好了想要调节也是修改xml文件
virsh edit CentOS-7.1-x86_64

<domain type=‘kvm‘>

  <name>CentOS-7.1-x86_64</name>

  <uuid>9d0660d2-d5c0-4c1e-b671-6b2c4ce84514</uuid>

  <memory unit=‘KiB‘>1048576</memory>

  <currentMemory unit=‘KiB‘>1048576</currentMemory>

  <vcpu placement=‘auto‘ current="1">4</vcpu>
重启生效
[root@localhost ~]# virsh shutdown CentOS-7.1-x86_64

Domain CentOS-7.1-x86_64 is being shutdown
[root@localhost ~]# virsh start CentOS-7.1-x86_64

Domain CentOS-7.1-x86_64 started
法二:也可以 手动install
# virt-install --help|grep cpu

 --vcpus VCPUS         Number of vcpus to configure for your guest. Ex:

                        --vcpus 5

                        --vcpus 5,maxcpus=10,cpuset=1-4,6,8

                        --vcpus sockets=2,cores=4,threads=2,

  --cpu CPU             CPU model and features. Ex:

                        --cpu coreduo,+x2apic

                        --cpu host
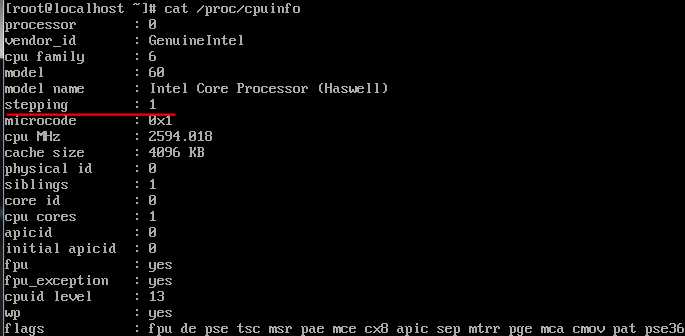
查看一下虚拟机的cpu个数
[root@localhost ~]# virsh setvcpus CentOS-7.1-x86_64 2 --live
添加完后 cat /proc/cpuinfo查看

查看cpu的工作状态
注意:热添加只能增加不能减少,添加的最大个数由xml文件里设置的个数决定
<vcpu placement=‘auto‘ current="1">4</vcpu>
[root@localhost ~]# virsh setvcpus CentOS-7.1-x86_64 3 --live
[root@localhost ~]#  virsh setvcpus CentOS-7.1-x86_64 2 --live

error: unsupported configuration: failed to find appropriate hotpluggable vcpus to reach the desired target vcpu count
[root@localhost ~]# virsh edit CentOS-7.1-x86_64

<memory unit=‘KiB‘>4048576</memory>
重启虚拟机进程
[root@localhost ~]# virsh shutdown CentOS-7.1-x86_64

Domain CentOS-7.1-x86_64 is being shutdown


[root@localhost ~]# virsh start CentOS-7.1-x86_64

Domain CentOS-7.1-x86_64 started
管理虚拟机内存的命令
[root@localhost ~]# virsh qemu-monitor-comman
后面接--help查看 命令使用
查看虚拟机的内存

在终端查看虚拟机内存
[root@localhost ~]# virsh qemu-monitor-command CentOS-7.1-x86_64 --hmp --cmd info balloon

balloon: actual=1024
设置虚拟机内存600M
[root@localhost ~]# virsh qemu-monitor-command CentOS-7.1-x86_64 --hmp --cmd balloon 600
在vnc上查看虚拟机内存,可以发现显示不是很准

给虚拟机设置2g内存
[root@localhost ~]# virsh qemu-monitor-command CentOS-7.1-x86_64 --hmp --cmd  balloon 2000

[root@localhost ~]# virsh qemu-monitor-command CentOS-7.1-x86_64 --hmp --cmd info  balloon

balloon: actual=2000
自动生成的xml文件存放位置
[root@localhost ~]# cd /etc/libvirt/qemu/

[root@localhost qemu]#

CentOS-7.1-x86_64.xml  networks
图形界面管理创建虚拟机
# virt-manager
当前主流Linux平台上默认的虚拟化管理工具virt-manager(图形化),virt-install(命令行模式)等均基于libvirt开发而成。
Libvirt 库是一种实现 Linux 虚拟化功能的 Linux® API,它支持各种虚拟机监控程序,包括 Xen 和 KVM,以及 QEMU 和用于其他操作系统的一些虚拟产品。
libvirt 提供一种虚拟机监控程序不可知的 API 来安全管理运行于主机上的客户操作系统。libvirt 本身 不是一种工具, 它是一种可以建立工具来管理客户操作系统的 API。libvirt 本身构建于一种抽象的概念之上。它为受支持的虚拟机监控程序实现的常用功能提供通用的 API。libvirt 起初是专门为 Xen 设计的一种管理 API,后来被扩展为可支持多个虚拟机监控程序。
virsh 管理工具
查看:
[root@localhost qemu]# virsh list

 Id    Name                           State

----------------------------------------------------

 1     CentOS-7.1-x86_64              running


[root@localhost qemu]# virsh list --all

 Id    Name                           State

----------------------------------------------------

 1     CentOS-7.1-x86_64              running
[root@localhost ~]# iptables -t nat -vnL

Chain PREROUTING (policy ACCEPT 1 packets, 52 bytes)

 pkts bytes target     prot opt in     out     source               destination


Chain INPUT (policy ACCEPT 1 packets, 52 bytes)

 pkts bytes target     prot opt in     out     source               destination


Chain OUTPUT (policy ACCEPT 15 packets, 1225 bytes)

 pkts bytes target     prot opt in     out     source               destination


Chain POSTROUTING (policy ACCEPT 15 packets, 1225 bytes)

 pkts bytes target     prot opt in     out     source               destination

    2   267 RETURN     all  --  *      *       192.168.122.0/24     224.0.0.0/24

    0     0 RETURN     all  --  *      *       192.168.122.0/24     255.255.255.255

    0     0 MASQUERADE  tcp  --  *      *       192.168.122.0/24    !192.168.122.0/24     masq ports: 1024-65535

    0     0 MASQUERADE  udp  --  *      *       192.168.122.0/24    !192.168.122.0/24     masq ports: 1024-65535

0     0 MASQUERADE  all  --  *      *       192.168.122.0/24    !192.168.122.0/24
[root@localhost ~]# cat /var/lib/libvirt/dnsmasq/default.conf

##WARNING:  THIS IS AN AUTO-GENERATED FILE. CHANGES TO IT ARE LIKELY TO BE

##OVERWRITTEN AND LOST.  Changes to this configuration should be made using:

##    virsh net-edit default

## or other application using the libvirt API.

##

## dnsmasq conf file created by libvirt

strict-order

pid-file=/var/run/libvirt/network/default.pid

except-interface=lo

bind-dynamic

interface=virbr0

dhcp-range=192.168.122.2,192.168.122.254

dhcp-no-override

dhcp-authoritative

dhcp-lease-max=253

dhcp-hostsfile=/var/lib/libvirt/dnsmasq/default.hostsfile

addn-hosts=/var/lib/libvirt/dnsmasq/default.addnhosts
支持的硬盘的类型
# qemu-img --help

Supported formats: vvfat vpc vmdk vhdx vdi ssh sheepdog rbd raw host_cdrom host_floppy host_device file qed qcow2 qcow parallels nbd iscsi gluster dmg tftp ftps ftp https http cloop bochs blkverify blkdebug
|
全镜像格式 |
稀疏格式 |
|
raw |
qcow2(支持压缩,快照,镜像) |
[root@localhost ~]# brctl show

bridge name     bridge id               STP enabled     interfaces

virbr0          8000.fe54006fd14f       yes             vnet0

[root@localhost ~]# brctl addbr br0

[root@localhost ~]# brctl show

bridge name     bridge id               STP enabled     interfaces

br0             8000.000000000000       no

virbr0          8000.fe54006fd14f       yes             vnet0

[root@localhost ~]# brctl addif br0 eth0 && ip addr del dev eth0 10.0.0.111/24 && ifconfig br0 10.0.0.111/24 up &&

route add default gw 10.0.0.2 && iptables -F
虚拟机的删除命令
virsh undefine 主机名
导出xml命令
[root@localhost ~]# virsh --help|grep dump

    dump                           dump the core of a domain to a file for analysis

    dumpxml                        domain information in XML

    save-image-dumpxml             saved state domain information in XML

    iface-dumpxml                  interface information in XML

    nwfilter-dumpxml               network filter information in XML

    net-dumpxml                    network information in XML

    nodedev-dumpxml                node device details in XML

    secret-dumpxml                 secret attributes in XML

    snapshot-dumpxml               Dump XML for a domain snapshot

    pool-dumpxml                   pool information in XML

vol-dumpxml                    vol information in XML
virsh start

virsh shutdown

virsh edit

virsh destroy  相当于物理机直接拔电源  kill -9 进程也是一样

virsh suspended 终止

virsh resumed   恢复

qemu-img      磁盘管理命令
taskset 绑定KVM进程到固定的CPU,减少Cache Miss
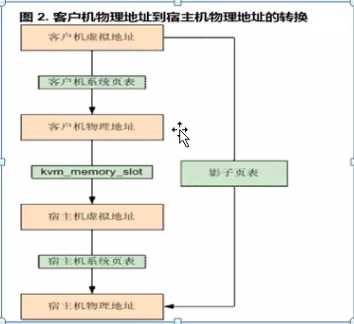
虚拟机的虚拟内存 -》 虚拟机的物理内存
影子列表
宿主机虚拟内存 -》 宿主机物理内存
ept 内存寻址
ksmd默认开启 来减少内存空间 合并内存相同内容
writeback性能最好但是最不安全 断电数据有可能不同步
WriteThrough 最慢但是最安全 (默认是该模式)
[root@localhost ~]# ps -ef |grep ksmd

root        282      2  0 21:39 ?        00:00:00 [ksmd]
大页内存默认开启
[root@localhost ~]# cat /sys/kernel/mm/transparent_hugepage/enabled

[always] madvise never
khugepaged将连续可用4k的内存页合并成2M的大页文件
[root@localhost ~]# ps -ef|grep kh

root        283      2  0 21:39 ?        00:00:01 [khugepaged]
I/O
默认使用 Virtio 半虚拟化队列接口
virio-net virio-blk
IO Schedulers
电梯算法
linux支持的调度算法
[root@localhost ~]# dmesg |grep -i scheduler

[    0.933120] io scheduler noop registered

[    0.933122] io scheduler deadline registered (default)

[    0.933137] io scheduler cfq registered
查看当前使用的调度算法
[root@localhost ~]# cat /sys/block/sda/queue/scheduler

noop [deadline] cfq
临时更改当前的算法
[root@localhost ~]# echo cfq > /sys/block/sda/queue/scheduler

[root@localhost ~]# cat /sys/block/sda/queue/scheduler

noop deadline [cfq]
永久修改
加入内核参数 elevator=noop
镜像制作:
OpenStack
CloudStack cloud.com公司--》Ctrix---》Apache基金会---》Java(商业化产品)
OpenNebula
ZStack
oVirt RHEV的开源实现 Fedora Centos RHEL https://www.ovirt.org/download/
管理端+客户端组成 oVirt Engine oVirt主机/节点
sudo yum install http://resources.ovirt.org/pub/yum-repo/ovirt-release41.rpm


sudo yum install -y ovirt-engine


sudo engine-setup
标签:schedule create turn rri cloud details suspend emc inf
原文地址:http://www.cnblogs.com/benjamin77/p/7899733.html