码迷,mamicode.com
首页 > 其他好文 > 详细

从零开始的嵌入式图像图像处理(PI+QT+OpenCV)实战演练(3)

时间:2017-12-02 12:52:42      阅读:260      评论:0      收藏:0      [点我收藏+]

标签:number   ide   show   ras   function   none   exe   str   模块   

一、打开PI自带的摄像头

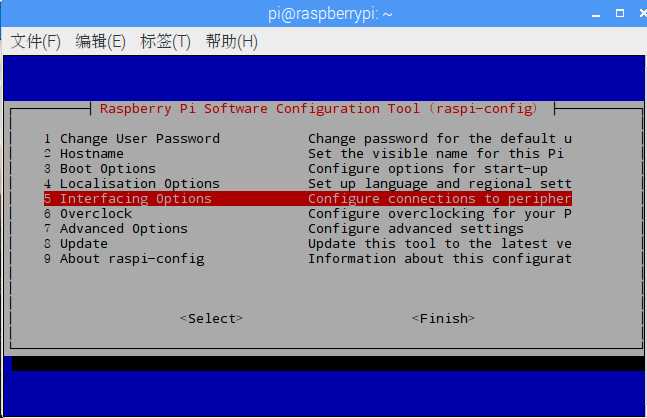
在raspi-config中使能摄像头
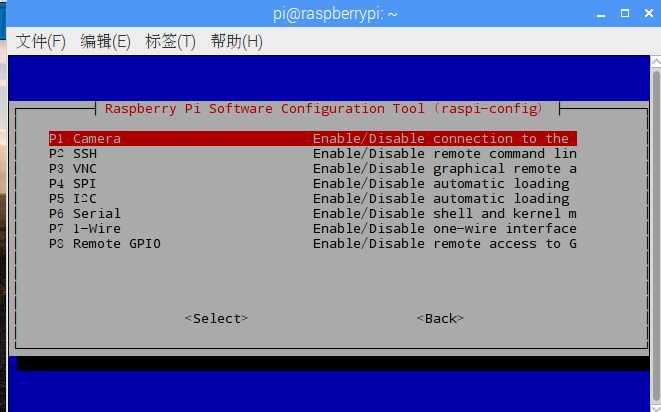
手动运行:sudo raspi-config

移动到“5”选项,按下回车键,选择camera。

技术分享图片

技术分享图片

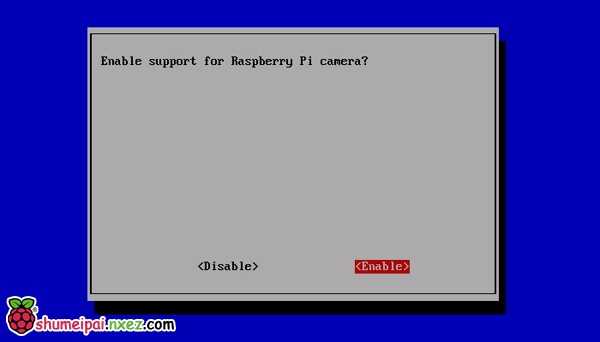
选择“Enable”然后回车。

技术分享图片

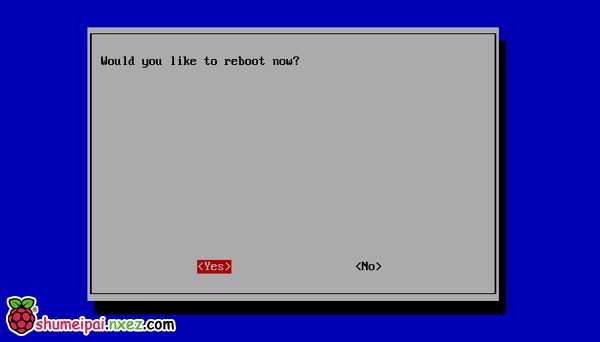
再选择“Yes”,回车后树莓派会重新启动。

技术分享图片

通过raspi-config工具更新了操作并使能摄像头之后,它会告诉树莓派摄像头已经连接成功,并增加了两个命令行工具以供用户使用摄像头。

raspistill

raspivid
 
如果是usb摄像头,现在已经可以直接使用。但是如果想集成度搞一些,直接使用csi的摄像头,需要这样做:
 
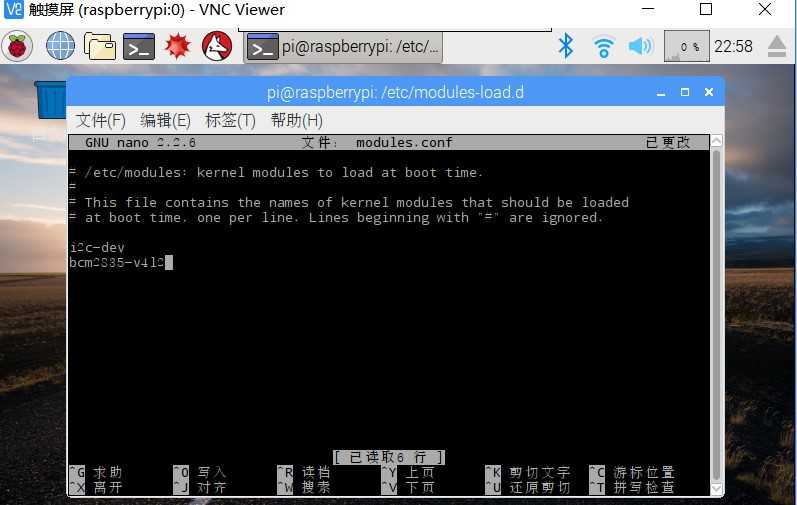
cd /etc/modules-load.d/
sudo vim modules.conf
加入 bcm2835-v4l2
 
技术分享图片
重启后即可
二、编写程序,获取并显示实时视频
主要程序代码:
#ifndef CLICKEDLABEL_H
#define CLICKEDLABEL_H

#include <QWidget>
#include <QLabel>

class ClickedLabel : public QLabel
{

    Q_OBJECT
   public:
       ClickedLabel(QWidget *parent=0): QLabel(parent){}
       ~ClickedLabel() {}
   signals:
       void clicked(ClickedLabel* click); // ????
   protected:
       void mouseReleaseEvent(QMouseEvent*); // ?????????
};

#endif // CLICKEDLABEL_H
 
#ifndef MAINWINDOW_H
#define MAINWINDOW_H

#include <QMainWindow>
//???
#include <opencv2/core/core.hpp>
#include <opencv2/highgui/highgui.hpp>
#include <opencv2/imgproc/imgproc.hpp>
#include <QFileDialog>
#include <QImage>
#include <QTimer>     // ???????????
#include "clickedlabel.h"
using namespace cv;
//helper??
QPixmap Mat2QImage(Mat src);

namespace Ui {
class MainWindow;
}

class MainWindow : public QMainWindow
{
    Q_OBJECT

public:
    explicit MainWindow(QWidget *parent = 0);
    ~MainWindow();

private slots:
    void on_MainWindow_iconSizeChanged(const QSize &iconSize);

    void on_pushButton_clicked();

    void on_pushButton_2_clicked();

    void on_pushButton_3_clicked();

    void on_pushButton_4_clicked();

    void readFarme();       // ???????

private:
    Ui::MainWindow *ui;
    QTimer    *timer;
    QImage    *imag;
    VideoCapture *videocapture;   // ??????? ???????????????
    Mat          matFrame;        //??IplImage?????????????????????
    bool      bMethod;//??????

    ClickedLabel * clickLabel;
    ClickedLabel * clickLabel2;
};

#endif // MAINWINDOW_H
 
#include "clickedlabel.h"

void ClickedLabel::mouseReleaseEvent(QMouseEvent *)
{
    emit clicked(this); // ??????????
}
 
#include "mainwindow.h"
#include <QApplication>


int main(int argc, char *argv[])
{
    QApplication a(argc, argv);
    MainWindow w;
    w.show();

    return a.exec();
}

 
#include "mainwindow.h"
#include "ui_mainwindow.h"
using namespace cv;
//????
Mat src;
Mat gray;
Mat tmp;
Mat dst;

MainWindow::MainWindow(QWidget *parent) :
    QMainWindow(parent),
    ui(new Ui::MainWindow)
{
    ui->setupUi(this);
    timer   = new QTimer(this);
    imag    = new QImage();         // ???
    connect(timer, SIGNAL(timeout()), this, SLOT(readFarme()));  // ?????????????
    bMethod = false;//??????

    on_pushButton_clicked();

    clickLabel = new ClickedLabel(this);
    clickLabel->setGeometry(0,0,400,400);
    connect(clickLabel,SIGNAL(clicked(ClickedLabel*)),this,SLOT(on_pushButton_3_clicked()));

    clickLabel2 = new ClickedLabel(this);
    clickLabel2->setGeometry(400,0,400,400);

    connect(clickLabel2,SIGNAL(clicked(ClickedLabel*)),this,SLOT(on_pushButton_2_clicked()));

}

MainWindow::~MainWindow()
{
    delete ui;
}

void MainWindow::on_MainWindow_iconSizeChanged(const QSize &iconSize)
{

}
//Open camera
//????
//?????
void MainWindow::on_pushButton_clicked()
{
    //???????????????
    videocapture  = new VideoCapture(0);
    // ??????????timeout()??
    timer->start(33);
}
//????Frame??
void MainWindow::readFarme()
{
    // ?????????????
    videocapture->read(matFrame);
    //????
    if(bMethod)
    {
        cvtColor(matFrame,tmp,COLOR_BGR2GRAY);
        Canny(tmp,dst,30,255);
    }
    else
    {
        dst = matFrame.clone();
    }
    // ????
    QPixmap qpixmap = Mat2QImage(dst);
    // ??????label?
    //ui->label->setPixmap(qpixmap);
    clickLabel->setPixmap(qpixmap);
}

//capture
void MainWindow::on_pushButton_2_clicked()
{
    // ????
    QPixmap qpixmap = Mat2QImage(dst);
    // ??????label?
    //ui->label_2->setPixmap(qpixmap);
     clickLabel2->setPixmap(qpixmap);
}

//action
void MainWindow::on_pushButton_3_clicked()
{
      bMethod = !bMethod;
}

//exit
void MainWindow::on_pushButton_4_clicked()
{
    timer->stop();         // ???????
    videocapture->release();
}

//////////////////////////helper??//////////////////////////////////////////////////
//????
QPixmap Mat2QImage(Mat src)
{
    QImage img;
    //??QT?????????
    if(src.channels() == 3)
    {
        cvtColor( src, tmp, CV_BGR2RGB );
        img = QImage( (const unsigned char*)(tmp.data), tmp.cols, tmp.rows, QImage::Format_RGB888 );
    }
    else
    {
        img = QImage( (const unsigned char*)(src.data), src.cols, src.rows, QImage::Format_Indexed8 );
    }
    QPixmap qimg = QPixmap::fromImage(img) ;
    return qimg;
}
 
三、程序要点
1、直接调用OpenCV的摄像头模块,实践证明在Linux上面很有效;
2、为了能够让label可以被点击,进行了一个类的重构工作;
 
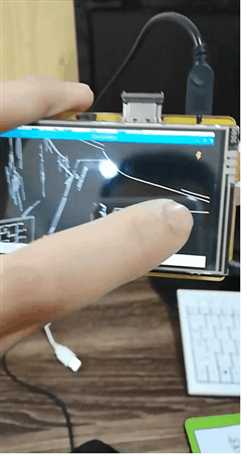
四、结果展示
 技术分享图片
 
代码:
https://files.cnblogs.com/files/jsxyhelu/7z.7z


从零开始的嵌入式图像图像处理(PI+QT+OpenCV)实战演练(3)

标签:number   ide   show   ras   function   none   exe   str   模块   

原文地址:http://www.cnblogs.com/jsxyhelu/p/7953805.html

(0)
(0)
   
举报
评论 一句话评论(0
登录后才能评论!
© 2014 mamicode.com 版权所有  联系我们:gaon5@hotmail.com
迷上了代码!