1、Struts2的前身是Opensymphony的Webwork2,实际上Strut和Webwork2合并后形成Struts2。
2、一个HelloWord示例
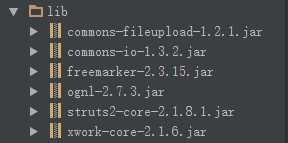
1)创建Web应用,所需要的Jar包为:
2)配置Struts2
在web.xml文件中配置如下:

<?xml version="1.0" encoding="UTF-8"?>
<web-app xmlns="http://java.sun.com/xml/ns/javaee"
           xmlns:xsi="http://www.w3.org/2001/XMLSchema-instance"
           xsi:schemaLocation="http://java.sun.com/xml/ns/javaee
          http://java.sun.com/xml/ns/javaee/web-app_3_0.xsd"
           version="3.0">
<display-name>struts2_helloworld</display-name>
    <filter>
        <filter-name>struts2</filter-name>
        <filter-class>org.apache.struts2.dispatcher.ng.filter.StrutsPrepareAndExecuteFilter</filter-class>
    </filter>
    <filter-mapping>
        <filter-name>struts2</filter-name>
        <url-pattern>/*</url-pattern>
    </filter-mapping>

    <welcome-file-list>
        <welcome-file>index.jsp</welcome-file>
    </welcome-file-list>
</web-app>
3)创建控制类HelloWorld
package com.yyq.action;
import com.opensymphony.xwork2.ActionSupport;
public class HelloWorld extends ActionSupport {
    private String message;
    @Override
    public String execute() throws Exception {
        message = "Hello World,Struts2";
        return SUCCESS;
    }
    public String getMessage(){
        return message;
    }
}
4)创建index.jsp
<%@ page contentType="text/html;charset=UTF-8" %>
<%@ taglib prefix="s" uri="/struts-tags" %>
<html>
  <head>
    <title><s:property value="message"/></title>
  </head>
  <body>
        <s:property value="message"/>
  </body>
</html>
5)配置HelloWorld。在Struts2中主要有三种方式来实现连接:使用XML文件进行配置;使用Annotation来配置;使用CoC来约定命名。
在src目录中新建一个名为struts.xml的文件,配置如下:
<?xml version="1.0" encoding="UTF-8"?>
<!DOCTYPE struts PUBLIC "-//Apache Software Foundation//DTD Struts Configuration 2.0//EN"
        "http://struts.apache.org/dtds/struts-2.0.dtd">
<struts>
    <package name="action" namespace="/" extends="struts-default">
        <action name="HWAction" class="com.yyq.action.HelloWorld">
            <result>/index.jsp</result>
        </action>
    </package>
</struts>
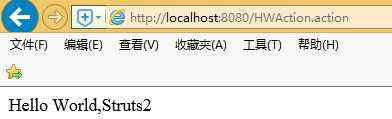
6)启动Tomcat,发布并运行HelloWorld,输入:http://localhost:8080/HWAction.action
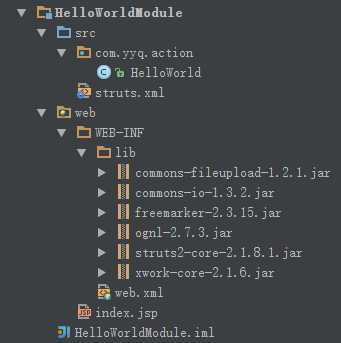
7)项目结构:
Struts2是一个框架,框架本身由于增加了更多的分层,因此会增加软件的复杂度,比起用纯Servlet或JSP的成本高。但是分层能够使得各个模块之间变得更清晰,适合多人协作来完成开发。并且使用分层结构,可以使软件开发的分工趋于细致,可以增强软件的可读性和可维护性。在引入Struts2时,只需要低廉的学习成本就可以得到一个高效的开发框架,这无论开发者还是管理者的角度来说,都是非常重要的。使用Struts2并不意味着开发人员可以很轻松地进行开发,不用写复杂的代码,Struts2并不意味着开发人员可以很轻松地进行开发,不用再写复杂的代码。Struts2只是屏蔽了分层,但复杂的业务逻辑还是需要由开发人员亲自编写。
3、一个简单的用户登录示例
1)创建用户POJO类文件:
package com.yyq.pojo;
public class User {
    private String userName;
    private String password;
    public User() {
    }
    public String getUserName() {
        return userName;
    }
    public void setUserName(String userName) {
        this.userName = userName;
    }
    public String getPassword() {
        return password;
    }
    public void setPassword(String password) {
        this.password = password;
    }
}
2)创建Action类文件:
package com.yyq.action;
import com.opensymphony.xwork2.ActionSupport;
import com.yyq.pojo.User;
public class Login extends ActionSupport {
    private User user;
    public User getUser() {
        return user;
    }
    public void setUser(User user) {
        this.user = user;
    }
    //执行登录的方法
    public String execute(){
        return SUCCESS;
    }
}
3)创建登陆页面index.jsp:
<%@ page contentType="text/html;charset=UTF-8" language="java" %>
<html>
<head>
    <title>登录实例</title>
</head>
<body>
请输入用户名和密码:
<br/>
<form action="Login.action" method="post">
    <p>
        用户名:<input type="text" name="user.userName"/>
    </p>
    <p>
        密码:<input type="text" name="user.password"/>
    </p>
    <input type="submit" value="登录"/>
</form>
</body>
</html>
4)创建登陆成功页面welcome.jsp:
<%@ taglib prefix="s" uri="/struts-tags" %>
<%@ page contentType="text/html;charset=UTF-8" language="java" %>
<html>
<head>
<title>登陆成功</title>
</head>
<body>
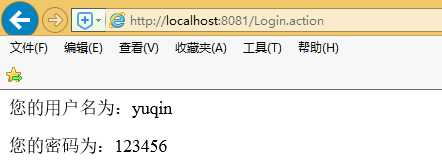
<p>
您的用户名为:<s:property value="user.userName"/>
</p>
<p>
您的密码为:<s:property value="user.password"/>
</p>
</body>
</html>
5)配置web.xml文件:
<?xml version="1.0" encoding="UTF-8"?>
<web-app xmlns="http://java.sun.com/xml/ns/javaee"
           xmlns:xsi="http://www.w3.org/2001/XMLSchema-instance"
           xsi:schemaLocation="http://java.sun.com/xml/ns/javaee
          http://java.sun.com/xml/ns/javaee/web-app_3_0.xsd"
           version="3.0">
    <display-name>struts2_helloworld</display-name>
    <filter>
        <filter-name>struts2</filter-name>
        <filter-class>org.apache.struts2.dispatcher.ng.filter.StrutsPrepareAndExecuteFilter</filter-class>
    </filter>
    <filter-mapping>
        <filter-name>struts2</filter-name>
        <url-pattern>/*</url-pattern>
    </filter-mapping>
    <welcome-file-list>
        <welcome-file>index.jsp</welcome-file>
    </welcome-file-list>
</web-app>
6)配置struts.xml文件:
<?xml version="1.0" encoding="UTF-8"?>
<!DOCTYPE struts PUBLIC "-//Apache Software Foundation//DTD Struts Configuration 2.0//EN"
        "http://struts.apache.org/dtds/struts-2.0.dtd">
<struts>
    <package name="action" namespace="/" extends="struts-default">
        <action name="Login" class="com.yyq.action.Login">
            <result>/welcome.jsp</result>
        </action>
    </package>
</struts>
7)启动Tomcat,输入http://localhost:8080/index.jsp
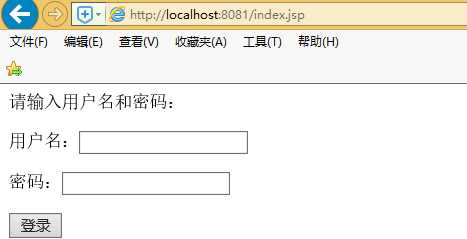
随意输入用户名和密码,点击登录即可:
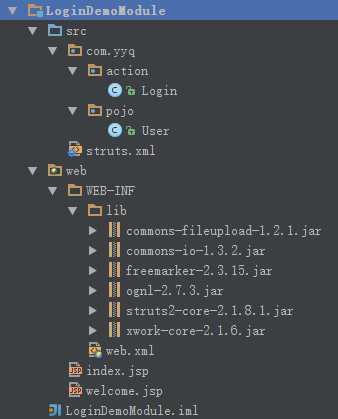
8)项目结构图:
转载 先码后学