1 电脑(或ESP8266)连接WIFI,建立服务 192.168.3.8 8080
1.1 查看电脑地址
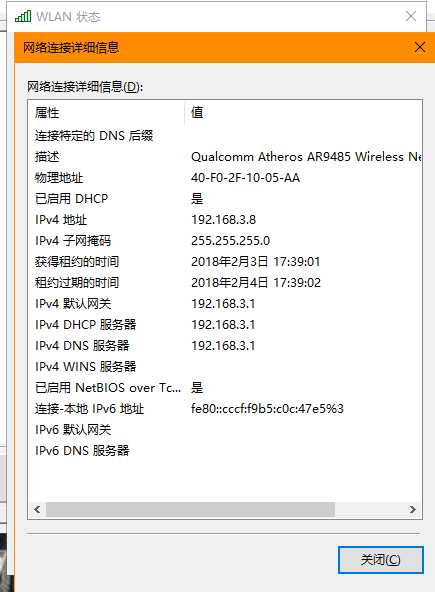
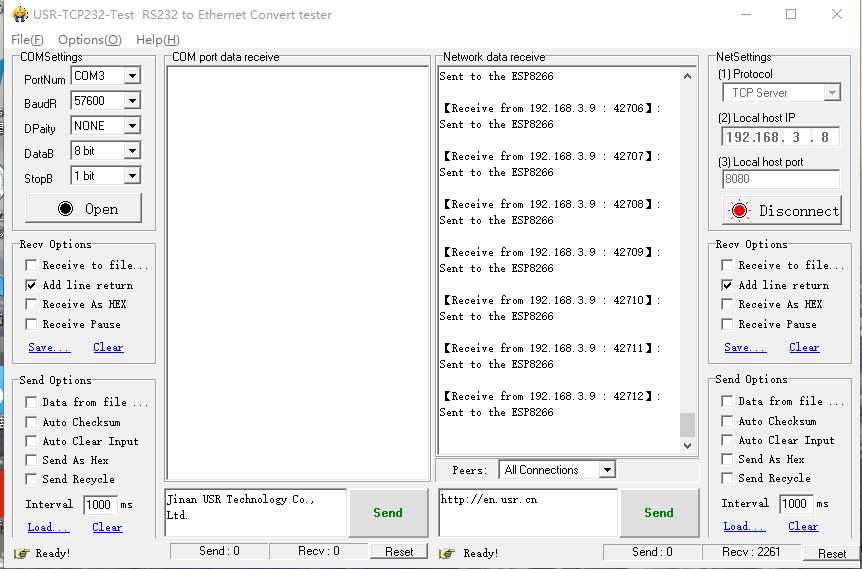
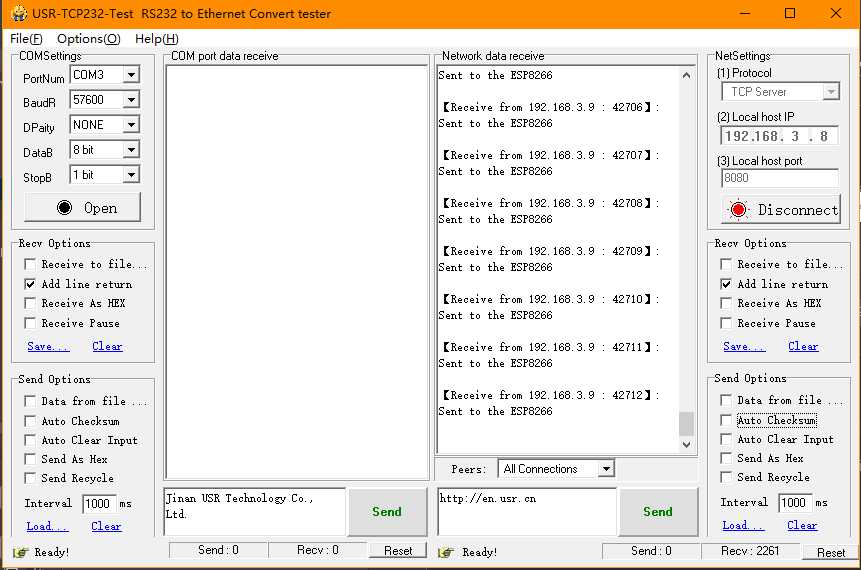
1.2 电脑建立服务 192.168.3.8 8080
2 手机连接WIFI,创建客户申请服务
手机在wifi 下分配的地址是 192.168.3.9
2.1 手机打开软件
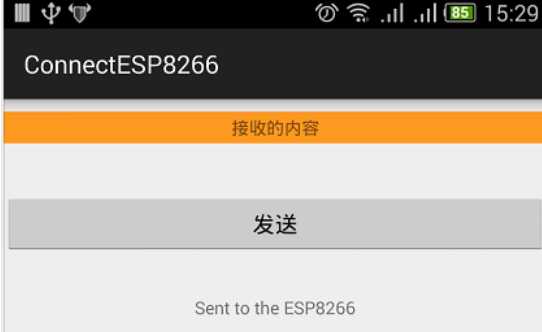
点击发送
电脑接收
手机端工程
1 布局管理
<?xml version="1.0" encoding="utf-8"?>
<android.support.constraint.ConstraintLayout xmlns:android="http://schemas.android.com/apk/res/android"
    xmlns:app="http://schemas.android.com/apk/res-auto"
    xmlns:tools="http://schemas.android.com/tools"
    android:layout_width="match_parent"
    android:layout_height="match_parent"
    tools:context="com.example.dongdong.myapplication.MainActivity">


      <RelativeLayout xmlns:android="http://schemas.android.com/apk/res/android"
    xmlns:tools="http://schemas.android.com/tools"
    android:layout_width="368dp"
    android:layout_height="495dp"
    tools:context="com.itman.connectesp8266.MainActivity"
    app:layout_constraintTop_toTopOf="parent"
    android:layout_marginLeft="8dp"
    app:layout_constraintBottom_toBottomOf="parent"
    app:layout_constraintLeft_toLeftOf="parent">

    <TextView
        android:id="@+id/tv_content"
        android:layout_width="match_parent"
        android:layout_height="25dp"
        android:layout_centerHorizontal="true"
        android:layout_marginTop="10dp"
        android:background="#fe9920"
        android:gravity="center"
        android:text="接收的内容" />

    <Button
        android:id="@+id/bt_send"
        android:layout_width="match_parent"
        android:layout_height="wrap_content"
        android:layout_below="@id/tv_content"
        android:layout_centerHorizontal="true"
        android:layout_marginTop="40dp"
        android:text="发送" />

    <TextView
        android:id="@+id/tv_send_text"
        android:layout_width="wrap_content"
        android:layout_height="wrap_content"
        android:layout_below="@id/bt_send"
        android:layout_centerHorizontal="true"
        android:layout_marginTop="33dp"
        android:text="发送的内容" />

</RelativeLayout>
</android.support.constraint.ConstraintLayout>
2 添加网络权限
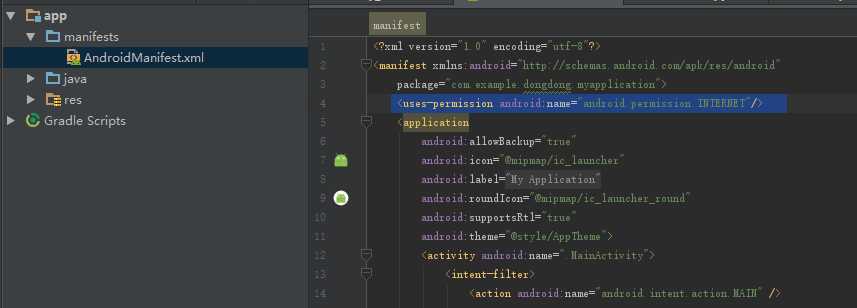
<uses-permission android:name="android.permission.INTERNET"/>
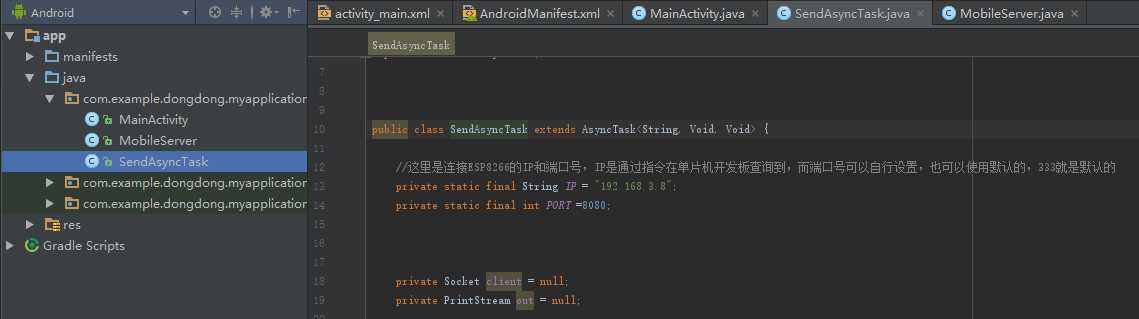
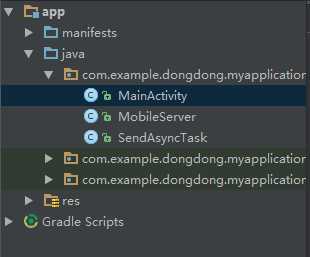
3 工程目录

package com.example.dongdong.myapplication;


import android.support.v7.app.AppCompatActivity;
import android.os.Bundle;
import android.os.Handler;
import android.os.Message;

import android.view.View;
import android.view.View.OnClickListener;

import android.widget.TextView;
import android.widget.Button;
import android.widget.Toast;

public class MainActivity extends AppCompatActivity implements OnClickListener {

  //  private EditText edit_pawd;
    private Button bt_send;
    private TextView tv_content;
    private TextView tv_send_text;

    @Override
    protected void onCreate(Bundle savedInstanceState) {
        super.onCreate(savedInstanceState);
        setContentView(R.layout.activity_main);
         // 1 控件初始化
        InitView();
        //2 开启服务器
        MobileServer mobileServer = new MobileServer();
        mobileServer.setHandler(handler);
        new Thread(mobileServer).start();

    }

    private void InitView() {
        tv_content = (TextView) findViewById(R.id.tv_content);
        tv_send_text = (TextView) findViewById(R.id.tv_send_text);
        bt_send = (Button) findViewById(R.id.bt_send);

        bt_send.setOnClickListener(this);

    }

    @Override
    public void onClick(View v) {
        switch (v.getId()) {
            case R.id.bt_send:
                String str = "Sent to the ESP8266";
                new SendAsyncTask().execute(str);
                tv_send_text.setText(str);
                break;
        }

    }

    Handler handler = new Handler() {
        @Override
        public void handleMessage(Message msg) {
            switch (msg.what) {
                case 1:
                    tv_content.setText("WiFi模块发送的:" + msg.obj);
                    Toast.makeText(MainActivity.this, "接收到信息", Toast.LENGTH_LONG)
                            .show();
            }
        }
    };
}

package com.example.dongdong.myapplication;

import java.io.IOException;

import java.net.ServerSocket;
import java.net.Socket;

import java.io.DataInputStream;

import android.os.Handler;
import android.os.Message;

public class MobileServer implements Runnable {
    private ServerSocket server;
    private DataInputStream in;
    private byte[] receice;

    private Handler handler = new Handler();

    public MobileServer() {
    }

    public void setHandler(Handler handler) {
        this.handler = handler;
    }

    @Override
    public void run() {

        try {
            //5000是手机端开启的服务器的端口号,ESP8266进行TCP连接时使用的端口,而IP也是通过指令查询的联入设备的IP
            server = new ServerSocket(5000);
            while (true) {
                Socket client = server.accept();
                in = new DataInputStream(client.getInputStream());
                receice = new byte[50];
                in.read(receice);
                in.close();

                Message message = new Message();
                message.what = 1;
                message.obj = new String(receice);
                handler.sendMessage(message);
            }

        } catch (IOException e) {
            e.printStackTrace();
        }
        try {
            server.close();
        } catch (IOException e) {
            e.printStackTrace();
        }
    }
}

package com.example.dongdong.myapplication;

import java.io.IOException;
import java.io.PrintStream;
import java.net.Socket;
import android.os.AsyncTask;


public class SendAsyncTask extends AsyncTask<String, Void, Void> {

    //这里是连接ESP8266的IP和端口号,IP是通过指令在单片机开发板查询到,而端口号可以自行设置,也可以使用默认的,333就是默认的
    private static final String IP = "192.168.3.8";
    private static final int PORT =8080;


    private Socket client = null;
    private PrintStream out = null;


    @Override
    protected Void doInBackground(String... params) {
        String str = params[0];
        try {
            client = new Socket(IP, PORT);
            client.setSoTimeout(5000);
            // 获取Socket的输出流,用来发送数据到服务端
            out = new PrintStream(client.getOutputStream());
            out.print(str);
            out.flush();

            if (client == null) {
                return null;
            } else {
                out.close();
                client.close();
            }

        } catch (IOException e) {
            e.printStackTrace();
        }

        return null;
    }

}