这里说的自动代理说的是自动代理bean对象,就是说在xml中不用再配置代理工厂,就可以自动代理
下面来说第一种
第一种自动代理:默认自动代理生成器(DefaultAdvisorAutoProxyCreator)
第一步:定义接口,在接口中声明几个方法
package demo17;

/**
 * Created by mycom on 2018/3/8.
 */
public interface ISomeService {
    public void select();
    public void insert();
    public void delete();
    public void update();
}
第二步:编写实现类,重写接口中的方法
package demo17;


/**
 * Created by mycom on 2018/3/8.
 */
public class SomeServiceImpl implements ISomeService {

    public void select() {
        System.out.println("select  ok!");
    }

    public void insert() {

    }

    public void delete() {

    }

    public void update() {

    }
}
第三步:写一个前置增强
package demo17;

import org.springframework.aop.MethodBeforeAdvice;

import java.lang.reflect.Method;

/**
 * Created by mycom on 2018/3/12.
 */
public class BeforeAdvice implements MethodBeforeAdvice {
    public void before(Method method, Object[] args, Object target) throws Throwable {
        System.out.println("before=======");
    }
}
第四步:配置xml文件
<?xml version="1.0" encoding="UTF-8"?>
<beans xmlns="http://www.springframework.org/schema/beans"
       xmlns:xsi="http://www.w3.org/2001/XMLSchema-instance"
       xmlns:aop="http://www.springframework.org/schema/aop"
       xmlns:p="http://www.springframework.org/schema/p"
       xmlns:context="http://www.springframework.org/schema/context"
       xsi:schemaLocation="
        http://www.springframework.org/schema/beans
        http://www.springframework.org/schema/beans/spring-beans.xsd
        http://www.springframework.org/schema/aop
        http://www.springframework.org/schema/aop/spring-aop.xsd
         http://www.springframework.org/schema/context
        http://www.springframework.org/schema/context/spring-context.xsd
">
    <!--1.目标对象-->
    <bean id="service" class="demo17.SomeServiceImpl"></bean>
    <!--通知-->
    <bean id="beforeAdvice" class="demo17.BeforeAdvice"></bean>
    <!--顾问-->
    <bean id="advisor" class="org.springframework.aop.support.RegexpMethodPointcutAdvisor">
        <property name="advice" ref="beforeAdvice"></property>
        <property name="patterns" value=".*e.*"></property>
    </bean>
    <!--默认自动代理-->
    <bean class="org.springframework.aop.framework.autoproxy.DefaultAdvisorAutoProxyCreator"></bean>

</beans>
最后一步:编写测试方法,进行单测
//默认自动代理
    @Test
    public void t1() {
        ApplicationContext context = new ClassPathXmlApplicationContext("applicationContextauto01.xml");
        ISomeService service =(ISomeService) context.getBean("service");
        service.select();
    }
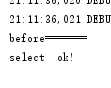
运行结果如下:
第二种:名称自动代理生成器(BeanNameAutoProxyCreator)
步骤和上述的一样,在这里我就直接用上一种的接口和实现类了,xml中的配置有所不同
这里我有创建了一个接口和实现类,如果要配置多个对象,应该怎么配?
新创建的接口和实体类
package demo17;

/**
 * Created by mycom on 2018/3/12.
 */
public interface IBookService {
    public void select();
}
package demo17;

/**
 * Created by mycom on 2018/3/12.
 */
public class BookServiceImpl implements IBookService {
    public void select() {
        System.out.println("Book select");
    }
}
配置文件中
<?xml version="1.0" encoding="UTF-8"?>
<beans xmlns="http://www.springframework.org/schema/beans"
       xmlns:xsi="http://www.w3.org/2001/XMLSchema-instance"
       xmlns:aop="http://www.springframework.org/schema/aop"
       xmlns:p="http://www.springframework.org/schema/p"
       xmlns:context="http://www.springframework.org/schema/context"
       xsi:schemaLocation="
        http://www.springframework.org/schema/beans
        http://www.springframework.org/schema/beans/spring-beans.xsd
        http://www.springframework.org/schema/aop
        http://www.springframework.org/schema/aop/spring-aop.xsd
         http://www.springframework.org/schema/context
        http://www.springframework.org/schema/context/spring-context.xsd
">
    <!--1.目标对象-->
    <bean id="service" class="demo17.SomeServiceImpl"></bean>
    <bean id="bookService" class="demo17.BookServiceImpl"></bean>
    <!--通知-->
    <bean id="beforeAdvice" class="demo17.BeforeAdvice"></bean>
    <!--顾问-->
    <bean id="advisor" class="org.springframework.aop.support.RegexpMethodPointcutAdvisor">
        <property name="advice" ref="beforeAdvice"></property>
        <property name="patterns" value=".*e.*"></property>
    </bean>
    <!--名称自动代理-->
    <bean class="org.springframework.aop.framework.autoproxy.BeanNameAutoProxyCreator">
        <property name="beanNames" value="service,bookService"></property>
        <property name="interceptorNames" value="advisor"></property>
    </bean>

</beans>
编写测试类
//名称自动代理
    @Test
    public void t2() {
        ApplicationContext context = new ClassPathXmlApplicationContext("applicationContextauto02.xml");
        ISomeService service =(ISomeService) context.getBean("service");
        service.select();
        IBookService bookService =(IBookService) context.getBean("bookService");
        bookService.select();
    }
运行结果
