标签:clust cal max isa 测试的 设置 count options tool
CentOS release 6.8 (Final)
wget https://www.elastic.co/downloads/past-releases/elasticsearch-5-6-8
unzip elasticsearch-5.6.8.zip
3.1 将解压缩的软件安装到项目目录下面
mv elasticsearch-5.6.8 /data/tools/
3.2 创建elasticsearch用户
useradd elasticsearch
passwd elasticsearch
由于elasticsearch不能赢root用户启动,所以需要单独用户管理
3.3 启动elasticsearch
cd /data/tools/elasticsearch-5.6.8/bin/
./elasticsearch -d
-d 表示后台执行
3.4 本地测试
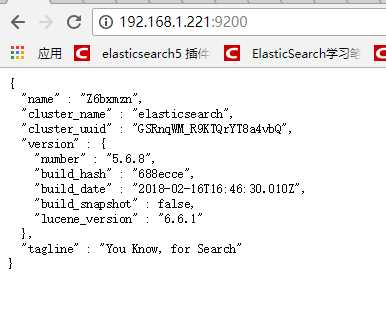
curl 127.0.0.1:9200
{
  "name" : "Z6bxmzn",
  "cluster_name" : "elasticsearch",
  "cluster_uuid" : "GSRnqWM_R9KTQrYT8a4vbQ",
  "version" : {
    "number" : "5.6.8",
    "build_hash" : "688ecce",
    "build_date" : "2018-02-16T16:46:30.010Z",
    "build_snapshot" : false,
    "lucene_version" : "6.6.1"
  },
  "tagline" : "You Know, for Search"
}
外部测试的话需要修改elasticsearch的elasticsearch.yml,将hosts设置为所有
network.host: 0.0.0.0
重启后测试
至此,elasticsearch的安装就基本完成了。
4.1 内存不足
问题现象:

处理办法:
修改elasticsearch配置文件中的内存值设定
编辑config目录下的jvm.options
默认值
-Xms2g
-Xmx2g
修改为
-Xms1g
-Xmx1g
或者更低。
4.2 centos 6报错
ERROR: bootstrap checks failed system call filters failed to install; check the logs and fix your configuration or disable system call filters at your own ris
解决办法:关闭bootstrap,编辑elasticsearch的config文件,修改为如下内容
bootstrap.memory_lock: false
bootstrap.system_call_filter: false
4.3 文件描述太小:
编辑/etc/security/limits.conf,修改为如何内容
* soft nofile 65536
* hard nofile 131072
* soft nproc 2048
* hard nproc 4096
编辑/etc/security/limits.d/90-nproc.conf修改为如下内容
* soft nproc 2048
修改内核参数:/etc/sysctl.conf
vm.max_map_count=655360
sysctl -p使配置生效
标签:clust cal max isa 测试的 设置 count options tool
原文地址:https://www.cnblogs.com/cangyuefeng/p/9140504.html