标签:dir lin 大小 部分 roo back 完全 左右 上下
即可以正常显示内容的部分。
 ?
?
 ?
?
additionalSafeAreaInsets 来调整 safeArea 的大小。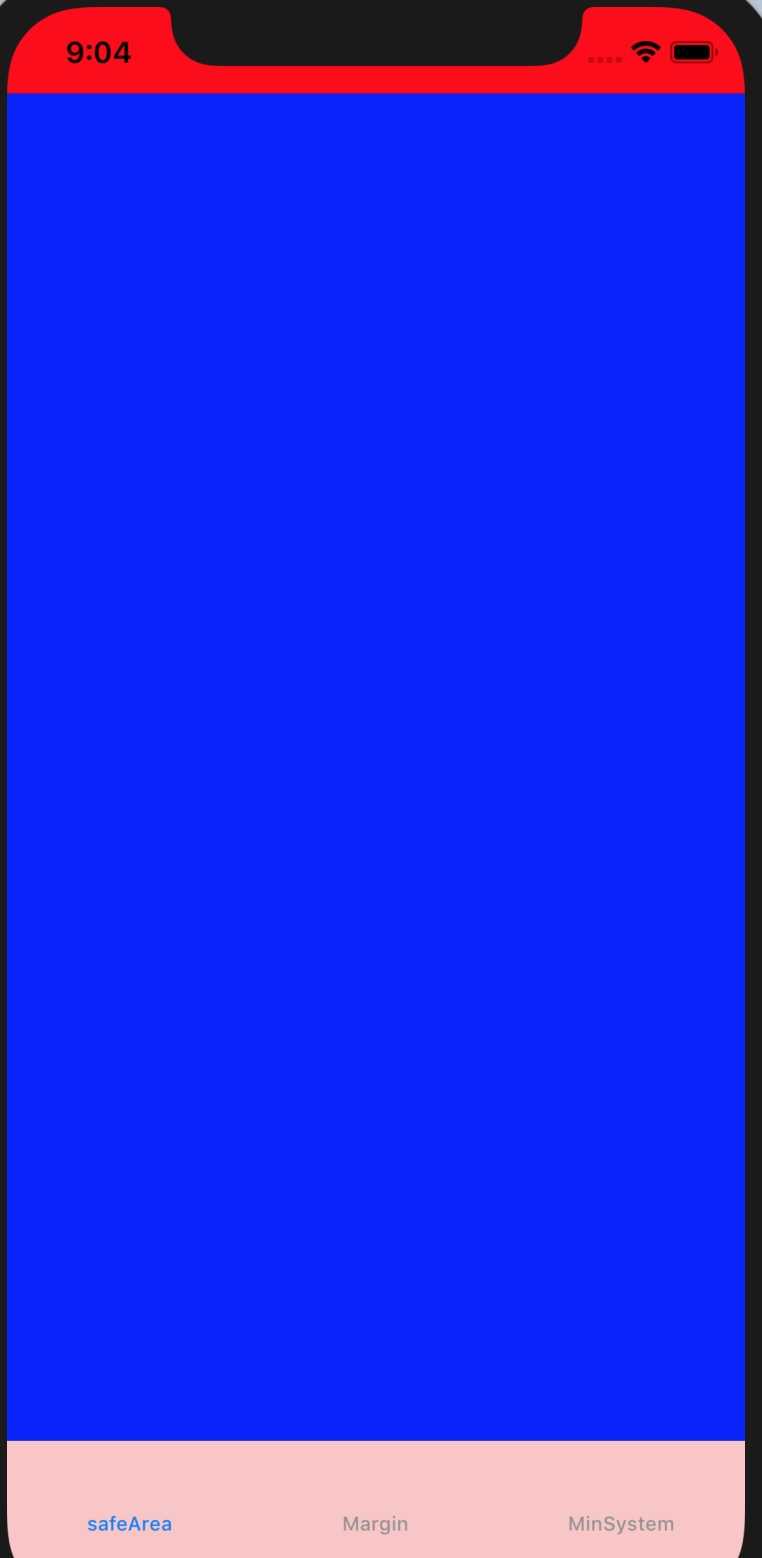 ?
?
经过调整,范围如下:
self.additionalSafeAreaInsets = UIEdgeInsets.init(top: 20, left: 30, bottom: 0, right: 10)
 ?
?
safeAreaLayoutGuide 创建约束 bgView.topAnchor.constraint(equalTo: view.safeAreaLayoutGuide.topAnchor),
bgView.bottomAnchor.constraint(equalTo: view.safeAreaLayoutGuide.bottomAnchor),
bgView.leadingAnchor.constraint(equalTo: view.safeAreaLayoutGuide.leadingAnchor),
bgView.trailingAnchor.constraint(equalTo: view.safeAreaLayoutGuide.trailingAnchor)
safeAreaInsets 为 0safeAreaInsets 为之间的大小safeAreaInsets 的大小,不会延伸出去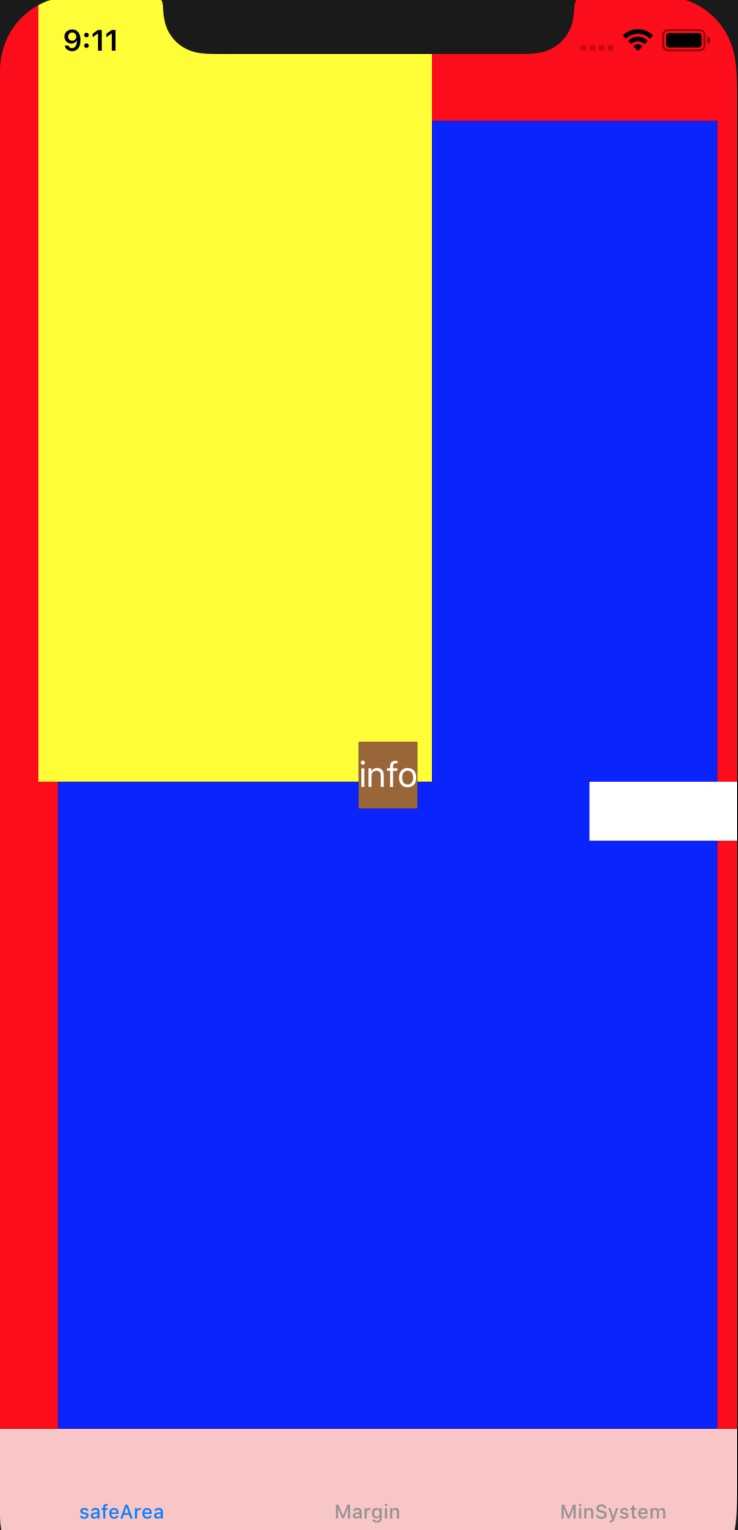 ?
?
view safeArea: UIEdgeInsets(top: 64.0, left: 30.0, bottom: 83.0, right: 10.0)
bgview SafeArea: UIEdgeInsets(top: 0.0, left: 0.0, bottom: 0.0, right: 0.0)
topview SafeArea: UIEdgeInsets(top: 64.0, left: 10.0, bottom: 0.0, right: 0.0)
rightView SafeArea: UIEdgeInsets(top: 0.0, left: 0.0, bottom: 0.0, right: 10.0)
如上所示,蓝色完全在 rootview 的 safeArea 之内,所以 safeAreaInsets 为0.
topview 在 rootview 的 bounds 之内,但是在 safeArea 之外,所以 safeAreaInsets 反映了在 rootview 的 bounds 之内, safeArea 之外的区域。
rightView 的右边已经超出了屏幕范围,所以 safeAreaInsets 的右边是 rootview 的 safeAreaInsets 的右边,不会继续超出。
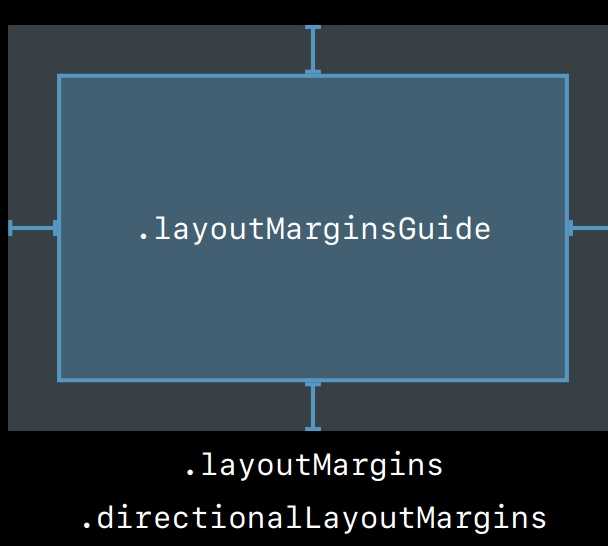
即内间距
 ?
?
layoutMarginsGuide 来创建约束bgView.topAnchor.constraint(equalTo: view.layoutMarginsGuide.topAnchor),
bgView.bottomAnchor.constraint(equalTo: view.layoutMarginsGuide.bottomAnchor),
bgView.leadingAnchor.constraint(equalTo: view.layoutMarginsGuide.leadingAnchor),
bgView.trailingAnchor.constraint(equalTo: view.layoutMarginsGuide.trailingAnchor)
When the value of this property is true, any margins that are outside the safe area are automatically modified to fall within the safe area boundary. The default value of this property is true. Changing the value to false allows your margins to remain at their original locations, even when they are outside the safe area.
即这个属性可以保证不落在 safeArea 区域之外
 ?
?
// 这里可以修改 layoutmargin
topView.layoutMargins = UIEdgeInsets.init(top: 0, left: 0, bottom: 0, right: 0)
[topView, rightView].forEach { (viewa) in
let label = UILabel.init()
label.translatesAutoresizingMaskIntoConstraints = false
label.backgroundColor = UIColor.purple
viewa?.addSubview(label)
label.text = "tesx"
let labelConstranits = [label.topAnchor.constraint(equalTo: viewa!.layoutMarginsGuide.topAnchor),
label.leftAnchor.constraint(equalTo: viewa!.layoutMarginsGuide.leftAnchor)]
NSLayoutConstraint.activate(labelConstranits)
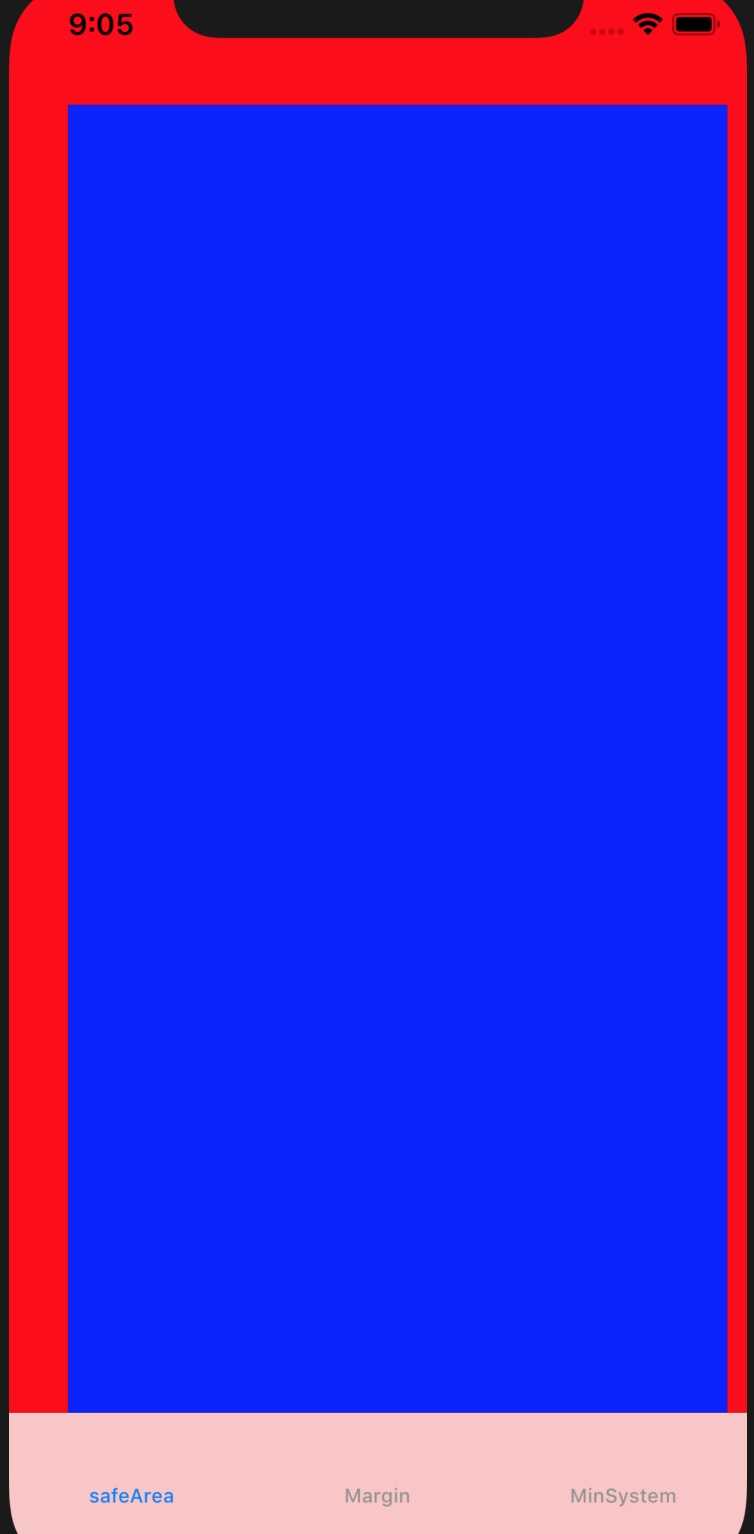
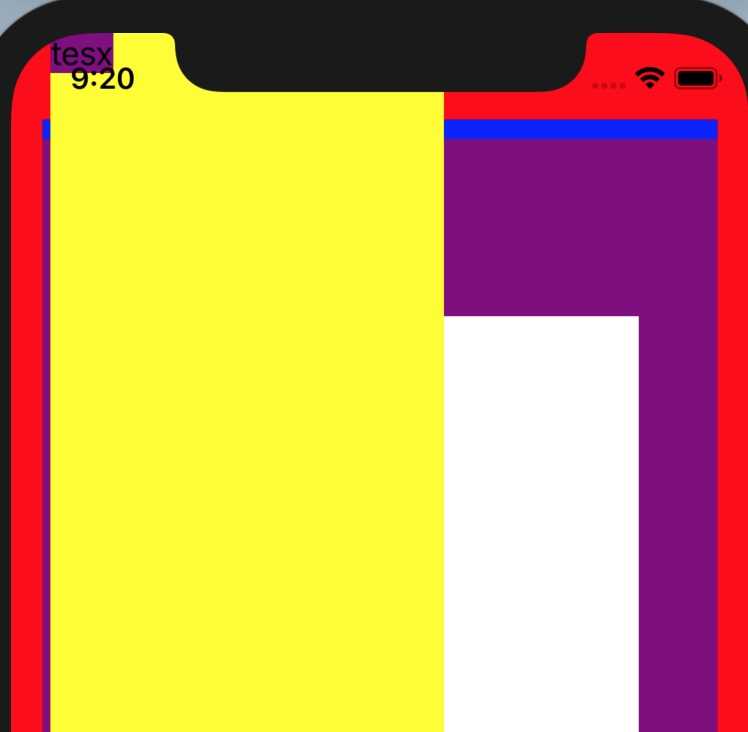
// 如果这个是false,那么topview中的label,可以出现在safeArea区域之外 topView.layoutMargins维持为0
// 如果这个是true,那么topview的lable一定在safeArea之内。topView.layoutMargins也会变化
viewa!.insetsLayoutMarginsFromSafeArea = false
}
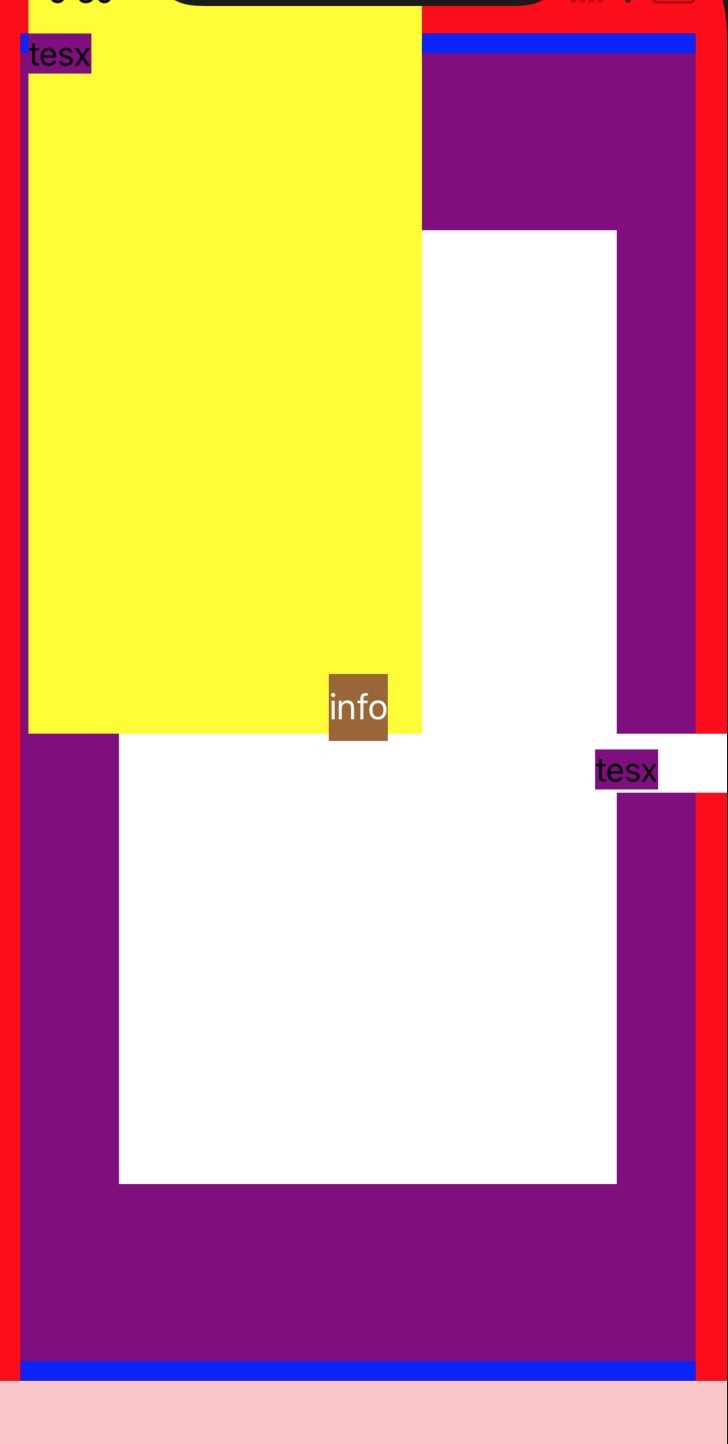
如上图所示,lable 落在了 safeArea 之外,如果把 insetsLayoutMarginsFromSafeArea 设置为 true,结果如下:
 ?
?
值得注意的是,创建约束时,一定要用 layoutMarginsGuide,否则,即使insetsLayoutMarginsFromSafeArea 设置为 true,也会落在 safeArea 之外。
When the value of this property is true, the superview’s margins are also considered when laying out content. This margin affects layouts where the distance between the edge of a view and its superview is smaller than the corresponding margin. For example, you might have a content view whose frame precisely matches the bounds of its superview. When any of the superview’s margins is inside the area represented by the content view and its own margins, UIKit adjusts the content view’s layout to respect the superview’s margins. The amount of the adjustment is the smallest amount needed to ensure that content is also inside the superview’s margins.
文档写的有点稀里糊涂的,我们看一个例子。
 ?
?
layoutMargins为 (top: 100, left: 50, bottom: 100, right: 40)preservesSuperviewLayoutMargins 为 truelayoutMarginsGuide 对齐layoutMargins 为 (top: 0, left: 0, bottom: 0, right: 0)如果 preservesSuperviewLayoutMargins 为 false,那么白色 view 和紫色 view 大小完全一致。由于这个属性为 true,所以紫色 view 在布局时,考虑到了父 view 的 layoutMargins,因此白色 view 大小被缩减了。
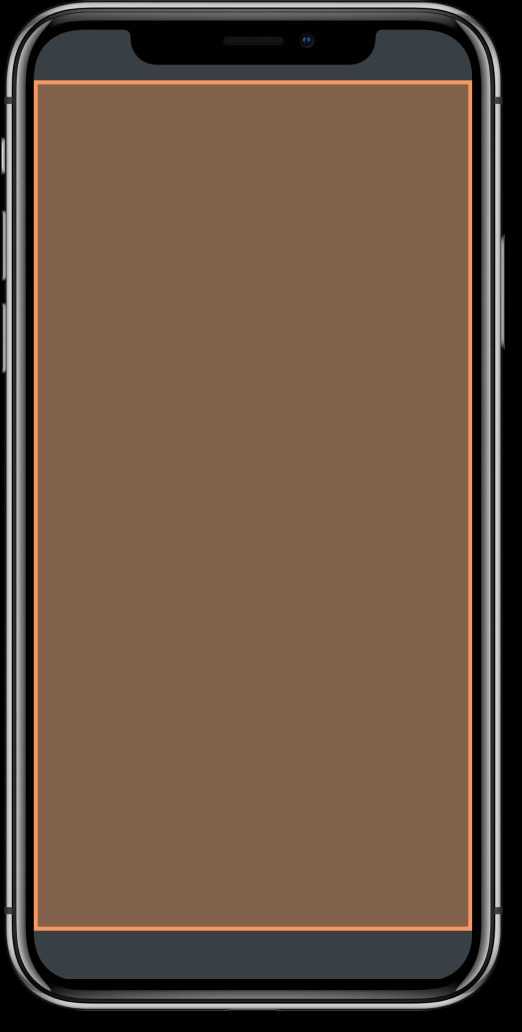
系统的 VC 有一个默认的最小内间距,只读不可写,称为 systemMinimumLayoutMargins。
即使我们设置了 rootview 的 directionalLayoutMargins,如果太小的话,系统会会退到系统默认的最小间距。
 ?
?
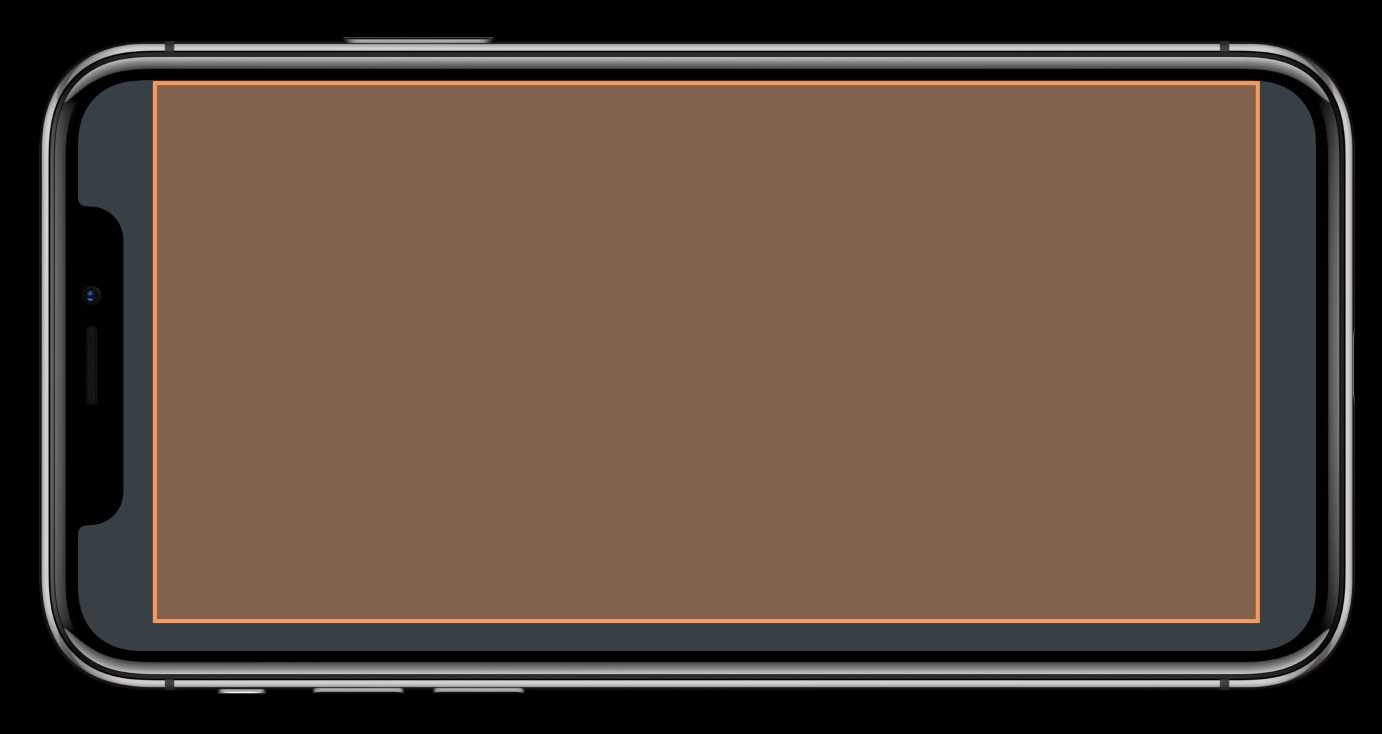
如上所示,VC 的 rootView 的内间距被设为了零,按照 layoutMarginsGuide 创建约束,左右仍然有内间距。是因为这个VC 的 systemMinimumLayoutMargins 为 (top: 0.0, leading: 16.0, bottom: 0.0, trailing: 16.0)。
如果把 viewRespectsSystemMinimumLayoutMargins 设置为 false,就可以扩展到边缘了。
 ?
?
UIKit: Apps for Every Size and Shape
标签:dir lin 大小 部分 roo back 完全 左右 上下
原文地址:https://www.cnblogs.com/huahuahu/p/UIKit-Apps-for-Every-Size-and-Shape.html