标签:颜色 密码字段 方便 scale targe lex 5.7 不能添加 习惯
该项目主要可以练习js操控dom事件,事件触发之间的逻辑关系,以及如何写入缓存,获取缓存、固定。
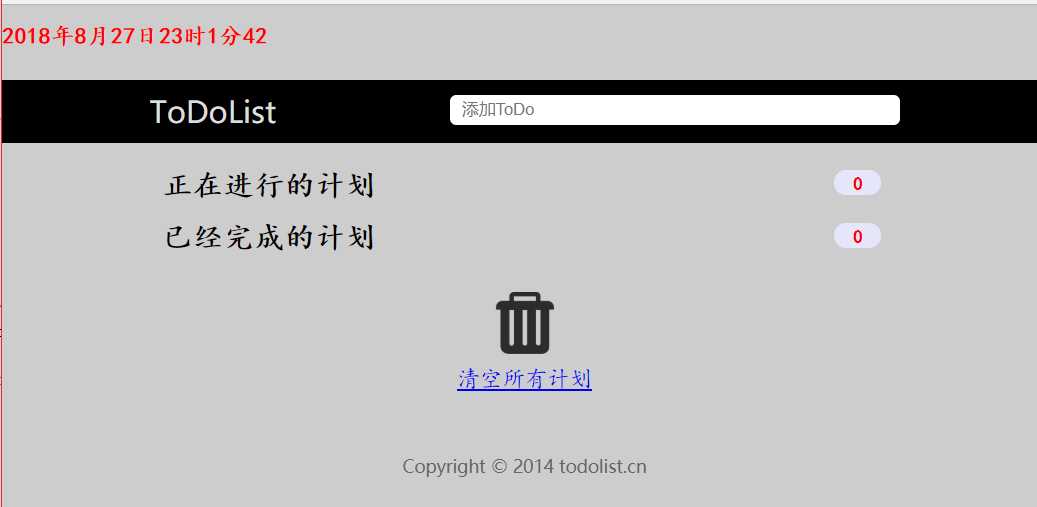
ToDoList是一款非常优秀的任务管理软件,用户可以用它方便地组织和安排计划。该软件短小精悍,仅有一个 数百 KB 的可执行文件就能完成所有功能,并且界面设计优秀,初级用户也能够快速上手。
本项目参考了http://www.todolist.cn/点击打开链接,对代码进行了一些精简,并添加了一些功能。在实现项目的过程中,首先是实现最基本的功能,然后不断地添加增强功能和美化。
参考链接http://www.todolist.cn/

1.将用户输入添加至待办项

2.可以对todolist进行分类(待办项和已完成组),用户勾选既将待办项分入已完成组

3.todolist的每一项可删除和编辑

4.下方有clear按钮,并清空所有todolist项
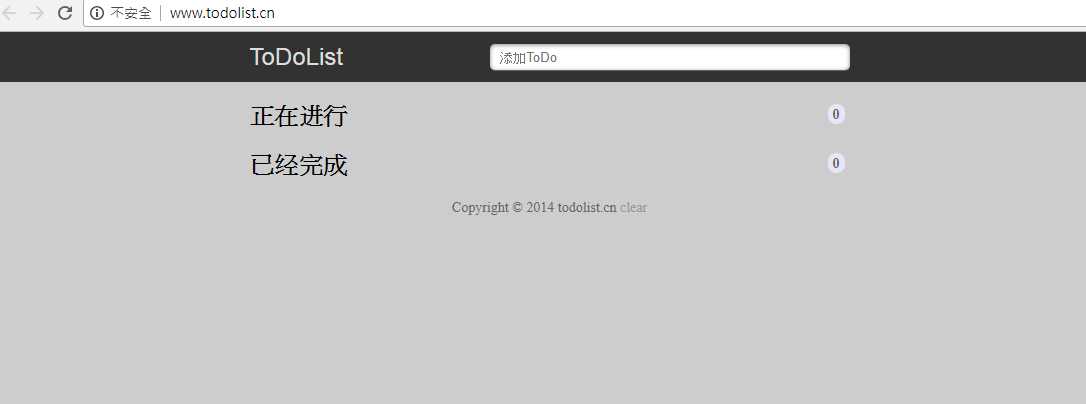
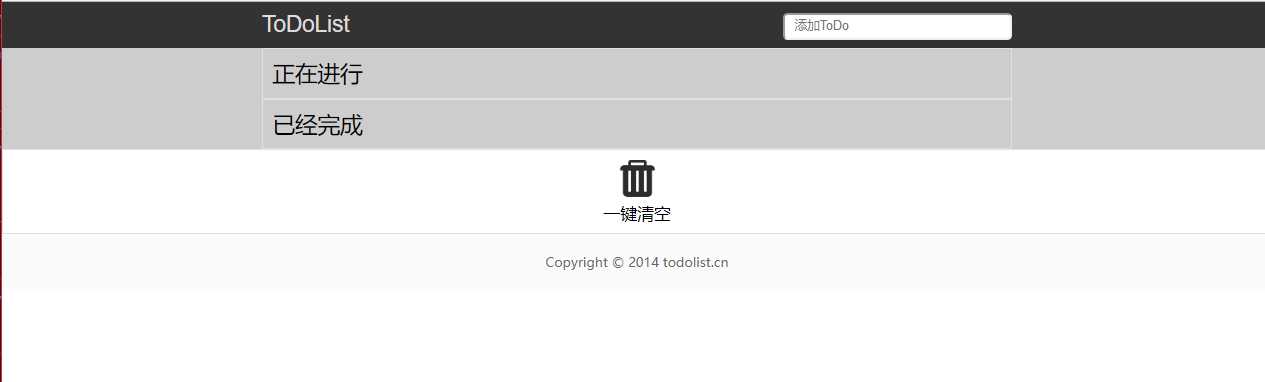
最终成型的结果:丑是丑了点,将就着看呗
一个简单的HTML表单,包含两个文本输入框,一个提交按钮。
总结Input的标签:(input标签用于搜集用户信息)
Input表示Form表单中的一种输入对象,其又随Type类型的不同而分文本输入框,密码输入框,单选/复选框,提交/重置按钮等。
输入类型是text,这是我们见的最多也是使用最多的,
比如登陆输入用户名,注册输入电话号码,电子邮件,家庭住址等等。
当然这也是Input的默认类型。

参数name:同样是表示的该文本输入框名称。

参数size:输入框的长度大小。

参数maxlength:输入框中允许输入字符的最大数。

参数value:输入框中的默认值

特殊参数readonly:表示该框中只能显示,不能添加修改。
代码格式:
<form>
  your name:
  <input type="text" name="yourname" size="30" maxlength="20" value="输入框的长度为30,允许最大字符数为20"><br>
  <input type="text" name="yourname" size="30" maxlength="20" readonly value="你只能读不能修改">
</form>
测试代码:
<!doctype html>
<html lang="zh-CN">
  <head>
     <meta charset="utf-8">
     <meta name="description" content="all kinds of input">
     <meta name="keywords" content="input,html">

      <title>各种input的测试</title>

  </head>

  <body>
          <form action="">
            姓名1:<input type="text" name="yourname" size="30" maxlength="20" value="输入框的长度为30,允许最大字符数为20"><br>
            姓名2:<input type="text" name="yourname" size="30" maxlength="20" readonly value="你只能读不能修改"><br>
          </form>
  </body>
</html>
此密码输入框,就是输入的信息是保密字符。
placeholder 属性提供可描述输入字段预期值的提示信息(hint)。
该提示会在输入字段为空时显示,并会在字段获得焦点时消失。
注释:placeholder 属性适用于以下的 <input> 类型:text, search, url, telephone, email 以及 password
期间又提及到一个表单标签form,下面继续介绍表单标签。
表单用于向服务器传输数据。
表单能够包含 input 元素,比如文本字段、复选框、单选框、提交按钮等等。
表单还可以包含textarea、select、fieldset和 label 元素。
其中上面又提到了提交按钮,我学一下。
就是下面代码标记了一个按钮
<button type="button">Click Me!</button>
定义和用法
<button> 标签定义一个按钮。
在 button 元素内部,您可以放置内容,比如文本或图像。这是该元素与使用 input 元素创建的按钮之间的不同之处。
<button> 控件 与 <input type="button"> 相比,提供了更为强大的功能和更丰富的内容。<button> 与 </button> 标签之间的所有内容都是按钮的内容,其中包括任何可接受的正文内容,比如文本或多媒体内容。例如,我们可以在按钮中包括一个图像和相关的文本,用它们在按钮中创建一个吸引人的标记图像。
唯一禁止使用的元素是图像映射,因为它对鼠标和键盘敏感的动作会干扰表单按钮的行为。
请始终为按钮规定 type 属性。Internet Explorer 的默认类型是 "button",而其他浏览器中(包括 W3C 规范)的默认值是 "submit"。
定义和用法
id 属性规定 HTML 元素的唯一的 id。
id 在 HTML 文档中必须是唯一的。
id 属性可用作链接锚(link anchor),通过 JavaScript(HTML DOM)或通过 CSS 为带有指定 id 的元素改变或添加样式。
<span> 在CSS定义中属于一个行内元素,在行内定义一个区域,也就是一行内可以被 <span> 划分成好几个区域,从而实现某种特定效果。
使用<Span>元素对文本的一部门进行着色。也就是说被<span>元素包含的文本,既可以使用css对其定义样式,或者使用JavaScript对其进行操作。
<span> 本身没有任何属性。 <div> 在CSS定义中属于一个块级元素 <div> 可以包含段落、标题、表格甚至其它部分。这使DIV便于建立不同集成的类,如章节、摘要或备注。在页面效果上,使用 <div> 会自动换行,使用 <span> 就会保持同行。
<label>标签为input元素定义标注。
label 元素不会向用户呈现任何特殊效果。不过,它为鼠标用户改进了可用性。如果您在 label 元素内点击文本,就会触发此控件。就是说,当用户选择该标签时,浏览器就会自动将焦点转到和标签相关的表单控件上。
<label> 标签的 for 属性应当与相关元素的 id 属性相同。
for功能:表示这个lable是为哪个控件服务的,lable标签要绑定for指定HTML元素的ID或name属性,你点击的时候,所绑定的元素将获取焦点。
用法:<lable for="inputBox">姓名</lable><input id="inputbox‘ type="text">
accesskay:(一般很少用)
功能:定义访问这个控件的热键。
用法:<label for="InputBox" accesskey="N">姓名</label><input id="InputBox" type="text">
局限性:accessKey属性所设置的快捷键不能与浏览器的快捷键冲突,否则将优先激活浏览器的快捷键。
label 元素不会向用户呈现任何特殊效果。不过,它为鼠标用户改进了可用性。如果您在 label 元素内点击文本,就会触发此控件。就是说,当用户选择该标签时,浏览器就会自动将焦点转到和标签相关的表单控件上。
<textarea> 标签定义多行的文本输入控件。
文本区中可容纳无限数量的文本,其中的文本的默认字体是等宽字体(通常是 Courier)。
可以通过 cols 和 rows 属性来规定 textarea 的尺寸,不过更好的办法是使用 CSS 的 height 和 width 属性。
注释:在文本输入区内的文本行间,用 "%OD%OA" (回车/换行)进行分隔。
提示:可以通过 <textarea> 标签的 wrap 属性设置文本输入区内的换行模式
autocomplete
默认为on,其含义代表是否让浏览器自动记录自谦输入的值。
很多时候,需要对客户的资料进行保密,防止浏览器软件或者恶意插件获取到。可以在input中加入autocomplete = "off"来关闭记录,系统需要保密的情况下可以使用此参数。
autocapitalize
自动大小写
autocorrect
纠错
<section> 标签定义文档中的节(section、区段)。比如章节、页眉、页脚或文档中的其他部分。
section的真正应用只是很少,主要是article里面的标签,例如<h1><p></p></h1> => <section><h1><p></p></h1></section> 这样语义化才有效,如果无缘无故把div改为section,反而是误导了搜索引擎。当然,这要看情况而定,但<section>到底还是代表章节,至于什么才属于‘章节’就有自己去判断了。
section和div的异同
1、section和div都可以对内容进行分块,但是section是进行有意义的分块,无意义的分块应该由div来做,例如用作设置样式的页面容器。
2、section内部必须有标题,标题也代表了section的意义所在。
<!DOCTYPE html>
<html lang="en">
<head>
    <meta http-equiv="Content-Type" content="text/html;charset=utf-8" />
        <meta name="viewport" content="width=device-width,initial-scale=1.0,maximun-scale=1.0,user-scalable=no" />
        <title>ToDoList-最简单的待办事项列表</title>
        <meta name="description" content="ToDoList无须注册即可使用,数据存储在用户浏览器的html5本地数据库里,是最简单最安全的待办事项列表应用!" />
        <link type="text/css" rel="stylesheet" href="css/index.css" >
</head>
<body>
        <div class="wrap">
            <!--上面的时间内容-->
            <div class="time">
                <h3 id="concrete_time"></h3>
            </div>
            <!--顶栏的内容-->
            <div class="header">
               <form id="form" action="javascript:postAction()" >
                <label for="title">ToDoList</label>
                <input id="title" name="‘title" placeholder="添加ToDo" required="required"
                 autocapitalize="off" type="text">
             </form>
            </div>

            <!--中间的内容-->
            <div class="section">
                <h2>
                    正在进行的计划
                    <span id="todocount">0</span>
                </h2>
                <ul id="todolist"></ul>
                    <h2>
                        已经完成的计划
                        <span id="donecount">0</span>
                    </h2>
                <ul id="donelist"></ul>
            </div>

            <!-- 清除键内容-->
            <div class="clear">
                <div class=‘clear-logo‘  id="btn"></div>
                <div class="clear_write">
                    <a href="javascript:clear();">清空所有计划</a>
                 </div>

            </div>

            <!--底部内容-->
            <div class="footer">
                    Copyright ? 2014 todolist.cn
                </div>
            </div>


</body>
    <script type="text/javascript" src="js/index.js">

    </script>
</html>
*{
    padding:0;
    margin:0;
}
ul>li{
    list-style: none;
    overflow: hidden;
}
.wrap{
    width:100%;
    background-color:#cdcdcd;
    overflow: hidden;
}

.header{
    background-color: black;
    height: 50px;
}

.time{
    background: #cdcdcd;
    height: 60px;
    margin: 0 auto;
    line-height: 50px;
    font-family: "楷体","楷体_GB2312";
    color: red;
}
h1{
    position: relative;
    margin: 15px 20px;
}

#form{
    width: 600px;
    margin:0 auto;
    overflow: hidden;
}

label{
    color: #ddd;
    line-height: 50px;
    font-size: 24px;
    float: left;
    width: 100px;
    cursor: pointer;
}

.header input{
    float: right;
    width:60%;
    height: 24px;
    margin-top: 12px;
    text-indent: 10px;
    border-radius: 5px;
    border: none;
}

.section{
    width: 600px;
    margin:20px auto;
}

h2{
    position: relative;
    margin: 15px 10px;
    font-family: "楷体","楷体_GB2312";
}

h2 span{
    position: absolute;
    right: 5px;
    top: 2px;
    padding: 0 15px;
    display: inline-block;
    background: #e6e6fa;
    font-size: 14px;
    color: red;
    text-align: center;
    height: 20px;
    line-height: 22px;
    border-radius: 20px;
}

ul li{
    overflow: hidden;
    height: 32px;
    line-height: 32px;
    background-color: #fff;
    border-radius: 3px;
    border: 2px solid red;
    padding:0 10px;
    margin-bottom: 10px;
}

/*给复选框中进行美化,*/
ul li input[type=‘checkbox‘]{
    float: left;
    width: 22px;
    height: 22px;
    margin:6px 5px 0 0;
    background-color: silver;
}
/*给计划的内容进行美化*/
ul li input[type=‘text‘]{
    float: left;
    width: 70%;
    text-indent: 5px;
    height: 26px;
    line-height: 27px;
    margin: 2px 0;
    margin-left: 20px;
    outline: none;
    border: none;
    font-family: "楷体","楷体_GB2312";
}

/*给移除的内容进行美化*/
ul li a{
    float: right;
    width:60px;
    background-color: #e6e6fa;
    color:red;
    border: 6px solid #fff;
    margin-top: 3px;
    border-radius: 14px;
    text-align: center;
    font-weight: bold;
    cursor: pointer;
    line-height: 14px;
}

#donelist li{
    border-left: 5px solid #fff;
}
#donelist li input[type=‘text‘]{
    background-color:#fff;
}

/*清除所有内容的设置*/
.clear {
    font-size: 18px;
    padding: 10px;
    margin-top: 12px;
    outline: none;
}
.clear .clear-logo{
    background: url(../img/clear.png) no-repeat center;
    background-size:50px ;
    height: 50px;
}
.clear .clear_write{
    text-align: center;
    margin: 10px auto;
    font-family: "楷体","楷体_GB2312";
}

.clear a:hover{
    color: red;
    cursor: pointer;
}

.footer{
    width: 600px;
    margin: 30px  auto;
    color: #666;
    font-size: 14px;
    text-align: center;
}
// 设置时间
var h1 = document.getElementById("concrete_time");

setInterval(function () {
    var myDate = new Date();

    var y = myDate.getFullYear();
    var m = myDate.getMonth();
    var d = myDate.getDate();
    var h = myDate.getHours();
    var min = myDate.getMinutes();
    var s = myDate.getSeconds();


 h1.innerHTML = y+"年"+(m+1)+ "月"+ d + "日"+h+"时"+min+"分" +num(s)
},1000);

function num(n) {
    if (n<10){
        return ‘0‘+n;
    }
    return n
}

var todolist = document.getElementById(‘todolist‘);
var donelist = document.getElementById(‘donelist‘);

var todoCount = document.getElementById(‘todocount‘);
var doneCount = document.getElementById(‘donecount‘);

var todoc =0;
var donec=0;

// 添加Todo的内容
function postAction() {
    var title = document.getElementById("title");

    if(title.value ===" "){
        alert("内容不能为空!")
    }else{
        var li = document.createElement("li");
        li.innerHTML =‘<input type="checkbox" onchange="update();">‘ +
            ‘<input class="title" type="text" onchange="change();" onclick="edit();">‘ +
            ‘<a href="javascript:remove();">remove</a>‘;
        if(todoc ===0){
            todolist.appendChild(li);
        }else{
            todolist.insertBefore(li,todolist.children[0]);
        }
        var txtTitle = document.getElementsByClassName("title")[0];
        txtTitle.value = title.value;

        loop(‘todolist‘);
        todoc++;
        todoCount.innerText = todoc;

        title.value = "";
    }
}

// 循环 每次添加不同的i值
function loop(str){
    var list = null;
    str ===‘todolist‘ ? list = todolist :list =donelist;

    childs = list.childNodes;
    for(var i=0; i<childs.length;i++){
        childs[i].children[0].setAttribute(‘onchange‘,‘update("‘+i+‘","‘+str+‘")‘);
        childs[i].children[1].setAttribute(‘onclick‘,‘edit("‘+i+‘","‘+str+‘")‘);
        childs[i].children[1].setAttribute(‘onchange‘,‘change("‘+i+‘","‘+str+‘","‘
            +childs[i].children[1].value+‘")‘);
        childs[i].children[2].setAttribute(‘href‘,‘javascript:remove("‘+i+‘","‘+str+‘")‘);
    }
}

// update方法
function update(n,str){
    var list = null;
    str === ‘todolist‘ ? list = todolist : list = donelist;

    var li = null;
    childs = list.childNodes;
    for(var i=0;i<childs.length;i++){
        if(i===Number(n)){
            li = childs[i];
        }
    }
     // 删除原有的,得到li 并刷新了原有的li
    remove(n,str);

    if(str===‘todolist‘){
        if(donec ===0){
            donelist.appendChild(li);
        }else {
            donelist.insertBefore(li,donelist.children[0]);
        }
        loop(‘donelist‘);
        donec++;
        doneCount.innerText = donec;
    }else if(str ===‘donelist‘){
        todolist.appendChild(li);
        loop(‘todolist‘);
        todoc++;
        todoCount.innerText = todoc;
    }
}

// edit方法编译title
function edit(n,str) {
    var list = null;
    str ===‘todolist‘ ? list = todolist : list = donelist;
    childs = list.childNodes;
    for(var i=0;i<childs.length;i++){
        if(i===Number(n)){
            childs[i].children[1].style.border = ‘1px solid red‘;
        }
    }
}

function change(n,str,oldValue) {
    var list = null;
    str===‘todolist‘ ? list = todolist : list = donelist;
    childs = list.childNodes;
    for(var i=0; i<childs.length; i++){
        if(i===Number(n)){
            childs[i].children[1].style.border = ‘none‘;
            if(childs[i].children[1].value === ""){
                alert(‘内容不能为空‘);
                childs[i].children[1].value = oldValue;
            }
        }
    }
    loop(str);
}

// 清除单个列表
function remove(n,str) {
    var list=null;
    if (str===‘todolist‘){
        list = todolist;
        todoc--;
        todoCount.innerText = todoc;
    } else if(str===‘donelist‘){
        list = donelist;
        donec--;
        doneCount.innerText = donec;
    }

    childs = list.childNodes;
    for(var i=childs.length-1;i>=0;i--){
        if(i===Number(n)){
            list.removeChild(childs[n]);
        }
    }
    loop(str);
}

// 清除所有列表
function clear(){
    childs1 = todolist.childNodes;
    for(var i=childs1.length-1;i>=0;i--){
        todolist.removeChild(childs1[i]);
    }
    childs2 = donelist.childNodes;
    for(var j=childs2.length-1;j>=0;j--){
        donelist.removeChild(childs2[j]);
    }
    todoc = 0;
    donec = 0;
    todoCount.innerText = todoc;
    doneCount.innerText = donec;
}
<!DOCTYPE html>
<html>
	<head>
		<meta http-equiv="Content-Type" content="text/html;charset=utf-8" />
		<meta name="viewport" content="width=device-width,initial-scale=1.0,maximun-scale=1.0,user-scalable=no" />
		<title>ToDoList-最简单的待办事项列表</title>
		<meta name="description" content="ToDoList无须注册即可使用,数据存储在用户浏览器的html5本地数据库里,是最简单最安全的待办事项列表应用!" />
		<link type="text/css" rel="stylesheet" href="css/index.css" >

	</head>
	<body>
		<div class=‘wrap‘>
			<!--#顶栏的内容-->
			<div class=‘topbar‘>
				<div class="container1">
					<!--<form action="javascript:postaction()" id="form">
						<label for=‘title‘>ToDoList</label>
						<input type="text" id="title" name="title" placeholder="添加ToDo"
						required="required" autocomplete="off" >
					</form>-->
					<div class=‘label‘>ToDoList</div>

					<input type="text" id="title" name="title" placeholder="添加ToDo"
						required="required" autocomplete="off" >
				</div>
			</div>

			<!--#中间的内容-->
			<div class=‘section‘>
				<div class="container2">

					<ul id=‘right-ul‘>
						<li><div class=‘todolist-logo‘></div><p>正在进行</p></li>
						<li><div class=‘donelist-logo‘></div><p>已经完成</p></li>
					</ul>

					<!--<div class=‘todolist‘>
						<p>正在进行</p>
					</div>

					<div class=‘donelist‘>
						<p>已经完成</p>
					</div>-->

				</div>
			</div>

			<!--清除内容-->
			<div class="clear">
				<ul id=‘center-clear‘>
					<li><div class=‘clear-logo‘  id="btn"></div><p >一键清空</p></li>
				</ul>
				<!--<a href="#">一键清空</a>-->
			</div>

			<!--#下面的内容-->
			<div class=‘footer‘>
				<div class="container3">
					<p>Copyright ? 2014 todolist.cn</p>

				</div>
			</div>
		</div>

		<script type="text/javascript" src="./js/index.js">


		</script>

	</body>
</html>
*{
	padding: 0;
	margin: 0;
}

.wrap{
	width: 100%;
	overflow: hidden;

}

ul>li{
	list-style: none;
}

a{
	text-decoration: none;
}

.topbar{
	height: 50p;
	background: #333;
	line-height: 50px;
}

.container1{
	width: 800px;
	overflow: hidden;
	margin: 0 auto;
}

.label{
	float: left;
	width: 100px;
	line-height: 50px;
	color: #DDD;
	font-size: 24px;
	cursor: pointer;
	font-family: "Helvetica Neue",Helvetica,Arial,sans-serif;
}

.topbar input{
	float: right;
	width: 30%;
	height: 24px;
	margin-top: 12px;
	text-indent: 10px;
	border-radius: 5px;
	/*box-shadow: "Helvetica Neue",Helvetica,Arial,sans-serif;*/
	/*border: none;*/
}

.section{
	padding: 0 10px;
	margin: 0 auto;
	background: #cdcdcd;
}

.container2{
	width: 800px;
	overflow: hidden;
	margin: 0 auto;
}

.section ul li{
	font-size: 24px;
	padding: 10px;
	border: 1px solid #E0E0E0;
}
.section ul li:hover{
	color: blue;
	cursor: pointer;
}


.clear{
	/*position: fixed;*/
	/*padding: 10px 0;*/
	/*font-size: 18px;*/
	/*background-color: #fafafa;*/
	/*text-align: center;*/

}

.clear ul li{
	font-size: 18px;
	padding: 10px;
	border: 1px solid #e0e0e0;
}

.clear ul li:hover{
	color: red;
	cursor: pointer;
}

.clear ul li p{
	text-align: center;
	padding-top: 5px;
}
.clear .clear-logo{
	background: url(../img/clear.png) no-repeat center;
	background-size:40px ;
	height: 40px;
}

.footer{
	padding: 10px 0;
	font-size: 12px;
	background-color: #fafafa;
}

.container3{
	width: 100%;
	overflow: hidden;
	margin: 0 auto;
}

.footer p{
	padding: 10px 0;
	text-align: center;
	color: #666;
	font-size: 14px;
	/*background:#fff;*/
	font-size: "楷体";
	min-width: 1226px;
}
对自己在做CSS,JS中遇到的一些问题,从简单到难,想记录下来自己的不足,因为前端这块是全新的知识点,我却当做自己会的,所以遇到了很大的困难,但是克服了这些问题,我觉得有必要记录一下。
color即可
font-family: "楷体","楷体_GB2312";
第一种思路:a标签外层加一个DIV 然后DIV 设置 样式 text-align:center; 这样里面就居中了。
第二种思路的:就直接在你的源码上改 .
a{
    text-decoration:none;
    font-size:20px;
    font-weight:bold;
    width:222px;
    height:100px;
    border:1px solid red;
    display:block;
    text-align:center
}
这个就行了,因为A标签不是一个块级元素 所以 要先 display:block。
var myDate = new Date();
myDate.getYear();  //获取当前年份(2位)
myDate.getFullYear();  //获取完整的年份(4位,1970-????)
myDate.getMonth();  //获取当前月份(0-11,0代表1月)
myDate.getDate();  //获取当前日(1-31)
myDate.getDay();  //获取当前星期X(0-6,0代表星期天)
myDate.getTime();  //获取当前时间(从1970.1.1开始的毫秒数)
myDate.getHours();  //获取当前小时数(0-23)
myDate.getMinutes();  //获取当前分钟数(0-59)
myDate.getSeconds();  //获取当前秒数(0-59)
myDate.getMilliseconds();  //获取当前毫秒数(0-999)
myDate.toLocaleDateString();  //获取当前日期
var mytime=myDate.toLocaleTimeString();  //获取当前时间
myDate.toLocaleString( );  //获取日期与时间
语法:
<input type="value">
属性值:
| 值 | 描述 |
|---|---|
| button | 定义可点击按钮(多数情况下,用于通过 JavaScript 启动脚本)。 |
| checkbox | 定义复选框。 |
| file | 定义输入字段和 "浏览"按钮,供文件上传。 |
| hidden | 定义隐藏的输入字段。 |
| image | 定义图像形式的提交按钮。 |
| password | 定义密码字段。该字段中的字符被掩码。 |
| radio | 定义单选按钮。 |
| reset | 定义重置按钮。重置按钮会清除表单中的所有数据。 |
| submit | 定义提交按钮。提交按钮会把表单数据发送到服务器。 |
| text | 定义单行的输入字段,用户可在其中输入文本。默认宽度为 20 个字符 |
对复选框自定义样式,我们以前一直用的脚本来实现,不过现在可以使用新的伪类 :checkbox 来实现。
如果直接对复选框设置样式,那么这个伪类并不实用,因为没有多少样式能够对复选框起作用。不过,倒是可以基于复选框的勾选状态借助组合选择符来给其他元素设置样式。
很多时候,无论是为了表单元素统一,还是为了用户体验良好,我们都会选择 label 元素和 input[type="checkbox"] 一起使用。当<label>元素与复选框关联之后,也可以起到触发开关的作用。
思路:
1. 可以为<label>元素添加生成性内容(伪元素),并基于复选框的状态来为其设置样式;
2. 然后把真正的复选框隐藏起来;
3. 最后把生成内容美化一下。
解决方法:
<input type="checkbox" id="onlyone" />
<label for="onlyone">onyone!</label>
input[type="checkbox"] + label::before {
    content: "\a0";  /*不换行空格*/
    display: inline-block;
    vertical-align: .2em;
    width: .8em;
    height: .8em;
    margin-right: .2em;
    border-radius: .2em;
    background-color: silver;
    text-indent: .15em;
    line-height: .65;  /*行高不加单位,子元素将继承数字乘以自身字体尺寸而非父元素行高*/
}
原来的复选框仍然可见,但是我们先给复选框的勾选状态添加样式:
input[type="checkbox"]:checked + label::before {
    content: "\2713";
    background-color: yellowgreen;
}
input {
    position: absolute;
    clip: rect(0, 0, 0, 0);
}
隐藏原来的复选框时,如果使用 display: none; 的话,那样会把它从键盘 tab 键切换焦点的队列中完全删除。
于是可采用剪切的方式,让剪切后的尺寸为零,这样就隐藏了原来的多选框。
::before选择器在被选元素的内容前面插入内容。
:after 选择器在被选元素的内容后面插入内容。
它们都必须使用content 属性来指定要插入的内容(content : "内容,可以为空值";)。如果没有content属性来指定内容的话将无效。
基本应用:做一个复选框的效果,由于给定的复选框不好看,所以我们可以先将给定的复选框隐藏掉,然后用before做一个自己想要的复选框出来。
JS中的函数实际上是一个对象,每个函数都是Function类型实例,而且可以与其他引用类型都一样具有属性和方法,由于函数是对象,因此函数名实际上是一个指向函数对象的指针,可以作为变量指向其他函数对象,也可以作为其他函数的返回值。
常用的函数定义方式有两种
一种是声明式定义,如下:
function sum (num1, num2) {
  return num1 + num2;
}
一种是表达式定义,如下:
var sum = function(num1, num2){
  return num1 + num2;
};
通常,通过 JavaScript,您需要操作 HTML 元素。
1、通过 id 找到 HTML 元素
2、通过标签名找到 HTML 元素
3、通过类名找到 HTML 元素
提示:通过类名查找 HTML 元素在 IE 5,6,7,8 中无效。
var x=document.getElementById("intro");
var y=document.getElementsByTagName("p");
①、改变 HTML 元素的内容 (innerHTML)
document.getElementById(id).innerHTML=new HTML
②、改变 HTML 属性
document.getElementById(id).attribute=new value
document.getElementById("image").src="landscape.jpg";
③、改变 HTML 样式
document.getElementById(id).style.property=new style
<script>
document.getElementById("p2").style.color="blue";
</script>
④、添加或删除 HTML 元素
JS中与变量常量声明相关的关键字有var,let和const。其中let和const是ES6的新特性。var和let都是用来声明变量的,不同的是var声明的变量会有一个一个作用域提升的效果,var声明的变量会被提升到当前作用域的最前面,它的作用域范围也就是当前作用域,即使它是在语句块中声明。而let声明的变量就没有作用域提升的效果,它声明的变量会绑定当前语句块(暂时性死区,temporal dead zone,简称TDZ),被声明之后才可以使用,只在声明所在的块级作用域内有效。const关键字用来声明常量,同时它声明的常量也和let一样不存在作用域提升的效果。
function foo(){
  //if中的声明语句会被提升到这里
  //var a;
  if(false) {
    var a = 1;
  }
  a = 10;
  console.log(a);//10
}

function bar(){
  {
    console.log(b); //ReferenceError: can‘t access lexical declaration `b‘ before initialization
    let b = 2;
  }
  console.log(b); //ReferenceError: b is not defined
}

function baz(){
  {
    const c = 2;
  }
  console.log(c); //ReferenceError: c is not defined
}
标签:颜色 密码字段 方便 scale targe lex 5.7 不能添加 习惯
原文地址:https://www.cnblogs.com/wj-1314/p/9446361.html