标签:create def 命名 修改 ber uilabel delegate ted strong
iOS开发UI篇—使用xib自定义UItableviewcell实现一个简单的团购应用界面布局
iOS开发UI篇—使用xib自定义UItableviewcell实现一个简单的团购应用界面布局
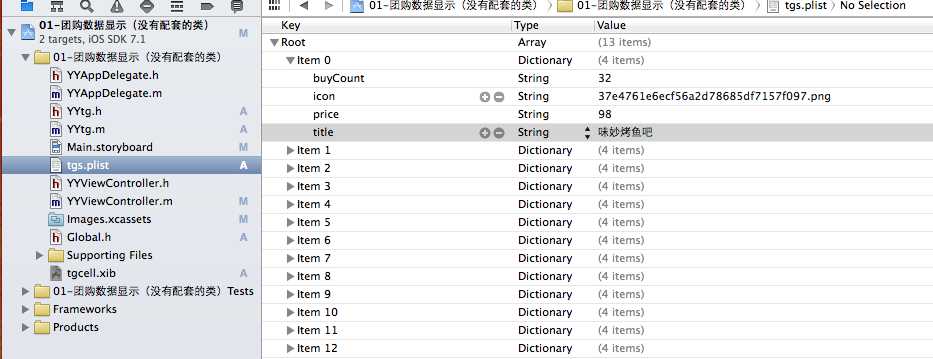
一、项目文件结构和plist文件
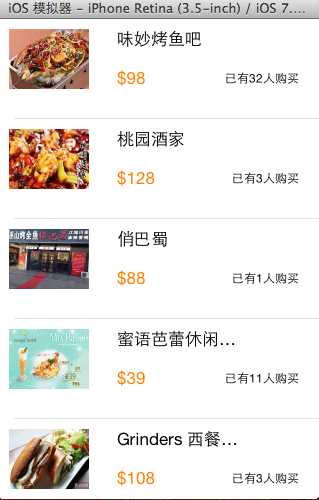
二、实现效果
三、代码示例
1.没有使用配套的类,而是直接使用xib文件控件tag值操作
数据模型部分:
YYtg.h文件

//
// YYtg.h
// 01-团购数据显示(没有配套的类)
//
// Created by apple on 14-5-29.
// Copyright (c) 2014年 itcase. All rights reserved.
//
#import <Foundation/Foundation.h>
#import "Global.h"
@interface YYtg : NSObject
@property(nonatomic,copy)NSString *buyCount;
@property(nonatomic,copy)NSString *icon;
@property(nonatomic,copy)NSString *price;
@property(nonatomic,copy)NSString *title;
YYinitH(tg)
@end
YYtg.m文件
//
// YYtg.m
// 01-团购数据显示(没有配套的类)
//
// Created by apple on 14-5-29.
// Copyright (c) 2014年 itcase. All rights reserved.
//
#import "YYtg.h"
@implementation YYtg
YYinitM(tg)
@end
主控制器
YYViewController.m文件
//
// YYViewController.m
// 01-团购数据显示(没有配套的类)
//
// Created by apple on 14-5-29.
// Copyright (c) 2014年 itcase. All rights reserved.
//
#import "YYViewController.h"
#import "YYtg.h"
@interface YYViewController ()<UITableViewDataSource>
@property(nonatomic,strong)NSArray *tg;
@property (strong, nonatomic) IBOutlet UITableView *tableview;
@end
@implementation YYViewController
- (void)viewDidLoad
{
[super viewDidLoad];
self.tableview.rowHeight=100;
}
#pragma mark- 懒加载
-(NSArray *)tg
{
if (_tg==nil) {
NSString *fullpath=[[NSBundle mainBundle]pathForResource:@"tgs.plist" ofType:nil];
NSArray *temparray=[NSArray arrayWithContentsOfFile:fullpath];
NSMutableArray *arrayM=[NSMutableArray arrayWithCapacity:temparray.count];
for (NSDictionary *dict in temparray) {
YYtg *tg=[YYtg tgWithDict:dict];
[arrayM addObject:tg];
}
_tg=[arrayM mutableCopy];
}
return _tg;
}
#pragma mark-数据显示
-(NSInteger)numberOfSectionsInTableView:(UITableView *)tableView
{
return 1;
}
-(NSInteger)tableView:(UITableView *)tableView numberOfRowsInSection:(NSInteger)section
{
return self.tg.count;
}
-(UITableViewCell *)tableView:(UITableView *)tableView cellForRowAtIndexPath:(NSIndexPath *)indexPath
{
//读取xib中的数据
// NSArray *arrayM=[[NSBundle mainBundle]loadNibNamed:@"tgcell" owner:nil options:nil];
// UITableViewCell *cell=[arrayM firstObject];
static NSString *identifier=@"tg";
UITableViewCell *cell=[tableView dequeueReusableCellWithIdentifier:identifier];
if (cell==nil) {
// cell=[[UITableViewCell alloc]initWithStyle:UITableViewCellStyleDefault reuseIdentifier:identifier];
cell= [[[NSBundle mainBundle]loadNibNamed:@"tgcell" owner:nil options:nil] firstObject];
}
YYtg *tg=self.tg[indexPath.row];
//设置数据
//使用tag
UIImageView *imgv=(UIImageView *)[cell viewWithTag:1];
imgv.image=[UIImage imageNamed:tg.icon];
UILabel *buyCount=(UILabel *)[cell viewWithTag:4];
buyCount.text=[NSString stringWithFormat:@"已有%@人购买",tg.buyCount];
UILabel *title=(UILabel *)[cell viewWithTag:2];
title.text=tg.title;
UILabel *price=(UILabel *)[cell viewWithTag:3];
price.text=[NSString stringWithFormat:@"$%@",tg.price];
//返回cell
return cell;
}
//隐藏状态栏
-(BOOL)prefersStatusBarHidden
{
return YES;
}
@end
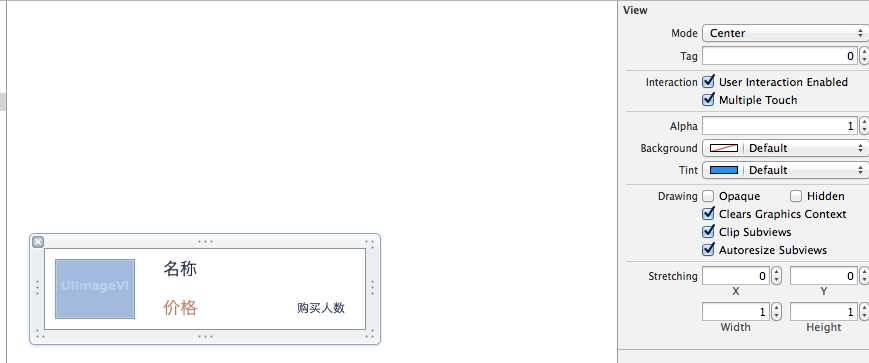
使用xib自定义的UItableviewcell
代码分析:
上面的代码通过使用xib文件中各个控件的tag值,完成对每个部分数据的赋值和刷新。但是,作为主控制器,它应该知道xib文件中各个控件的tag值,它知道的是不是太多了呢?
为了解决上面的问题,我们可以为自定义的cell设置一个配套的类,让这个类来操作这个xib,对外提供接口,至于内部的数据处理,外界不需要关心,也不用关心。
改造后的代码如下:
2.使用xib和对应的类完成自定义cell的数据展示
新建一个类,用来管理对应的xib文件
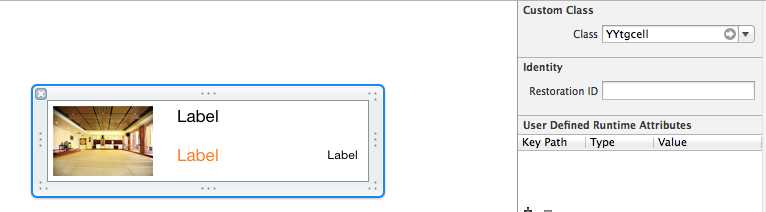
注意类的继承类,并把该类和xib文件进行关联
YYtgcell.h文件代码:
//
// YYtgcell.h
// 02-团购(使用xib和类完成数据展示)
//
// Created by apple on 14-5-29.
// Copyright (c) 2014年 itcase. All rights reserved.
//
#import <UIKit/UIKit.h>
#import "YYtg.h"
@interface YYtgcell : UITableViewCell
@property(nonatomic,strong)YYtg *yytg;
@end
YYtgcell.m文件
//
// YYtgcell.m
// 02-团购(使用xib和类完成数据展示)
//
// Created by apple on 14-5-29.
// Copyright (c) 2014年 itcase. All rights reserved.
//
#import "YYtgcell.h"
//私有扩展
@interface YYtgcell()
@property (strong, nonatomic) IBOutlet UIImageView *img;
@property (strong, nonatomic) IBOutlet UILabel *titlelab;
@property (strong, nonatomic) IBOutlet UILabel *pricelab;
@property (strong, nonatomic) IBOutlet UILabel *buycountlab;
@end
@implementation YYtgcell
#pragma mark 重写set方法,完成数据的赋值操作
-(void)setYytg:(YYtg *)yytg
{
_yytg=yytg;
self.img.image=[UIImage imageNamed:yytg.icon];
self.titlelab.text=yytg.title;
self.pricelab.text=[NSString stringWithFormat:@"$%@",yytg.price];
self.buycountlab.text=[NSString stringWithFormat:@"已有%@人购买",yytg.buyCount];
}
@end
主控制器
YYViewController.m文件
//
// YYViewController.m
// 02-团购(使用xib和类完成数据展示)
//
// Created by apple on 14-5-29.
// Copyright (c) 2014年 itcase. All rights reserved.
//
#import "YYViewController.h"
#import "YYtg.h"
#import "YYtgcell.h"
@interface YYViewController ()<UITableViewDataSource,UITableViewDelegate>
@property (strong, nonatomic) IBOutlet UITableView *tableview;
@property(strong,nonatomic)NSArray *tg;
@end
@implementation YYViewController
- (void)viewDidLoad
{
[super viewDidLoad];
self.tableview.rowHeight=80.f;
}
#pragma mark- 懒加载
-(NSArray *)tg
{
if (_tg==nil) {
NSString *fullpath=[[NSBundle mainBundle]pathForResource:@"tgs.plist" ofType:nil];
NSArray *temparray=[NSArray arrayWithContentsOfFile:fullpath];
NSMutableArray *arrayM=[NSMutableArray arrayWithCapacity:temparray.count];
for (NSDictionary *dict in temparray) {
YYtg *tg=[YYtg tgWithDict:dict];
[arrayM addObject:tg];
}
_tg=[arrayM mutableCopy];
}
return _tg;
}
#pragma mark- xib创建cell数据处理
#pragma mark 多少组
-(NSInteger)numberOfSectionsInTableView:(UITableView *)tableView
{
return 1;
}
#pragma mark多少行
-(NSInteger)tableView:(UITableView *)tableView numberOfRowsInSection:(NSInteger)section
{
return self.tg.count;
}
#pragma mark设置每组每行
-(UITableViewCell *)tableView:(UITableView *)tableView cellForRowAtIndexPath:(NSIndexPath *)indexPath
{
static NSString *identifier= @"tg";
YYtgcell *cell=[tableView dequeueReusableCellWithIdentifier:identifier];
if (cell==nil) {
//如何让创建的cell加个戳
//对于加载的xib文件,可以到xib视图的属性选择器中进行设置
cell=[[[NSBundle mainBundle]loadNibNamed:@"tgcell" owner:nil options:nil]firstObject];
NSLog(@"创建了一个cell");
}
//设置cell的数据
//获取当前行的模型
YYtg *tg=self.tg[indexPath.row];
cell.yytg=tg;
return cell;
}
-(BOOL)prefersStatusBarHidden
{
return YES;
}
@end
3.对上述代码进行进一步的优化和调整(MVC)
优化如下:
(1)把主控制器中创建cell的过程抽取到YYtgcell中完成,并对外提供一个接口。
YYtgcell.h文件(提供接口)
#import <UIKit/UIKit.h>
#import "YYtgModel.h"
@interface YYtgcell : UITableViewCell
@property(nonatomic,strong)YYtgModel *yytg;
//把加载数据(使用xib创建cell的内部细节进行封装)
+(instancetype)tgcellWithTableView:(UITableView *)tableView;
@end
YYtgcell.m文件(把创建自定义cell的部分进行封装)
//
// YYtgcell.m
// 02-团购(使用xib和类完成数据展示)
//
// Created by apple on 14-5-29.
// Copyright (c) 2014年 itcase. All rights reserved.
//
#import "YYtgcell.h"
//私有扩展
@interface YYtgcell()
@property (strong, nonatomic) IBOutlet UIImageView *img;
@property (strong, nonatomic) IBOutlet UILabel *titlelab;
@property (strong, nonatomic) IBOutlet UILabel *pricelab;
@property (strong, nonatomic) IBOutlet UILabel *buycountlab;
@end
@implementation YYtgcell
#pragma mark 重写set方法,完成数据的赋值操作
-(void)setYytg:(YYtgModel *)yytg
{
_yytg=yytg;
self.img.image=[UIImage imageNamed:yytg.icon];
self.titlelab.text=yytg.title;
self.pricelab.text=[NSString stringWithFormat:@"$%@",yytg.price];
self.buycountlab.text=[NSString stringWithFormat:@"已有%@人购买",yytg.buyCount];
}
+(instancetype)tgcellWithTableView:(UITableView *)tableView
{
static NSString *identifier= @"tg";
YYtgcell *cell=[tableView dequeueReusableCellWithIdentifier:identifier];
if (cell==nil) {
//如何让创建的cell加个戳
//对于加载的xib文件,可以到xib视图的属性选择器中进行设置
cell=[[[NSBundle mainBundle]loadNibNamed:@"tgcell" owner:nil options:nil]firstObject];
NSLog(@"创建了一个cell");
}
return cell;
}
@end
主控器中的业务逻辑更加清晰,YYViewController.m文件代码如下
//
// YYViewController.m
// 02-团购(使用xib和类完成数据展示)
//
// Created by apple on 14-5-29.
// Copyright (c) 2014年 itcase. All rights reserved.
//
#import "YYViewController.h"
#import "YYtgModel.h"
#import "YYtgcell.h"
@interface YYViewController ()<UITableViewDataSource,UITableViewDelegate>
@property (strong, nonatomic) IBOutlet UITableView *tableview;
@property(strong,nonatomic)NSArray *tg;
@end
@implementation YYViewController
- (void)viewDidLoad
{
[super viewDidLoad];
self.tableview.rowHeight=80.f;
}
#pragma mark- 懒加载
-(NSArray *)tg
{
if (_tg==nil) {
NSString *fullpath=[[NSBundle mainBundle]pathForResource:@"tgs.plist" ofType:nil];
NSArray *temparray=[NSArray arrayWithContentsOfFile:fullpath];
NSMutableArray *arrayM=[NSMutableArray arrayWithCapacity:temparray.count];
for (NSDictionary *dict in temparray) {
YYtgModel *tg=[YYtgModel tgWithDict:dict];
[arrayM addObject:tg];
}
_tg=[arrayM mutableCopy];
}
return _tg;
}
#pragma mark- xib创建cell数据处理
#pragma mark 多少组
-(NSInteger)numberOfSectionsInTableView:(UITableView *)tableView
{
return 1;
}
#pragma mark多少行
-(NSInteger)tableView:(UITableView *)tableView numberOfRowsInSection:(NSInteger)section
{
return self.tg.count;
}
#pragma mark设置每组每行
-(UITableViewCell *)tableView:(UITableView *)tableView cellForRowAtIndexPath:(NSIndexPath *)indexPath
{
//1.创建cell
YYtgcell *cell=[YYtgcell tgcellWithTableView:tableView];
//2.获取当前行的模型,设置cell的数据
YYtgModel *tg=self.tg[indexPath.row];
cell.yytg=tg;
//3.返回cell
return cell;
}
#pragma mark- 隐藏状态栏
-(BOOL)prefersStatusBarHidden
{
return YES;
}
@end
四、推荐调整的项目文件结构
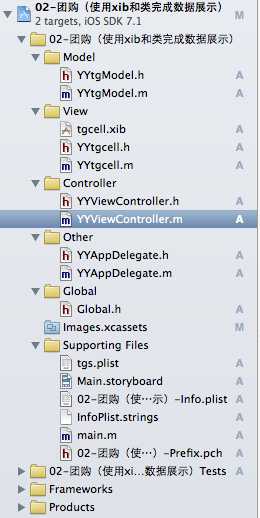
这是调整后的文件结构,完整的MVC架构。
注意:注意文件的命名规范。
提示技巧:批量改名,操作如下:
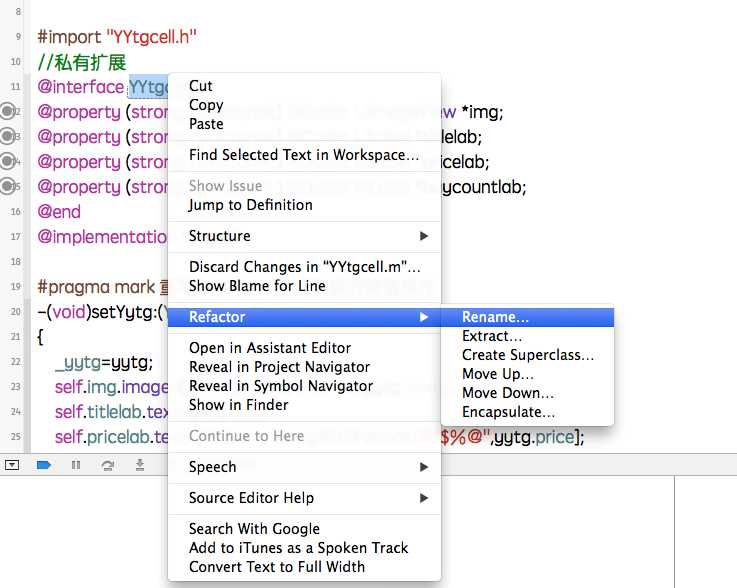
修改为想要的名称:

iOS开发UI篇—使用xib自定义UItableviewcell实现一个简单的团购应用界面布局
标签:create def 命名 修改 ber uilabel delegate ted strong
原文地址:https://www.cnblogs.com/CoderAlex/p/9686108.html