标签:不用 row line 配置nginx 表示 ide password lse cmak
本例采用MySQL二进制安装包进行安装演示
(1) 创建mysql用户的账号
[root@mysql ~]# groupadd mysql[root@mysql ~]# useradd -s /sbin/nologin -g mysql -M mysql[root@localhost ~]# tail -1 /etc/passwdmysql:x:500:501::/home/mysql:/sbin/nologin[root@mysql ~]# id mysqluid=500(mysql) gid=501(mysql) groups=501(mysql)(2)获取MySQL二进制软件包
百度云盘:http://pan.baidu.com/s/1hrBCzsC
提取码:4yjf

(3) 采用二进制方式安装MySQL
[root@mysql ~]# tar xf mysql-5.5.32-linux2.6-x86_64.tar.gz -C /usr/local/[root@mysql ~]# cd /usr/local/[root@mysql local]# mv mysql-5.5.32-linux2.6-x86_64 mysql-5.5.32[root@mysql local]# ln -s mysql-5.5.32 mysql[root@mysql local]# lsbin etc games include lib lib64 libexec mysql mysql-5.5.32 sbin share src[root@mysql local]# cd /usr/local/mysql[root@mysql mysql]# lsbin data include lib mysql-test scripts sql-benchCOPYING docs INSTALL-BINARY man README share support-files#提示:二进制安装包,仅需要解压就可以了,不需要执行cmake/configure,make,make install等过程(4)初始化MySQL配置文件my.cnf
[root@mysql mysql]# ls -l support-files/*.cnf-rw-r--r--. 1 7161 wheel 4691 Jun 19 2013 support-files/my-huge.cnf-rw-r--r--. 1 7161 wheel 19759 Jun 19 2013 support-files/my-innodb-heavy-4G.cnf-rw-r--r--. 1 7161 wheel 4665 Jun 19 2013 support-files/my-large.cnf-rw-r--r--. 1 7161 wheel 4676 Jun 19 2013 support-files/my-medium.cnf-rw-r--r--. 1 7161 wheel 2840 Jun 19 2013 support-files/my-small.cnf[root@mysql mysql]# /bin/cp support-files/my-small.cnf /etc/my.cnf提示:
- support-files下有my.cnf的各种配置样例。
- 使用cp全路径/bin/cp,可实现拷贝而不出现替换提示,即如果有重名文件会直接覆盖
- 本例为测试安装环境,因此选择参数配置小的my-small.cnf配置模版,如果是生产环境可以根据硬件选择更高级的配置文件,上述配置文件模版对硬件的要求从低到高依次为
my-medium.cnf (最低)my-small.cnfmy-large.cnfmy-huge.cnfmy-innodb-heavy-4G.cnf(最高)(5)初始化MySQL数据库文件
初始化命令如下
[root@mysql mysql]# mkdir -p /usr/local/mysql/data [root@mysql mysql]# chown -R mysql.mysql /usr/local/mysql[root@mysql mysql]# yum -y install libaio [root@mysql mysql]# /usr/local/mysql/scripts/mysql_install_db --basedir=/usr/local/mysql --datadir=/usr/local/mysql/data --user=mysql#初始化MySQL数据库文件,会有很多信息提示,如果没有ERROR级别的错误,会有两个OK的字样,表示初始化成功,否则就要解决初始化的问题(1)设置MySQL启动脚本,命令如下
[root@mysql mysql]# cp support-files/mysql.server /etc/init.d/mysqld#拷贝MySQL启动脚本到MySQL的命令路径[root@mysql mysql]# chmod +x /etc/init.d/mysqld#使脚本可执行(2)MySQL二进制默认安装路径是/usr/local/mysql,启动脚本里是/usr/local/mysql。如果安装路径不同,那么脚本里路径等都需要替换
(3)启动MySQL数据库,命令如下:
[root@mysql mysql]# /etc/init.d/mysqld startStarting MySQL... SUCCESS![root@mysql mysql]# netstat -antup | grep mysqltcp 0 0 0.0.0.0:3306 0.0.0.0:* LISTEN 1347/mysqld 如果发现3306端口没起来,请tail -100 /usr/local/mysql/data/主机名.err查看日志信息,看是否有报错信息,然后根据相关错误提示进行调试。经常查看服务运行日志是个很好的习惯,也是高手的习惯。
(4)设置MySQL开机自启动,命令如下:
[root@mysql mysql]# chkconfig --add mysqld[root@mysql mysql]# chkconfig mysqld on[root@mysql mysql]# chkconfig --list mysqldmysqld 0:off 1:off 2:on 3:on 4:on 5:on 6:off(5)配置mysql命令的全局使用路径,命令如下:
[root@mysql mysql]# ln -s /usr/local/mysql/bin/* /usr/local/bin/[root@mysql mysql]# which mysqladmin/usr/local/bin/mysqladmin(6)登陆MySQL测试,命令如下:
[root@mysql mysql]# mysqlWelcome to the MySQL monitor. Commands end with ; or \g.Your MySQL connection id is 1Server version: 5.5.32 MySQL Community Server (GPL)Copyright (c) 2000, 2013, Oracle and/or its affiliates. All rights reserved.Oracle is a registered trademark of Oracle Corporation and/or itsaffiliates. Other names may be trademarks of their respectiveowners.Type ‘help;‘ or ‘\h‘ for help. Type ‘\c‘ to clear the current input statement.(1)为MySQL的root用户设置密码,命令如下:
[root@mysql mysql]# mysqladmin -uroot password ‘666666‘[root@mysql mysql]# mysql -uroot -p666666Welcome to the MySQL monitor. Commands end with ; or \g.Your MySQL connection id is 4Server version: 5.5.32 MySQL Community Server (GPL)Copyright (c) 2000, 2013, Oracle and/or its affiliates. All rights reserved.Oracle is a registered trademark of Oracle Corporation and/or itsaffiliates. Other names may be trademarks of their respectiveowners.Type ‘help;‘ or ‘\h‘ for help. Type ‘\c‘ to clear the current input statement.(2)清理无用的MySQL用户及库,命令如下:
mysql> select user,host from mysql.user;+------+-----------+| user | host |+------+-----------+| root | 127.0.0.1 || root | ::1 || | localhost || root | localhost || | mysql || root | mysql |+------+-----------+6 rows in set (0.00 sec)mysql> drop user "root"@"::1";Query OK, 0 rows affected (0.00 sec)mysql> drop user ""@"localhost";Query OK, 0 rows affected (0.05 sec)mysql> select user,host from mysql.user;+------+-----------+| user | host |+------+-----------+| root | 127.0.0.1 || root | localhost || | mysql || root | mysql |+------+-----------+4 rows in set (0.00 sec)[root@nginx ~]# mount /dev/sr0 /media/cdrom/mount: block device /dev/sr0 is write-protected, mounting read-only[root@nginx ~]# yum install -y pcre-devel openssl-devel#wget -q http://nginx.org/download/nginx-1.10.2.tar.gz[root@nginx ~]# useradd -s /sbin/nologin -M www #创建程序用户[root@nginx ~]# tar xf nginx-1.10.2.tar.gz -C /usr/src/ #解压缩[root@nginx ~]# cd /usr/src/nginx-1.10.2[root@nginx nginx-1.10.2]# ./configure --user=www --group=www --prefix=/usr/local/nginx --with-http_stub_status_module --with-http_ssl_module #预配置[root@nginx nginx-1.10.2]# make && make install #编译和安装[root@nginx nginx-1.10.2]# ln -s /usr/local/nginx/sbin/* /usr/local/sbin/ #给命令做软连接,以便PATH能找到[root@nginx nginx-1.10.2]# /usr/local/nginx/sbin/nginx #启动nginx[root@nginx conf]# cat nginx.conf.default | egrep -v "#|^$" > nginx.conf[root@nginx conf]# vim nginx.conf[root@nginx conf]# cat nginx.confworker_processes 1;events { worker_connections 1024;}http { include mime.types; default_type application/octet-stream; sendfile on; keepalive_timeout 65; server { listen 80; server_name www.yunjisuan.com; root /www; location / { index index.html index.htm; } error_page 500 502 503 504 /50x.html; location = /50x.html { root html; } }}# 检查配置文件[root@nginx conf]# /usr/local/nginx/sbin/nginx -tnginx: the configuration file /usr/local/nginx/conf/nginx.conf syntax is oknginx: configuration file /usr/local/nginx/conf/nginx.conf test is successful#加入映射文件[root@nginx conf]# echo "`hostname -I` www.yunjisuan.com" >> /etc/hosts[root@nginx conf]# cat /etc/hosts127.0.0.1 localhost localhost.localdomain localhost4 localhost4.localdomain4::1 localhost localhost.localdomain localhost6 localhost6.localdomain6192.168.200.20 www.yunjisuan.com[root@nginx conf]# mkdir /www[root@nginx conf]# echo "`hostname -I` www.yunjisuan.com" >> /www/index.html[root@nginx conf]# chown -R www.www /www/ #PHP的程序用户也要弄成www[root@nginx conf]# curl www.yunjisuan.com192.168.200.20 www.yunjisuan.comPHP程序在开发及运行时会调用一些诸如zlib,gd等函数库,因此需要确认lib库是否已经安装,执行过程如下:
[root@PHP ~]# rpm -qa zlib-devel libxml2-devel libjpeg-devel libjpeg-turbo-devel libiconv-devel[root@PHP ~]# rpm -qa freetype-devel libpng-devel gd libcurl-devel libxslt-devel提示:
1)每个lib一般都会存在对应的以“*-devel”命名的包,安装lib对应的-devel包后,对应的lib包就会自动安装好,例如安装gd-devel时就会安装gd。
2)这些lib库不是必须安装的,但是目前的企业环境下一般都需要安装。否则,PHP程序运行时会出现问题,例如验证码无法显示等。
执行下面命令安装相关的lib软件包
[root@PHP ~]# yum -y install zlib-devel libxml2-devel libjpeg-devel libjpeg-turbo-devel libiconv-devel[root@PHP ~]# yum -y install freetype-devel libpng-devel gd libcurl-devel libxslt-devel安装后的结果如下:
[root@PHP ~]# rpm -qa zlib-devel libxml2-devel libjpeg-devel libjpeg-turbo-devel libiconv-devellibxml2-devel-2.7.6-14.el6.x86_64zlib-devel-1.2.3-29.el6.x86_64libjpeg-turbo-devel-1.2.1-1.el6.x86_64#这里仅缺少libiconv-devel包[root@PHP ~]# rpm -qa freetype-devel libpng-devel gd libcurl-devel libxslt-devellibxslt-devel-1.1.26-2.el6_3.1.x86_64libcurl-devel-7.19.7-37.el6_4.x86_64libpng-devel-1.2.49-1.el6_2.x86_64gd-2.0.35-11.el6.x86_64freetype-devel-2.3.11-14.el6_3.1.x86_64从以上结果看出,仅有libiconv-devel这个包没有安装,因为默认的yum源没有此包,后面会编译安装。
[root@PHP ~]# yum -y install wget[root@PHP ~]# wget http://ftp.gnu.org/pub/gnu/libiconv/libiconv-1.14.tar.gz[root@PHP ~]# lsanaconda-ks.cfg install.log install.log.syslog libiconv-1.14.tar.gz[root@PHP ~]# tar xf libiconv-1.14.tar.gz -C /usr/src/[root@PHP ~]# cd /usr/src/libiconv-1.14/[root@PHP libiconv-1.14]# ./configure --prefix=/usr/local/libiconv && make && make install推荐使用简单的在线yum的方式安装:wget -O /etc/yum.repos.d/epel.repo http://mirrors.aliyun.com/repo/epel-6.repo[root@PHP libiconv-1.14]# yum -y install libmcrypt-devel推荐使用简单的在线yum的方式安装:wget -O /etc/yum.repos.d/epel.repo http://mirrors.aliyun.com/repo/epel-6.repo[root@PHP ~]# yum -y install mhash推荐使用简单的在线yum的方式安装:wget -O /etc/yum.repos.d/epel.repo http://mirrors.aliyun.com/repo/epel-6.repo[root@PHP ~]# yum -y install mcrypt[root@PHP ~]# wget http://cn2.php.net/get/php-5.3.28.tar.gz/from/this/mirror[root@PHP ~]# useradd -s /sbin/nologin -M www[root@PHP ~]# id wwwuid=500(www) gid=500(www) groups=500(www)[root@PHP ~]# tar xf php-5.3.28.tar.gz -C /usr/src/[root@PHP ~]# cd /usr/src/php-5.3.28/[root@PHP php-5.3.28]# ./configure --prefix=/usr/local/php5.3.28 --with-mysql=mysqlnd --with-iconv-dir=/usr/local/libiconv --with-freetype-dir --with-jpeg-dir --with-png-dir --with-zlib --with-libxml-dir=/usr --enable-xml --disable-rpath --enable-safe-mode --enable-bcmath --enable-shmop --enable-sysvsem --enable-inline-optimization --with-curl --with-curlwrappers --enable-mbregex --enable-fpm --enable-mbstring --with-mcrypt --with-gd --enable-gd-native-ttf --with-openssl --with-mhash --enable-pcntl --enable-sockets --with-xmlrpc --enable-zip --enable-soap --enable-short-tags --enable-zend-multibyte --enable-static --with-xsl --with-fpm-user=www --with-fpm-group=www --enable-ftp-devel是安装前面命令有关的所有包
yum install openssl openssl-devel
执行上述命令后,最后的正确输出提示为下图 
正确执行前文配置PHP软件的./configure系列命令后,就可以编译PHP软件了,具体操作过程如下:
[root@PHP php-5.3.28]# ln -s /usr/local/mysql/lib/libmysqlclient.so.18 /usr/lib64/ #分离式不用这步[root@PHP php-5.3.28]# touch ext/phar/phar.phar #分离式不用这步[root@PHP php-5.3.28]# make # 直接编译#make最后的正确提示Build complete.Don‘t forget to run ‘make test‘.[root@PHP php-5.3.28]# make install(1)设置软链接以方便访问,命令如下
[root@PHP php-5.3.28]# ln -s /usr/local/php5.3.28/ /usr/local/php[root@PHP php-5.3.28]# ls -l /usr/local/phplrwxrwxrwx. 1 root root 21 Nov 25 23:30 /usr/local/php -> /usr/local/php5.3.28/(2)查看PHP配置默认模版文件,命令如下
[root@PHP php-5.3.28]# ls php.ini*php.ini-development php.ini-production(3)拷贝PHP配置文件到PHP默认目录,并更改文件名称为php.ini,命令如下
[root@PHP php-5.3.28]# cp php.ini-production /usr/local/php/lib/php.ini[root@PHP php-5.3.28]# ls -l /usr/local/php/lib/php.ini-rw-r--r--. 1 root root 69627 Nov 25 23:32 /usr/local/php/lib/php.ini[root@PHP php-5.3.28]# cd /usr/local/php/etc/[root@PHP etc]# lspear.conf php-fpm.conf.default[root@PHP etc]# cp php-fpm.conf.default php-fpm.conf#修改配置文件就是修改一下监听端口
(1)启动PHP服务php-fpm,命令如下
[root@PHP etc]# /usr/local/php/sbin/php-fpm (2)检查PHP服务php-fpm的进程及启动端口的情况,命令如下:
[root@PHP etc]# ps -ef | grep php-fpmroot 30699 1 0 23:42 ? 00:00:00 php-fpm: master process (/usr/local/php5.3.28/etc/php-fpm.conf)www 30700 30699 0 23:42 ? 00:00:00 php-fpm: pool www www 30701 30699 0 23:42 ? 00:00:00 php-fpm: pool www root 30716 1046 0 23:43 pts/0 00:00:00 grep php-fpm[root@PHP etc]# lsof -i:9000COMMAND PID USER FD TYPE DEVICE SIZE/OFF NODE NAMEphp-fpm 30699 root 7u IPv4 146919 0t0 TCP 192.168.200.30:cslistener (LISTEN)php-fpm 30700 www 0u IPv4 146919 0t0 TCP 192.168.200.30:cslistener (LISTEN)php-fpm 30701 www 0u IPv4 146919 0t0 TCP 192.168.200.30:cslistener (LISTEN)[root@nginx conf]# cat nginx.confworker_processes 1;events { worker_connections 1024;}http { include mime.types; default_type application/octet-stream; sendfile on; keepalive_timeout 65; server { listen 80; server_name www.yunjisuan.com; root /www; location / { index index.html index.htm; } location ~ .*\.(php|php5)?$ { fastcgi_pass 192.168.200.30:9000; fastcgi_index index.php; include fastcgi.conf; } error_page 500 502 503 504 /50x.html; location = /50x.html { root html; } }}[root@nginx conf]# /usr/local/sbin/nginx -tnginx: the configuration file /usr/local/nginx/conf/nginx.conf syntax is oknginx: configuration file /usr/local/nginx/conf/nginx.conf test is successful[root@nginx conf]# /usr/local/sbin/nginx -s reload映射IP 

[root@nginx conf]# cd /www/[root@nginx www]# lsindex.html[root@nginx www]# echo "huahua" > index.php[root@nginx www]# lsindex.html index.php[root@PHP etc]# mkdir /www #php服务器里的目录必须和nginx服务器的一致[root@PHP www]# touch index.php[root@PHP www]# echo "123" >> index.php[root@PHP www]# cat index.php 123
[root@mysql mysql]# mysql -uroot -p666666Welcome to the MySQL monitor. Commands end with ; or \g.Your MySQL connection id is 5Server version: 5.5.32 MySQL Community Server (GPL)Copyright (c) 2000, 2013, Oracle and/or its affiliates. All rights reserved.Oracle is a registered trademark of Oracle Corporation and/or itsaffiliates. Other names may be trademarks of their respectiveowners.Type ‘help;‘ or ‘\h‘ for help. Type ‘\c‘ to clear the current input statement.mysql> grant all on *.* to ‘yunjisuan‘@‘%‘ identified by ‘666666‘;Query OK, 0 rows affected (0.00 sec)#php上创建[root@PHP www]# cat test_mysql.php <?php //$link_id=mysql_connect(‘主机名‘,‘用户‘,‘密码‘); $link_id=mysql_connect(‘192.168.200.31‘,‘yunjisuan‘,‘666666‘); if($link_id){ echo "mysql successful by hua !"; }else{ echo mysql_error(); }?>#nginx也要创建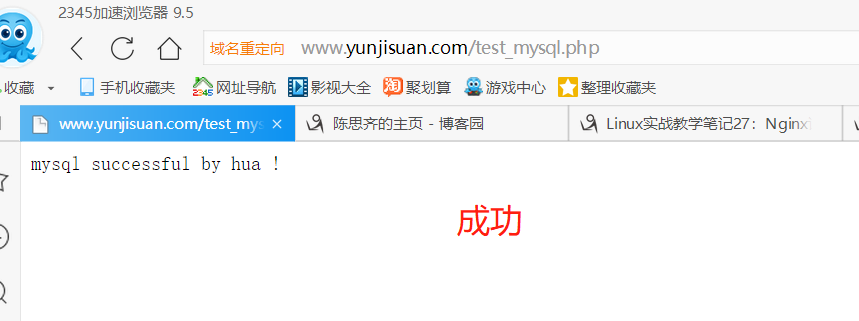
标签:不用 row line 配置nginx 表示 ide password lse cmak
原文地址:https://www.cnblogs.com/fengdou/p/10016196.html