标签:layout 定制 通讯录 安装python proc 实现 微信 input 环境配置
#Appium+Python实现自动化测试官方的概述为:
Appium is an open source test automation framework for use with native,
hybrid and mobile web apps. It drives iOS, Android,
and Windows apps using the WebDriver protocol.
Appium是一个开源的测试自动化框架,用于本地、混合和移动Web应用程序。
它使用WebDevices协议驱动iOS、Android和Windows应用程序。也就是可以用它来帮助我们实现自动化测试,代替人为的点击,每次发版都能够按照案例清单完整的跑一套流程,保证当前版本的稳定性。
支持多种语言开发定制
python,javaSprict,java,ruby,Objective C,php,.net,RobotFramework
其中Android SDK ≥ 16
支持多平台
mac和WindowsAppium官网,点击downLoad即可
1:安装node
2:npm install -g appium
3:npm install -g appium-doctor
appium-doctor是检查你的本地环境是否正常的工具
注:如果权限问题请加上sudo,appium-doctor在新版appium已经移除,需要利用npm安装
sudo npm install -g appium-doctor,安装完成后输入appium-doctor检测环境是否正常
如果遇到缺少js文件错误,说明你的node版本太低,需要升级nodejs,升级的方式为
    1: sudo npm cache clean -f  清楚nodejs的cache
    2:sudo npm install -g n 管理npm的工具
    3:sudo n stable 升级node
    4: sudo npm install npm@latest -g 更新npm
    4:node -v查看node版本(最新为11.4.0)
再次运行appium-doctor查看本地环境配置是否正常,不正常修复即可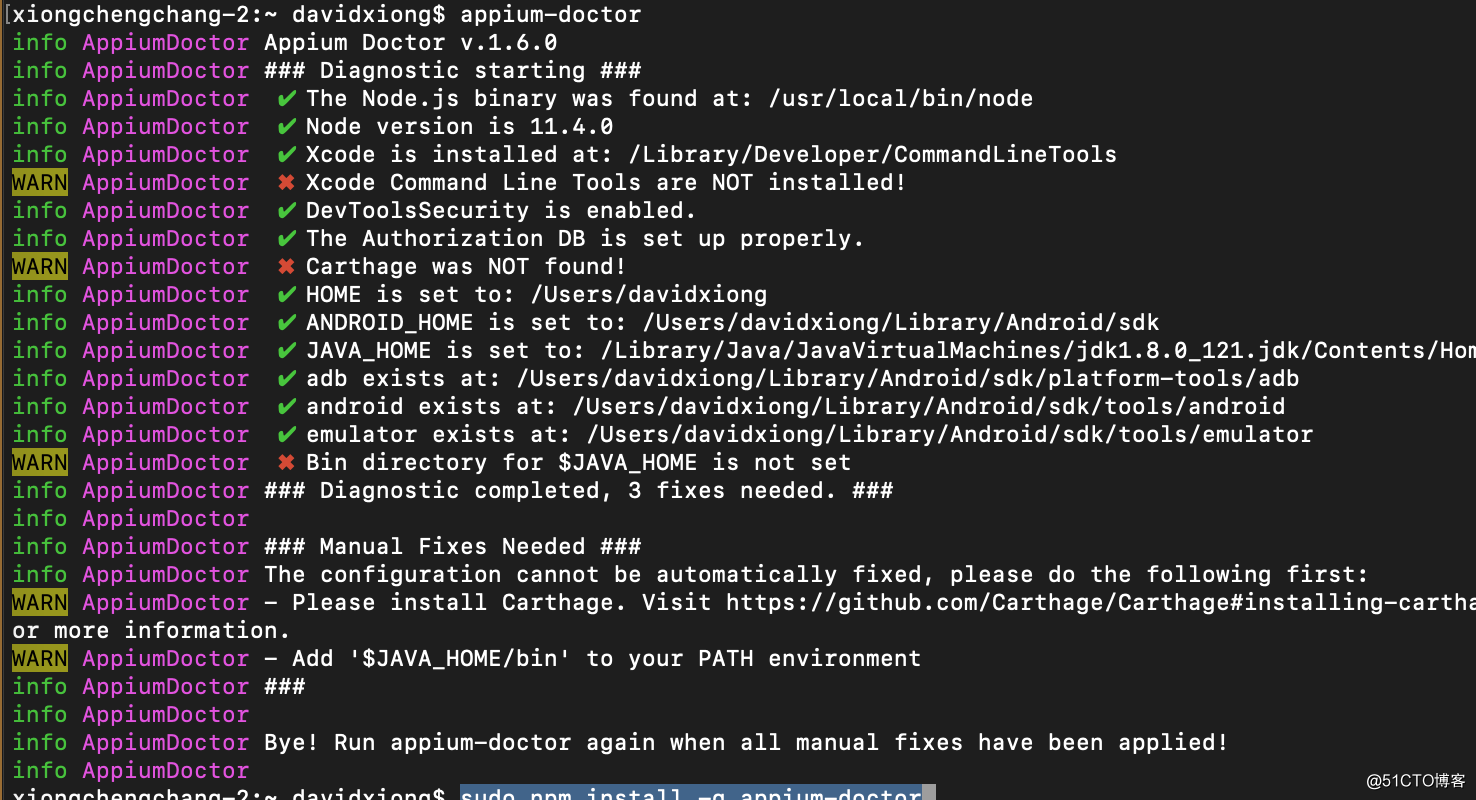
安装方式网上很多,不在阐述,目前我用的是python3.7
推荐的ide为:Pycharmfrom appium import webdriver
import time
class UiTest(object):
def __init__(self):
# 设备信息
self.config = {
"platformName": "Android",
"platformVersion": "5.1.1",
"deviceName": "Pixel XL",
"automationName": "app",
"app": ‘/Users/davidxiong/Desktop/wx.apk‘,
}
# 有多重模拟点击方式:
# 1:坐标,
# 2:id
# 3:xpath
# 4:name,这边我采用坐标和xpath,因为微信的元素id会动态改变
# 手机号元素路径
self.phone = ‘/hierarchy/android.widget.FrameLayout/android.widget.FrameLayout/android.widget.FrameLayout/android.widget.LinearLayout/android.widget.FrameLayout/android.view.View/android.widget.FrameLayout[2]/android.widget.FrameLayout/android.widget.LinearLayout/android.widget.LinearLayout/android.widget.ScrollView/android.widget.LinearLayout/android.widget.LinearLayout[2]/android.widget.EditText‘
# 手机号点击登录元素路径
self.phone_enter = ‘/hierarchy/android.widget.FrameLayout/android.widget.FrameLayout/android.widget.FrameLayout/android.widget.LinearLayout/android.widget.FrameLayout/android.view.View/android.widget.FrameLayout[2]/android.widget.FrameLayout/android.widget.LinearLayout/android.widget.LinearLayout/android.widget.ScrollView/android.widget.LinearLayout/android.widget.Button[2]‘
# 密码路径
self.pass_word = ‘/hierarchy/android.widget.FrameLayout/android.widget.FrameLayout/android.widget.FrameLayout/android.widget.LinearLayout/android.widget.FrameLayout/android.view.View/android.widget.FrameLayout[2]/android.widget.FrameLayout/android.widget.LinearLayout/android.widget.LinearLayout/android.widget.ScrollView/android.widget.LinearLayout/android.widget.LinearLayout[2]/android.widget.EditText‘
# 密码确认路径
self.pass_word_enter = ‘/hierarchy/android.widget.FrameLayout/android.widget.FrameLayout/android.widget.FrameLayout/android.widget.LinearLayout/android.widget.FrameLayout/android.view.View/android.widget.FrameLayout[2]/android.widget.FrameLayout/android.widget.LinearLayout/android.widget.LinearLayout/android.widget.ScrollView/android.widget.LinearLayout/android.widget.Button[2]‘
# 关闭匹配框
self.close_match = ‘/hierarchy/android.widget.FrameLayout/android.widget.FrameLayout/android.widget.FrameLayout/android.widget.LinearLayout/android.widget.LinearLayout/android.widget.LinearLayout[2]/android.widget.LinearLayout/android.widget.Button[1]‘
# 个人中心
self.mine_info = ‘//android.widget.FrameLayout[@content-desc="当前所在页面,与的聊天"]/android.widget.FrameLayout/android.widget.LinearLayout/android.widget.FrameLayout/android.view.View/android.widget.FrameLayout[1]/android.widget.FrameLayout/android.widget.FrameLayout/com.tencent.mm.ui.mogic.WxViewPager/android.widget.FrameLayout/android.widget.RelativeLayout/android.widget.ListView/android.widget.LinearLayout[1]/android.widget.RelativeLayout/android.widget.LinearLayout‘
self.driver = webdriver.Remote(‘http://localhost:4723/wd/hub‘, self.config)
# editText输入
def edit_input(self, et_id, content, xpath=‘‘, timer=-1):
if xpath == ‘‘:
pl = self.driver.find_element_by_id(et_id)
else:
pl = self.driver.find_element_by_xpath(xpath)
if timer != -1:
time.sleep(timer)
pl.send_keys(content)
# 点击事件
def click(self, btn_id, xpath=‘‘, timer=-1):
if timer != -1:
time.sleep(timer)
if xpath == ‘‘:
self.driver.find_element_by_id(btn_id).click()
else:
self.driver.find_element_by_xpath(xpath).click()
def run(self):
time.sleep(2)
# 点击登录
self.driver.tap([(259, 1773)])
# 输入手机号
self.edit_input(‘ht‘, ‘你的账号‘, xpath=self.phone, timer=1)
# 点击下一步,这边采用xpath
self.click(‘akb‘, xpath=self.phone_enter)
# 输入密码
time.sleep(2)
self.edit_input(‘ht‘, ‘密码‘, xpath=self.pass_word, timer=1)
# 登录R
self.click(‘akb‘, xpath=self.pass_word_enter)
time.sleep(8)
# 关闭提示匹配通讯录弹出框
self.click(‘akb‘, xpath=self.close_match)
# 等地同步数据
time.sleep(30)
# 点击我的,这边采用坐标
self.driver.tap([(933, 1823)])
# 查看我的个人信息
self.click(‘akb‘, xpath=self.mine_info)
if __name__ == "__main__":
UiTest().run()
标签:layout 定制 通讯录 安装python proc 实现 微信 input 环境配置
原文地址:http://blog.51cto.com/8912823/2327913