标签:图片 文件 instance 分辨率 prot tap rri show ESS
react native 项目默认是没有图标,并且启动页面只有文字。这个样子并不能算是一个完整的APP,现在就给APP加一个图标和一个适应所有屏幕尺寸的启动图,并且设置启动图遮住项目启动时候的白色闪屏。
首先我们来创建一个新项目
react-native init splashExample首先我们修改应用名称
Android
编辑 android/app/src/main/res/values/strings.xml 文件:
<resources>
    <!-- <string name="app_name">splashExample</string> -->
    <string name="app_name">测试程序</string>
</resources>
接下来是图片的准备
先从图标开始,一套图标需要各种大大小小的尺寸。
如果没有设计师朋友的话,我们可以用工具批量生成,现在需要一张1024*1024的母版即可。
图片链接
https://raw.githubusercontent.com/kk412027247/splashExample/master/image/icon.png
图片处理工具
https://icon.wuruihong.com/
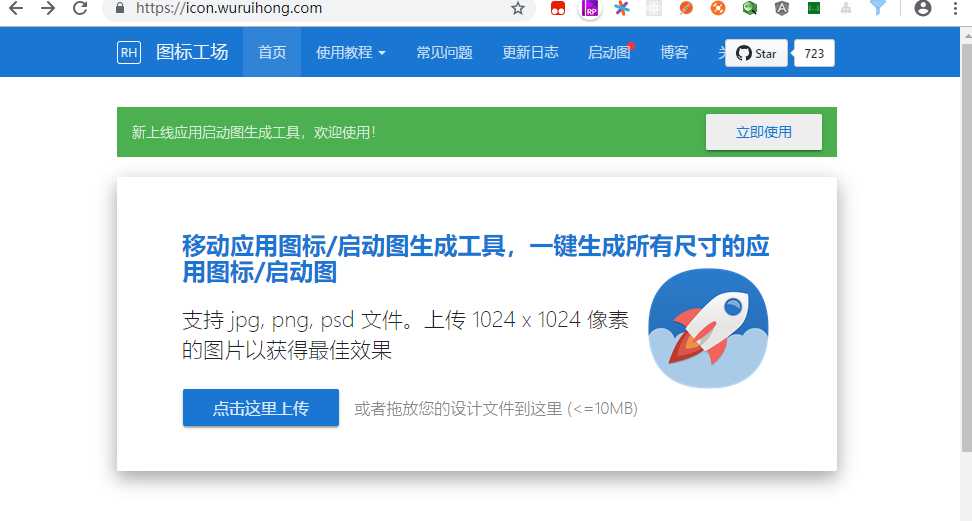
上传之后处理之后,会下载得到一个压缩包,解压之后会看到得到了一堆各种尺寸的图标文件。
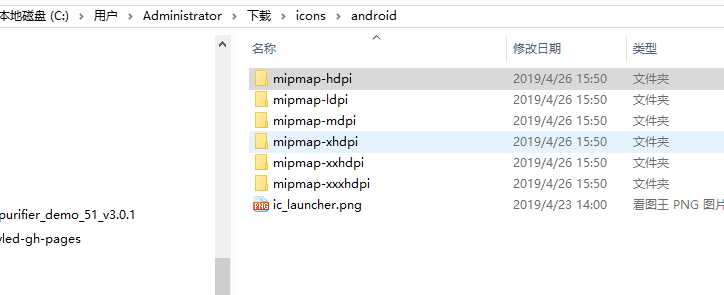
我们可以直接用生成好的内容替换默认的图标即可。
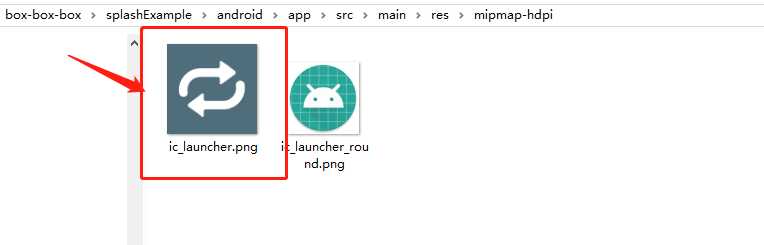
1.Android
替换 android/app/src/main/res 下对应的图标。
运行项目看我们的图标改了没有
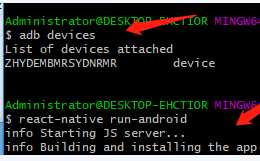
我们会发现测试机上面出现了APP图标,并且更改了名字为测试程序
接下来我们给react-native项目添加启动页
Android
添加启动页可以使用 react-native-splash-screen 库,通过它可以控制启动页的显示和隐藏。
第一步:安装$ yarn add react-native-splash-screen
第二步:编辑 MainActivity.java,添加显示启动页的代码:
整理启动屏图片
现在开始添加启动页面,启动页面的操作需要写IOS与安卓的源码,但是也没太复杂,跟着一步步来即可。
这里提供了三张不同分辨率,但是和图标一样的启动图,这样用户在点击图标的时候,视觉上感觉是进入了app。
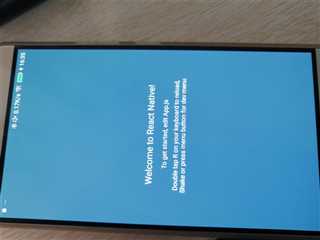
我们先改一下app页面的背景颜色,以及状态栏的颜色,编辑 app.js,整体代码如下
/**
 * Sample React Native App
 * https://github.com/facebook/react-native
 *
 * @format
 * @flow
 */

import React, {Component} from 'react';
import {Platform, StyleSheet, Text, View,StatusBar} from 'react-native';

const instructions = Platform.select({
  ios: 'Press Cmd+R to reload,\n' + 'Cmd+D or shake for dev menu',
  android:
    'Double tap R on your keyboard to reload,\n' +
    'Shake or press menu button for dev menu',
});

type Props = {};
export default class App extends Component<Props> {
  render() {
    return (
      <View style={styles.container}>
         <StatusBar
          backgroundColor={'#4f6d7a'}
          barStyle={'light-content'}
        />
        <Text style={styles.welcome}>Welcome to React Native!</Text>
        <Text style={styles.instructions}>To get started, edit App.js</Text>
        <Text style={styles.instructions}>{instructions}</Text>
      </View>
    );
  }
}

const styles = StyleSheet.create({
  container: {
    flex: 1,
    justifyContent: 'center',
    alignItems: 'center',
    backgroundColor: '#4f6d7a',
  },
  welcome: {
    fontSize: 20,
    textAlign: 'center',
    margin: 10,
    color: '#f5fcff',
  },
  instructions: {
    textAlign: 'center',
    color: '#f5fcff',
    marginBottom: 5,
  },
});
修改好的页面如下
添加安卓启动屏
首先需要先把不同尺寸的图片放到资源文件夹。
splashExample/android/app/src/main/res 目录下有几个mipmap文件夹,根据以下的规则把图片拖进去,然后把文件名统一改成splash.png。
mipmap-mdpi = splash.png
mipmap-hdpi = splash@2x.png
mipmap-xhdpi = splash@3x.png
mipmap-xxhdpi = splash@3x.png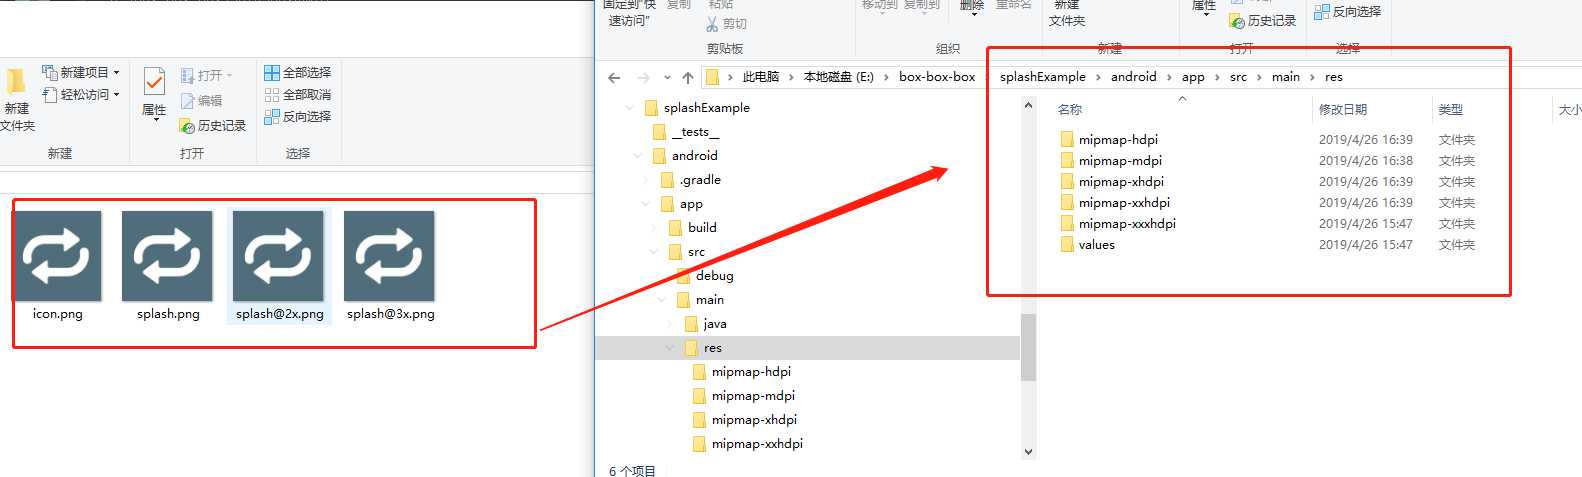
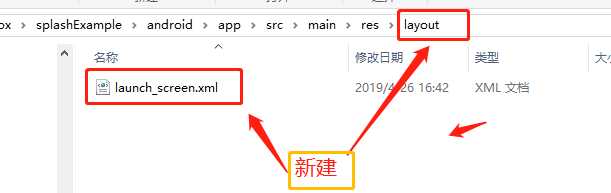
在splashExample/android/app/src/main/res文件夹下新建layout文件夹,在layout文件夹中新建launch_screen.xml
编辑launch_screen.xml
<?xml version="1.0" encoding="utf-8"?>
<LinearLayout xmlns:android="http://schemas.android.com/apk/res/android"
    android:orientation="vertical"
    android:layout_width="match_parent"
    android:layout_height="match_parent"
    android:background="@color/blue"
    android:gravity="center">

    <ImageView
        android:layout_width="200dp"
        android:layout_height="200dp"
        android:src="@mipmap/splash"
        />
</LinearLayout>
这个页面也就是启动屏。
如果要调整页面填充拉伸之类的,可以在Android Atudio 的Design可视化模式调整。
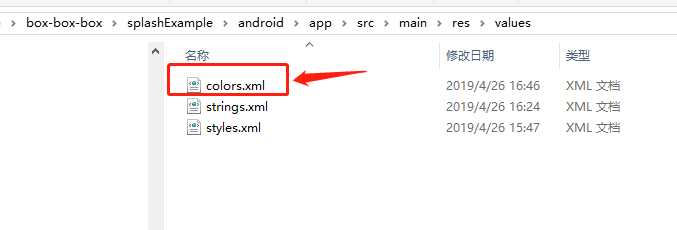
在splashExample/android/app/src/main/res/values文件夹下新建colors.xml,并编辑。
到这里定义一个和背景颜色一样的颜色名。
<?xml version="1.0" encoding="utf-8"?>
<resources>
    <color name="blue">#4F6D7A</color>
</resources>
编辑splashExample/android/app/src/main/res/values/styles.xm文件,增加以下代码。
<resources>
    <!-- Base application theme. -->
    <style name="AppTheme" parent="Theme.AppCompat.Light.NoActionBar">
        <!-- Customize your theme here. -->
        <!--设置透明背景-->
        <item name="android:windowIsTranslucent">true</item>
    </style>
</resources>
这个页面会和启动页一起弹起,并且挡在启动页前面,所以要把这页设成透明。
编辑android/app/src/main/java/com/splashexample/MainActivity.java
package com.splashexample;
import android.os.Bundle;
import com.facebook.react.ReactActivity;
import org.devio.rn.splashscreen.SplashScreen;

public class MainActivity extends ReactActivity {

    @Override
    protected void onCreate(Bundle savedInstanceState) {
        // 这里定义了在加载js的时候,同时弹起启动屏
        // 第二个参数true,是启动页全屏显示,隐藏了状态栏。
        SplashScreen.show(this, true);
        super.onCreate(savedInstanceState);
    }

    /**
     * Returns the name of the main component registered from JavaScript.
     * This is used to schedule rendering of the component.
     */
    @Override
    protected String getMainComponentName() {
        return "splashExample";
    }
}
最后一步运行项目
即可
标签:图片 文件 instance 分辨率 prot tap rri show ESS
原文地址:https://www.cnblogs.com/smart-girl/p/10775319.html