标签:fst read 源码 技术 整理 ica png 第三部分 方法
在上篇简单说明RHI的作用后, 我们在引擎中探索一下RHI的种种细节与实现. 在解决方案资源管理器中搜索RHI, 会有这些文件:
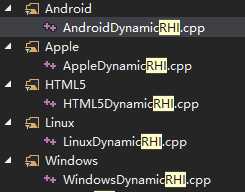
(1)对应不同运行平台的PlatformDynamicRHI.cpp(上篇有提到, 主要进行硬件接口创建前的配置并创建不同绘图接口对应的RHI). 由于目标平台在打包时就确定了, 在打包时会选择编译这些PlatformDynamicRHI.cpp中的一个, 而其他平台的.cpp会被绕过编译.
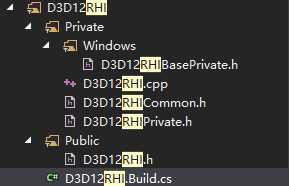
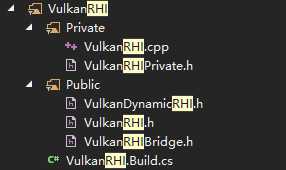
(2)对应不同绘图接口的DynamicRHI. 可以看到有DX11, DX12, Vulkan, Metal的RHI模块.
一顿找却没有找到OpenGL的DynamicRHI, 在管理器搜索发现被集成进了OpenGLDrv.h中: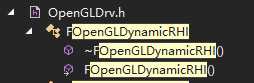
(3)RHI的具体功能实现部分:
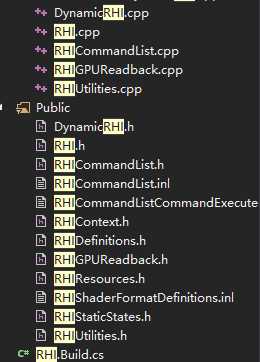
重点探索第三部分.
1.首先看RHI.h/RHI.cpp:
在这部分, 引擎会定义各种RHI的公共变量, 比如当前显卡硬件的代号以及驱动版本:
/**
 * only set if RHI has the information (after init of the RHI and only if RHI has that information, never changes after that)
 * e.g. "NVIDIA GeForce GTX 670"
 */
extern RHI_API FString GRHIAdapterName;
extern RHI_API FString GRHIAdapterInternalDriverVersion;
extern RHI_API FString GRHIAdapterUserDriverVersion;
extern RHI_API FString GRHIAdapterDriverDate;
extern RHI_API uint32 GRHIDeviceId;
extern RHI_API uint32 GRHIDeviceRevision;

// 0 means not defined yet, use functions like IsRHIDeviceAMD() to access
extern RHI_API uint32 GRHIVendorId;

// to trigger GPU specific optimizations and fallbacks
RHI_API bool IsRHIDeviceAMD();

// to trigger GPU specific optimizations and fallbacks
RHI_API bool IsRHIDeviceIntel();

// to trigger GPU specific optimizations and fallbacks
RHI_API bool IsRHIDeviceNVIDIA();
以及各项着色/绘图特性, 例如在深度测试时获取深度, 体纹理, 硬件合并渲染, 对MSAA的支持, 对各种RenderTarget格式的支持程度, 乃至于光栅化等. 这些特性因硬件平台、绘图接口以及显示驱动的不同会有种种差异.
2.DynamicRHI
在这部分会有FDynamicRHI接口的定义以及图形渲染所需要的各种基础接口如创建Buffer, 创建Texture以及创建着色器等:
/** The interface which is implemented by the dynamically bound RHI. */
class RHI_API FDynamicRHI
{
public:

    ....
}
例如创建PixelShader和VertexShader这一类操作:
// FlushType: Wait RHI Thread
    virtual FPixelShaderRHIRef RHICreatePixelShader(FRHIShaderLibraryParamRef Library, FSHAHash Hash)
    {
        return nullptr;
    }

    // FlushType: Wait RHI Thread
    virtual FVertexShaderRHIRef RHICreateVertexShader(const TArray<uint8>& Code) = 0;

    // FlushType: Wait RHI Thread
    virtual FVertexShaderRHIRef RHICreateVertexShader(FRHIShaderLibraryParamRef Library, FSHAHash Hash)
    {
        return nullptr;
    }
3.FRenderResource
这也是我们应用中实际操作RHI时较多使用的部分, 定义了许多创建渲染资源时需要的类, 以及众多选择进行实现的函数. 首先看资源类基类FRenderResource:
/**
 * A rendering resource which is owned by the rendering thread.
 */
class RENDERCORE_API FRenderResource
{
public:
    /** @return The global initialized resource list. */
    static TLinkedList<FRenderResource*>*& GetResourceList();
        ...
        /**
     * Initializes the RHI resources used by this resource.
     * Called when entering the state where both the resource and the RHI have been initialized.
     * This is only called by the rendering thread.
     */
    virtual void InitRHI() {}

    /**
     * Releases the RHI resources used by this resource.
     * Called when leaving the state where both the resource and the RHI have been initialized.
     * This is only called by the rendering thread.
     */
    virtual void ReleaseRHI() {}
        ...
}
会有众多纯虚函数暴露出来供我们选择重写. 具体接口功能在注释中有很完备的写出. 如果要具体地操作RHI, 这个资源类也会是我们进行了解与学习的入口, 这些接口是首先要了解的内容.
例如创建一个简单的IndexBuffer, 我们会在RenderResource中发现IndexBuffer的基类:
/** An index buffer resource. */
class FIndexBuffer : public FRenderResource
{
public:
    FIndexBufferRHIRef IndexBufferRHI;

    /** Destructor. */
    virtual ~FIndexBuffer() {}

    // FRenderResource interface.
    virtual void ReleaseRHI() override
    {
        IndexBufferRHI.SafeRelease();
    }
    virtual FString GetFriendlyName() const override { return TEXT("FIndexBuffer"); }
};
会了解到对于这个IndexBuffer对应的Resource, 引擎为我们实现了Realease, 而Init的工作就需要我们亲力完成. 即可如此创建子类:
/* Index Buffer */
class FMyMeshIndexBuffer : public FIndexBuffer
{
public:
    int32 NumIndices;
    virtual void InitRHI() override
    {
        FRHIResourceCreateInfo CreateInfo;
        IndexBufferRHI = RHICreateIndexBuffer(sizeof(int32), NumIndices * sizeof(int32), BUF_Dynamic, CreateInfo);
    }
};
并可以在此基础上实现其他的虚函数接口.
4. RHICommandList
在看源码之前先要了解一下RHICommandList的机制: RHI的指令会压入RHICommandList中, 而这个List本身是存放在渲染线程中的. RHI的工作是管理各个RHI对象, 在不干扰渲染线程工作的情况下把这些对象的Command压入到渲染线程的CommanList中, 以及为渲染线程做各种复杂的异步操作而不干涉到渲染线程的正常工作.(皇上我把文件都给你整理好了你批就行了...)
FRHICommandBase & FRHICommand: 初看到FRHICommandBase时会略感懵逼...
struct FRHICommandBase
{
    FRHICommandBase* Next = nullptr;
    virtual void ExecuteAndDestruct(FRHICommandListBase& CmdList, FRHICommandListDebugContext& DebugContext) = 0;
};
其实看类名和虚函数名可以看出这样一个结构体是一条RHI指令的一个基类, 其中的CommanBase空指针就是为了构成CommanList链表而生的. 每个Command下的函数指针会携带一条指令, 而Next指针又会指向下一条Command, 渲染线程只需不停地读这个链表执行这些指令进行工作就可以了.
而在其之下会有一个类模板子类FRHICommand:
template<typename TCmd>
struct FRHICommand : public FRHICommandBase
{
    void ExecuteAndDestruct(FRHICommandListBase& CmdList, FRHICommandListDebugContext& Context) override final
    {
        TCmd *ThisCmd = static_cast<TCmd*>(this);
#if RHI_COMMAND_LIST_DEBUG_TRACES
        ThisCmd->StoreDebugInfo(Context);
#endif
        ThisCmd->Execute(CmdList);
        ThisCmd->~TCmd();
    }

    virtual void StoreDebugInfo(FRHICommandListDebugContext& Context) {};
};
需要模板TCmd实现方法Execute. 而此子类在执行ExecuteAndDestruct时会退化到参数类型TCmd, 执行TCmd下的Execute方法后自动析构, 这个过程也就实现了所谓"ExecuteAndDestruct".
标签:fst read 源码 技术 整理 ica png 第三部分 方法
原文地址:https://www.cnblogs.com/Saeru-Hikari/p/10898909.html