标签:download update web 选择 lib mac client cts object
1 配置 Jenkins 使用 gitlib 更新代码
2 实现 gitlib 触发 Jenkins 自劢部署
3 增加 Build Pipeline 插件以流程图的形式展示各个 Job 的顺序
15.1 配置 Jenkins 使用 gitlib 更新代码
登录 gitlab http://10.10.10.11/ 用户名: root 密码:yanglin123
登录 jenkins http://10.10.10.11:198/ 用户名: admin 密码: 123456
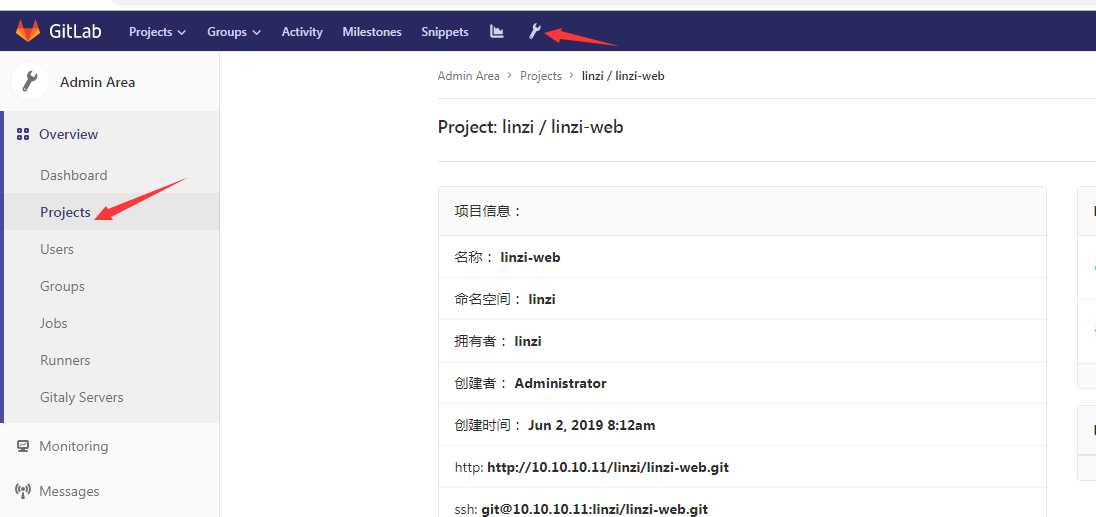
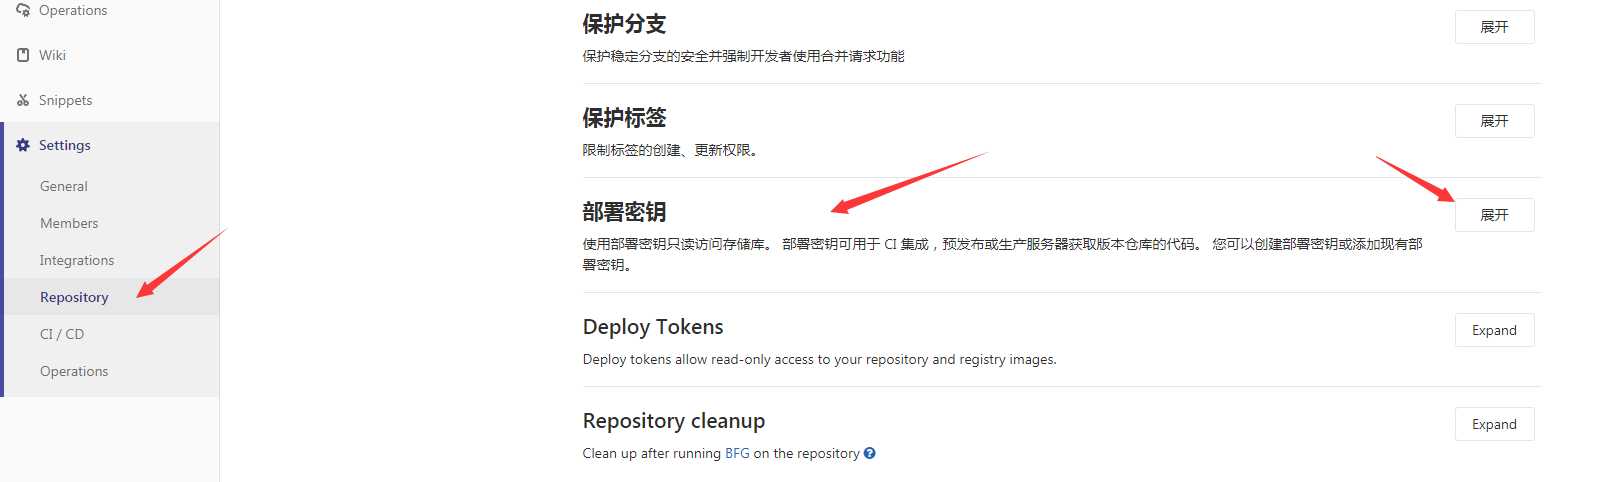
15.1.1 查看 GitLab 上创建的项目:
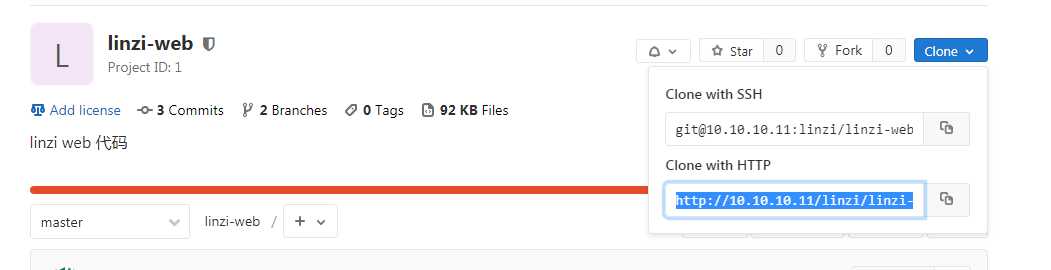
导出项目:
[root@yanglin1 ~]# git clone http://10.10.10.11/linzi/linzi-web.git
正克隆到 ‘linzi-web‘...
Username for ‘http://10.10.10.11‘: root
Password for ‘http://root@10.10.10.11‘:
remote: Enumerating objects: 12, done.
remote: Counting objects: 100% (12/12), done.
remote: Compressing objects: 100% (5/5), done.
remote: Total 12 (delta 0), reused 0 (delta 0)
Unpacking objects: 100% (12/12), done.
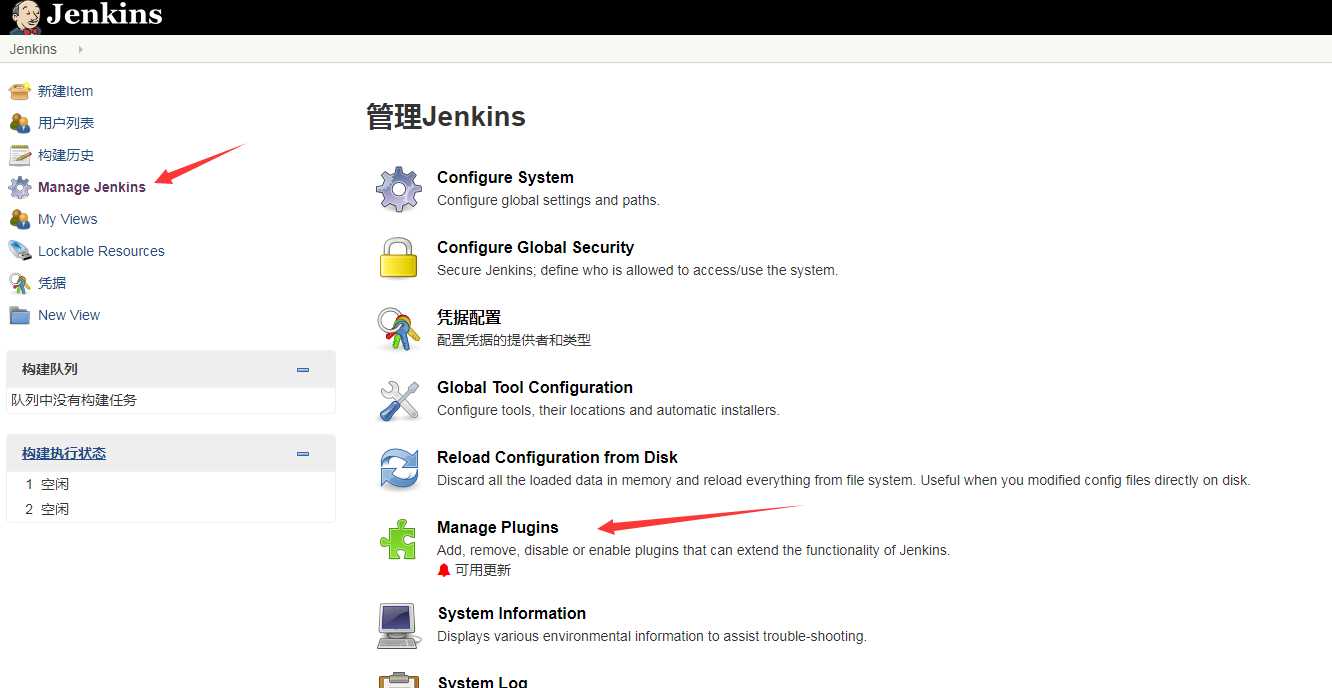
15.1.2 安装 Jenkins 插件
安装以下插件:
Credentials Plugin(默认已经安装)    #签名证书管理插件
Gitlab Plugin                      #安装后从 gitlab 获取代码
Git Plugin 和 Git Client Plugin    ##用于jenkins 在 gitlab 中拉取源码
GitLab Hook                        #gitlab 触发 jenkins 构建项目
gitlab Authentication              # gitlab 和 jenkins 认证相关的插件
SSH Plugin                         #进程执行 shell 脚本
Publish Over SSH                   ##用亍通过 ssh 部署应用
系统管理–>插件管理–>选择你需要的
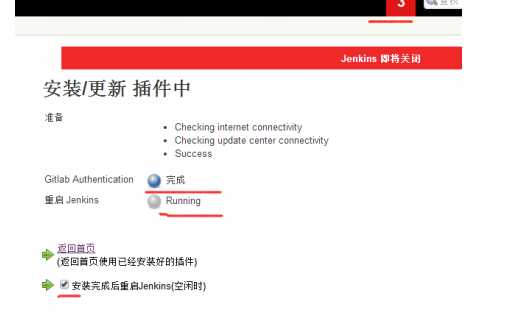
之后Jenkins就会重启
安装插件方式选择:
方法一.如果服务器可以上网,那边选择在线安装最好不过了,安装流程为: 系统管理(Configure System)----插件管理(Manage Jenkins)---选择需要的插件直接安装即可

方法二.如果服务器不能上网,那么就只能离线安装,首先去http://updates.jenkins-ci.org/download/plugins/ 下载需要的 plugin,选择匹配的版本号,下载到本地,然后打开:系统管理()---插件管理—高级---找到”上传插件”(浏览,找到扩展名为.hpi 的插件,
上传之后默认直接就安装了。重启 jenkins,安装的插件就可以使用了。
安装插件依赖解决:
插件安装不上去,一定是某个地方出现问题。在 Jenkins 的终端日志中,可以查看到对应的错误。需要针对性的解决。
比如:在安装 subversion 的时候,的错误提示。 一般的情况安装对应的插件,会把需要依赖的插件安装上。如出现对应的依赖问题,就需要一一安装上对应的依赖包。
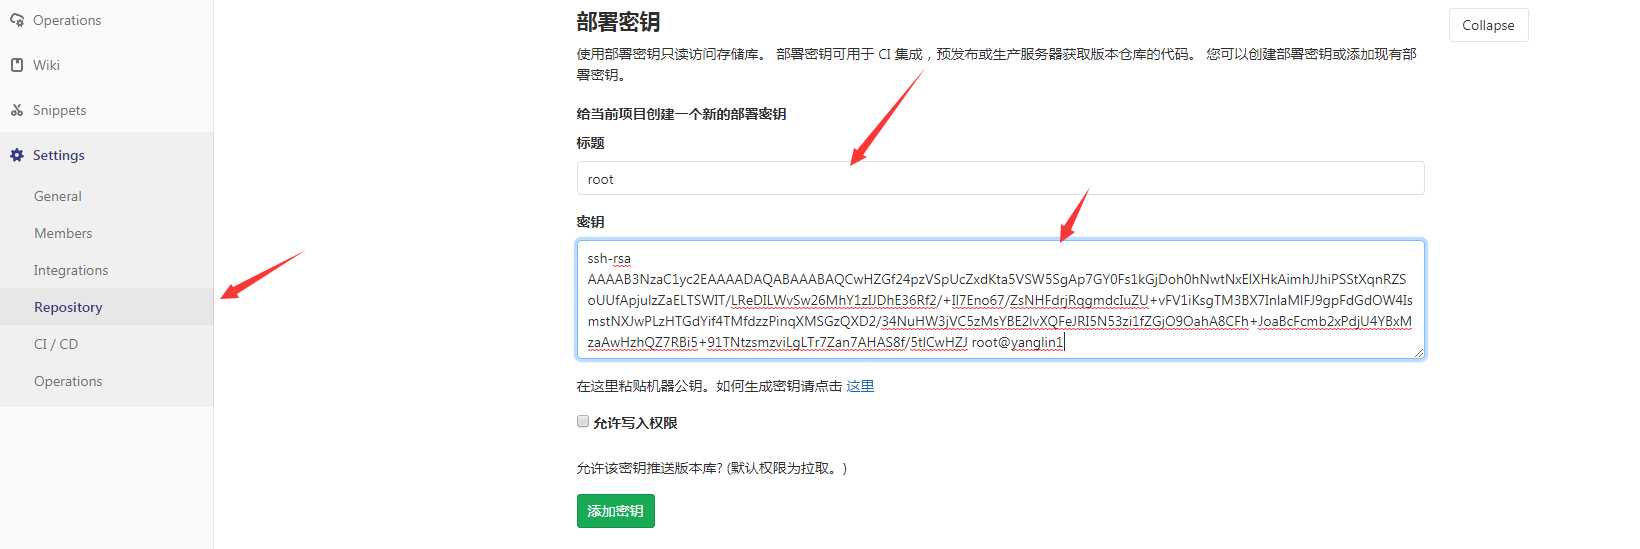
15.1.3 设置 gitlab 用户 root 可以通过 ssh 公钥直接下载代码
部署 key,让 root 用户可以不输入密码,获取 gitlab 上的源代码
[root@yanglin1 ~]#  ssh-keygen               #生成的公钥。 一路回车,不要输入保护私钥的密码。
Generating public/private rsa key pair.
Enter file in which to save the key (/root/.ssh/id_rsa):
Created directory ‘/root/.ssh‘.
Enter passphrase (empty for no passphrase):
Enter same passphrase again:
Your identification has been saved in /root/.ssh/id_rsa.
Your public key has been saved in /root/.ssh/id_rsa.pub.
The key fingerprint is:
SHA256:nMUgUK/D8fo9v/XmaqimcJpZbITB0jcuIDHywmqZ3lg root@yanglin1
The key‘s randomart image is:
+---[RSA 2048]----+
|. o .oo .        |
|.o o o o o       |
|..o o = + o      |
|..o. + X +       |
|.+ E  * S        |
|o +    *         |
| o .  o =    ..  |
|       X .o .....|
|      + ooo+oo.+o|
+----[SHA256]-----+


[root@yanglin1 ~]#  cat .ssh/id_rsa.pub                 #查看公钥
测试部署 key,发现可以不用用户名密码后直接获取代码 :
测试:
[root@yanglin1 ~]# git clone git@10.10.10.11:linzi/linzi-web.git
正克隆到 ‘linzi-web‘...
The authenticity of host ‘10.10.10.11 (10.10.10.11)‘ can‘t be established.
ECDSA key fingerprint is SHA256:DnGjNlQFm9FPHZKs9u1TgRnsMjnD6oqY3/9tIwi+iKQ.
ECDSA key fingerprint is MD5:fb:f7:8c:2d:cf:16:2c:ab:7a:dc:32:27:91:43:74:7e.
Are you sure you want to continue connecting (yes/no)? yes
Warning: Permanently added ‘10.10.10.11‘ (ECDSA) to the list of known hosts.
remote: Enumerating objects: 12, done.
remote: Counting objects: 100% (12/12), done.
remote: Compressing objects: 100% (5/5), done.
remote: Total 12 (delta 0), reused 0 (delta 0)
接收对象中: 100% (12/12), done.
此时可以不用输入用户名和密码来下载代码
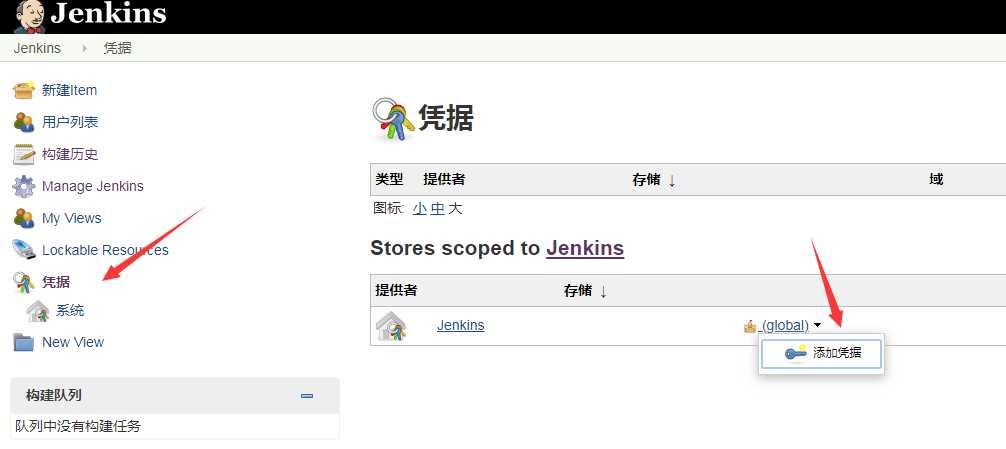
15.1.4 Jenkins 添加 git 用户 root 的私钥
复制yanglin1中 id_dsa.pub 里面的公钥添加到 Jenkins(private key 选项)
[root@yanglin1 ~]# cat .ssh/id_rsa
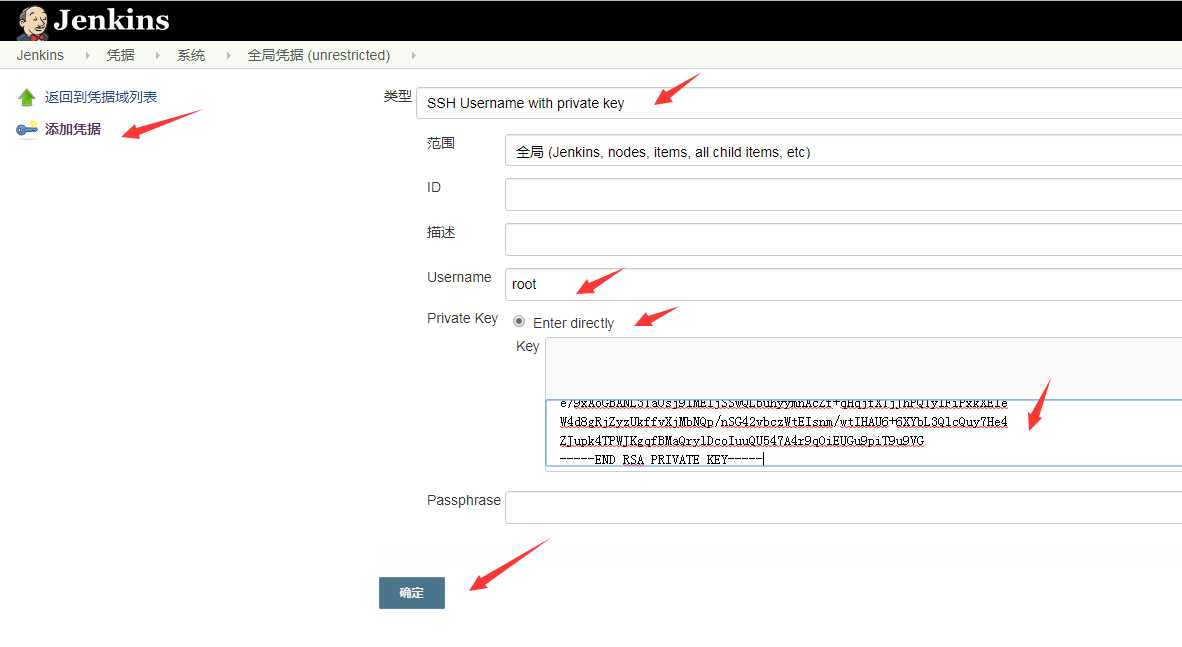
注:这里直接复制/root/.ssh/id_rsa 中的内容。
root 公钥在 gitlab,root 私钥在 jenkins,这样 jenkins 就可以直接拉取 gitlab 上的代码
15.1.5 Jenkins 创建项目
新建任务:
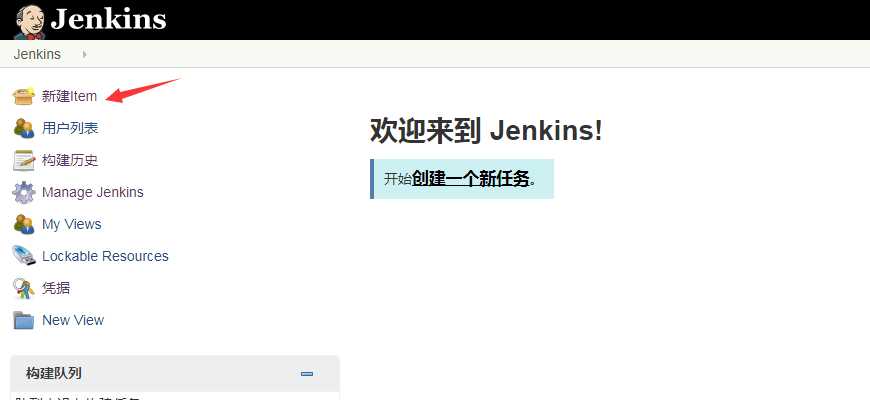

linzi-web网站代码提交
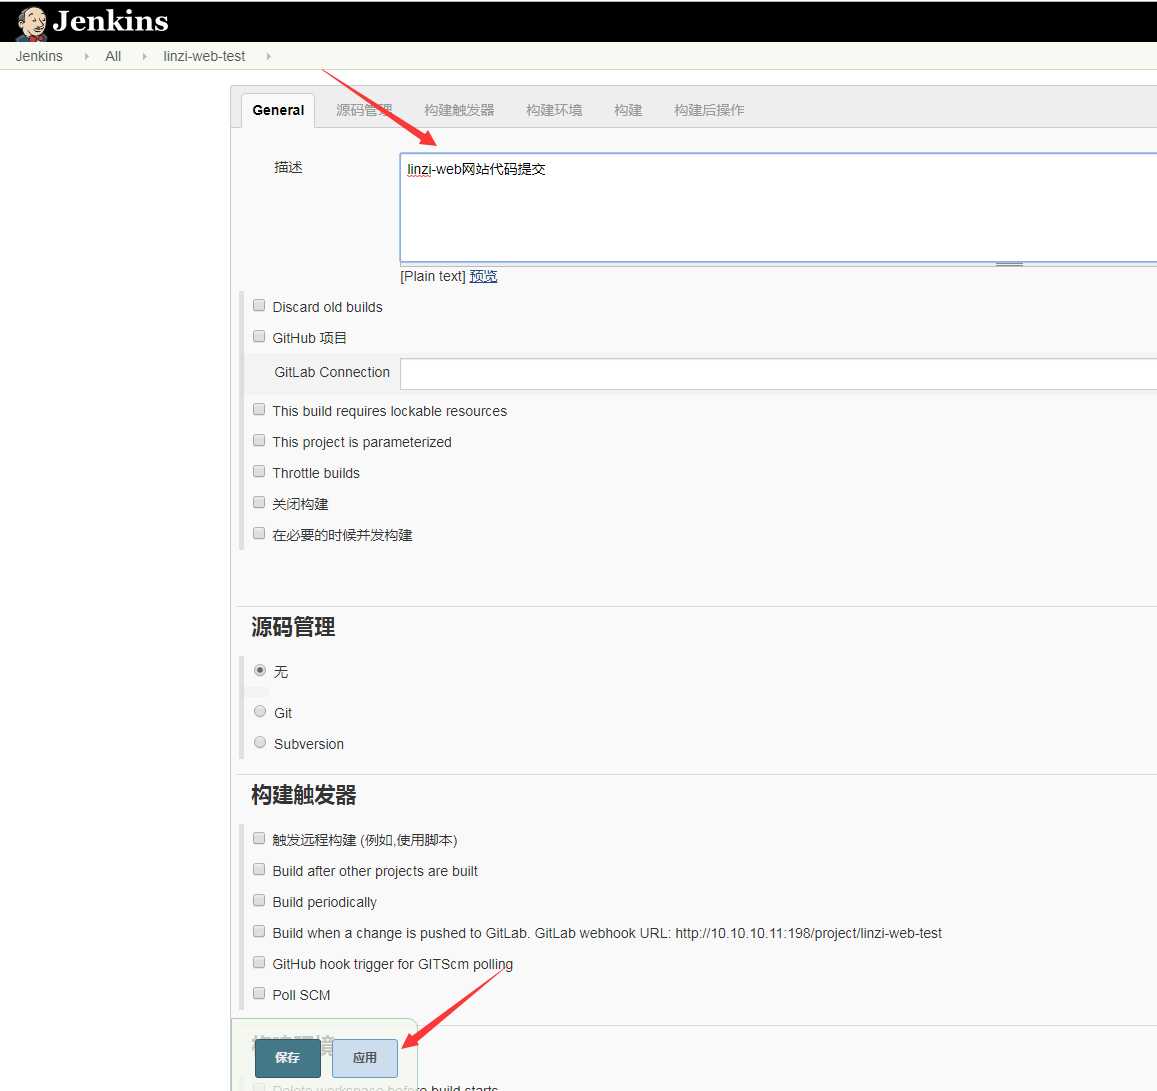
配置适用 git 源:git@10.10.10.11:linzi/linzi-web.git
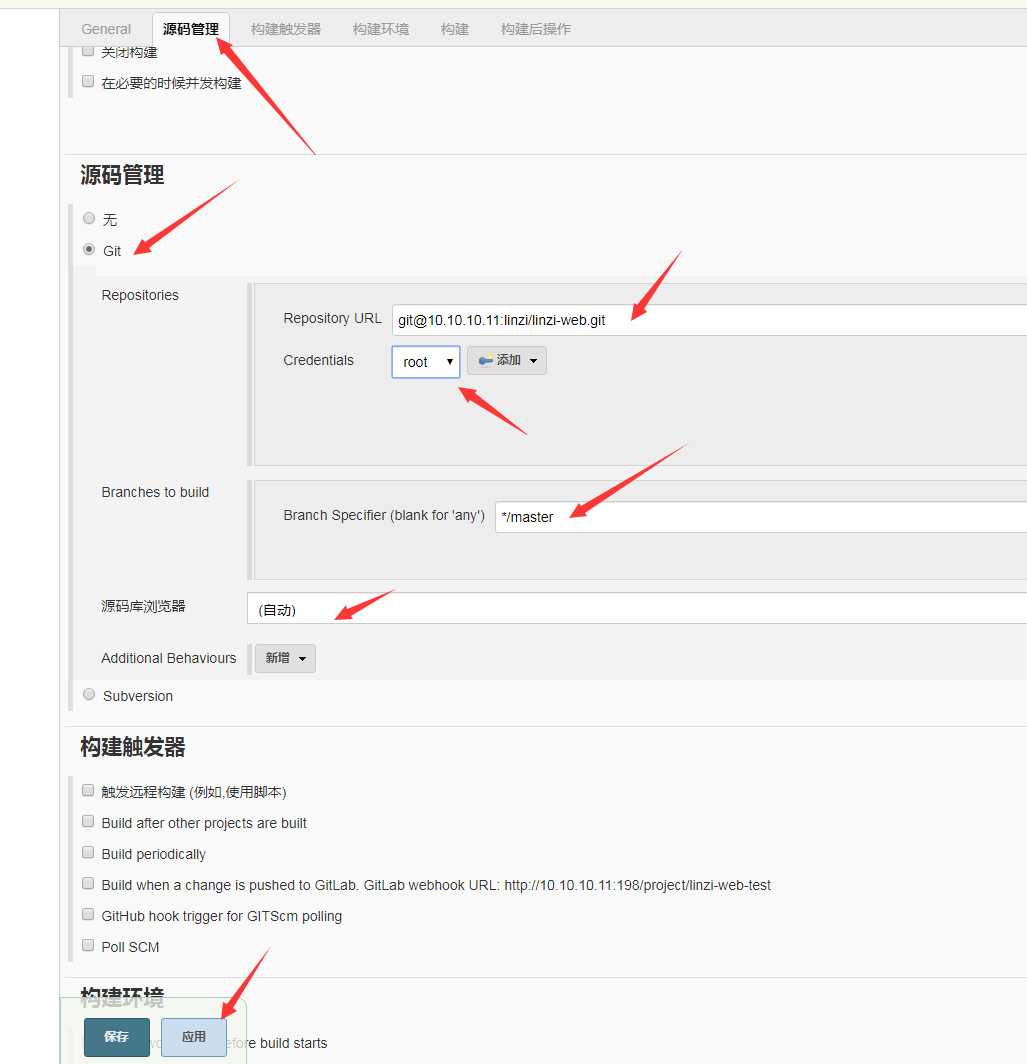
点击应用之后点击保存
构建成功。
15.1.6 将代码发布到 web 服务器
可以通过执行命令或脚本的方式进行代码发布,我使用 root 用户在各个 web 服务器上发布代码。也可以建立一些普通用户如果 www 戒 apache 来发布。如果使用普通用户发布代码,要保持所有服务 器上的用户 id 一致,这样没有权限的问题。
安装 apache 服务
[root@yanglin1 ~]# yum install httpd -y
[root@yanglin1 ~]# vim /etc/httpd/conf/httpd.conf
改:Listen 80
为:Listen 81
[root@yanglin1 ~]#  systemctl restart httpd
15.1.7 准备自动部署 web 代码事项
1、实现 root 用户可以无密码直接登录系统:
[root@yanglin1 ~]# ssh-copy-id root@10.10.10.11
/usr/bin/ssh-copy-id: INFO: Source of key(s) to be installed: "/root/.ssh/id_rsa.pub"
/usr/bin/ssh-copy-id: INFO: attempting to log in with the new key(s), to filter out any that are already installed
/usr/bin/ssh-copy-id: INFO: 1 key(s) remain to be installed -- if you are prompted now it is to install the new keys
root@10.10.10.11‘s password:

Number of key(s) added: 1

Now try logging into the machine, with:   "ssh ‘root@10.10.10.11‘"
and check to make sure that only the key(s) you wanted were added.

[root@yanglin1 ~]# ssh 10.10.10.11
Last login: Fri Jun  7 22:06:24 2019 from 10.10.10.8
注:需要在哪台机器上自劢发布代码,就需要让 jenkins 这样机器的 root 用户可以免费密码登录到 那台服务器上。
2、配置 Jenkins 用户 sudu 权限并写
[root@yanglin1 ~]# visudo   #最后添加
jenkins ALL=(ALL) NOPASSWD: /usr/bin/ssh
#不需要使用密码即可执行 ssh
3、创建自动上传 web 代码的脚本
 vim deploy.sh
#!/bin/bash
echo $USER
cd /root/linzi-web
git pull
scp -r ./* root@10.10.10.11:/var/www/html/
添加权限并执行
[root@yanglin1 ~]#  chmod +x deploy.sh
[root@yanglin1 ~]# ./deploy.sh
测试自动上传代码:
浏览器访问:http://10.10.10.11:81/
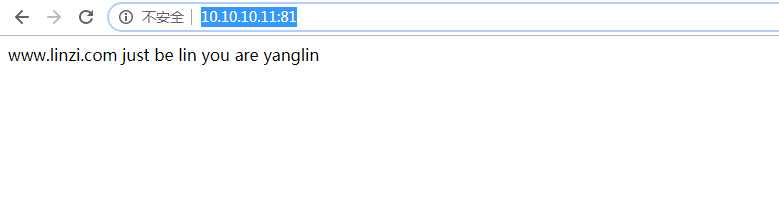
代码已更新
标签:download update web 选择 lib mac client cts object
原文地址:https://www.cnblogs.com/hbxZJ/p/10989434.html