标签:dir 坐标 corn popen csdn nat rtt install rem
1.python + appium +图片对比实现UI自动化:
背景:
当手机需要适配不同的语言时,测试过程中易出现因为语言不熟悉,导致UIbug被遗漏(例如setting中的描述性文字显示不完整等等问题)
环境搭建:
需使用模块PIL,Windows版本链接地址:http://pythonware.com/products/pil/
ubuntu (使用16.04虚拟机):sudo apt-get install python-imaging
安装过程遭遇
Unable to acquire the dpkg frontend lock (/var/lib/dpkg/lock-frontend), is another process using it?
强制解锁进行的下一步
sudo rm /var/cache/apt/archives/lock
sudo rm /var/lib/dpkg/lock
各种小毛病:
安装PIL模块提示python2.7没有注册,解决方法:
https://www.cnblogs.com/thinksasa/p/3283695.html
虚拟机连接手机提示没有权限的问题:
在root账号下,kill-server 然后start-server
在win7 64位会报错:tThe _imaging C module is not installed,安装64位的PIL可解决,
https://www.lfd.uci.edu/~gohlke/pythonlibs/#pillow
安装后在python下执行import ImageFon,不报错就OK。安装过程各种不爽,用python3.6搭配64位的PIL在Windows下成功执行(上面的网址可以下载)
在使用ImageChops.difference函数时,部分结果图片显示为一张网格图,导致压根看不到两张图的差异,结合如下链接
https://blog.csdn.net/qq_41500251/article/details/82919656
对图片进行取反,使得结果可见
逻辑梳理:
保存已确认过的UI截图,在测试时将当前页面进行截图,与保存的期望截图做对比
问题一
期望结果截图和测试结果截图时间不同,当前已运行的程序不同,会导致状态栏显示不同,并且有时候navigation bar也会不一样(Android P手机倾斜时,出现一个转屏操作按钮)
方案:将图片进行裁剪,只保留需要对比的部分。
截图使用到如下模块:
im = Image.open(im_path)
cropedIm = im.crop((700, 100, 1200, 1000))#此处为(左,上,右,下)坐标
cropedIm.save(r‘C:\Users\Administrator\Desktop\cropped.png‘)
https://www.cnblogs.com/sun-haiyu/p/7127582.html
#在不同的机种上需要重新适配截图的大小
目录结构:
-----------
├─WlanUi.py 主程序,负责测试报告生成
│ └─Test_case 存放测试case
│ └─test_Network01.py
├─DesiredResult 此处存放期望结果图片
│ ├─test_NetworkEN01.png
│ └─test_NetworkEN02.png
├─DiffPicture 当期望结果和世界结果不同时,生成一张差分图,存放于此路径
├─testReport 测试报告(.html)
├─testResult 实际测试结果截图
├─readme.md
代码:
test_Network01.py
#coding=utf-8
#python3
import unittest
from appium import webdriver
import time
import os
from PIL import Image
from PIL import ImageChops
#如下导入解决‘image file is truncated’问题
from PIL import ImageFile
ImageFile.LOAD_TRUNCATED_IMAGES = True

PATH = lambda p: os.path.abspath(p)
def screenshot(testcase):
	path = PATH(os.getcwd() + "/TestResult")
	if not os.path.isdir(PATH(os.getcwd() + "/TestResult")):
		os.makedirs(path)
	os.popen("adb wait-for-device")
	time.sleep(1)#由于多次出现截图延迟现象(每次截图都截的是上次操作的画面),故此处设置一个等待
	os.popen("adb shell screencap -p /data/local/tmp/tmp.png")
	time.sleep(1)
	os.popen("adb pull /data/local/tmp/tmp.png " + PATH(path + "/"  + testcase + ‘.png‘))
	time.sleep(1)
	os.popen("adb shell rm /data/local/tmp/tmp.png")
	time.sleep(1)
	im = Image.open(PATH(path + "/"  + testcase + ‘.png‘))
	cropedIm = im.crop((0, 70, 1079,2080 ))
	cropedIm.save(PATH(path + "/"  + testcase + ‘.png‘))
def compare_images(path_one, path_two, diff_save_location):
	"""
	比较图片,如果有不同则生成展示不同的图片

	@参数一: path_one: 第一张图片的路径
	@参数二: path_two: 第二张图片的路径
	@参数三: diff_save_location: 不同图的保存路径
	"""
	image_one = Image.open(path_one)
	image_two = Image.open(path_two)
	try:
		diff = ImageChops.difference(image_one, image_two)
		if diff.getbbox() is None:
		# 图片间没有任何不同则直接退出
			return True
		else:
			diff.save(diff_save_location)
			return False
	except ValueError as e:
		text = ("表示图片大小和box对应的宽度不一致,参考API说明:Pastes another image into this image."
				"The box argument is either a 2-tuple giving the upper left corner, a 4-tuple defining the left, upper, "
				"right, and lower pixel coordinate, or None (same as (0, 0)). If a 4-tuple is given, the size of the pasted "
				"image must match the size of the region.使用2纬的box避免上述问题")
		print("【{0}】{1}".format(e,text))


class Test(unittest.TestCase):
	def setUp(self):
		#appium 固定设置,沿用之前的即可
		self.desired_caps = {}
		self.desired_caps[‘platformName‘] = ‘Android‘
		self.desired_caps[‘platformVersion‘] = ‘9‘
		self.desired_caps[‘deviceName‘] = ‘Android Emulator‘
		self.desired_caps[‘appPackage‘] = ‘com.android.settings‘
		self.desired_caps[‘appActivity‘] = ‘.Settings$NetworkDashboardActivity‘
		self.desired_caps[‘noReset‘] = ‘true‘
		self.driver = webdriver.Remote(‘http://localhost:4723/wd/hub‘, self.desired_caps)
	def test01(self):
		‘‘‘Network & internetEN01‘‘‘
		driver = self.driver
		driver.wait_activity(".Settings$NetworkDashboardActivity", 30)
		screenshot(‘test_NetworkEN01‘)
		driver.find_element_by_xpath("//*[@text=‘Advanced‘]").click()
		time.sleep(2)
		#讲道理这个截图应该放到test02里面的,只是跑逻辑,就懒得改了
		screenshot(‘test_NetworkEN02‘)
		time.sleep(5)
		#下面这个可以用参数来写,会显得短一些,懒得改了
		ac = compare_images(‘./TestResult/test_NetworkEN01.png‘,‘./DesiredResult/test_NetworkEN01.png‘,‘./DiffPicture/test_NetworkEN01.png‘)
		self.assertEqual(ac, True)
	def test02(self):
		‘‘‘Network & internetEN02‘‘‘
		bc = compare_images(‘./TestResult/test_NetworkEN02.png‘,‘./DesiredResult/test_NetworkEN02.png‘,‘./DiffPicture/test_NetworkEN02.png‘)
		self.assertEqual(bc, True)
		#clear envirment
	def tearDown(self):

		#self.assertTrue(ac != preStatus)
		self.driver.quit()
if __name__ == ‘__main__‘:
	unittest.main()
WlanUi.py
#coding=utf-8

import time
import unittest
from HTMLTestRunner import HTMLTestRunner
import os


if __name__==‘__main__‘:
    print (‘=====AutoTest Start======‘)
    test_dir = ‘./Test_case/‘
    #知道测试报告的路径
    test_report_dir=‘./testReport/‘
    PATH = lambda p: os.path.abspath(p)
    if not os.path.isdir(PATH(os.getcwd() + "/testReport")):
        os.makedirs(test_report_dir)
    discover=unittest.defaultTestLoader.discover(test_dir, pattern=‘test_*.py‘)
    now=time.strftime(‘%Y-%m-%d_%H_%M_%S_‘)
    filename = test_report_dir+‘/‘+ now + ‘result.html‘
    fp=open(filename ,‘wb‘)

    runner = HTMLTestRunner(stream=fp,title=u‘测试报告‘,description=u‘用例执行情况:‘)
    runner.run(discover)

#注意:调用函数一定要加括号,一个括号害死个人,哎,查了几天的问题,才发现导致html文件始终显示空白,就是因为close函数调用不正确,漏了括号。
    fp.close()

    #2.取最新测试报告
   # new_report=new_file(test_report_dir)
#调试用的
#    print new_report

    #3.发送邮件,发送最新测试报告html
  #  send_email(new_report)
    print(‘=====AutoTest Over======‘)
time.sleep(10)
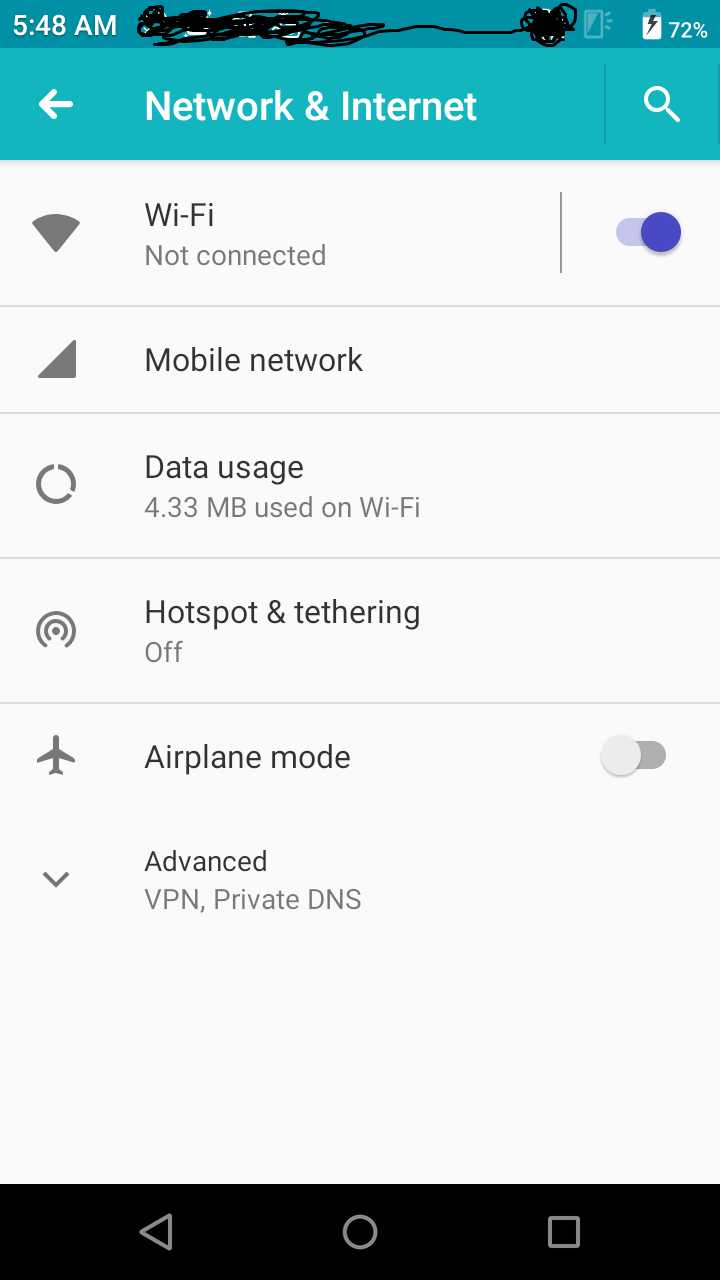
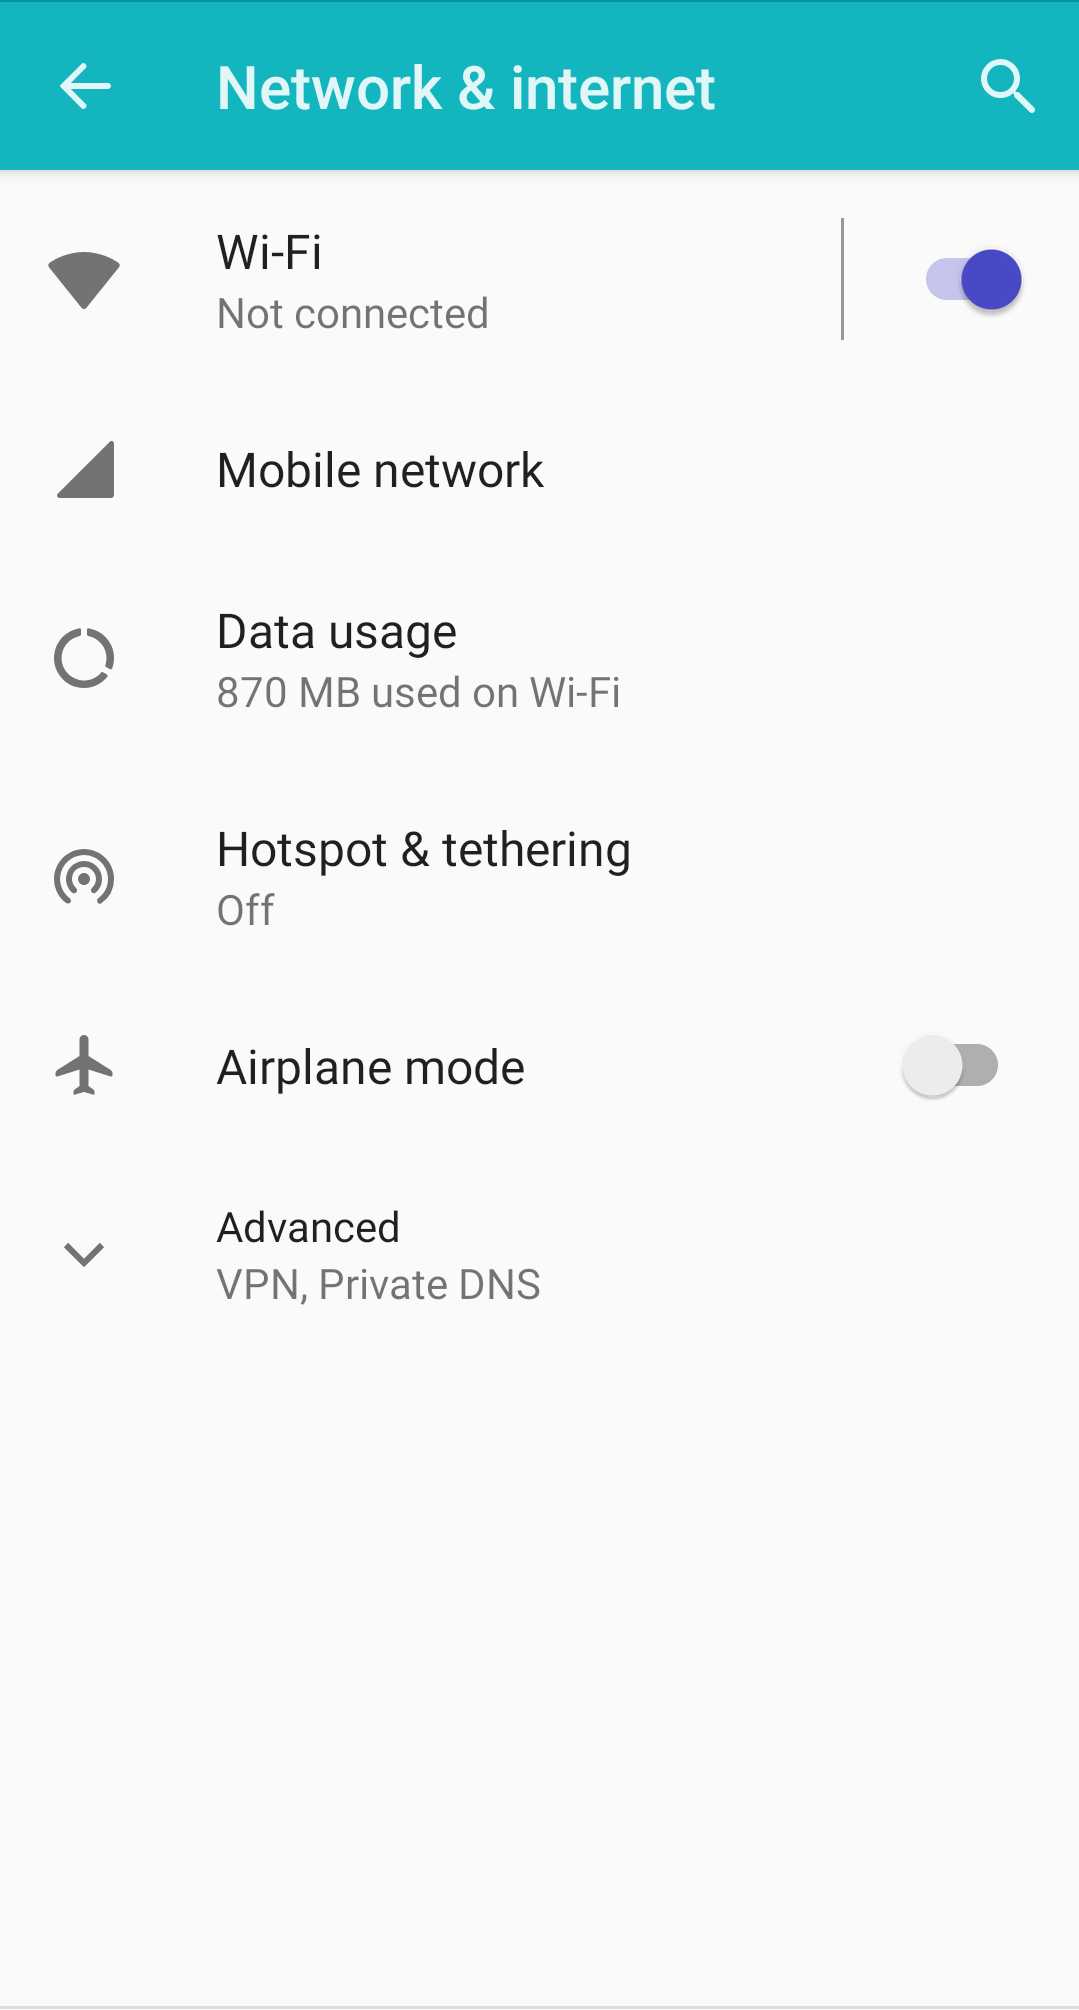
左侧是原始截图,右侧是截取的对比区域
初次实现时, ImageChops.difference得到的截图基本上看不清差异点,见下图:


左侧有张图,但是看不清,使用ImageChops.invert 后变成这样了
代码:
def invert(im1):
	IM = Image.open(im1)
	im3 = ImageChops.invert(IM)
	im3.save(‘./DesiredResult/test_NetworkEN04.png‘)
	im3.close()
拼凑代码查了多方资料,实在罗列不出各大大的链接,见谅!!
初次写总结,感觉不怎么流畅,啥都想写,尴尬得一撇
‘‘‘
以下为临时笔记,备忘:
2.文件名以路径首单词为名字命名,eg:Sound/Display/Battery and so on
如下链接详细介绍了ImageChops的使用
https://blog.csdn.net/icamera0/article/details/50727599
‘‘‘
标签:dir 坐标 corn popen csdn nat rtt install rem
原文地址:https://www.cnblogs.com/wzerowx/p/11093085.html