标签:create which widgets 步骤 模块 头文件 comm 图片 androi
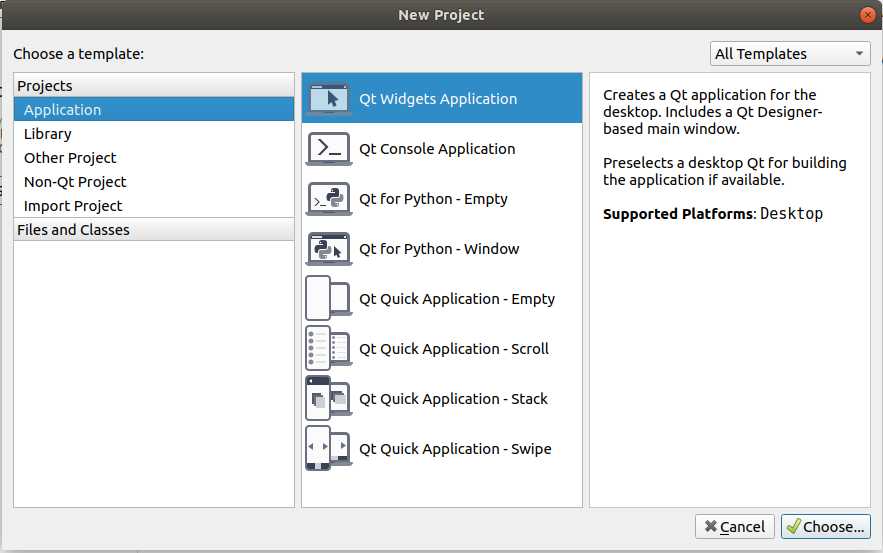
在Welcome界面选择New Project --> Application --> Qt Widgets Application --> Choose
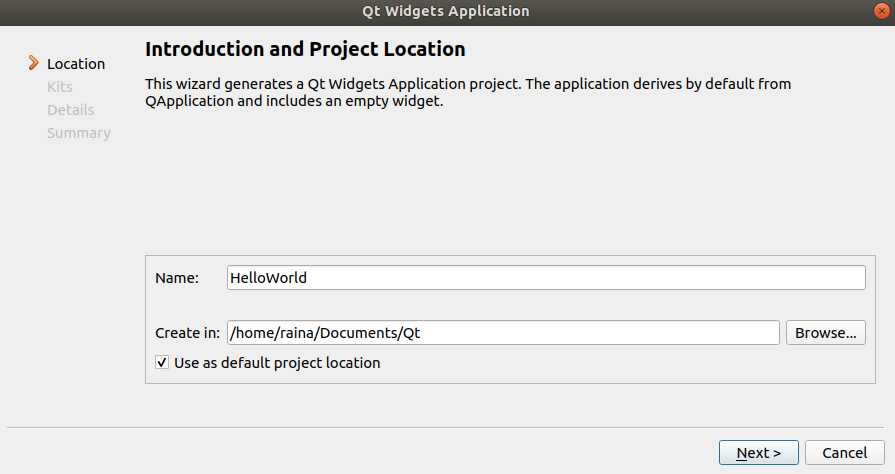
输入工程名称Name, 并选择工程存放路径, 点击Next. 下一个页面继续点击Next(是否作为默认工程路径, 自己决定勾不勾选).
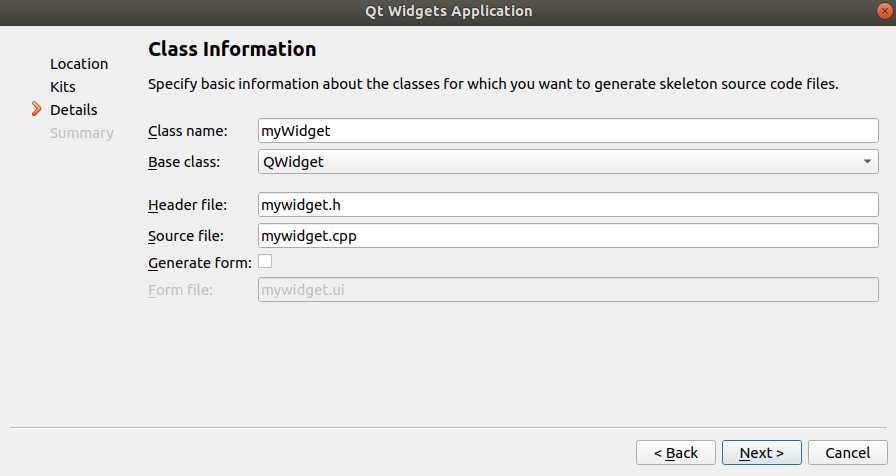
选择Base class为Qwidget, 输入Class name(自定义), 取消勾选Generate form(不添加ui文件), 点击Next, 再点击Finish, 工程就创建好了.
#include "mywidget.h"
/*
 * QApplication为应用程序类
 * Qt的头文件没有.h, 前2个字母都大写
 * Qt类名和头文件名一样
 */
#include <QApplication>

int main(int argc, char *argv[])
{
    // 一个应用程序有且只有一个应用程序类的对象
    // 这里的a即应用程序类对象
    QApplication a(argc, argv);

    // myWidget是创建工程时创建的, 继承于QWidge
    // QWidget是一个窗口基类
    myWidget w;

    // 窗口创建默认影藏的, 需要人为显示
    w.show();

    // 相当于:
    // a.exec();
    // return 0;
    // exec()功能是让程序一直执行, 等待事件的发生
    return a.exec();
}
main文件的整个框架如下:
#include <QApplication>

int main(int argc, char *argv[])
{
    QApplication a(argc, argv);

    // 代码

    return a.exec();
}#ifndef MYWIDGET_H
#define MYWIDGET_H
#include <QWidget>
// 创建一个类myWidget, 继承于QWidget
class myWidget : public QWidget
{
Q_OBJECT // 信号与槽时需要, 用不到可注释掉
public:
myWidget(QWidget *parent = 0); // 构造函数: 创建对象时自动执行
~myWidget(); // 属性函数
};
#endif // MYWIDGET_H#-------------------------------------------------
#
# Project created by QtCreator 2019-08-06T15:06:28
#
#-------------------------------------------------
# 用#注释一行
# 添加所需模块
QT += core gui
# 当前版本高于Qt4, 则加入widgets模块
greaterThan(QT_MAJOR_VERSION, 4): QT += widgets
# HelloWorld为生成的可执行文件名
TARGET = HelloWorld
# 制定makefile的类型为应用程序
TEMPLATE = app
# The following define makes your compiler emit warnings if you use
# any feature of Qt which has been marked as deprecated (the exact warnings
# depend on your compiler). Please consult the documentation of the
# deprecated API in order to know how to port your code away from it.
DEFINES += QT_DEPRECATED_WARNINGS
# You can also make your code fail to compile if you use deprecated APIs.
# In order to do so, uncomment the following line.
# You can also select to disable deprecated APIs only up to a certain version of Qt.
#DEFINES += QT_DISABLE_DEPRECATED_BEFORE=0x060000 # disables all the APIs deprecated before Qt 6.0.0
CONFIG += c++11
# 项目中包含的源程序文件
SOURCES += main.cpp mywidget.cpp
# 项目中包含的头文件
HEADERS += mywidget.h
# Default rules for deployment.
qnx: target.path = /tmp/$${TARGET}/bin
else: unix:!android: target.path = /opt/$${TARGET}/bin
!isEmpty(target.path): INSTALLS += target
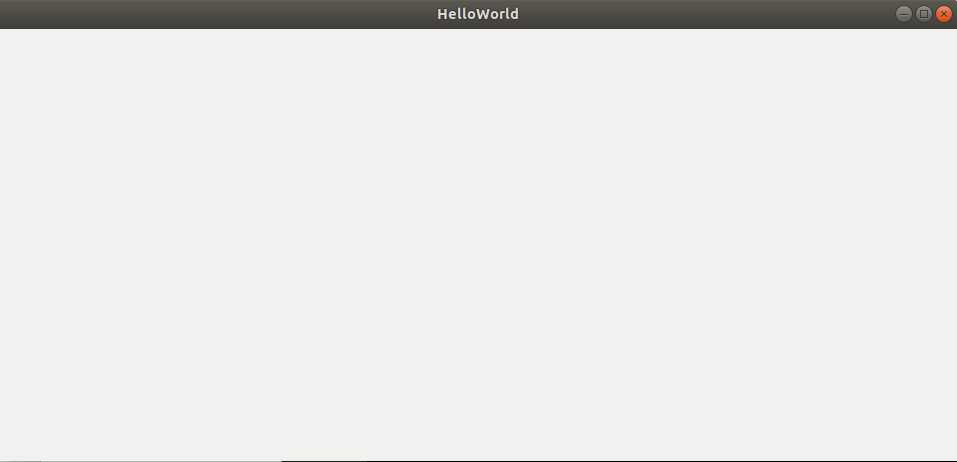
使用 Ctrl + R 快捷键, 或点击左下角的 Run 图标:

运行后会显示一个空白窗口, 窗口名为HelloWorld.
(完整的程序在本文最后会提供)
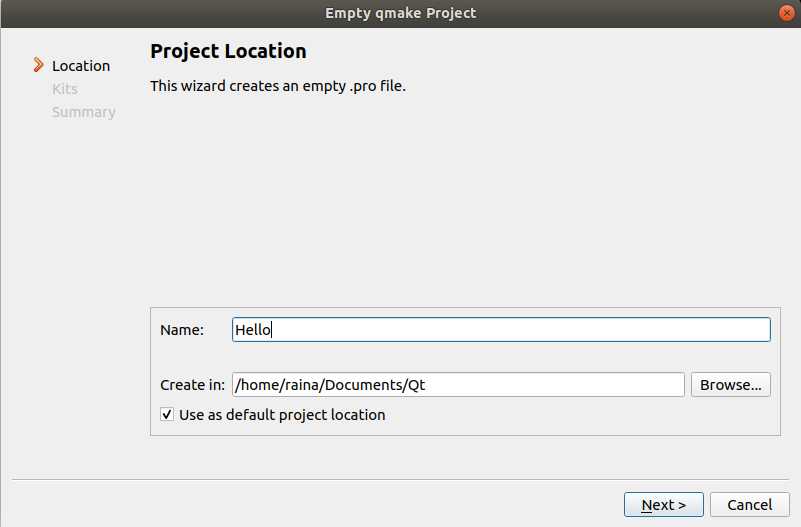
现在我们再新建一个空白项目, 从零手写一个Hello World程序.
点击File --> New File or Project, 或使用快捷键 Ctrl + N, 这次我们选择Other Project --> Empty qmake --> Choose.

然后输入项目名称, 选择工程存放路径, 之后一路Next, Finish.
新生成的项目只有一个空的Hello.pro文件
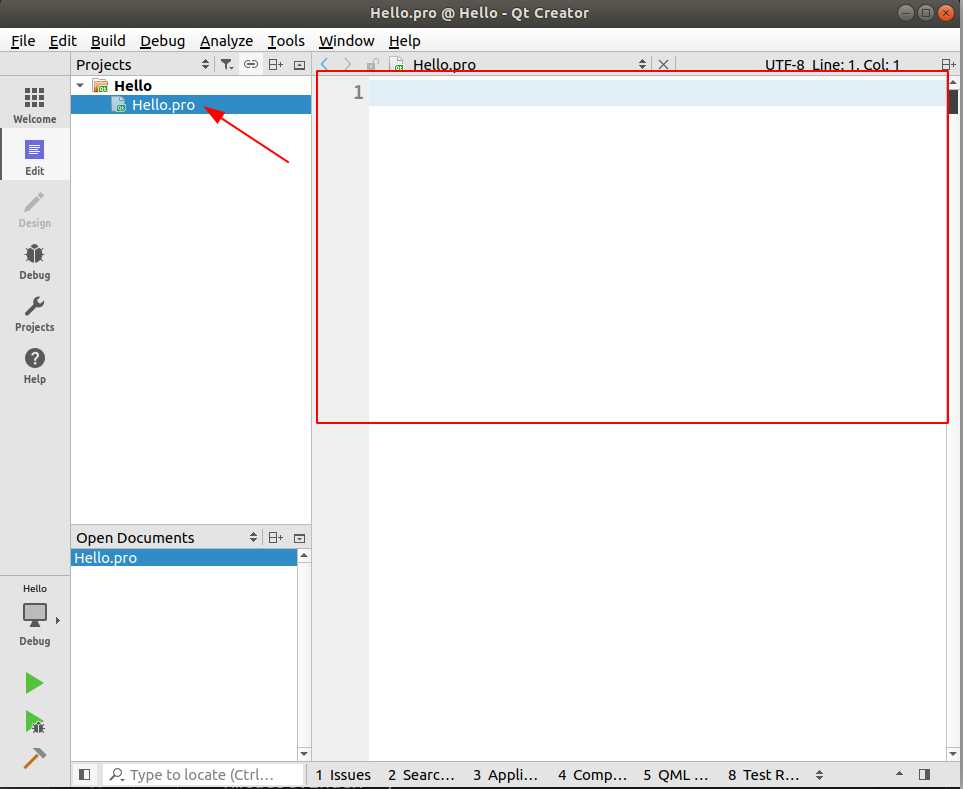
首先, 在Hello.pro中添加图形界面模块, 输入:
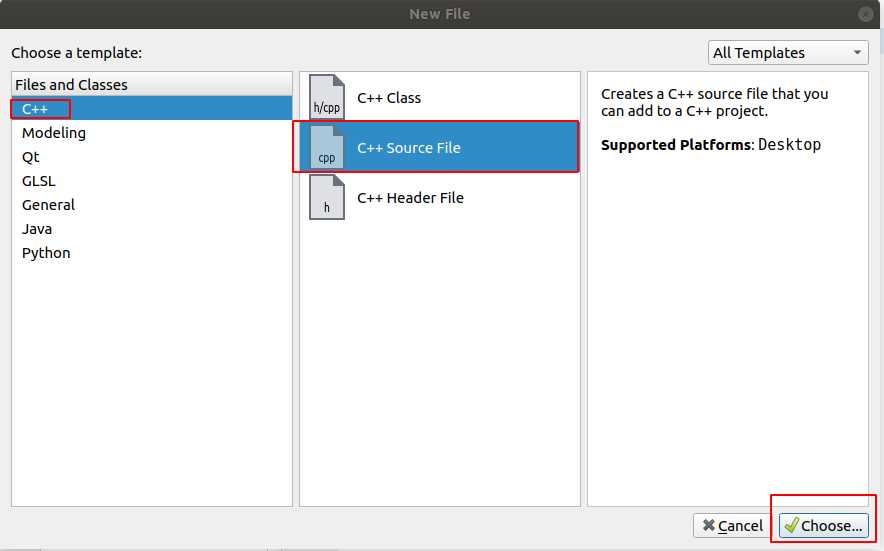
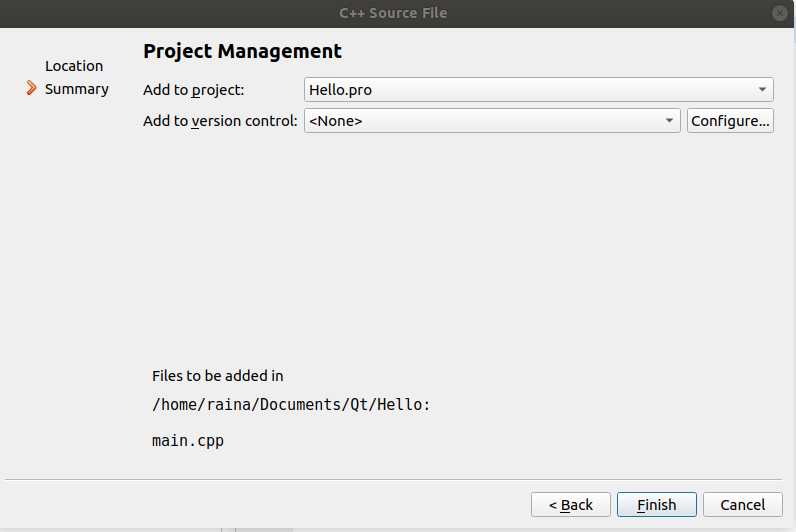
Qt += widgets之后, 添加一个main.cpp文件, 右击Hello文件夹 -->Add New(添加新文件) --> C++ --> C++ Source File --> Choose
文件名Name为: main.cpp, 存放路径Path默认即可, 然后点击Next.
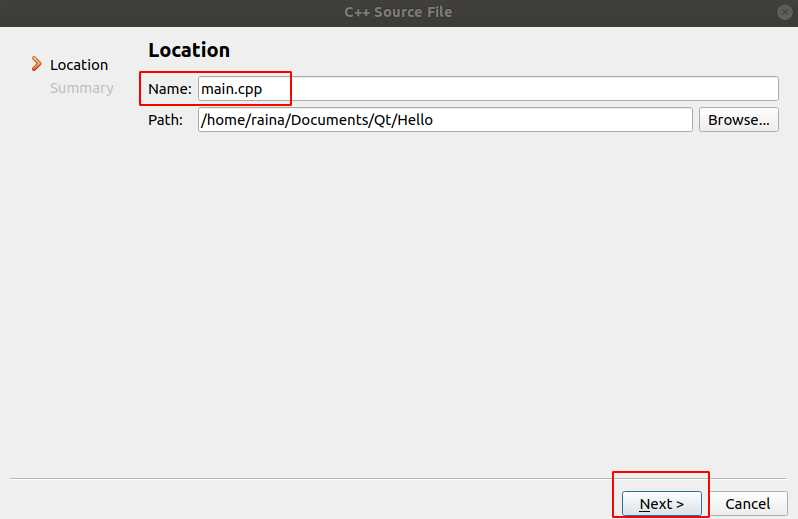
之后点击Finish即可
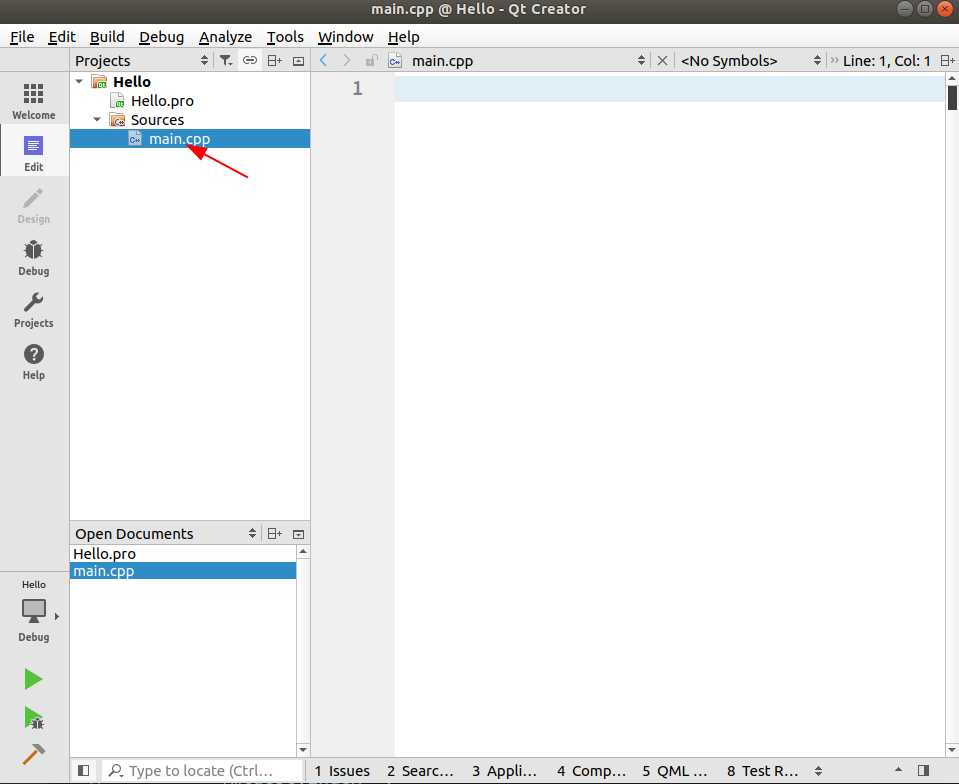
main.cpp就被添加到工程中了.
在mian.cpp文件中先添加上面讲的框架:
#include <QApplication>

int main(int argc, char *argv[])
{
    QApplication a(argc, argv);

    return a.exec();
}
之后, 我们需要创建一个窗口,
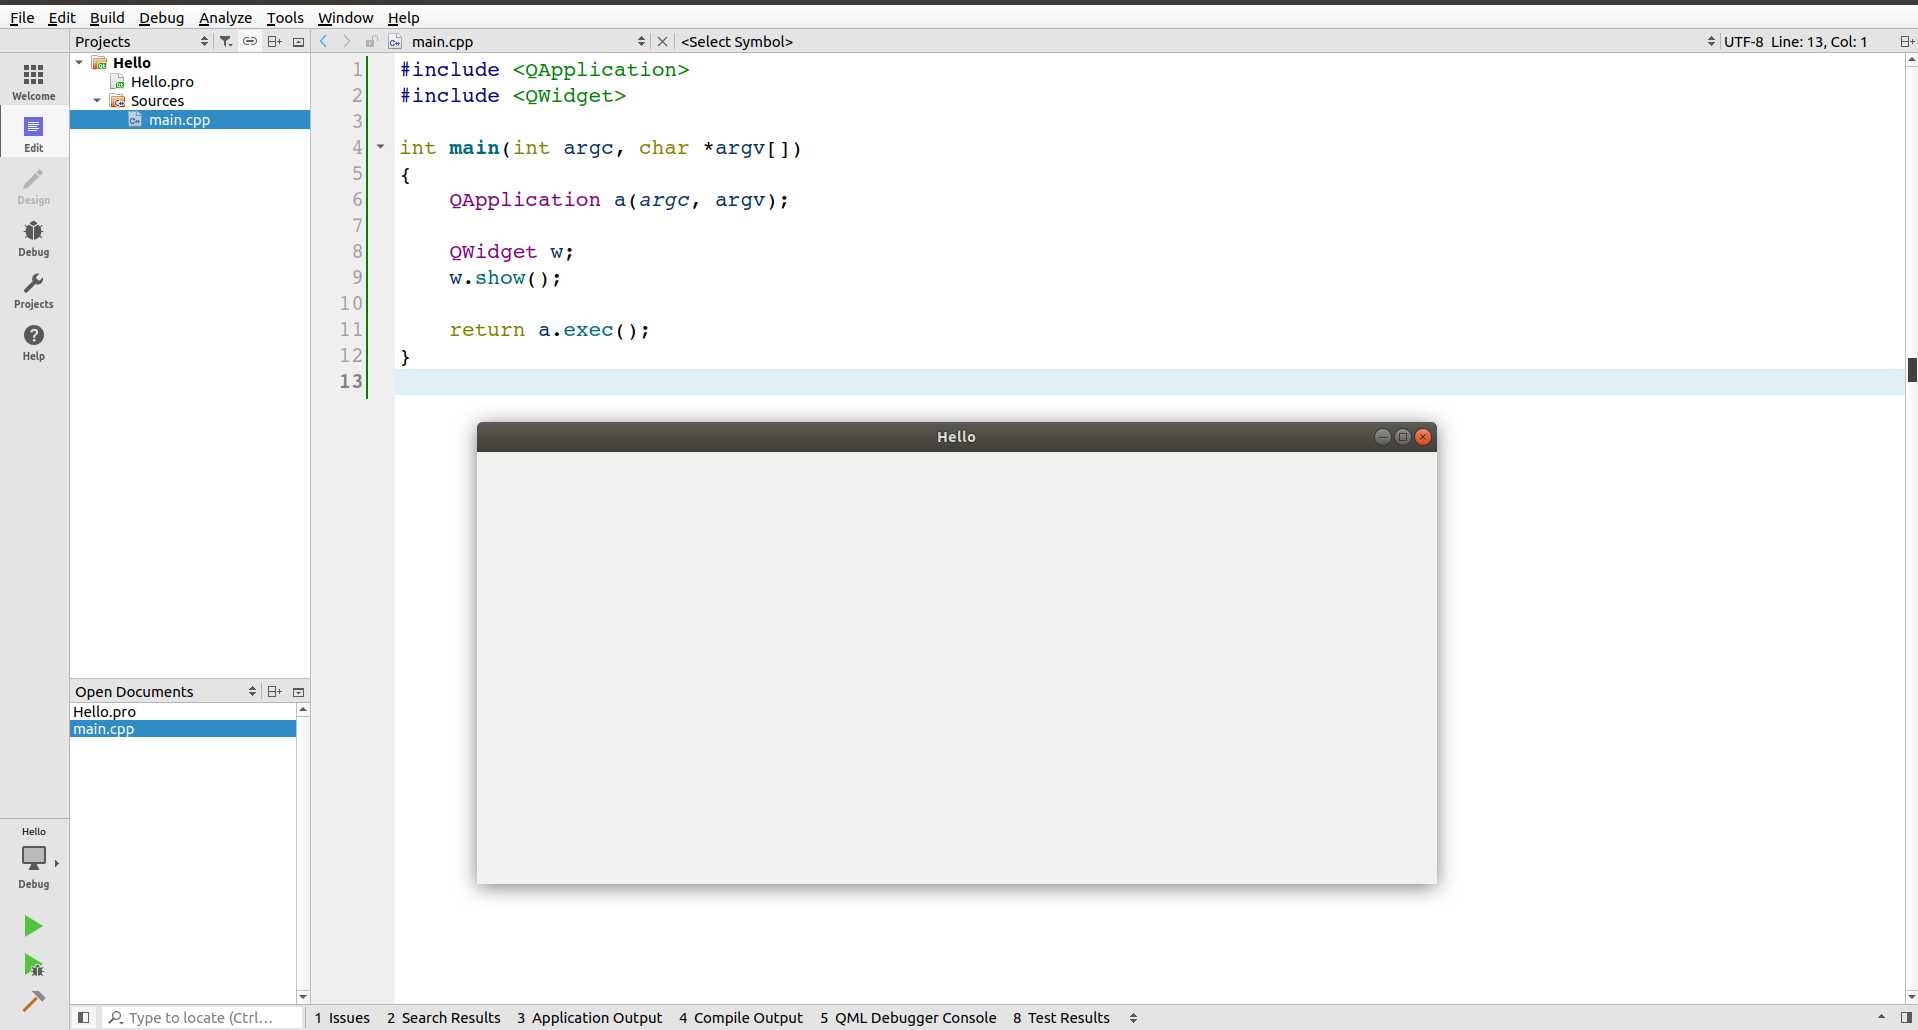
#include <QApplication>
#include <QWidget>  // 添加窗口控件的头文件

int main(int argc, char *argv[])
{
    QApplication a(argc, argv);

    QWidget w;  // 创建一个窗口对象
    w.show();  // 显示窗口

    return a.exec();
}
现在Ctrl + R 运行, 就会出现一个空白窗口了.
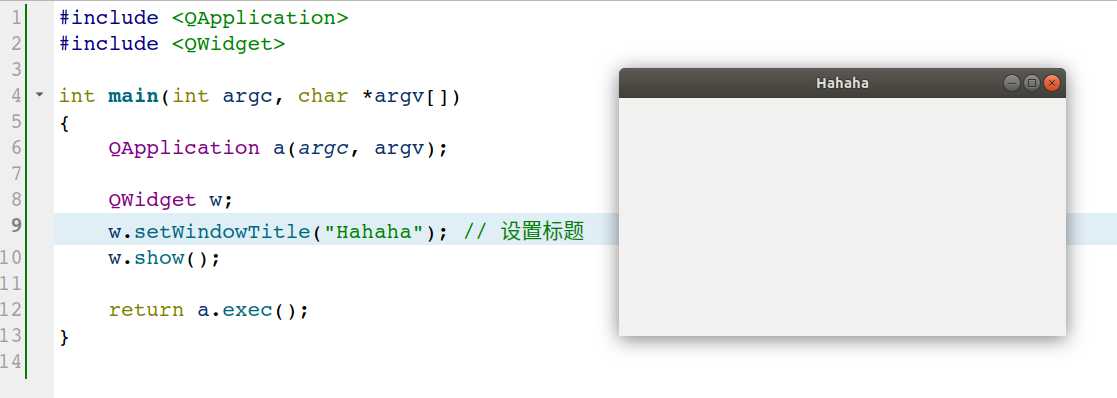
通过setWindowTitle()来设置窗口标题:
和创建窗口一样的步骤, 先添加头文件
#include <QApplication>
#include <QWidget>
#include <QPushButton>

int main(int argc, char *argv[])
{
    QApplication a(argc, argv);

    QWidget w;
    w.setWindowTitle("Hahaha");
    w.show();

    QPushButton b;  // 创建按钮对象
    b.setText("Click");  // 设置按钮内容

    return a.exec();
}
运行后发现并没有按钮, 所以应该也是要人为显示的, 添加
b.show(); // 显示按钮b再次运行, 按钮出现了:
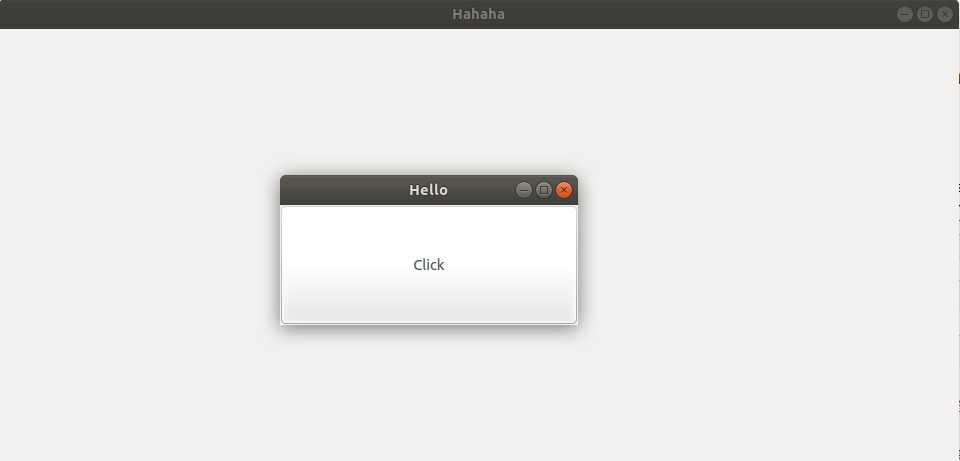
可是按钮并不是在我们那个窗口上显示的, 而是按钮自成一个窗口, 这并不是我们想要的效果.
在Qt中, 对象和对象是独立的(我们这里的窗口和按钮是独立的), 但如果给一个对象指定父对象, 那么该对象就会在父对象上面显示(如果指定窗口为按钮的父对象, 则按钮会在窗口上显示), 而指定父对象的方法有两种: (1) setParent; (2) 通过构造函数传参. 如果指定了父对象, 则父对象显示后, 子对象会自动显示.
下面我们重写按钮的程序:
#include <QApplication>
#include <QWidget>
#include <QPushButton>
int main(int argc, char *argv[])
{
QApplication a(argc, argv);
QWidget w;
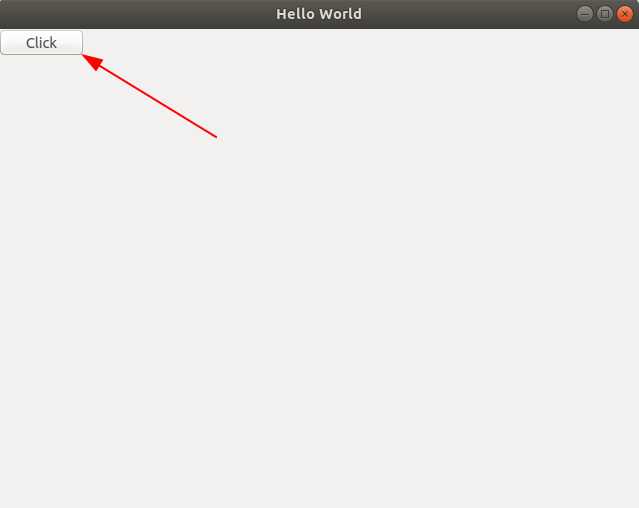
w.setWindowTitle("Hello World");
QPushButton b;
b.setText("Click");
b.setParent(&w);
w.show();
return a.exec();
}
按钮就出现在我们的窗口上了:
通过move()设置按钮位置:
b.move(100, 100);
#include <QApplication>
#include <QWidget>
#include <QPushButton>

int main(int argc, char *argv[])
{
    QApplication a(argc, argv);

    QWidget w;
    w.setWindowTitle("Hello World");

    QPushButton b;
    b.setText("Click");
    b.setParent(&w);
    b.move(100, 100);

    w.show();
    return a.exec();
}Qt += widgets
# 下面两行是自动添加的
SOURCES += main.cpp标签:create which widgets 步骤 模块 头文件 comm 图片 androi
原文地址:https://www.cnblogs.com/raina/p/11310373.html