标签:end efault eth0 libtool soc base sse ref 安装脚本
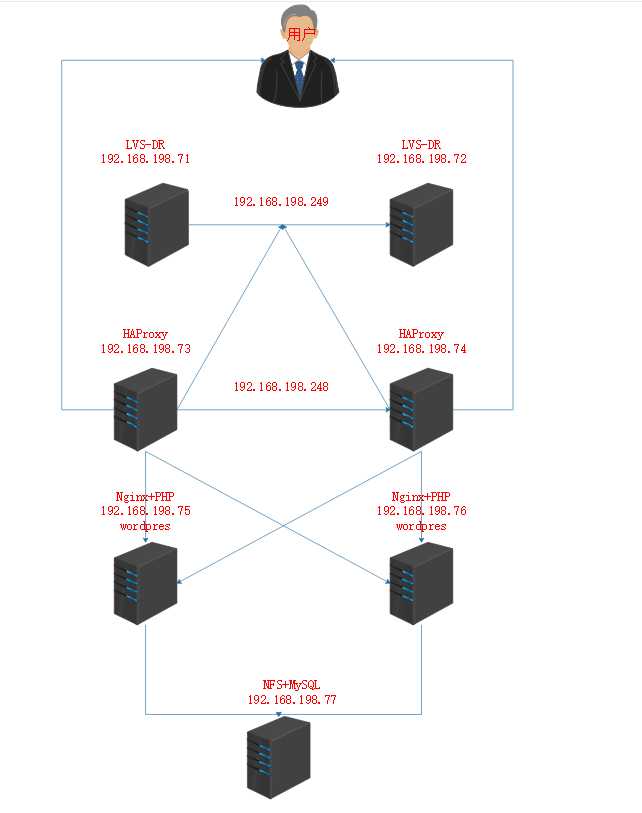
*实验前景:准备7台新机器,准备好IP,yum源和epel源,关闭防火墙策略,禁用selinux,清空iptables
*NFS+MySQL操作:切入安装目录:cd /usr/local/src
准备数据库安装包:my.cnf为配置文件 mysql-install.sh安装脚本,一键安装,mysql-5.6.34源码包
https://link.jianshu.com/?t=https://dev.mysql.com/get/Downloads/MySQL-5.6/mysql-5.6.34-linux-glibc2.5-x86_64.tar.gz[源码包下载地址]

my.cnf内容:
[mysqld]
socket=/var/lib/mysql/mysql.sock
user=mysql
symbolic-links=0
datadir=/data/mysql
innodb_file_per_table=1

[client]
port=3306
socket=/var/lib/mysql/mysql.sock

[mysqld_safe]
log-error=/var/log/mysqld.log
pid-file=/tmp/mysql.sock
mysql-install.sh内容:
#!/bin/bash
DIR=`pwd`
NAME="mysql-5.6.34-linux-glibc2.5-x86_64.tar.gz"
FULL_NAME=${DIR}/${NAME}
DATA_DIR="/data/mysql"

yum install libiao vim gcc gcc-c++ wget autoconf  net-tools lrzsz iotop lsof iotop bash-completion -y
yum install curl policycoreutils openssh-server openssh-clients postfix -y

if [ -f ${FULL_NAME} ];then
    echo "安装文件存在"
else
    echo "安装文件不存在"
    exit 3
fi
if [ -h /usr/local/mysql ];then
    echo "Mysql 已经安装"
    exit 3
else
    tar xvf ${FULL_NAME}   -C /usr/local/src
    ln -sv /usr/local/src/mysql-5.6.34-linux-glibc2.5-x86_64  /usr/local/mysql
    if id  mysql;then
        echo "mysql 用户已经存在,跳过创建用户过程"
    fi
        useradd  mysql  -s /sbin/nologin
    if  id  mysql;then
        chown  -R mysql.mysql  /usr/local/mysql/* -R
        if [ ! -d  /data/mysql ];then
            mkdir -pv /data/mysql && chown  -R mysql.mysql  /data   -R
            /usr/local/mysql/scripts/mysql_install_db  --user=mysql --datadir=/data/mysql  --basedir=/usr/local/mysql/
            cp  /usr/local/src/mysql-5.6.34-linux-glibc2.5-x86_64/support-files/mysql.server /etc/init.d/mysqld
            chmod a+x /etc/init.d/mysqld
            cp ${DIR}/my.cnf   /etc/my.cnf
            ln -sv /usr/local/mysql/bin/mysql  /usr/bin/mysql
            /etc/init.d/mysqld start
        else
            echo "MySQL数据目录已经存在,"
                        exit 3
        fi
    fi
fi
登录即可:mysql[登录]
创建数据库:CREATE DATABASE wordpress;
授权账户:GRANT ALL PRIVILEGES ON wordpress.* TO "wordpress"@"192.168.198.%" IDENTIFIED BY "xdk";
*76测试操作:安装数据库 yum install mysql -y
查看账户是否可以登录:mysql -uwordpress -pxdk -h192.168.198.77
*NFS+MySQL操作:安装软件yum install nfs-utils -y
编辑/etc/exports目录,写如wordpress的文件存放路径及权限:vim /etc/exports[添加:/data/wordpress *(rw,no_root_squash)]

创建wordpress目录:mkdir /data/wordpress
启动nfs并设置为开机启动:systemctl start nfs; systemctl enable nfs;
*75和76共同操作:安装软件yum install nfs-utils -y
查看共享文件:showmount -e 192.168.198.77

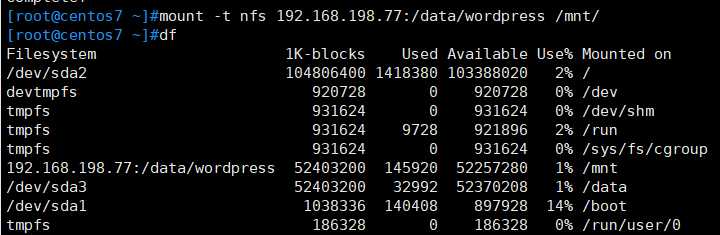
实现挂载:mount -t nfs 192.168.198.77:/data/wordpress /mnt/
*75和76共同操作:切入目录:cd /usr/local/src
下载nginx源码包:wget https://nginx.org/download/nginx-1.16.1.tar.gz
解压包:tar xf nginx-1.16.1.tar.gz
切入目录:cd nginx-1.16.1/
编译安装:./configure --prefix=/apps/nginx --user=www --group=www --with-http_ssl_module --with-http_v2_module --with-http_realip_module --with-http_stub_status_module --with-http_gzip_static_module --with-pcre --with-stream --with-stream_ssl_module --with-stream_realip_module
make
make install
创建账号:useradd www -s /sbin/nologin -u 2019
查看启动nginx成功:/apps/nginx/sbin/nginx -t

下载php源码包:https://www.php.net/distributions/php-7.2.21.tar.gz
解压包:tar xf php-7.2.21.tar.gz
切入目录:cd php-7.2.21/
安装php依赖包:yum -y install wget vim pcre pcre-devel openssl openssl-devel libicu-devel gcc gcc-c++ autoconf libjpeg libjpeg-devel libpng libpng-devel freetype freetype-devel libxml2 libxml2-devel zlib zlib-devel glibc glibc-devel glib2 glib2-devel ncurses ncurses-devel curl curl-devel krb5-devel libidn libidn-devel openldap openldap-devel nss_ldap jemalloc-devel cmake boost-devel bison automake libevent libevent-devel gd gd-devel libtool* libmcrypt libmcrypt-devel mcrypt mhash libxslt libxslt-devel readline readline-devel gmp gmp-devel libcurl libcurl-devel openjpeg-devel
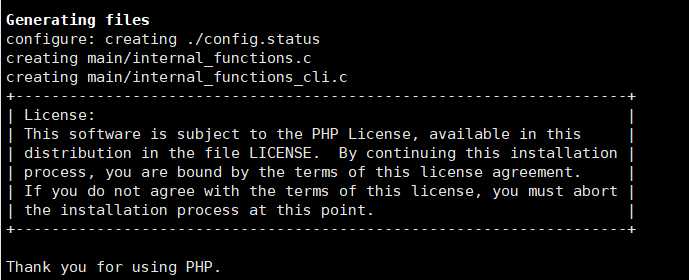
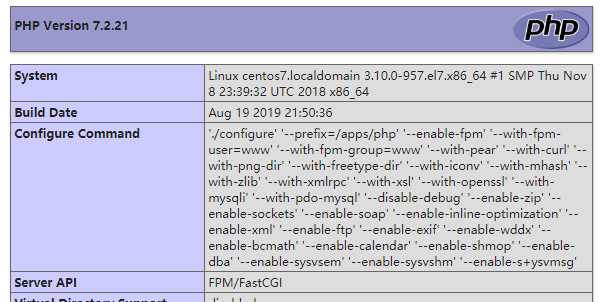
编译:./configure --prefix=/apps/php --enable-fpm --with-fpm-user=www --with-fpm-group=www --with-pear --with-curl --with-png-dir --with-freetype-dir --with-iconv --with-mhash --with-zlib --with-xmlrpc --with-xsl --with-openssl --with-mysqli --with-pdo-mysql --disable-debug --enable-zip --enable-sockets --enable-soap --enable-inline-optimization --enable-xml --enable-ftp --enable-exif --enable-wddx --enable-bcmath --enable-calendar --enable-shmop --enable-dba --enable-sysvsem --enable-sysvshm --enable-sysvmsg
出现此图显示为编译通过正确
开启make进程:make -j 2
安装:make install
准备目录:mkdir /data/nginx/wordpress -p
切入目录:cd /apps/php/etc/
复制文件:cp php-fpm.conf.default php-fpm.conf
切入目录:cd php-fpm.d/
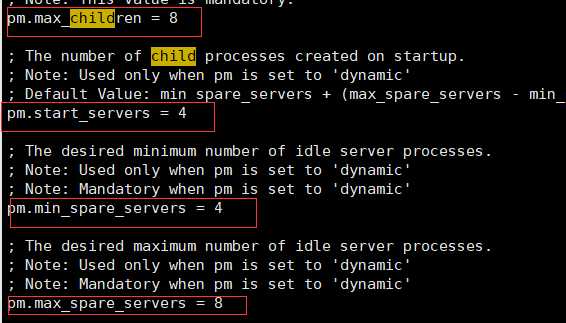
修改配置文件:vim www.conf
复制文件:cp /usr/local/src/php-7.2.21/php.ini-production /apps/php/etc/php.ini
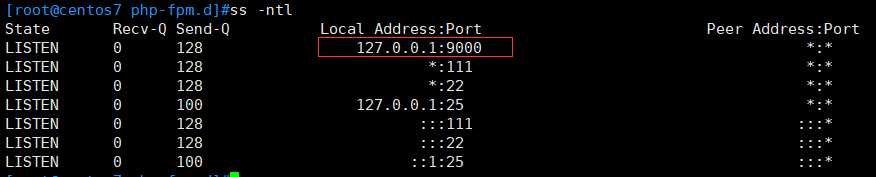
测试php启动成功:/apps/php/sbin/php-fpm -t

/apps/php/sbin/php-fpm -c /apps/php/etc/php.ini
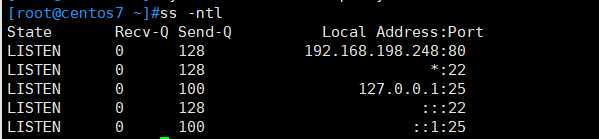
查看端口:ss -ntl
修改配置文件:vim /apps/nginx/conf/nginx.conf


测试是否成功:/apps/nginx/sbin/nginx -t

编写一个测试网页:vim /data/nginx/wordpress/index.php

打开网页查看:http://192.168.198.[75.76]/index.php[成功出现则显示以上配置成功]
切入目录:cd /data/nginx/wordpress
下载wordpress源码包:wget https://wordpress.org/latest.tar.gz
移动文件志目录:mv wordpress/* .
移走不需要的目录:mv wordpress wordpress-5.2.2-zh_CN.zip /opt/
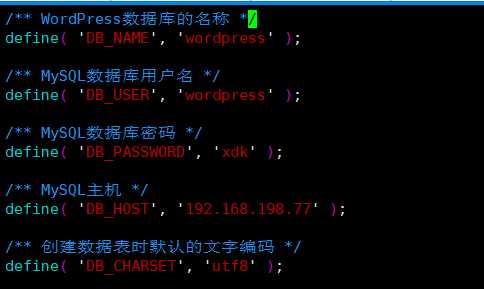
拷贝文件改名:cp wp-config-sample.php wp-config.php
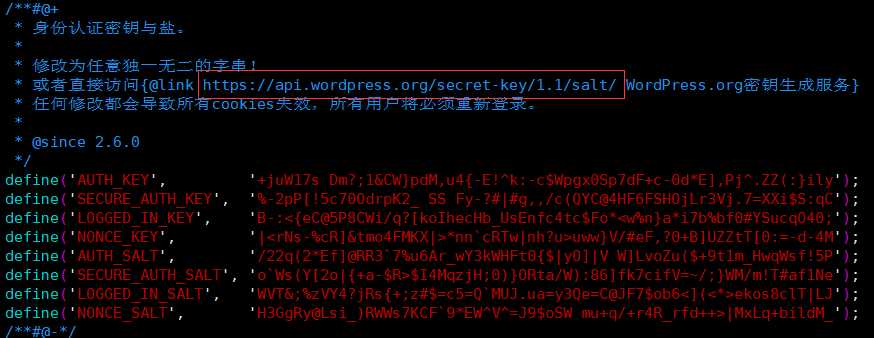
修改文件:vim wp-config.php
更改身份验证:删除原有的身份,复制网址去浏览器粘贴新的身份,https://api.wordpress.org/secret-key/1.1/salt/
打开windows目录:C:\Windows\System32\drivers\etc,编辑hosts文件[添加:192.168.198.75/76 www.xdk.net]
打开网页:www.xdk.net[安装wordpress即可]
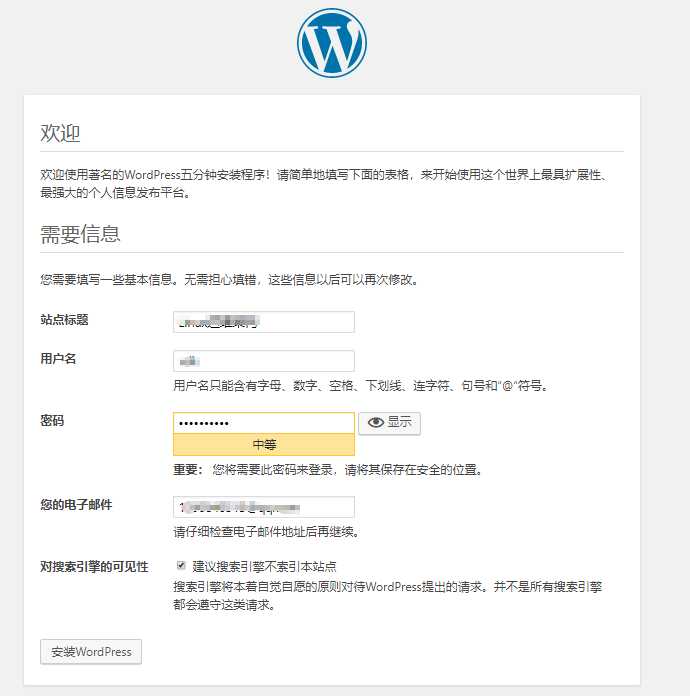
安装成功

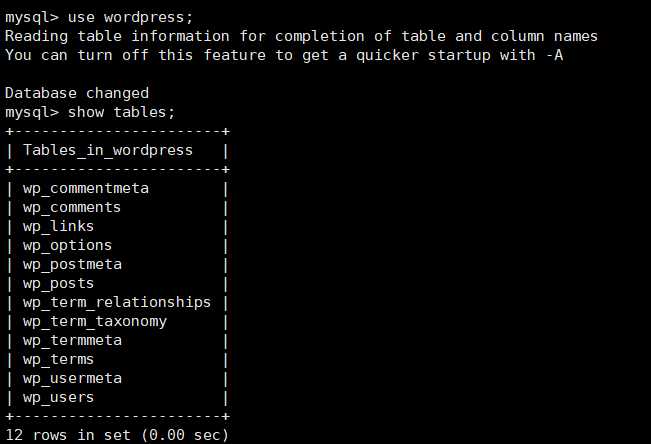
*MySQL操作:查看库中是否有数据
*73和74共同操作:安装包yum install keepalived haproxy -y
设置负载均衡
*73操作:编辑配置文件:vim /etc/keepalived/keepalived.conf
! Configuration File for keepalived

global_defs {
   notification_email {
     acassen@firewall.loc
     failover@firewall.loc
     sysadmin@firewall.loc
   }
   notification_email_from Alexandre.Cassen@firewall.loc
   smtp_server 192.168.200.1
   smtp_connect_timeout 30
   router_id LVS_DEVEL
   vrrp_skip_check_adv_addr
   vrrp_strict
   vrrp_iptables
   vrrp_gna_interval 0
}

vrrp_instance VI_1 {
    state MASTER
    interface eth0
    virtual_router_id 200
    priority 100
    advert_int 2
    authentication {
        auth_type PASS
        auth_pass 123456
    }
    virtual_ipaddress {
        192.168.198.248 dev eth0 label eth0:0
    }

}
启动服务:systemctl start keepalived.service
设置开机启动:systemctl enable keepalived.service
查看ip是否存在:ip a

*74操作:编辑配置文件:vim /etc/keepalived/keepalived.conf
! Configuration File for keepalived

global_defs {
   notification_email {
     acassen@firewall.loc
     failover@firewall.loc
     sysadmin@firewall.loc
   }
   notification_email_from Alexandre.Cassen@firewall.loc
   smtp_server 192.168.200.1
   smtp_connect_timeout 30
   router_id LVS_DEVEL
   vrrp_skip_check_adv_addr
   vrrp_strict
   vrrp_iptables
   vrrp_gna_interval 0
}

vrrp_instance VI_1 {
    state BACKUP
    interface eth0
    virtual_router_id 200
    priority 80
    advert_int 2
    authentication {
        auth_type PASS
        auth_pass 123456
    }
    virtual_ipaddress {
        192.168.198.248 dev eth0 label eth0:0
    }

}
启动服务:systemctl start keepalived.service
设置开机启动:systemctl enable keepalived.service
*73和74测试操作:73停止服务systemctl stop keepalived
74查看:ip a[发现Ip已经迁移过去,证明成功]
也可在其他机器上ping 192.168.198.248[ping成功]
*73操作:编辑配置文件vim /etc/haproxy/haproxy.cfg[添加一下四行数据]

重启服务:systemctl restart haproxy.service
查看端口:ss -ntl

使用vip看是否能登录成功:更改hosts文件[删除以前写的,添加192.168.198.248 www.xdk.net]
打开网页:www.xdk.net[查看登录成功]
复制文件给74:scp /etc/haproxy/haproxy.cfg 192.168.198.74:/etc/haproxy/haproxy.cfg
*74操作:不能启动服务,因为ip在73上
打开配置文件:vim /etc/sysctl.conf[添加net.ipv4.ip_nonlocal_bind=1]
让其生效:sysctl -p
启动服务:systemctl start haproxy
查看端口:ss -ntl[已经成功]
*71和72共同操作:安装keepalived:yum install keepalived -y
*71操作:编辑文件vim /etc/keepalived/keepalived.conf
! Configuration File for keepalived

global_defs {
   notification_email {
     acassen@firewall.loc
     failover@firewall.loc
     sysadmin@firewall.loc
   }
   notification_email_from Alexandre.Cassen@firewall.loc
   smtp_server 192.168.200.1
   smtp_connect_timeout 30
   router_id LVS_DEVEL
   vrrp_skip_check_adv_addr
   vrrp_strict
   vrrp_garp_interval 0
   vrrp_gna_interval 0
}

vrrp_instance VI_1 {
    state MASTER
    interface eth0
    virtual_router_id 51
    priority 100
    advert_int 1
! Configuration File for keepalived

global_defs {
   notification_email {
     acassen@firewall.loc
     failover@firewall.loc
     sysadmin@firewall.loc
   }
   notification_email_from Alexandre.Cassen@firewall.loc
   smtp_server 192.168.200.1
   router_id LVS_DEVEL
   vrrp_skip_check_adv_addr
   vrrp_garp_interval 0
   vrrp_gna_interval 0
}

vrrp_instance VI_2 {
    state MASTER
    interface eth0
    virtual_router_id 202
    priority 100
    advert_int 1
        auth_pass 123456
    }
    }
}
virtual_server 192.168.198.249 80 {
    delay_loop 6
    lb_algo rr

        weight 1
        weight 1
        SSL_GET {
            url {
              path /
virtual_server 192.168.198.249 80 {
    protocol TCP
    real_server 192.168.198.103 80 {
        weight 1
         connect_timeout 5
}

virtual_server 192.168.198.249 80 {
    lb_algo rr
    lb_kind DR
    persistence_timeout 50
    protocol TCP
    real_server 192.168.198.73 80 {
        weight 1
         connect_timeout 5
         nb_get_retry 3
         delay_before_retry 3
         connect_port 80
        }
    }

    real_server 192.168.198.74 80 {
        weight 1
        TCP_CHECK {
         connect_timeout 5
         nb_get_retry 3
         delay_before_retry 3
         connect_port 80
        }
    }

}
*73和74操作:vim /etc/haproxy/haproxy.cfg


*
标签:end efault eth0 libtool soc base sse ref 安装脚本
原文地址:https://www.cnblogs.com/dengkui/p/11370337.html