标签:http arch 文章 oca city 国内 boolean google fatal
Hexo默认的主题是landscape,推荐以下主题:
详见:https://github.com/search?q=hexo-theme
themes下。_config.yml 的theme字段,为主题文件夹的名称:# Extensions## Plugins: https://hexo.io/plugins/## Themes: https://hexo.io/themes/theme: <主题文件夹的名称>以上主题都有比较详细的说明文档,本节主要解决主题优化的常见问题。
主题优化一般包括:
设置「RSS」
添加「标签」页面
添加「分类」页面
设置「字体」
问题:引用国外字体镜像较慢。
解决:可以改用国内的。将\themes*\layout_partials\head external-fonts.swig文件中fonts.google.com改成fonts.lug.ustc.edu.cn。
设置「代码高亮主题」
侧边栏社交链接
问题:图标哪里找?
解决:Font Awesome
开启打赏功能
问题:微信支付宝二维码不美观,规格不一。
解决:在线生成二维码
设置友情链接
腾讯公益404页面
站点建立时间
订阅微信公众号
设置「动画效果」
问题:慢,需要等待 JavaScript 脚本完全加载完毕后才会显示内容。
解决:将主题配置文件_config.yml中,use_motion字段的值设为 false 来关闭动画。
设置「背景动画」
主题优化还包括:
在 themes/*/source/css/_custom/custom.styl 中添加如下代码:
body{ background:url(/images/bg.jpg); background-size:cover; background-repeat:no-repeat; background-attachment:fixed; background-position:center;}在 themes/*/source/css/_custom/custom.styl 中添加如下代码:
@font-face { font-family: Zitiming; src: url('/fonts/Zitiming.ttf');}.site-title { font-size: 40px !important; font-family: 'Zitiming' !important;}其中字体文件在 themes/next/source/fonts 目录下,里面有个 .gitkeep 的隐藏文件,打开写入你要保留的字体文件,比如我的是就是写入 Zitiming.ttf ,具体字库自己从网上下载即可。
编辑主题的 source/css/_variables/custom.styl 文件,新增变量:
// 修改成你期望的宽度$content-desktop = 700px// 当视窗超过 1600px 后的宽度$content-desktop-large = 900px打开 themes/*/source/css/_custom/custom.styl ,在里面写下如下代码:
.site-meta { background: $blue; //修改为自己喜欢的颜色}打开 themes/*/source/css/_custom/custom.styl ,在里面写下如下代码:
// 鼠标样式 * { cursor: url("http://om8u46rmb.bkt.clouddn.com/sword2.ico"),auto!important } :active { cursor: url("http://om8u46rmb.bkt.clouddn.com/sword1.ico"),auto!important }打开 themes/*/layout/_partials/head.swig文件,在 ``之前插入代码:
<script> (function(){ if('{{ page.password }}'){ if (prompt('请输入密码') !== '{{ page.password }}'){ alert('密码错误'); history.back(); } } })();</script>写文章时加上password: *:
---title: 2018date: 2018-10-25 16:10:03password: 123456---/themes/*/source/js/src下新建文件click.js,接着把以下粘贴到click.js文件中。!function(e,t,a){function n(){c(".heart{width: 10px;height: 10px;position: fixed;background: #f00;transform: rotate(45deg);-webkit-transform: rotate(45deg);-moz-transform: rotate(45deg);}.heart:after,.heart:before{content: '';width: inherit;height: inherit;background: inherit;border-radius: 50%;-webkit-border-radius: 50%;-moz-border-radius: 50%;position: fixed;}.heart:after{top: -5px;}.heart:before{left: -5px;}"),o(),r()}function r(){for(var e=0;e<d.length;e++)d[e].alpha<=0?(t.body.removeChild(d[e].el),d.splice(e,1)):(d[e].y--,d[e].scale+=.004,d[e].alpha-=.013,d[e].el.style.cssText="left:"+d[e].x+"px;top:"+d[e].y+"px;opacity:"+d[e].alpha+";transform:scale("+d[e].scale+","+d[e].scale+") rotate(45deg);background:"+d[e].color+";z-index:99999");requestAnimationFrame(r)}function o(){var t="function"==typeof e.onclick&&e.onclick;e.onclick=function(e){t&&t(),i(e)}}function i(e){var a=t.createElement("div");a.className="heart",d.push({el:a,x:e.clientX-5,y:e.clientY-5,scale:1,alpha:1,color:s()}),t.body.appendChild(a)}function c(e){var a=t.createElement("style");a.type="text/css";try{a.appendChild(t.createTextNode(e))}catch(t){a.styleSheet.cssText=e}t.getElementsByTagName("head")[0].appendChild(a)}function s(){return"rgb("+~~(255*Math.random())+","+~~(255*Math.random())+","+~~(255*Math.random())+")"}var d=[];e.requestAnimationFrame=function(){return e.requestAnimationFrame||e.webkitRequestAnimationFrame||e.mozRequestAnimationFrame||e.oRequestAnimationFrame||e.msRequestAnimationFrame||function(e){setTimeout(e,1e3/60)}}(),n()}(window,document);\themes\*\layout\_layout.swig文件末尾添加:<!-- 页面点击小红心 --><script type="text/javascript" src="/js/src/clicklove.js"></script>在站点目录下:
$ npm install gulp -g安装gulp插件:
npm install gulp-minify-css --savenpm install gulp-uglify --savenpm install gulp-htmlmin --savenpm install gulp-htmlclean --savenpm install gulp-imagemin --save在 Hexo 站点下新建 gulpfile.js文件,文件内容如下:
var gulp = require('gulp');var minifycss = require('gulp-minify-css');var uglify = require('gulp-uglify');var htmlmin = require('gulp-htmlmin');var htmlclean = require('gulp-htmlclean');var imagemin = require('gulp-imagemin');// 压缩css文件gulp.task('minify-css', function() { return gulp.src('./public/**/*.css') .pipe(minifycss()) .pipe(gulp.dest('./public'));});// 压缩html文件gulp.task('minify-html', function() { return gulp.src('./public/**/*.html') .pipe(htmlclean()) .pipe(htmlmin({ removeComments: true, minifyJS: true, minifyCSS: true, minifyURLs: true, })) .pipe(gulp.dest('./public'))});// 压缩js文件gulp.task('minify-js', function() { return gulp.src(['./public/**/.js','!./public/js/**/*min.js']) .pipe(uglify()) .pipe(gulp.dest('./public'));});// 压缩 public/demo 目录内图片gulp.task('minify-images', function() { gulp.src('./public/demo/**/*.*') .pipe(imagemin({ optimizationLevel: 5, //类型:Number 默认:3 取值范围:0-7(优化等级) progressive: true, //类型:Boolean 默认:false 无损压缩jpg图片 interlaced: false, //类型:Boolean 默认:false 隔行扫描gif进行渲染 multipass: false, //类型:Boolean 默认:false 多次优化svg直到完全优化 })) .pipe(gulp.dest('./public/uploads'));});// 默认任务gulp.task('default', [ 'minify-html','minify-css','minify-js','minify-images']);只需要每次在执行 generate 命令后执行 gulp 就可以实现对静态资源的压缩,压缩完成后执行 deploy 命令同步到服务器:
hexo ggulphexo d默认情况下访问URL路径为:domain/2018/10/18/关于本站,修改为 domain/About/关于本站。 编辑 Hexo 站点下的 _config.yml 文件,修改其中的 permalink字段:
permalink: :category/:title/安装插件
$ npm uninstall hexo-generator-index --save
$ npm install hexo-generator-index-pin-top --save
然后在需要置顶的文章的Front-matter中加上top即可:
---title: 2018date: 2018-10-25 16:10:03top: 10---打开:/themes/*/layout/_macro/post.swig,定位到
,插入以下代码即可:
{% if post.top %} <i class="fa fa-thumb-tack"></i> <font color=7D26CD>置顶</font> <span class="post-meta-divider">|</span>{% endif %}<a href="https://github.com/you">中的链接换为自己Github链接:themes/next/layout/_layout.swig 文件,把代码复制到<div class="headband"></div>下面。打开 themes/*/source/css/_custom/custom.styl ,向里面加代码:
// 主页文章添加阴影效果.post { margin-top: 0px; margin-bottom: 60px; padding: 25px; -webkit-box-shadow: 0 0 5px rgba(202, 203, 203, .5); -moz-box-shadow: 0 0 5px rgba(202, 203, 204, .5);}修改themes/*/_config.yml,把 false 改为 true:
# Back to top in sidebarb2t: true# Scroll percent label in b2t buttonscrollpercent: true在终端窗口下,定位到 Hexo 站点目录下,新建:
$ cd <站点目录>$ hexo new page categories注册,复制广告代码
部署到网站。
2.1. 新建 theme/*/layout/_custom/google_ad.swig,将 AdSense 上的代码粘贴进去
2.2. 头部。在 theme/*/layout/_custom/head.swig 中也粘贴一份
2.3. 每篇博客。在 theme/*/layout/post.swig 里中在希望看到的地方加上:
{% include '_custom/google_ad.swig' %}例如:在 <div id="posts" class="posts-expand"> </div> 中间插入,总代码如下:
{% block content %} <div id="posts" class="posts-expand"> {{ post_template.render(page) }} {% include '_custom/google_ad.swig' %} </div>{% endblock %}等待审核通过。如果失败,可再次申请。
首先,安装npm包:
npm install --save hexo-helper-live2d然后在hexo的配置文件_config.yml中添加如下配置,详细配置可以参考文档:
live2d:
  enable: true
  scriptFrom: local
  pluginRootPath: live2dw/
  pluginJsPath: lib/
  pluginModelPath: assets/
  tagMode: false
  debug: false
  model:
    use: live2d-widget-model-shizuku
  display:
    position: right
    width: 150
    height: 300
  mobile:
show: true然后下载模型,模型名称可以到这里参考,一些模型的预览可以在这里。
npm install live2d-widget-model-shizuku所有模型列表如下:
live2d-widget-model-chitoselive2d-widget-model-epsilon2_1live2d-widget-model-gflive2d-widget-model-haru/01 (use npm install --save live2d-widget-model-haru)live2d-widget-model-haru/02 (use npm install --save live2d-widget-model-haru)live2d-widget-model-harutolive2d-widget-model-hibikilive2d-widget-model-hijikilive2d-widget-model-izumilive2d-widget-model-koharulive2d-widget-model-mikulive2d-widget-model-ni-jlive2d-widget-model-nicolive2d-widget-model-nietzschelive2d-widget-model-nipsilonlive2d-widget-model-nitolive2d-widget-model-shizukulive2d-widget-model-tororolive2d-widget-model-tsumikilive2d-widget-model-unitychanlive2d-widget-model-wankolive2d-widget-model-z16下载完之后,在Hexo根目录中新建文件夹live2d_models,然后在node_modules文件夹中找到刚刚下载的live2d模型,将其复制到live2d_models中,然后编辑配置文件中的model.use项,将其修改为live2d_models文件夹中的模型文件夹名称。
复制你喜欢的模型名字:
Epsilon2.1

Gantzert_Felixander

haru

miku

ni-j

nico

nietzche

nipsilon

nito

shizuku

tsumiki

wanko

z16

hibiki

koharu

haruto

Unitychan

tororo

hijiki

以下插件(评论系统、数据统计与分析、内容分享服务、搜索服务)各选一个即可。
| 推荐指数 | 优点 | 缺点 | |
|---|---|---|---|
| Valine | 4 | 每天30000条评论,10GB的储存 | 作者评论无标识 |
| 来必力/livere | 4 | 多种账号登录 | 评论无法导出 |
| 畅言 | 3 | 美观 | 必须备案域名 |
| gitment | 3 | 简洁 | 只能登陆github评论 |
| Disqus | 1 | 需要翻*墙 |
1.1. 获取APP ID 和 APP Key
请先登录或注册 LeanCloud, 进入控制台后点击左下角创建应用,
进入刚刚创建的应用,选择左下角的设置>应用Key,然后就能看到你的APP ID和APP Key了。
1.2. 填写APP ID 和 APP Key到主题配置文件_config.yml
1.3. 运行hexo g&&hexo d推送到博客。
2.1. 登陆 来必力 获取你的 LiveRe UID。
2.2. 填写LiveRe UID到主题配置文件_config.yml
3.1.获取APP ID 和 APP Key
请先登录或注册 畅言, 点击“立即免费获取畅言”,
新建站点,点击管理,点击评论插件>评论管理,
点击后台总览,然后就能看到你的APP ID和APP Key了。
3.2. 填写APP ID 和 APP Key到主题配置文件_config.yml
3.3. 运行hexo g&&hexo d推送到博客。
(如果博客搭建再码云上不能运行,个人没有解决)
4.1. 安装插件:
npm i --save gitment
4.2. 申请应用
在New OAuth App为你的博客应用一个密钥:
Application name:随便写Homepage URL:这个也可以随意写,就写你的博客地址就行Application description:描述,也可以随意写Authorization callback URL:这个必须写你的博客地址4.3. 配置
编辑主题配置文件themes/*/_config.yml:
# Gitment# Introduction: https://imsun.net/posts/gitment-introduction/gitment: enable: true mint: true # RECOMMEND, A mint on Gitment, to support count, language and proxy_gateway count: true # Show comments count in post meta area lazy: false # Comments lazy loading with a button cleanly: false # Hide 'Powered by ...' on footer, and more language: # Force language, or auto switch by theme github_user: {you github user id} github_repo: 公开的git仓库,评论会作为那个项目的issue client_id: {刚才申请的ClientID} client_secret: {刚才申请的Client Secret} proxy_gateway: # Address of api proxy, See: https://github.com/aimingoo/intersect redirect_protocol: # Protocol of redirect_uri with force_redirect_pro编辑 主题配置文件themes/*/_config.yml, 将 disqus 下的 enable 设定为 true,同时提供您的 shortname。count 用于指定是否显示评论数量。
disqus: enable: false shortname: count: true| 推荐指数 | 优点 | 缺点 | |
|---|---|---|---|
| 不蒜子 | 4 | 可直接将访问次数显示在您在网页上(也可不显示) | 只计数 |
| 百度统计 | 3 | 收录慢 |
编辑 主题配置文件 themes/*/_config.yml中的busuanzi_count的配置项即可。
enable: true时,代表开启全局开关。site_uv(本站访客数)、site_pv(本站访客数)、page_pv(本文总阅读量)的值均为false时,不蒜子仅作记录而不会在页面上显示。注意:
不蒜子官方因七牛强制过期原有的『dn-lbstatics.qbox.me』域名(预计2018年10月初),与客服沟通数次无果,即使我提出为此付费也不行,只能更换域名到『busuanzi.ibruce.info』!解决办法:
找到主题调用不蒜子的swig文件。一般在”\themes*\layout_third-party\analytics\busuanzi-counter.swig”
更改域名
把原有的:<script async src="//dn-lbstatics.qbox.me/busuanzi/2.3/busuanzi.pure.mini.js"></script>域名改一下即可:<script async src="//busuanzi.ibruce.info/busuanzi/2.3/busuanzi.pure.mini.js"></script>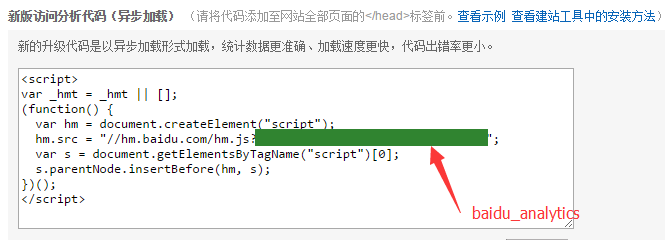
themes/*/_config.yml,修改字段 google_analytics,值设置成你的统计脚本 id。| 推荐指数 | 优点 | 缺点 | |
|---|---|---|---|
| 百度分享 | 4 | 稳定 | 不太美观 |
| need-more-share2 | 4 | 美观 | 更新不及时(比如微信分享API) |
编辑 主题配置文件,添加/修改字段 baidushare,值为 true即可。
# 百度分享服务baidushare: true编辑 主题配置文件,添加/修改字段 needmoreshare2,值为 true即可。
needmoreshare2: enable: true| 推荐指数 | 优点 | 缺点 | |
|---|---|---|---|
| Local Search | 4 | 配置方便 | |
| Swiftype | 2 | 需注册 | |
| Algolia | 2 | 需注册 |
添加百度/谷歌/本地 自定义站点内容搜索
安装 hexo-generator-searchdb,在站点的根目录下执行以下命令:
$ npm install hexo-generator-searchdb --save编辑 站点配置文件,新增以下内容到任意位置:
search: path: search.xml field: post format: html limit: 10000编辑 主题配置文件,启用本地搜索功能:
# Local searchlocal_search: enable: trueError: watch /path/to/hexo/theme/ EMPERM
因为目前在Windows Subsystem for Linux中,有些内容更改时,还不能实时更新到hexo服务器。所以需要重新编译,再启动服务器:$ hexo generate
$ hexo server -s
#### Template render error有时运行命令`$ hexo generate` 返回一个错误:FATAL Something’s wrong. Maybe you can find the solution here: http://hexo.io/docs/troubleshooting.html
Template render error: (unknown path)
这意味着有些认不出来单词在你的文件,并且很可能在你的新博文,或者配置文件`_config.yml`中,比如缩进错误:错误例子:plugins:
hexo-generator-feed
hexo-generator-sitemap
```
标签:http arch 文章 oca city 国内 boolean google fatal
原文地址:https://www.cnblogs.com/pythonywy/p/11402682.html