标签:数据交互 listen 区别 接口测试 username nodejs host clone user
简单来说,就是将前端项目和后端项目进行独立部署,互相之间通过token进行数据交互。
动静分离,是将动态页面编译成静态,然后缓存到CDN上面。
前后端分离,前端项目被编译成HTML,但是JS会通过Ajax获取数据,所以前端页面内容依然是动态的。
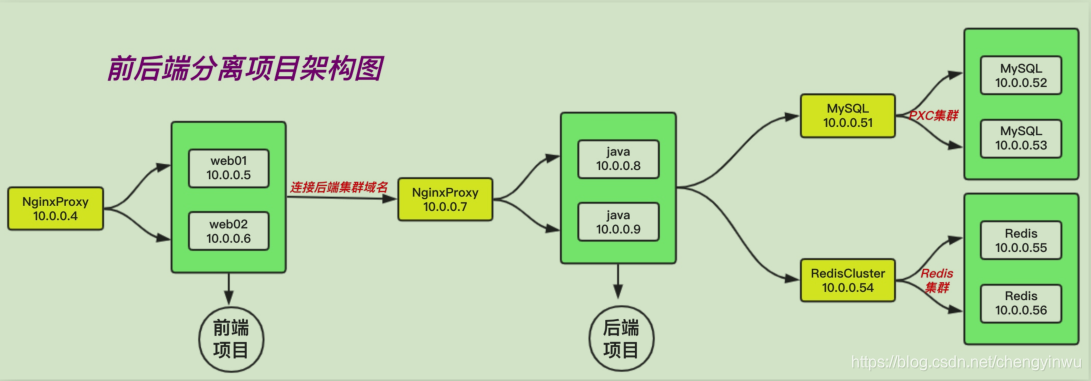
| 服务 | 台数 | 地址 | 功能 |
|---|---|---|---|
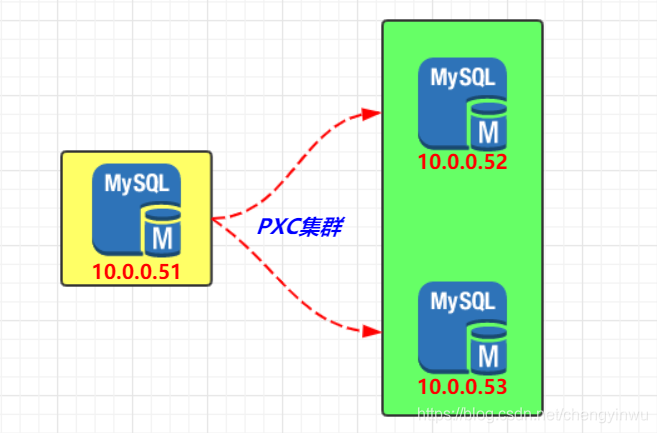
| MySQL | 3台 | 10.0.0.51,10.0.0.52,10.0.0.53 | 配置pxc集群,保证高度一致性 |
| Redis | 3台 | 10.0.0.54,10.0.0.55,10.0.0.56 | 配置RedisCluster集群 |
| 后端 | 3台 | 10.0.0.7,10.0.0.8,10.0.0.9 | Nginx负载+Java动态环境 |
| 前端 | 3台 | 10.0.0.4,10.0.0.5,10.0.0.6 | Nginx负载+Nginx静态环境 |
PS:
1.先导入数据库;
2.后端所有节点都需要连接MySQL、Redis
3.前端项目需要连接后端项目
[root@db01 ~]# yum install mariadb mariadb-server -y
[root@db01 ~]# systemctl start mariadb
[root@db01 ~]# systemctl enable mariadb
[root@db01 ~]# mysqladmin password 123456
[root@db01 ~]# mysql -uroot -p123456
MariaDB [(none)]> grant all privileges on *.* to 'all'@'%' identified by '123456';
MariaDB [(none)]> flush privileges;
MariaDB [(none)]> create database renren_fast charset utf8;
[root@db01 ~]# systemctl restart mariadb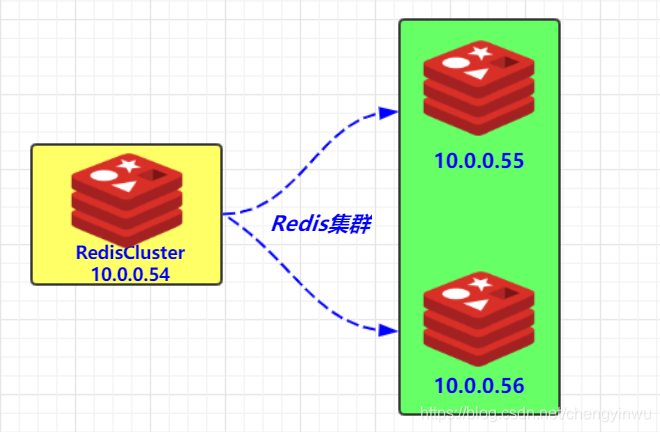
[root@redis ~]# yum install redis-server -y
[root@redis ~]# vim /etc/redis.conf +61
bind 127.0.0.1 172.16.1.52
[root@redis ~]# systemctl restart redis
[root@redis ~]# systemctl enable redis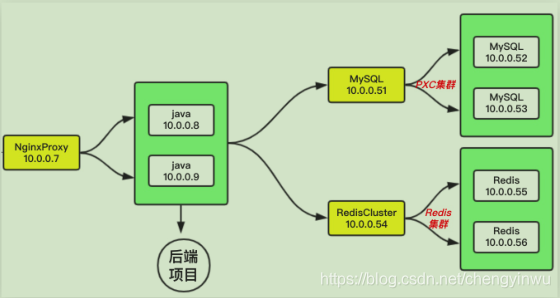
[root@web01 ~]# git clone https://gitee.com/renrenio/renren-fast.git
[root@web01 ~]# cd renren-fast/1.导入数据至数据库
[root@web01 renren-fast]# mysql -h10.0.0.51 -uall -p123456 -B renren_fast < db/mysql.sql
2.修改连接数据库的配置
[root@web01 renren-fast]# vim src/main/resources/application-dev.yml
spring:
datasource:
type: com.alibaba.druid.pool.DruidDataSource
druid:
driver-class-name: com.mysql.cj.jdbc.Driver
url: jdbc:mysql://10.0.0.51:3306/renren_fast?
useUnicode=true&characterEncoding=UTF-8&serverTimezone=As
ia/Shanghai
username: all
password: 1234561.编译项目
[root@web01 renren-fast]# yum install java maven -y
[root@web01 renren-fast]# mvn install -Dmaven.test.skip=true
2.拷贝jar包至其他机器,然后通过java命令运行
[root@web01 renren-fast]# scp target/renren-fast.jar root@172.16.1.8:~
[root@web01 renren-fast]# scp target/renren-fast.jar root@172.16.1.9:~
[root@web02 ~]# yum install java -y
[root@web02 ~]# java -jar ~/renren-fast.jar &
[root@web03 ~]# yum install java -y
[root@web03 ~]# java -jar ~/renren-fast.jar &
3.配置Nginx负载均衡,调度到后端多台Java项目
[root@web01 conf.d]# cat fast.cheng.com.conf
upstream fast {
server 172.16.1.8:8080;
server 172.16.1.9:8080;
}
server {
listen 80;
server_name fast.cheng.com;
location / {
proxy_pass http://fast;
proxy_set_header Host $http_host;
}
}
[root@web01 conf.d]# nginx -t
[root@web01 conf.d]# systemctl restart nginx
4.域名解析:10.0.0.7 fast.cheng.com
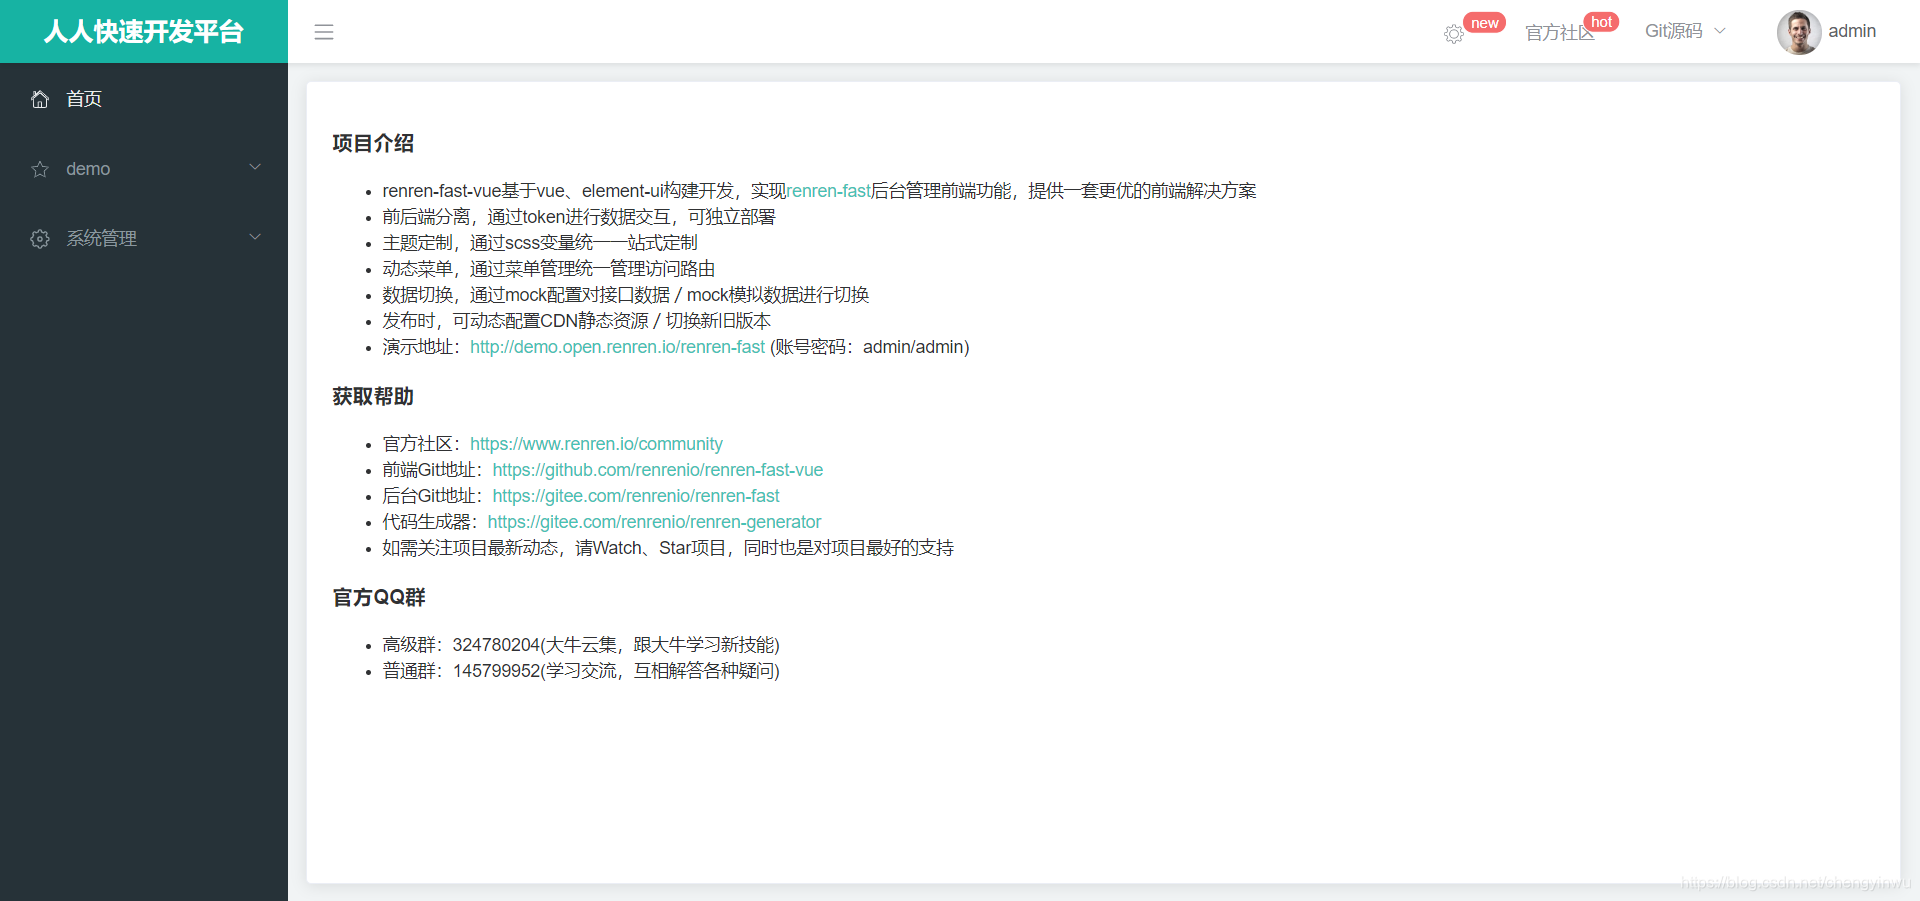
renren-fast-vue基于vue、element-ui构建开发,实现renren-fast后台管理前端功能,提供一套更优的前端解决方案。前端集群架构图如下:
[root@lb01 ~]# git clone https://gitee.com/renrenio/renren-fast-vue.git
[root@lb01 ~]# cd renren-fast-vue/[root@lb01 renren-fast-vue]# curl --silent --location https://rpm.nodesource.com/setup_8.x | bash -
[root@lb01 renren-fast-vue]# yum install nodejs npm -y --skip-broken
[root@lb01 renren-fast-vue]# npm install -g cnpm --registry=https://registry.npm.taobao.org
[root@lb01 renren-fast-vue]# cnpm install[root@lb01 renren-fast-vue]# vim static/config/index-prod.js
/**
* 生产环境
*/
;(function () {
window.SITE_CONFIG = {};
// api接口请求地址
window.SITE_CONFIG['baseUrl'] = 'http://fast.cheng.com/renren-fast';
...............[root@lb01 renren-fast-vue]# cnpm rebuild node-sass
[root@lb01 renren-fast-vue]# cnpm run build
拷贝到各个节点
[root@lb01 renren-fast-vue]# mkdir /code/renren-fast -p
[root@lb01 renren-fast-vue]# cp -rp dist/* /code/renren-fast/
[root@lb01 ~]# scp -rp /code root@10.0.0.6:/
[root@lb01 ~]# scp -rp /code root@10.0.0.5:/[root@lb01 conf.d]# yum install nginx -y
[root@lb01 conf.d]# cat renren.cheng.com.conf
server {
listen 80;
server_name renren.cheng.com;
root /code/renren-fast;
location / {
index index.html;
}
}
[root@lb01 conf.d]# nginx -t
[root@lb01 conf.d]# systemctl restart nginx
[root@lb02 conf.d]# cat renren.cheng.com.conf
server {
listen 80;
server_name renren.cheng.com;
root /code/renren-fast;
location / {
index index.html;
}
}
[root@lb02 conf.d]# nginx -t
[root@lb02 conf.d]# systemctl restart nginx
[root@lb03 ~]# yum install nginx -y
[root@lb03 conf.d]# cat proxy_renren.cheng.com.conf
upstream renren {
    server 10.0.0.5:80;
    server 10.0.0.6:80;
}

server {
    listen 80;
    server_name renren.cheng.com;

    location / {
    proxy_pass http://renren;
    proxy_set_header Host $http_host;
    }
}
[root@lb03 conf.d]# nginx -t
[root@lb03 conf.d]# systemctl restart nginx

域名解析:10.0.0.4  renren.cheng.com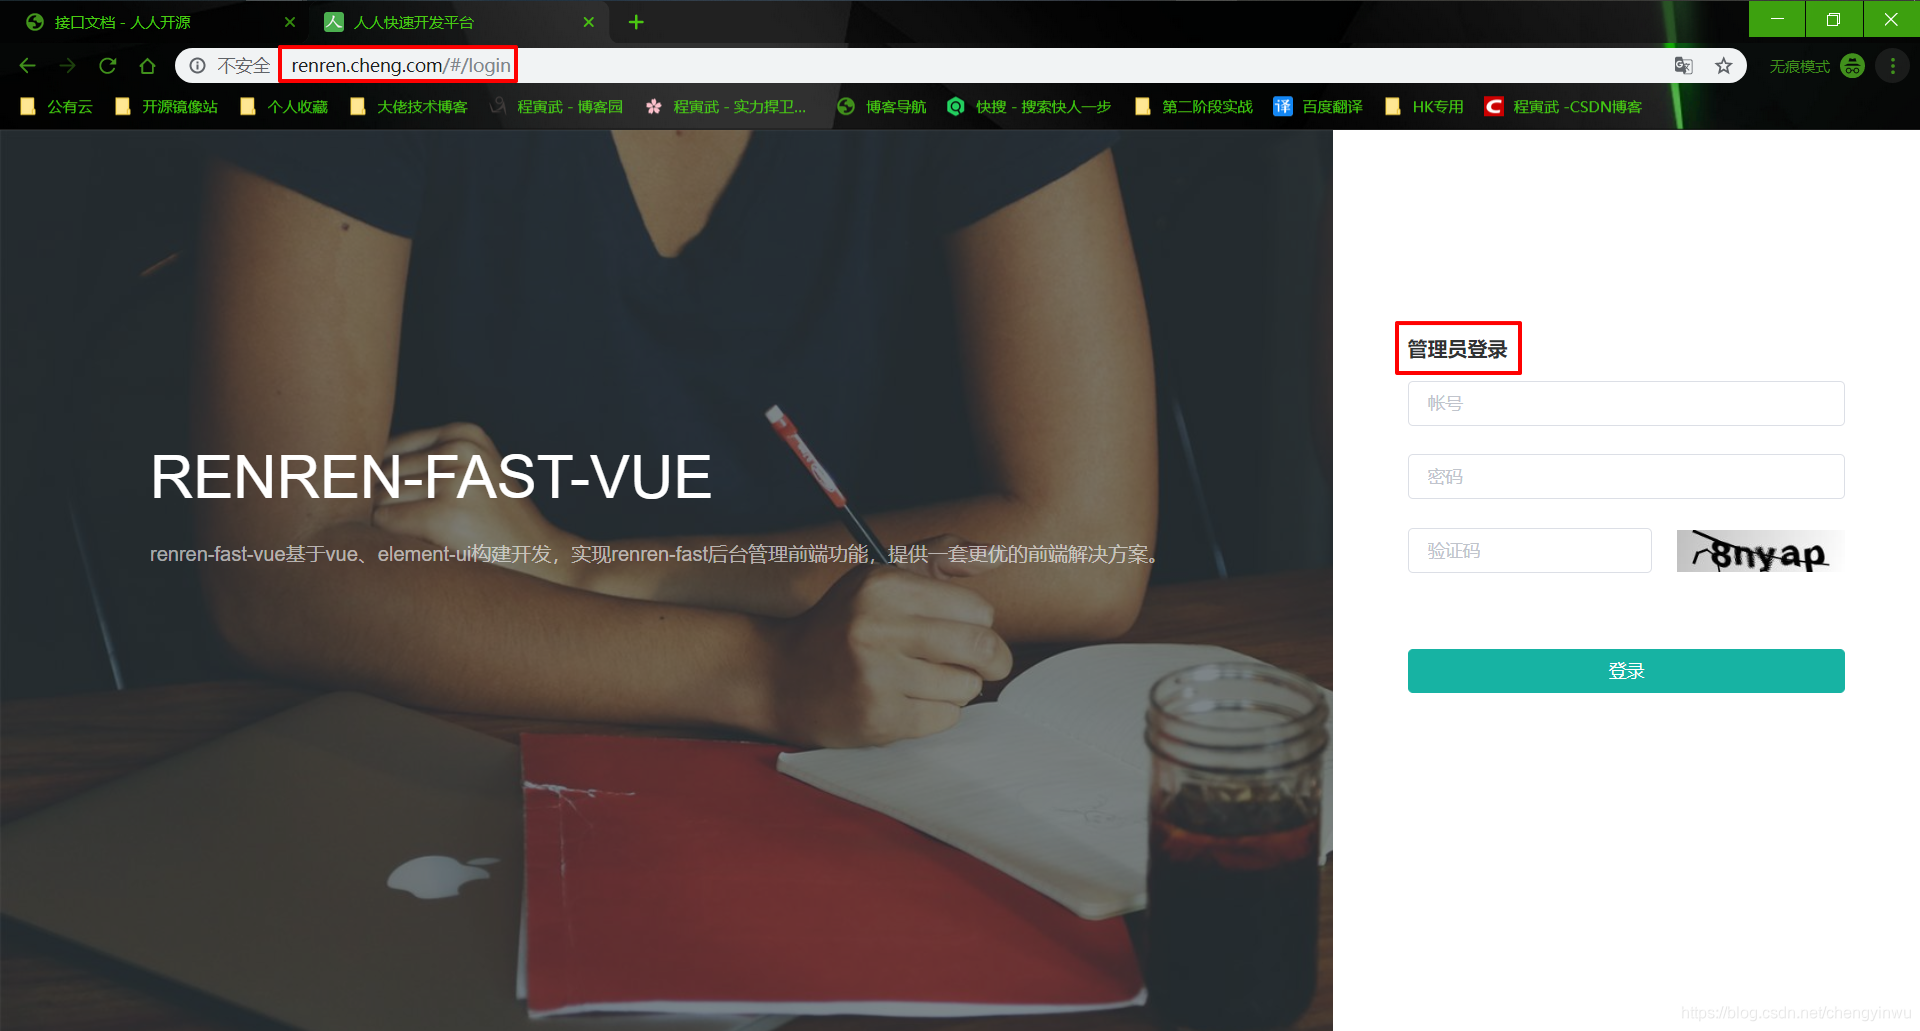
标签:数据交互 listen 区别 接口测试 username nodejs host clone user
原文地址:https://www.cnblogs.com/yinwu/p/11620432.html