标签:def ide user spl tco efault epo launcher image
uniapp的离线打包太麻烦,留个记录方便以后使用。uniapp离线打包步骤:
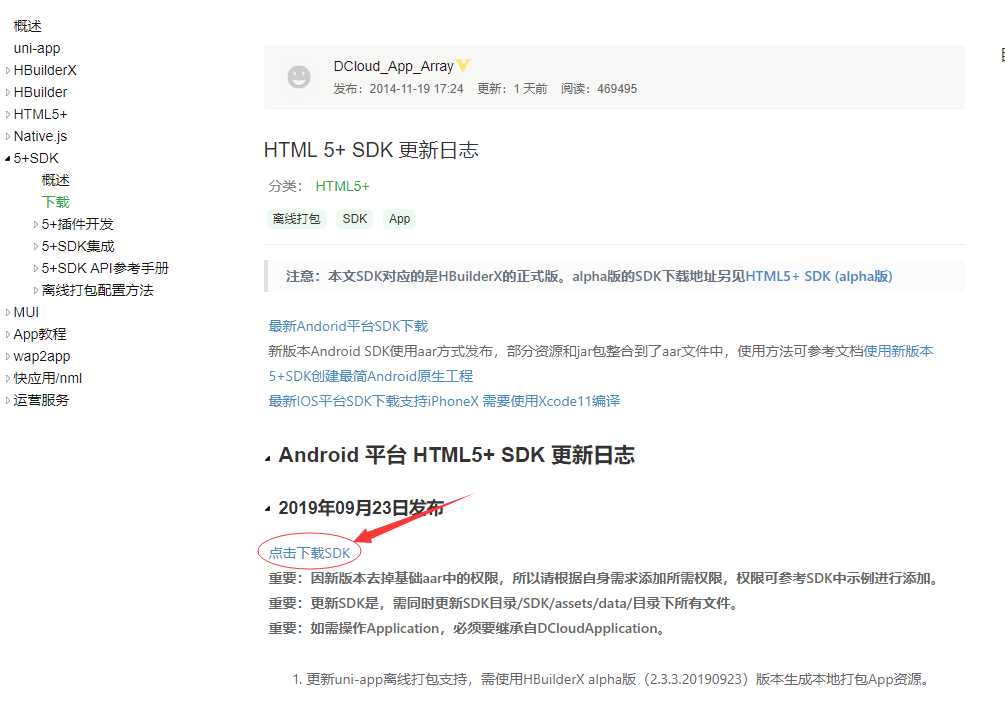
1. 下载uniapp的 HTML 5+ SDK
下载地址 https://ask.dcloud.net.cn/docs/#//ask.dcloud.net.cn/article/103 。网页打开后点如下图片圈内的链接下载SDK
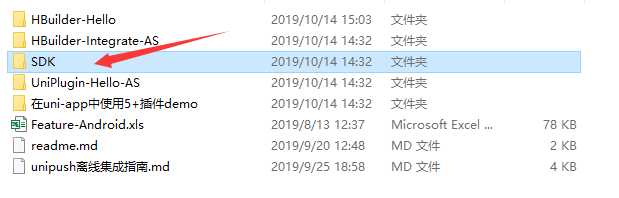
下载解压之后的目录如下:注意这个SDK是第2步中新建Android项目需要使用到的

2. 在Android studio中新建Android项目
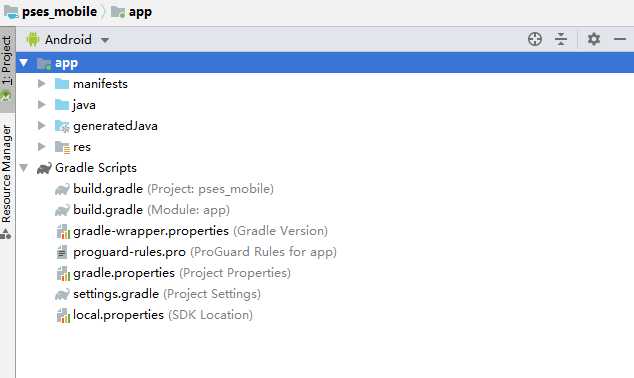
删除原生工程中Java目录下系统默认创建的源代码

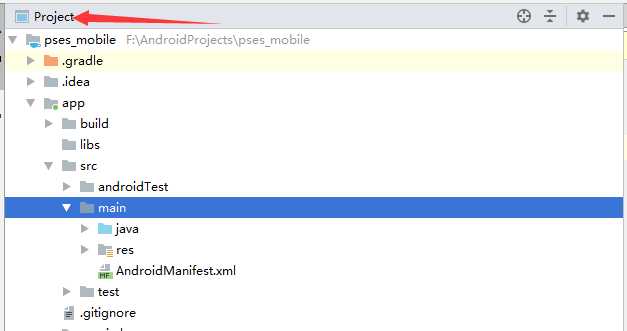
将试图切换至project,如下图:
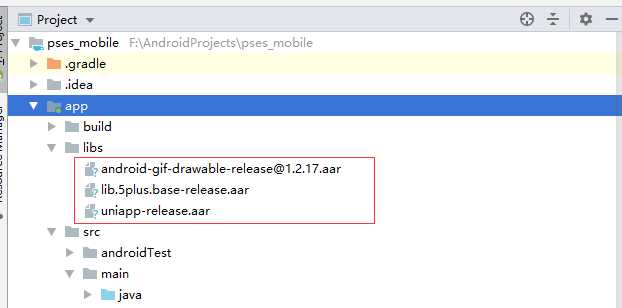
3. 将SDK目录中如下图所示的三个SDK 拷贝到新建的项目的libs目录下,如图所示
此时需要在下图所示的文件中添加配置,如图所示
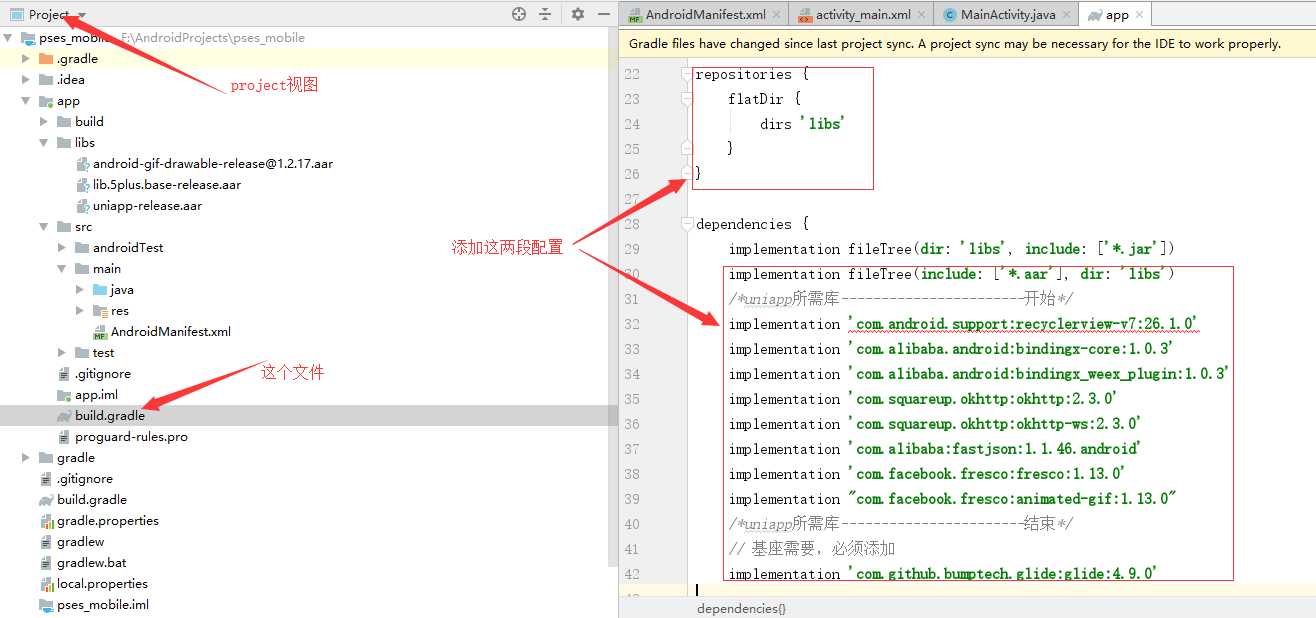
还需要在上面这个文件中添加入下图所示的配置
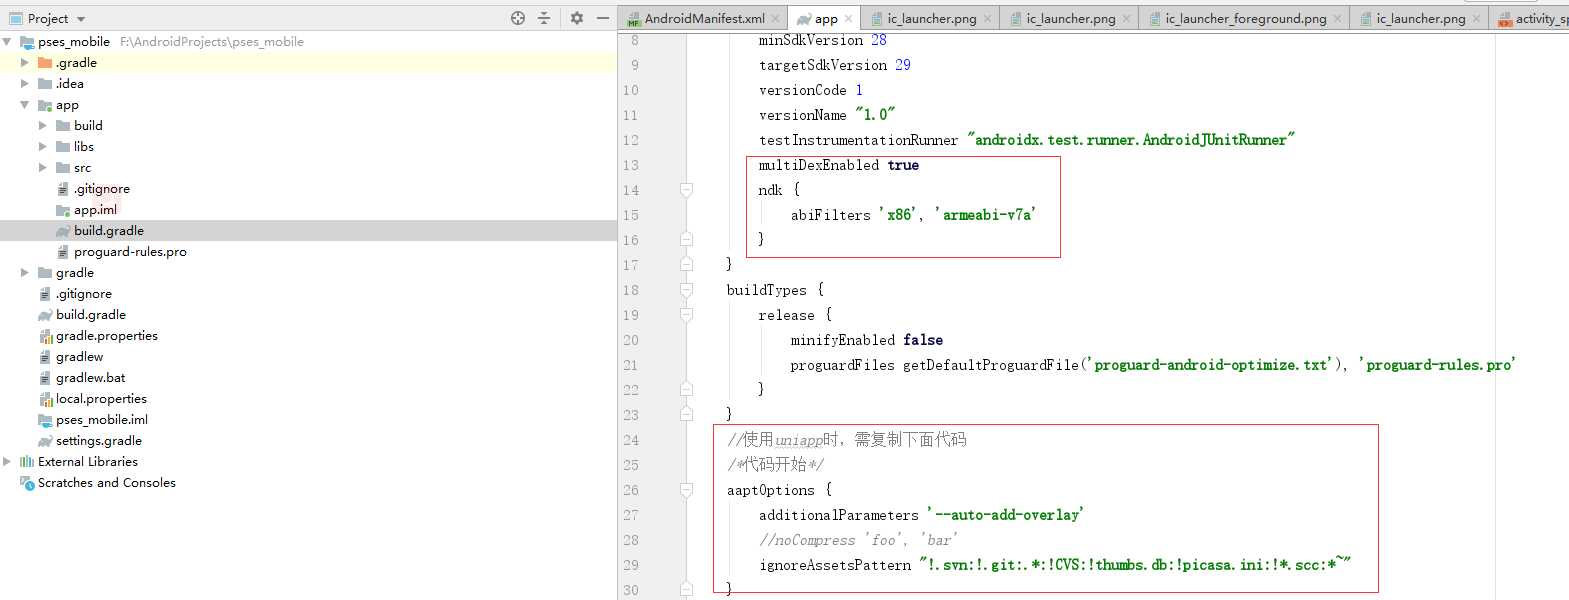
如下标黄的代码就是需要添加的
apply plugin: ‘com.android.application‘

android {
    compileSdkVersion 29
    buildToolsVersion "29.0.2"
    defaultConfig {
        applicationId "com.gzrj.pses_mobile"
        minSdkVersion 28
        targetSdkVersion 29
        versionCode 1
        versionName "1.0"
        testInstrumentationRunner "androidx.test.runner.AndroidJUnitRunner"
        multiDexEnabled true
        ndk {
            abiFilters ‘x86‘, ‘armeabi-v7a‘
        }
    }
    buildTypes {
        release {
            minifyEnabled false
            proguardFiles getDefaultProguardFile(‘proguard-android-optimize.txt‘), ‘proguard-rules.pro‘
        }
    }
    //使用uniapp时,需复制下面代码
    /*代码开始*/
    aaptOptions {
        additionalParameters ‘--auto-add-overlay‘
        //noCompress ‘foo‘, ‘bar‘
        ignoreAssetsPattern "!.svn:!.git:.*:!CVS:!thumbs.db:!picasa.ini:!*.scc:*~"
    }
    /*代码结束*/
}
repositories {
    flatDir {
        dirs ‘libs‘
    }
}
dependencies {
    implementation fileTree(dir: ‘libs‘, include: [‘*.jar‘])
    implementation fileTree(include: [‘*.aar‘], dir: ‘libs‘)
    implementation ‘androidx.appcompat:appcompat:1.1.0‘
    implementation ‘androidx.constraintlayout:constraintlayout:1.1.3‘
    testImplementation ‘junit:junit:4.12‘
    androidTestImplementation ‘androidx.test:runner:1.2.0‘
    androidTestImplementation ‘androidx.test.espresso:espresso-core:3.2.0‘
    /*uniapp所需库-----------------------开始*/
    implementation ‘com.android.support:recyclerview-v7:26.1.0‘
    implementation ‘com.alibaba.android:bindingx-core:1.0.3‘
    implementation ‘com.alibaba.android:bindingx_weex_plugin:1.0.3‘
    implementation ‘com.squareup.okhttp:okhttp:2.3.0‘
    implementation ‘com.squareup.okhttp:okhttp-ws:2.3.0‘
    implementation ‘com.alibaba:fastjson:1.1.46.android‘
    implementation ‘com.facebook.fresco:fresco:0.12.0‘
/*uniapp所需库-----------------------结束*/
// 基座需要,必须添加
    implementation ‘com.github.bumptech.glide:glide:4.9.0‘
}
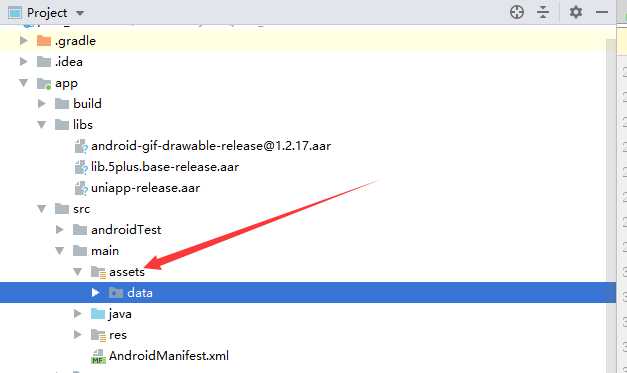
4. 在app => src => main 文件夹下新建 assets文件夹,将下载的SDK中的assets文件夹下的data拷贝到 assets文件夹下

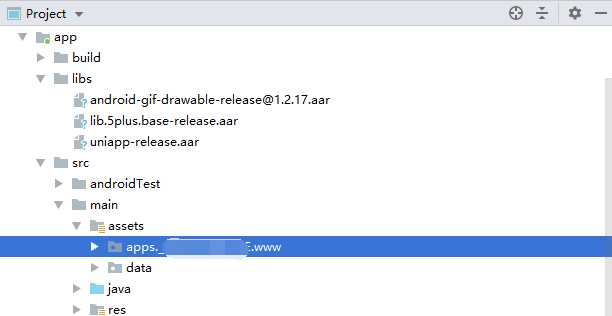
5.在assets目录下新建apps => [appid] => www文件目录。此处的appid是uniapp生成的appid(可以在uniapp的 配置中生成)
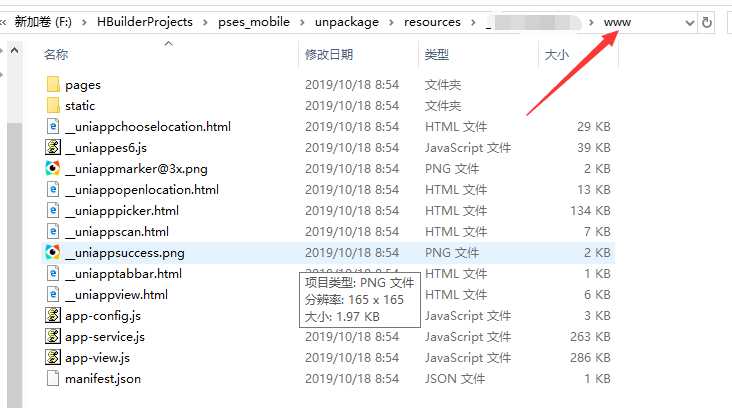
6.将在HbuilderX中开发的项目进行离线打包,并将打包好的www文件夹下资源拷贝到上一步新建的文件夹
7.将data下的dcloud_control.xml中的appid改为第5步中一样的id
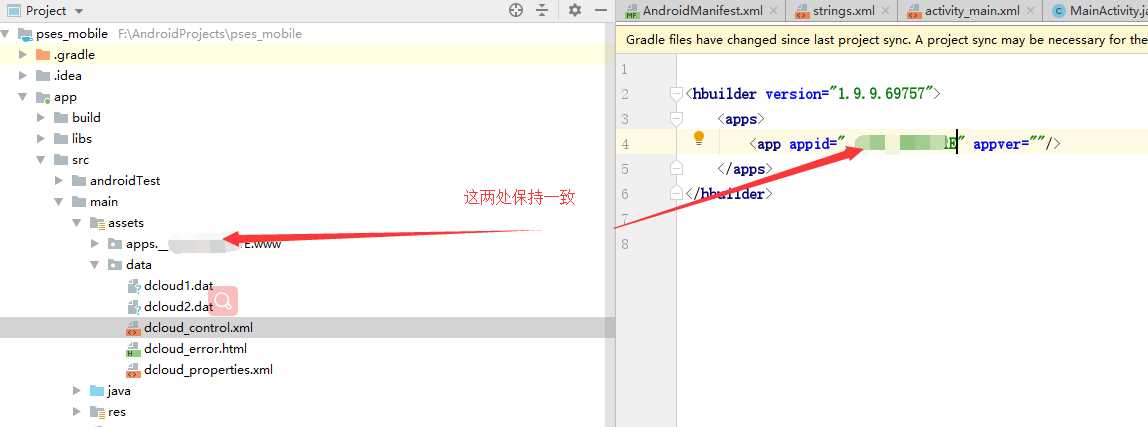
8.将新建的项目AndroidManifest.xml中的application节点替换成如下内容
<application
        android:name="io.dcloud.application.DCloudApplication"
        android:allowClearUserData="true"
        android:icon="@mipmap/ic_launcher"
        android:label="@string/app_name"
        android:largeHeap="true"
        android:roundIcon="@mipmap/ic_launcher_round">
        <activity android:name=".SplashActivity">

        </activity>
        <activity
            android:name="io.dcloud.PandoraEntry"
            android:configChanges="orientation|keyboardHidden|keyboard|navigation"
            android:hardwareAccelerated="true"
            android:label="@string/app_name"
            android:launchMode="singleTask"
            android:screenOrientation="user"
            android:theme="@style/TranslucentTheme"
            android:windowSoftInputMode="adjustResize">
            <intent-filter>
                <action android:name="android.intent.action.MAIN" />

                <category android:name="android.intent.category.LAUNCHER" />
            </intent-filter>
        </activity>
    </application>
9.运行到android模拟器可以看到自己在uniapp开发的项目
标签:def ide user spl tco efault epo launcher image
原文地址:https://www.cnblogs.com/hebing0415/p/11676657.html