标签:www err form 工具 inter reserve idt eve physical
1、自建yum仓库,分别为网络源和本地源
在centos7安装yum源:
(1)本地自建yum仓库:首先需要启动神奇目录ls /misc/cd,用来挂载光盘,
1、 安装autofs软件,并启动。
2、 [root@centos7-2 ~]# yum install autofs 安装autofs
3、 [root@centos7-2 ~]# systemctl start autofs 启动autofs
4、 [root@centos7-2 ~]# systemctl enable autofs 下次开机启动autofs
5、 [root@centos7-2 yum.repos.d]# rm -rf repo.* 删除yum源多余的文件
[root@centos7-2 yum.repos.d]#vim development.repo  创建Yum仓库

[development]
baseurl=file:///misc/cd
#gpgcheck=0
gpgcheck=file:///misc/cd/RPM-GPG-KEY-CenstOS-7
enable=1
6、yum repolist 加载当前的yum源仓库
(2)光盘挂载到httpd服务上的yum源仓库
1、[root@centos7-2 yum.repos.d]#mkdir -pv /var/www/html/centos/6/os/x86_64/ 新建一个类似光盘的路径目录
2、[root@centos7-2 yum.repos.d]#yum install httpd -y 安装httpd服务
3、[root@centos7-2 yum.repos.d]#systemctl start httpd 启动httpd服务
4、[root@centos7-2 yum.repos.d]#mount /dev/sr0 /var/www/html/centos/6/os/x86_64 将本地光盘挂载到httpd网上
[root@centos7-2 yum.repos.d]#vim   base.repo  开始创建yum仓库
[base]
baseurl=http://192.168.34.101/CentOS/$releasever/os/$basearch
gpgcheck= 0
enable=1
5、 yum repolist 加载当前的Yum源仓库
(3) 创建网络yum源仓库(ELPL源):
1、[root@centos7-2 yum.repos.d]#cd /etc/yum.repos.d/
直接在阿里官网找到elpl源仓库,将repodata上级所有目录都复制出来,放到baseurl指定的目录即可:
[root@centos7-2 yum.repos.d]#vim elpl.repo

[elpl]
baseurl= https://mirrors.aliyun.com/epel/$releasever/x86_64
gpgcheck=0
enable=1
2、yum repolist 加载当前的yum源仓库
2、编译安装http2.4,实现可以正常访问,并将编译步骤和结果提交。
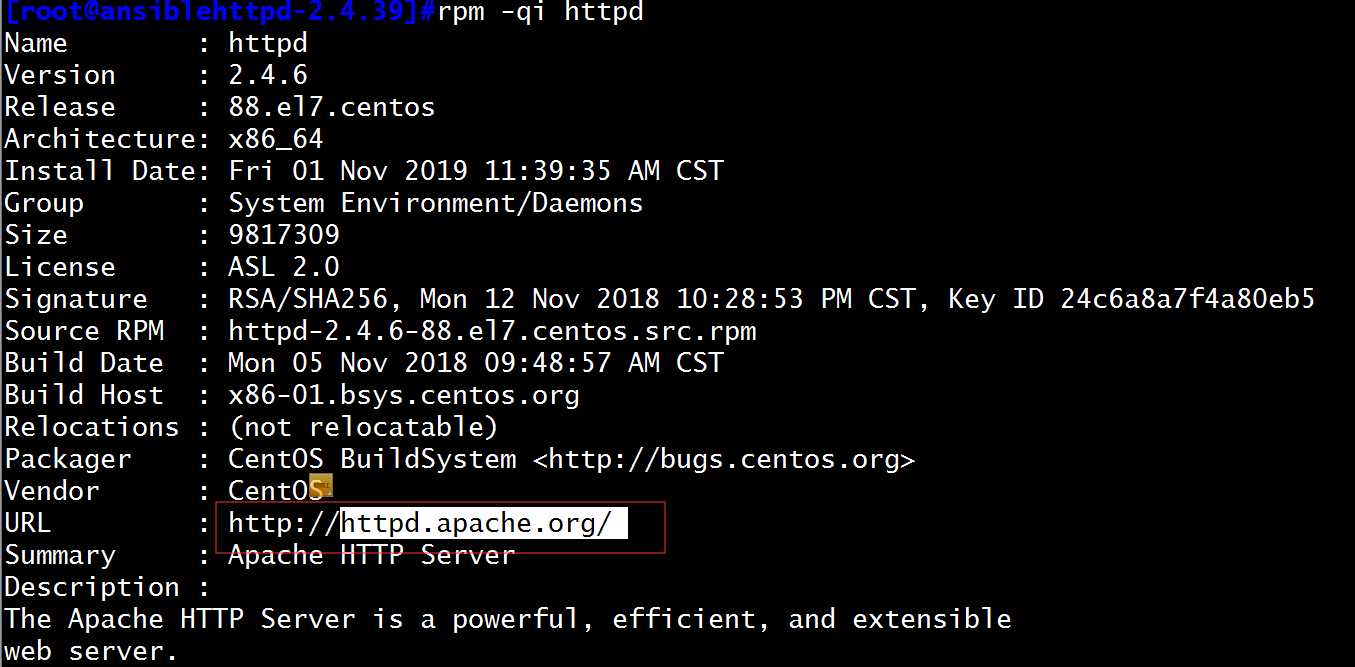
在官网上下载httpd源码包http://httpd.apache.org,也可以在linux中输入rpm -qi httpd查看到当前下载源码httpd的网址
下载到linux的data目录下,然后进行解压:
|
1
2
3
|
[root@ansibledata]#rz[root@ansibledata]#tar xf httpd-2.4.39 |
注意:一定要在解压后的httpd目录下安装,下面的编译需要用到httdp目录下的脚本,所以我用cd httpd把目录切换到httpd中去进入cd httpd-2.4.27/
查询 cat INSTALL,里边有简单的安装过程,和一些例子
查询 cat README,(what is it ?)里边有一些Apache 的功能介绍
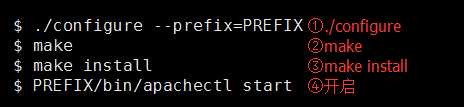
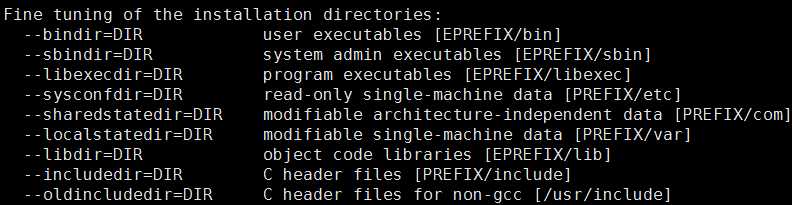
(1)./configure --help 查询这个脚本的用法,
--prefix=PREFIX 指定默认安装总目录, 默认为/usr/local/
--sysconfdir=/PATH 配置文件安装位置,默认就安装到指定安装总目录的下面
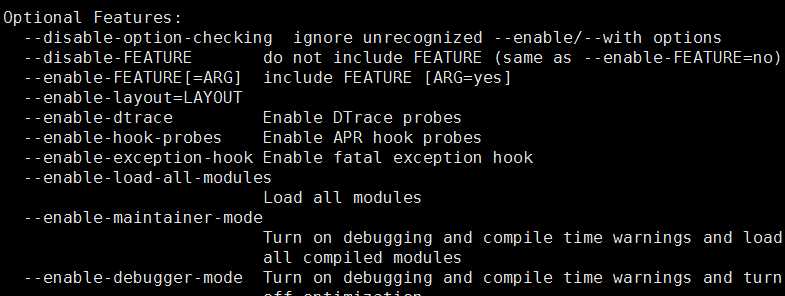
Optional Features: 需要什么功能
--disable-FEATURE 关闭某些功能
--enable-FEATURE 开启某些功能
下面我们就来执行这个脚本,添加一些简单的设置
手工创建账号:
|
1
|
[root@ansiblehttpd-2.4.39]#useradd -r -u 80 -d /var/www -s /sbin/nologin httpd |
(1)首先安装development-tools包,因为没有C编译工具,缺少gcc,这时候,我们需要下一个包组development tools
yum -y groupinstall "Development Tools"
|
1
|
[root@ansiblehttpd-2.4.39]#yum groupinstall "development tools" |
(2)首次安装包,会有一些提示错误,第一次安装没有一些准备好的包,可以根据提示错误进行安装:
|
1
|
[root@ansiblehttpd-2.4.39]#./configure --prefix=/app/httpd --sysconfdir=/etc/httpd24 --enable-ssl --disable-status |
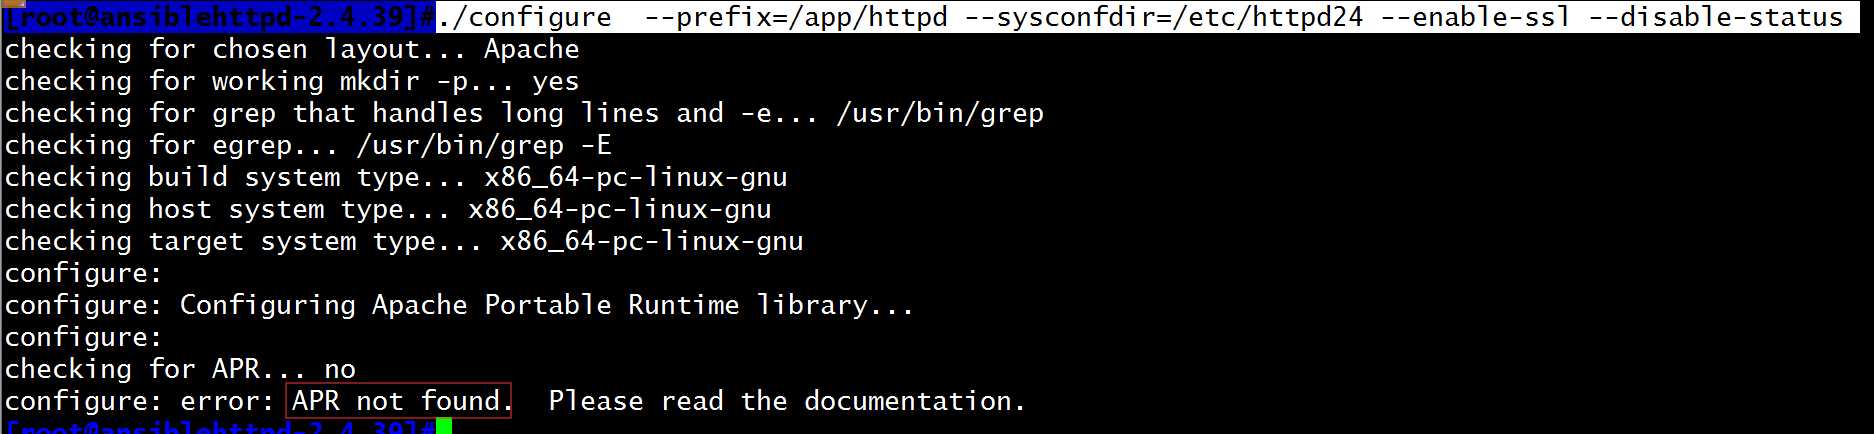
(3)我们只需按照提示的错误,把需要的都安装上去(直到没有提示错误)
先查询缺少的 yum search apr-devel(一般关于开发的都叫 devel)
再安装 yum -y install apr-devel
|
1
|
[root@ansiblehttpd-2.4.39]#yum install apr-devel |

(4)此时缺少apr-util包,按照提示错误来进行下一步安装:
|
1
|
[root@ansiblehttpd-2.4.39]#yum install apr-util-devel |
|
1
|
[root@ansiblehttpd-2.4.39]#./configure --prefix=/app/httpd --sysconfdir=/etc/httpd24 --enable-ssl --disable-status |
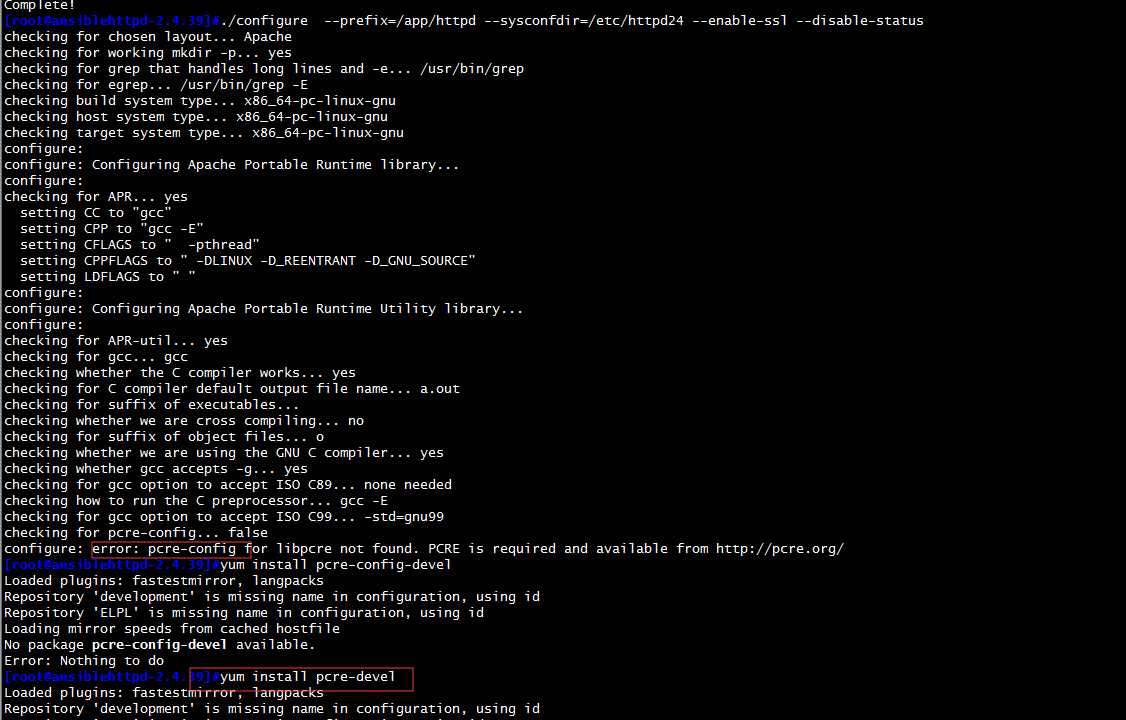
(5)根据提示错误继续往下安装,此时缺少pcre包,安装pcre-devel包
|
1
|
[root@ansiblehttpd-2.4.39]#yum install pcre-devel |
继续执行指定路径的包安装
|
1
|
[root@ansiblehttpd-2.4.39]#./configure --prefix=/app/httpd --sysconfdir=/etc/httpd24 --enable-ssl --disable-status |
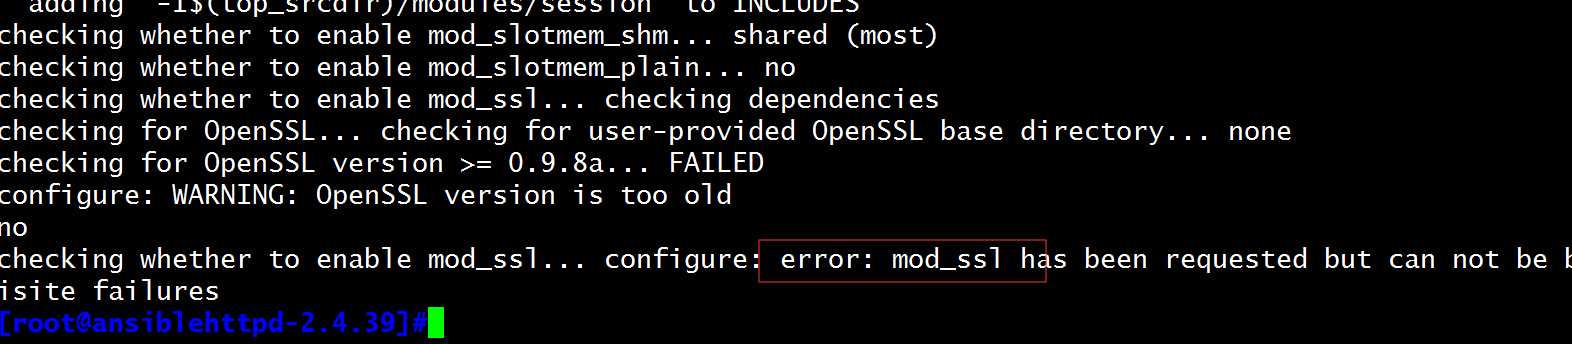
(6)根据提示的错误,安装openssl-devel包:
|
1
|
[root@ansiblehttpd-2.4.39]#yum install openssl-devel |
(7)再执行指定路径的包安装,此时就已经完成指定路径包的安装。
|
1
|
[root@ansiblehttpd-2.4.39]#./configure --prefix=/app/httpd --sysconfdir=/etc/httpd24 --enable-ssl --disable-status |
(8)configure脚本完全执行成功(多了一个Makefile)没有Makefile
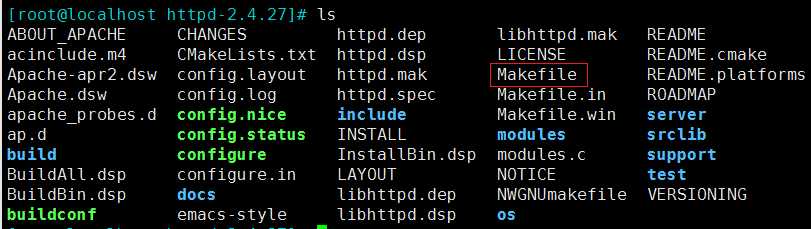
(1)进行make编译,make 编译后,多了很多.o .lo 文件 (二进制文件),在此之前的工作,任何用户都能做,并且都在httpd-2.4.27 这个目录下进行
|
1
|
[root@ansiblehttpd-2.4.39]#make |
(2)make install 安装到指定位置,只有root 能做,此时httpd的编译完成。
|
1
|
[root@ansiblehttpd]#make install |
(3)切换到/app/httpd/bin执行程序目录下,此时去执行服务启动,都必须是./apachectl start,不太方便,我们可以指定变量路径
|
1
2
3
4
5
|
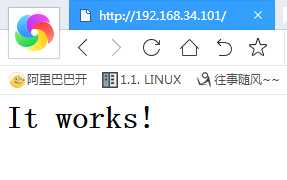
[root@ansiblehttpd]#cd /app/httpd/bin[root@ansiblebin]#pwd/app/httpd/bin[root@ansiblebin]#echo ‘PATH=/app/httpd/bin:$PATH‘ > /etc/profile.d/httpd.sh 定义一个/app/httpd/bin的配置文件路径[root@ansiblebin]#apachectl start 启动当前编译的httpd服务 |
此时在网上输入本机的IP地址就可以访问信息:
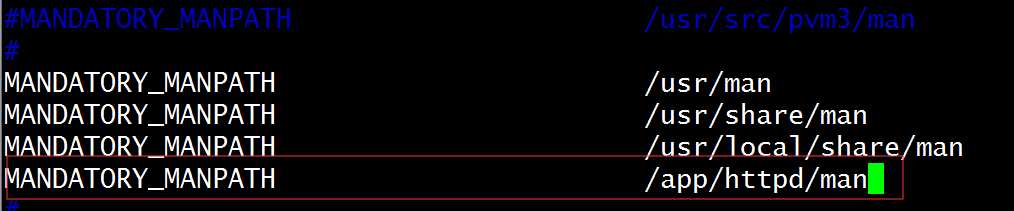
导入帮助手册man
vim /etc/man_db.conf
加入一行 MANDATORY_MANPATH /app/httpd/man
3、创建一个2G的文件系统,块大小为2048byte,预留1%可用空间,文件系统 ext4,卷标为TEST,要求此分区开机后自动挂载至/test目录,且默认有acl挂载选项
(1)先在/dev/sdb磁盘上创建一个2G的分区
[root@centos6~]#fdisk /dev/sdb
Device contains neither a valid DOS partition table, nor Sun, SGI or OSF disklabel
Building a new DOS disklabel with disk identifier 0xef64b475.
Changes will remain in memory only, until you decide to write them.
After that, of course, the previous content won‘t be recoverable.

Warning: invalid flag 0x0000 of partition table 4 will be corrected by w(rite)

WARNING: DOS-compatible mode is deprecated. It‘s strongly recommended to
         switch off the mode (command ‘c‘) and change display units to
         sectors (command ‘u‘).

Command (m for help): m
Command action
   a   toggle a bootable flag
   b   edit bsd disklabel
   c   toggle the dos compatibility flag
   d   delete a partition
   l   list known partition types
   m   print this menu
   n   add a new partition
   o   create a new empty DOS partition table
   p   print the partition table
   q   quit without saving changes
   s   create a new empty Sun disklabel
   t   change a partition‘s system id
   u   change display/entry units
   v   verify the partition table
   w   write table to disk and exit
   x   extra functionality (experts only)

Command (m for help): p

Disk /dev/sdb: 214.7 GB, 214748364800 bytes
255 heads, 63 sectors/track, 26108 cylinders
Units = cylinders of 16065 * 512 = 8225280 bytes
Sector size (logical/physical): 512 bytes / 512 bytes
I/O size (minimum/optimal): 512 bytes / 512 bytes
Disk identifier: 0xef64b475

   Device Boot      Start         End      Blocks   Id  System

Command (m for help): n
Command action
   e   extended
   p   primary partition (1-4)
p
Partition number (1-4): 1
First cylinder (1-26108, default 1): 1
Last cylinder, +cylinders or +size{K,M,G} (1-26108, default 26108): +2G

Command (m for help): w
The partition table has been altered!

Calling ioctl() to re-read partition table.
Syncing disks.
查看此时的/dev/sdb的分区大小是2G
[root@centos6~]#lsblk
NAME   MAJ:MIN RM  SIZE RO TYPE MOUNTPOINT
sr0     11:0    1  3.7G  0 rom
sda      8:0    0  200G  0 disk
├─sda1   8:1    0    1G  0 part /boot
├─sda2   8:2    0 97.7G  0 part /
├─sda3   8:3    0 48.8G  0 part /data
├─sda4   8:4    0    1K  0 part
└─sda5   8:5    0    2G  0 part [SWAP]
sdb      8:16   0  200G  0 disk
└─sdb1   8:17   0 15.7M  0 part
(2)指定磁盘空间及系统标记:块大小为2048byte,预留1%可用空间,文件系统 ext4,卷标为TEST
[root@centos6~]#mkfs.ext4 -b 2048 -L "TEST" -m 1 /dev/sdb1
mke2fs 1.41.12 (17-May-2010)
Filesystem label=TEST
OS type: Linux
Block size=2048 (log=1)
Fragment size=2048 (log=1)
Stride=0 blocks, Stripe width=0 blocks
131560 inodes, 1052240 blocks
10522 blocks (1.00%) reserved for the super user
First data block=0
Maximum filesystem blocks=538968064
65 block groups
16384 blocks per group, 16384 fragments per group
2024 inodes per group
Superblock backups stored on blocks:
	16384, 49152, 81920, 114688, 147456, 409600, 442368, 802816

Writing inode tables: done
Creating journal (32768 blocks): done
Writing superblocks and filesystem accounting information: done

This filesystem will be automatically checked every 22 mounts or
180 days, whichever comes first.  Use tune2fs -c or -i to override.
查看指定后的分区信息:
lsblk /dev/sdb1
[root@centos6~]#blkid /dev/sdb1
/dev/sdb1: LABEL="TEST" UUID="9250f7d0-977b-4c0b-bba8-7dfca23c3dcd" TYPE="ext4"
查看文件系统的ACL功能:
tune2fs -l /dev/sdb1
[root@centos6~]#tune2fs -l  /dev/sdb1
tune2fs 1.41.12 (17-May-2010)
Filesystem volume name:   TEST
Last mounted on:          <not available>
Filesystem UUID:          9250f7d0-977b-4c0b-bba8-7dfca23c3dcd
Filesystem magic number:  0xEF53
Filesystem revision #:    1 (dynamic)
Filesystem features:      has_journal ext_attr resize_inode dir_index filetype extent flex_bg sparse_super huge_file uninit_bg dir_nlink extra_isize
Filesystem flags:         signed_directory_hash
Default mount options:    acl
Filesystem state:         clean
Errors behavior:          Continue
Filesystem OS type:       Linux
Inode count:              131560
Block count:              1052240
Reserved block count:     10522
Free blocks:              998252
Free inodes:              131549
First block:              0
Block size:               2048
Fragment size:            2048
Reserved GDT blocks:      512
Blocks per group:         16384
Fragments per group:      16384
Inodes per group:         2024
Inode blocks per group:   253
Flex block group size:    16
Filesystem created:       Sun Nov 10 09:17:32 2019
Last mount time:          n/a
Last write time:          Sun Nov 10 09:21:25 2019
Mount count:              0
Maximum mount count:      22
Last checked:             Sun Nov 10 09:17:32 2019
Check interval:           15552000 (6 months)
Next check after:         Fri May  8 09:17:32 2020
Lifetime writes:          97 MB
Reserved blocks uid:      0 (user root)
Reserved blocks gid:      0 (group root)
First inode:              11
Inode size:	          256
Required extra isize:     28
Desired extra isize:      28
Journal inode:            8
Default directory hash:   half_md4
Directory Hash Seed:      840447d7-3f85-4ff3-bec5-89fb0e95a853
Journal backup:           inode block
(3)开机挂载/dev/sdb1磁盘:
vim /dev/fstab 将文件UUID写入到配置文件中即可:
[root@centos6~]#cat /etc/fstab

#
# /etc/fstab
# Created by anaconda on Thu Aug 22 15:06:16 2019
#
# Accessible filesystems, by reference, are maintained under ‘/dev/disk‘
# See man pages fstab(5), findfs(8), mount(8) and/or blkid(8) for more info
#
UUID=26a9ab70-c62f-471f-bdf2-bb38c350526a /                       ext4    defaults        1 1
UUID=e1f6dde3-d380-4e79-80cc-b41fbf93f404 /boot                   ext4    defaults        1 2
UUID=7f570fd9-b234-46a1-9bc5-c8cf3942d9ca /data                   ext4    defaults        1 2
UUID=be5f6d9c-1887-4895-ac3f-c795f2eaafac swap                    swap    defaults        0 0
UUID=9250f7d0-977b-4c0b-bba8-7dfca23c3dcd /mnt/sdb1               ext4    defaults        0 0
4、创建一个至少有两个PV组成的大小为20G的名为testvg的VG;要求PE大小 为16MB, 而后在卷组中创建大小为5G的逻辑卷testlv;挂载至/users目录
(1)虚拟机上安上两个10G的虚拟硬盘,然后组合PV物理组:
[root@ansiblehttpd]#pvcreate /dev/{sdc,sdd}
  Physical volume "/dev/sdc" successfully created.
  Physical volume "/dev/sdd" successfully created.
(2)创建PE为16MB的VG组
[root@ansiblehttpd]#vgcreate -s 16m vg0 /dev/sd{c,d}
  Volume group "vg0" successfully created
(3)将卷组创建成5G逻辑卷
[root@ansiblehttpd]#lvcreate -n testly  -L 5G vg0
  Logical Volume "testly" already exists in volume group "vg0"
(4)格式化当前的卷组
[root@ansiblehttpd]#mkfs.ext4 /dev/vg0/testly
mke2fs 1.42.9 (28-Dec-2013)
Filesystem label=
OS type: Linux
Block size=1024 (log=0)
Fragment size=1024 (log=0)
Stride=0 blocks, Stripe width=0 blocks
16384 inodes, 65536 blocks
3276 blocks (5.00%) reserved for the super user
First data block=1
Maximum filesystem blocks=33685504
8 block groups
8192 blocks per group, 8192 fragments per group
2048 inodes per group
Superblock backups stored on blocks:
	8193, 24577, 40961, 57345

Allocating group tables: done
Writing inode tables: done
Creating journal (4096 blocks): done
Writing superblocks and filesystem accounting information: done
查看当前的卷组信息:
[root@ansible~]#pvdisplay
  --- Physical volume ---
  PV Name               /dev/sdc
  VG Name               vg0
  PV Size               10.00 GiB / not usable 16.00 MiB
  Allocatable           yes
  PE Size               16.00 MiB
  Total PE              639
  Free PE               635
  Allocated PE          4
  PV UUID               AYecKo-37eD-N6sC-jL33-kCrb-ACAV-ez47oc

  --- Physical volume ---
  PV Name               /dev/sdd
  VG Name               vg0
  PV Size               10.00 GiB / not usable 16.00 MiB
  Allocatable           yes
  PE Size               16.00 MiB
  Total PE              639
  Free PE               639
  Allocated PE          0
  PV UUID               JMGIQr-CS6e-XpUb-1MNu-J4fW-faeW-twAMni
(5)挂载卷组
[root@ansiblehttpd]#mount /dev/vg0/testly /users
标签:www err form 工具 inter reserve idt eve physical
原文地址:https://www.cnblogs.com/struggle-1216/p/11831802.html