标签:表示 rpm centos sudo rest wap extern mirrors 日志
1.安装policycoreutils-python
yum install policycoreutils-python
2.安装postfix
yum install postfix
sudo systemctl enable postfix
systemctl start postfix
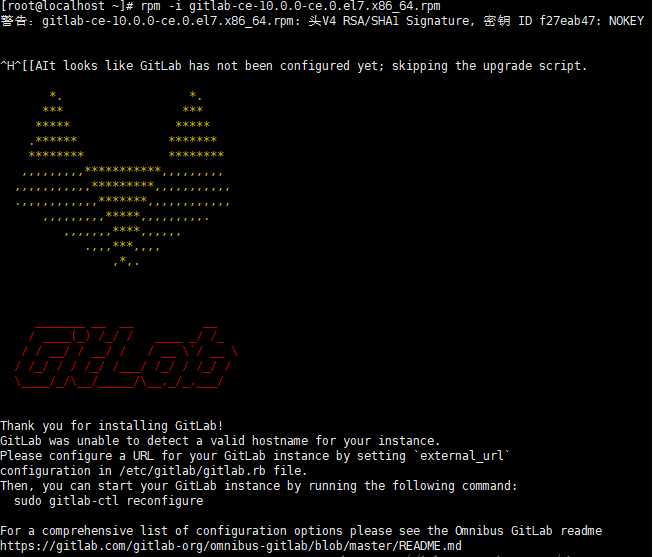
3.下载并安装gitlab
wget https://mirrors.tuna.tsinghua.edu.cn/gitlab-ce/yum/el7/gitlab-ce-10.0.0-ce.0.el7.x86_64.rpm
rpm -i gitlab-ce-10.0.0-ce.0.el7.x86_64.rpm
4.修改配置文件
vim /etc/gitlab/gitlab.rb
external_url ‘http://54.180.195.132:8080‘
unicorn[‘port‘] = 9527
执行:
gitlab-ctl reconfigure
gitlab-ctl restart
提示 "ok: run:"表示启动成功
PS:如果出现502的解决方案
80%是因为端口号被占,需要修改端口号后重启服务
gitlab硬性要求最少4G(RAM + Swap),用htop查看cpu和内存是否爆满
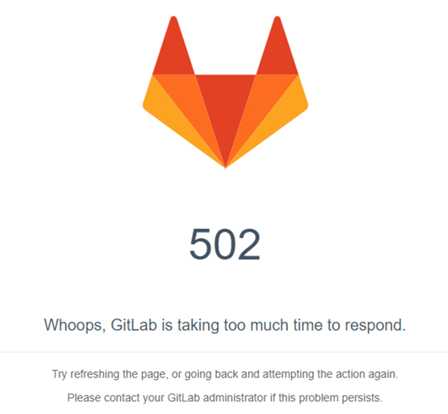
gitlab-ctl tail #查看运行日志
标签:表示 rpm centos sudo rest wap extern mirrors 日志
原文地址:https://www.cnblogs.com/cx850116/p/11907345.html