标签:href protector 调用 mamicode 防止 auto emc sed -n 调整
目录
我叫张贺,贪财好色。一名合格的LINUX运维工程师,专注于LINUX的学习和研究,曾负责某中型企业的网站运维工作,爱好佛学和跑步。
个人博客:传送阵
笔者微信:zhanghe15069028807,非诚勿扰。
不要安装epel,因为配置文件比较乱,用官方的,配置文件简单
http://nginx.org/en/linux_packages.html#RHEL-CentOS
[nginx-stable]
name=nginx stable repo
baseurl=http://nginx.org/packages/centos/$releasever/$basearch/
gpgcheck=1
enabled=1
gpgkey=https://nginx.org/keys/nginx_signing.key
module_hotfixes=true

[nginx-mainline]
name=nginx mainline repo
baseurl=http://nginx.org/packages/mainline/centos/$releasever/$basearch/
gpgcheck=1
enabled=0
gpgkey=https://nginx.org/keys/nginx_signing.key
module_hotfixes=true

yum install nginx   发现源是从nginx过来的,700多K的,源很重要。
[root@web01 tmp]# rpm -ql nginx
/etc/logrotate.d/nginx 日志切割
/etc/nginx #这三行都是配置文件文件,defaut.conf里面有一个include
/etc/nginx/conf.d
/etc/nginx/conf.d/default.conf
/etc/nginx/fastcgi_params
/etc/nginx/koi-utf
/etc/nginx/koi-win
/etc/nginx/mime.types #格式关系对应表
/etc/nginx/modules #模块
/etc/nginx/nginx.conf #主配置文件
/etc/nginx/scgi_params
/etc/nginx/uwsgi_params
/etc/nginx/win-utf
/etc/sysconfig/nginx #存放的是参数
/etc/sysconfig/nginx-debug
/usr/lib/systemd/system/nginx-debug.service
/usr/lib/systemd/system/nginx.service #启动的服务名
/usr/lib64/nginx
/usr/lib64/nginx/modules
/usr/libexec/initscripts/legacy-actions/nginx
/usr/libexec/initscripts/legacy-actions/nginx/check-reload
/usr/libexec/initscripts/legacy-actions/nginx/upgrade
/usr/sbin/nginx
/usr/sbin/nginx-debug
/usr/share/doc/nginx-1.16.1
/usr/share/doc/nginx-1.16.1/COPYRIGHT
/usr/share/man/man8/nginx.8.gz
/usr/share/nginx
/usr/share/nginx/html
/usr/share/nginx/html/50x.html
/usr/share/nginx/html/index.html #默认页面
/var/cache/nginx
/var/log/nginx #日志上面这是nginx官方安装编译好的,我们可以查看其安装编译的参数:
[root@web01 ~]# nginx -V
nginx version: nginx/1.16.1
built by gcc 4.8.5 20150623 (Red Hat 4.8.5-36) (GCC)
built with OpenSSL 1.0.2k-fips  26 Jan 2017
TLS SNI support enabled
configure arguments:
--prefix=/etc/nginx   #安装的路径
--sbin-path=/usr/sbin/nginx   #命令的路径
--modules-path=/usr/lib64/nginx/modules  #模块的路径
--conf-path=/etc/nginx/nginx.conf  #配置文件的路径
--error-log-path=/var/log/nginx/error.log  #错误日志
--http-log-path=/var/log/nginx/access.log  #正常日志
--pid-path=/var/run/nginx.pid  #进程号
--lock-path=/var/run/nginx.lock  #锁文件,防止反复重启

--http-client-body-temp-path=/var/cache/nginx/client_temp  客户端内容临时存放的路径
--http-proxy-temp-path=/var/cache/nginx/proxy_temp
--http-fastcgi-temp-path=/var/cache/nginx/fastcgi_temp
--http-uwsgi-temp-path=/var/cache/nginx/uwsgi_temp
--http-scgi-temp-path=/var/cache/nginx/scgi_temp

--user=nginx --group=nginx  #nginx运行的用户和组

--with-compat    #with开头的都是模块
--with-file-aio
--with-threads
--with-http_addition_module
--with-http_auth_request_module
--with-http_dav_module
--with-http_flv_module
--with-http_gunzip_module
--with-http_gzip_static_module
--with-http_mp4_module
--with-http_random_index_module
--with-http_realip_module
--with-http_secure_link_module
--with-http_slice_module
--with-http_ssl_module          #ssl模块
--with-http_stub_status_module  #状态码模块
--with-http_sub_module
--with-http_v2_module     #支持go语言代理
--with-mail
--with-mail_ssl_module
--with-stream            #stream用来做四层的负载均衡
--with-stream_realip_module
--with-stream_ssl_module
--with-stream_ssl_preread_module
--with-cc-opt='-O2 -g -pipe -Wall -Wp,-D_FORTIFY_SOURCE=2 -fexceptions -fstack-protector-strong --param=ssp-buffer-size=4 -grecord-gcc-switches -m64 -mtune=generic -fPIC' --with-ld-opt='-Wl,-z,relro -Wl,-z,now -pie'
如果想看公司的nginx编译参数,-V看一下,直接复制去编译就行。
/etc/nginx/nginx.conf是主配置文件,里面有一个包括,这个包括把/etc/nginx/conf.d里面的所有以.conf结尾的文件 ,默认里面就有一个default.conf
[root@web01 nginx]# cat nginx.conf
user  nginx;    #启动的用户
worker_processes  1;   #进程的数量
error_log  /var/log/nginx/error.log warn;   #错误日志的路径
pid        /var/run/nginx.pid;              #进程运行后,存放进程ID的文件
####################上面是核心模块,下面是事件层
events {
    worker_connections  1024;     #每一个worker进程最大支持的连接数
    use epool;                    #使用的网络模型select,pool,epool,默认是epool层
}
#####################下面是http模块层
http {
    include       /etc/nginx/mime.types;
    default_type  application/octet-stream;

    log_format  main  '$remote_addr - $remote_user [$time_local] "$request" '
                      '$status $body_bytes_sent "$http_referer" '
                      '"$http_user_agent" "$http_x_forwarded_for"';

    access_log  /var/log/nginx/access.log  main;

    sendfile        on;
    #tcp_nopush     on;
    keepalive_timeout  65;   #长连接时间,0就变成了短连接了
    #gzip  on;

    include /etc/nginx/conf.d/*.conf;      #包括
}
[root@web01 conf.d]# cat default.conf
server { #放到http层,定义具体的网站
listen 80;
server_name localhost; #域名或主机名
location / { #一个server里面可以出现多个location
root /usr/share/nginx/html; #这是个目录,默认去到根目录
index index.html index.htm; #默认请求的主页面
}
}[root@web01 conf.d]# nginx -t 测试语法
nginx: the configuration file /etc/nginx/nginx.conf syntax is ok
nginx: configuration file /etc/nginx/nginx.conf test is successful
[root@web01 conf.d]# systemctl start nginx #//路径匹配,一个server层里面可以出现多个location
[root@web01 conf.d]# cat default.conf
server {
listen 80;
server_name localhost;
location / { #定义一个网站
root /usr/share/nginx/html;
index index.html index.htm;
}
location /test { #用户这样访问IP/test才能访问到oldboy.html,IP后面是根,而这里的根指的是/opt,/opt/下面的test目录
root /opt/;
index oldboy.html;
}
}关系
http层下允许有多个server层,一个server层下又允许有多个location
http{}标签主要用来解决用户请求和响应
server标签主要用来响应具体的某一个网站
location标签主要用于匹配网站的具体URL路径
[root@nginx bbs]# cd /etc/nginx/conf.d
[root@nginx conf.d]# ls
bbs.zhanghe.conf  www.zhanghe.conf
[root@nginx conf.d]# cat www.zhanghe.conf
server {
    listen       192.168.80.2:80;
    server_name  www.zhanghe.com;

    location / {
        root   /usr/share/nginx/html;
        index  index.html index.htm;
    }
}
[root@nginx conf.d]# cat bbs.zhanghe.conf
server {
    listen       192.168.80.5:80;
    server_name  www.zhanghe.com;

    location / {
        root   /www/web/bbs;
        index  index.html index.htm;
    }
}[root@nginx conf.d]# ls
bbs.zhanghe.conf www.zhanghe.conf
[root@nginx conf.d]# cat www.zhanghe.conf
server {
listen 192.168.80.2:80;
server_name www.zhanghe.com;
location / {
root /usr/share/nginx/html;
index index.html index.htm;
}
}
[root@nginx conf.d]# cat bbs.zhanghe.conf
server {
listen 192.168.80.2:80;
server_name bbs.zhanghe.com;
location / {
root /www/web/bbs;
index index.html index.htm;
}
}[root@nginx conf.d]# ls
bbs.zhanghe.conf www.zhanghe.conf
[root@nginx conf.d]# cat www.zhanghe.conf
server {
listen 192.168.80.2:80;
server_name www.zhanghe.com;
location / {
root /usr/share/nginx/html;
index index.html index.htm;
}
}
[root@nginx conf.d]# cat bbs.zhanghe.conf
server {
listen 192.168.80.2:8080;
server_name www.zhanghe.com;
location / {
root /www/web/bbs;
index index.html index.htm;
}
}访问控制就是可以允许哪些IP地址来访问location站点,不允许哪些IP地址来访问location站点,举个例子:
[root@nginx conf.d]# cat default.conf
server {
    listen       80;
    server_name  localhost;

    location / {
        root   /usr/share/nginx/html;
        index  index.html index.htm;
    }

    location /test {                 #对这个站点做了访问控制
        root   /www/web/bbs;
        index  index.html index.htm;
        deny 192.168.80.6;           #80.6这台主机访问时就会报4.3错误
        allow all;
    }
}用户认证就是访问网站时会弹出一个框来让你输入用户名和密码,只有输入正确了才能查看页面,很少用这种方式,会用即可。
//准备一个目录用来存放用户名和密码
yum -y install httpd-tools
[root@nginx ~]# mkdir /etc/nginx/conf
[root@nginx ~]# cd /etc/nginx/conf
[root@nginx conf]# htpasswd -bc htpasswd zhanghe cba-123  #bc的意思无需关心,记住格式即可。
Adding password for user zhanghe                          #注意密码文件的权限和属主和属组

//把用户文件的路径写上
[root@nginx conf]# cat /etc/nginx/conf.d/default.conf
server {
    listen       80;
    server_name  localhost;

    location / {
        root   /usr/share/nginx/html;
        index  index.html index.htm;
    }

    location /test {
        root   /www/web/bbs;
        index  index.html index.htm;
        auth_basic "closed site";         #引号里面的名字随便写
        auth_basic_user_file conf/htpasswd;  #这里是相对路径,相对于/etc/nginx,与上文响应
    }
}[root@web01 conf.d]# cat game.oldboy.conf
server{
listen 80;
server_name game.oldboy.com;
location / {
root /code;
index index.html;
autoindex on; #加上一行即可
}注意,有时不生产,把默认的index.html注释掉即可,如果还这样,就把index.html更名。
在浏览器上打开文件,有的会下载,有的会直接下载,nginx是根据扩展名来判断的,我们可以根据/etc/mime.types文件来进行控制,这个文件叫媒体资源类型,默认txt的扩展名被识别为文本,所以能够在浏览器中直接打开,而不是下载,假如我们想php文件也当在文件,就在txt后加上php即可。
vim /etc/mime.types
text/plain txt;  #默认是这样
text/plain txt php; #变成了这样,重启nginx,php文件也能当成文本文件直接打开了
浏览器默认访问索引时把中文显示为了乱码,怎么解决呢?
[root@nginx test]# cat /etc/nginx/conf.d/default.conf
server {
    listen       80;
    server_name  localhost;

    location / {
        root   /usr/share/nginx/html;
        index  index.html index.htm;
    autoindex on;
    }

    location /test {
        root   /www/web/bbs;
        index  123.jkk;
        autoindex on;
        charset utf-8;    #加上这一行即可
    }
}为什么用别名呢?
方便测试,用短的域名测试,方便书写,代码上线的时候方便标记
[root@nginx conf.d]# cat default.conf
server {
    listen       80;
    server_name  www.zhanghe.com a.com;  #加一个别名a.com

    location / {
        root   /usr/share/nginx/html;
        index  index.html index.htm;
    autoindex on;
    }

}
在windows上修改hosts文件之后,用a.com访问比写一长串www.zhanghe.com要快好多。
[root@nginx conf.d]# vim state.conf
server {
    listen       80;
    server_name  state.zhanghe.com;
    stub_status;

}
在windows上访问state zhanghe.com就可以看到状态页面,别忘记重写hosts文件。
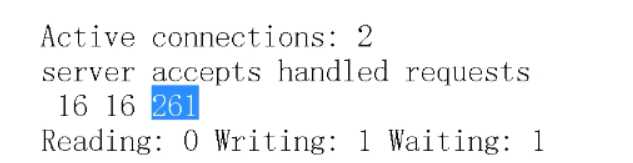
Active connections:当前在多少个用户连接,可以通过zabbix监控在这,达到一定数量就会报警。
accepts:接收的连接数汇总(综合) tcp,nginx服务重启就会清零。
handied:处理的连接数汇总(综合) TCP,通常和上面的相等,有时也有例外,比如资源限制服务器不处理,那就不相等了。·
requests:总计的请求数量 HTP协议请求,一次连接可以有多次请求,这里体现了长短连接。
Reading: nginx:正在读取的请求报文,一共是0,并发大的时候才会体现。
writing: nginx:正在读取的响应报文,一共是0,并发大的时候才会体现。
waiting: nginx:nginx忙不过的时候,请求报文和响应报文要排除,这里会体现队列的长度,这里也可以通过zabbix监控,看排除的人多不多,如果太多了,及时调整。
nginx有两个日志比较重要,如下:
[root@nginx nginx]# pwd
/var/log/nginx
[root@nginx nginx]# ls
access.log error.log错误日志的路径和级别的设置在/etc/nginx/nginx.conf文件里面,如下所示:
[root@nginx ~]# grep error /etc/nginx/nginx.conf
error_log  /var/log/nginx/error.log warn;    #格式:路径,级别
错误日志级别

级别设置的越低,错误日志里面产生的信息也就越多,比如你设置的是debug这种的,那鸡毛蒜皮的小事都会记录到日志里面,如果设置的级别高一些,就会记录此级别以及此级别之上级别的信息,如果设置看自己的磁盘大小,如果自己的磁盘空间很充足,可以设置低一些,如果磁盘空间不太充足,就可以只记录关键的信息,节省点空间,默认是warn级别,如下所示,当然我们可以更改,一般更改成error级别,在此级别上只记录错误信息,方便我们排错。
访问日志的路径和级别的设置在/etc/nginx/nginx.conf里面,如下所示:
//访问日志整体分为两个部分,定义格式log_format,然后起一个名字,最后调用这个格式
[root@nginx ~]# sed -n '18,+4p' /etc/nginx/nginx.conf
    log_format  main  '$remote_addr - $remote_user [$time_local] "$request" '
                      '$status $body_bytes_sent "$http_referer" '
                      '"$http_user_agent" "$http_x_forwarded_for"';

    access_log  /var/log/nginx/access.log  main;
‘$remote_addr 客户端的IP
$remote_user 通过认证的用户
[$time_local] 客户端访问网站的时间
"$request" ‘ 用户请求头部:用户请求的方法,http协议的版本
‘$status 用户访问网站的状态码$body_bytes_sent 服务器给客户端回复的流量大小,默认是字节,可通过awk做求和运算,看流量,来确定我们买带宽买多大的合适。
"$http_referer" ‘ 从哪里面跳转过来的(防止盗链)
‘"$http_user_agent" 通过什么浏览器过来的
"$http_x_forwarded_for"‘; 负载均衡相关的,我们在负载均衡的章节为讲一下
可以用来做什么事情呢?比如错误页面优雅显示。
[root@nginx ~]# vim /etc/nginx/conf.d/default.conf
server {
    listen       80;
    server_name  www.zhanghe.com  a.com;

    location / {
        root   /usr/share/nginx/html;
        index  index.html index.htm;
        autoindex on;
    }
    location /test {
        root   /www/;
        error_page 404 = 123.jpg;   #通过123.jpg覆盖404界面,123.jpg存放在/www/test里面
    }
}这个功能用的比较少,知道即可。
就是通过匹配某个URL,返回特定的界面,我们举个例子:
[root@nginx conf.d]# cat test.conf
server {
    listen       80;
    server_name  www.123.com;

    location = / {   #默认,即输入www.123.com或www.123.com/,精确匹配到这里。
    return 404;
    }
    location / {     #输入www.123.com之后乱输入,比如www.123.com/kjdfkjdkfjkd
    return 403;
    }
    location /doc {  #输入的路径中带有doc,比如www.123.com/doc/kdjfjdfj
    return 402;
    }
    location ^~ /images {  #输入的路径中带有doc,比如www.123.com/images/kdjfjdfj
    return 405;
    }
    location ~* \.(jpg|jpeg)$ {  #不区分大小与,比如www.123/kdfjkldfj/djfkj.jgp
    return 501;
    }
}跳转功能就是我们上百度的时候,不用输入www.baidu.com,只需要输入baidu.com即可,浏览器会自动跳转到www.baidu.com上。
[root@nginx conf.d]# vim default.conf

server {
    listen       80;
    server_name  www.zhanghe.com  zhanghe.com;     #这里有一个别名
    rewrite ^/(.*) www.zhanghe.com/$1 permanent;   #permanent永久跳转301

    location / {
        root   /usr/share/nginx/html;
        index  index.html index.htm;
        autoindex on;
    }
    location /test {
        root   /www/;
        error_page 404 = 123.jpg;
    }
}
效果就是当我们curl zhanghe.com/test自然会跳转到www.zhanghe.com/test
permanent 301 永久跳转
redirect 302 临时跳转
[root@tomcat02 ~]# curl zhanghe.com/test
<html>
<head><title>302 Found</title></head>
<body>
<center><h1>302 Found</h1></center>
<hr><center>nginx/1.16.1</center>
</body>
</html>
//出现了坑,传递的参数超过nginx 服务器的限制
[root@tomcat02 ~]# curl -L www.zhanghe.com #-L跟着跳转走,还是出了错误
<html>
<head><title>414 Request-URI Too Large</title></head>
<body>
<center><h1>414 Request-URI Too Large</h1></center>
//解决办法 在/etc/nginx/nginx.conf里面加两行
client_header_buffer_size 512k;
large_client_header_buffers 4 512k;//又出现了坑,逻辑次数,跳转次数过多,排除curl -Lv 看过程,发现一直跳转,问题出在rewrite的位置上
[root@tomcat02 ~]# curl -L www.zhanghe.com
curl: (47) Maximum (50) redirects followed怎么办呢?调整rewrite的位置,如下所示,再加一个server:
[root@nginx ~]# vim /etc/nginx/conf.d/default.conf

server {                         #这样即打破循环
        listen 80;
        server_name zhanghe.com;
        rewrite ^/(.*) http://www.zhanghe.com/$1 permanent;
}

server {
    listen       80;
    server_name  www.zhanghe.com;

    location / {
        root   /usr/share/nginx/html;
        index  index.html index.htm;
        autoindex on;
    }
    location /test {
        root   /www/;
        index  index.html index.htm;
        error_page 404 = 123.jpg;
    }
}标签:href protector 调用 mamicode 防止 auto emc sed -n 调整
原文地址:https://www.cnblogs.com/yizhangheka/p/12072445.html