一、集群介绍

为什么要用集群



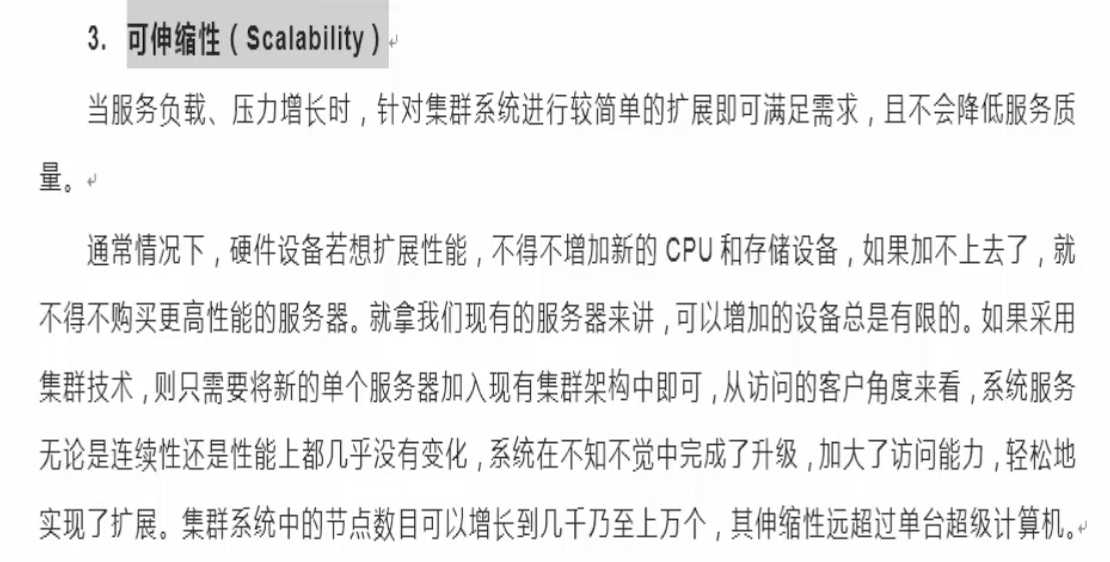



为什么要用集群


二、负载均衡


三、 nginx负载均衡实验
Nginx负载均衡概述
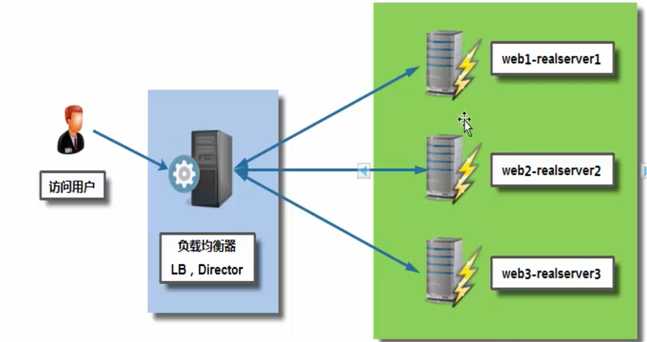
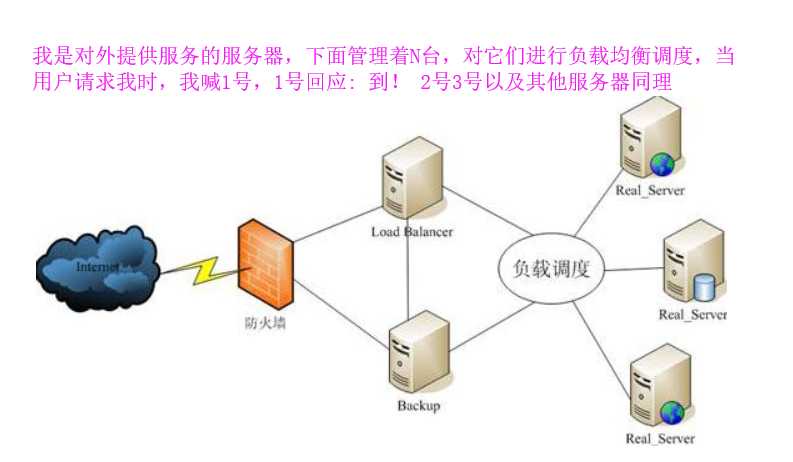
Web服务器,直接面向用户,往往要承载大量并发请求,单台服务器难以负荷,我使用多台WEB服务器组成集群,前端使用Nginx负载均衡,将请求分散的打到我们的后端服务器集群中,
实现负载的分发。那么会大大提升系统的吞吐率、请求性能、高容灾
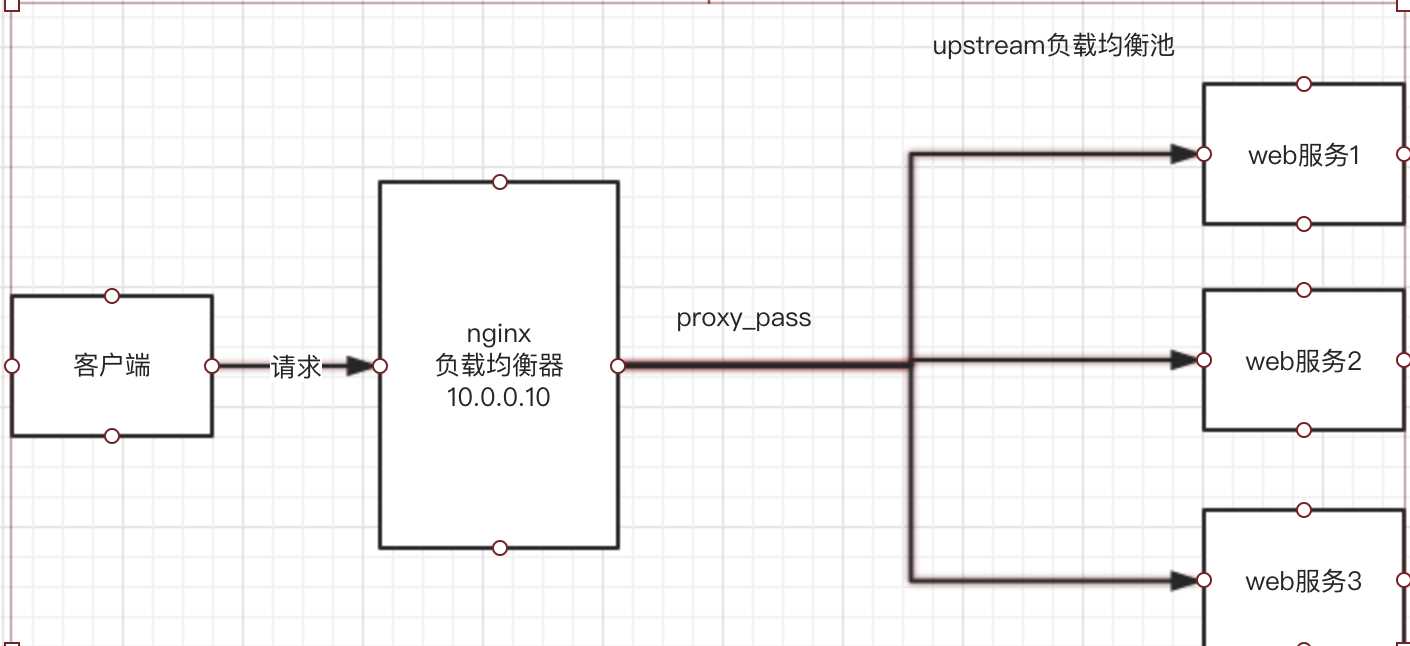
Nginx要实现负载均衡需要用到proxy_pass代理模块配置
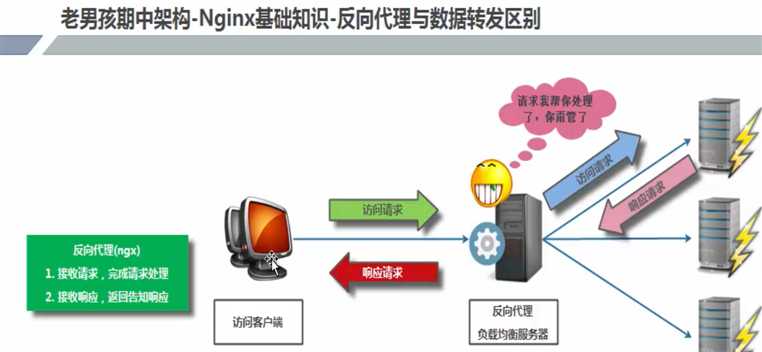
Nginx负载均衡与Nginx代理不同地方在于
Nginx代理仅代理一台服务器,而Nginx负载均衡则是将客户端请求代理转发至一组upstream虚拟服务池
Nginx可以配置代理多台服务器,当一台服务器宕机之后,仍能保持系统可用。
upstream配置
在nginx.conf > http 区域中
upstream django {
       server 10.0.0.10:8000;
       server 10.0.0.11:9000;
}
在nginx.conf > http 区域 > server区域 > location配置中
添加proxy_pass
location / {
            root   html;
            index  index.html index.htm;
            proxy_pass http://django;
}
此时初步负载均衡已经完成,upstream默认按照轮训方式负载,每个请求按时间顺序逐一分配到后端节点。
upstream分配策略
weight 权重
upstream django {
       server 10.0.0.10:8000 weight=5;
       server 10.0.0.11:9000 weight=10;#这个节点访问比率是大于8000的
}
ip_hash
每个请求按访问ip的hash结果分配,这样每个访客固定访问一个后端服务器
upstream django {
    ip_hash;
       server 10.0.0.10:8000;
       server 10.0.0.11:9000;
}
backup
在非backup机器繁忙或者宕机时,请求backup机器,因此机器默认压力最小
upstream django {
       server 10.0.0.10:8000 weight=5;
       server 10.0.0.11:9000;
       server node.oldboy.com:8080 backup;
}
负载均衡实验环境规划
角色            ip                    主机名
lb01         10.0.0.5         lb01
web01        10.0.0.10        web01
web02        10.0.0.11        web02
关闭防火墙
iptables -F
sed  -i ‘s/enforcing/disabled/‘ /etc/selinux/config

systemctl stop firewalld
systemctl disable firewalld
一、web01服务器配置nginx,创建index.html
server {
        listen       80;
        server_name  10.0.0.10;
        location / {
        root /node;
            index  index.html index.htm;
        }
}

mkdir /node
echo ‘i am web01‘ > /node/index.html

#启动NGINX
./sbgin/nginx
二、web02服务器配置nginx,创建index.html
server {
    listen       80;
    server_name  10.0.0.11;
    location / {
        root /node;
        index  index.html index.htm;
}


mkdir /node
echo ‘i am web02...‘ > /node/index.html
#启动nginx
./sbing/nginx
三、配置lb01服务器的nginx负载均衡
1.检查lb01的 nginx.conf
http {
    include       mime.types;
    default_type  application/octet-stream;
    sendfile        on;
    keepalive_timeout  65;
    upstream qishi3 {
      server 10.0.0.10:80;
      server 10.0.0.11:80;
  }
    server {
        listen       80;
        server_name 192.168.119.10;
        location / {
          proxy_pass http://qishi3;
          include proxy_params;  #需要手动创建
        }
    }
}
2.手动创建proxy_params文件,文件中存放代理的请求头相关参数
[root@lb01 conf]# cat /opt/nginx/conf/proxy_params
proxy_set_header Host $http_host;
proxy_set_header X-Real-IP $remote_addr;
proxy_set_header X-Forwarded-For $proxy_add_x_forwarded_for;

proxy_connect_timeout 30;
proxy_send_timeout 60;
proxy_read_timeout 60;

proxy_buffering on;
proxy_buffer_size 32k;
proxy_buffers 4 128k;
启动lb01负载均衡nginx服务

./sbin/nginx
四、访问lb01节点nginx,反复刷新


五、nginx负载均衡调度算法
调度算法      概述
轮询        按时间顺序逐一分配到不同的后端服务器(默认)
weight       加权轮询,weight值越大,分配到的访问几率越高
ip_hash      每个请求按访问IP的hash结果分配,这样来自同一IP的固定访问一个后端服务器
url_hash      按照访问URL的hash结果来分配请求,是每个URL定向到同一个后端服务器
least_conn    最少链接数,那个机器链接数少就分发
1.轮询(不做配置,默认轮询)
2.weight权重(优先级)
3.ip_hash配置,根据客户端ip哈希分配,不能和weight一起用
六、nginx动静分离负载均衡
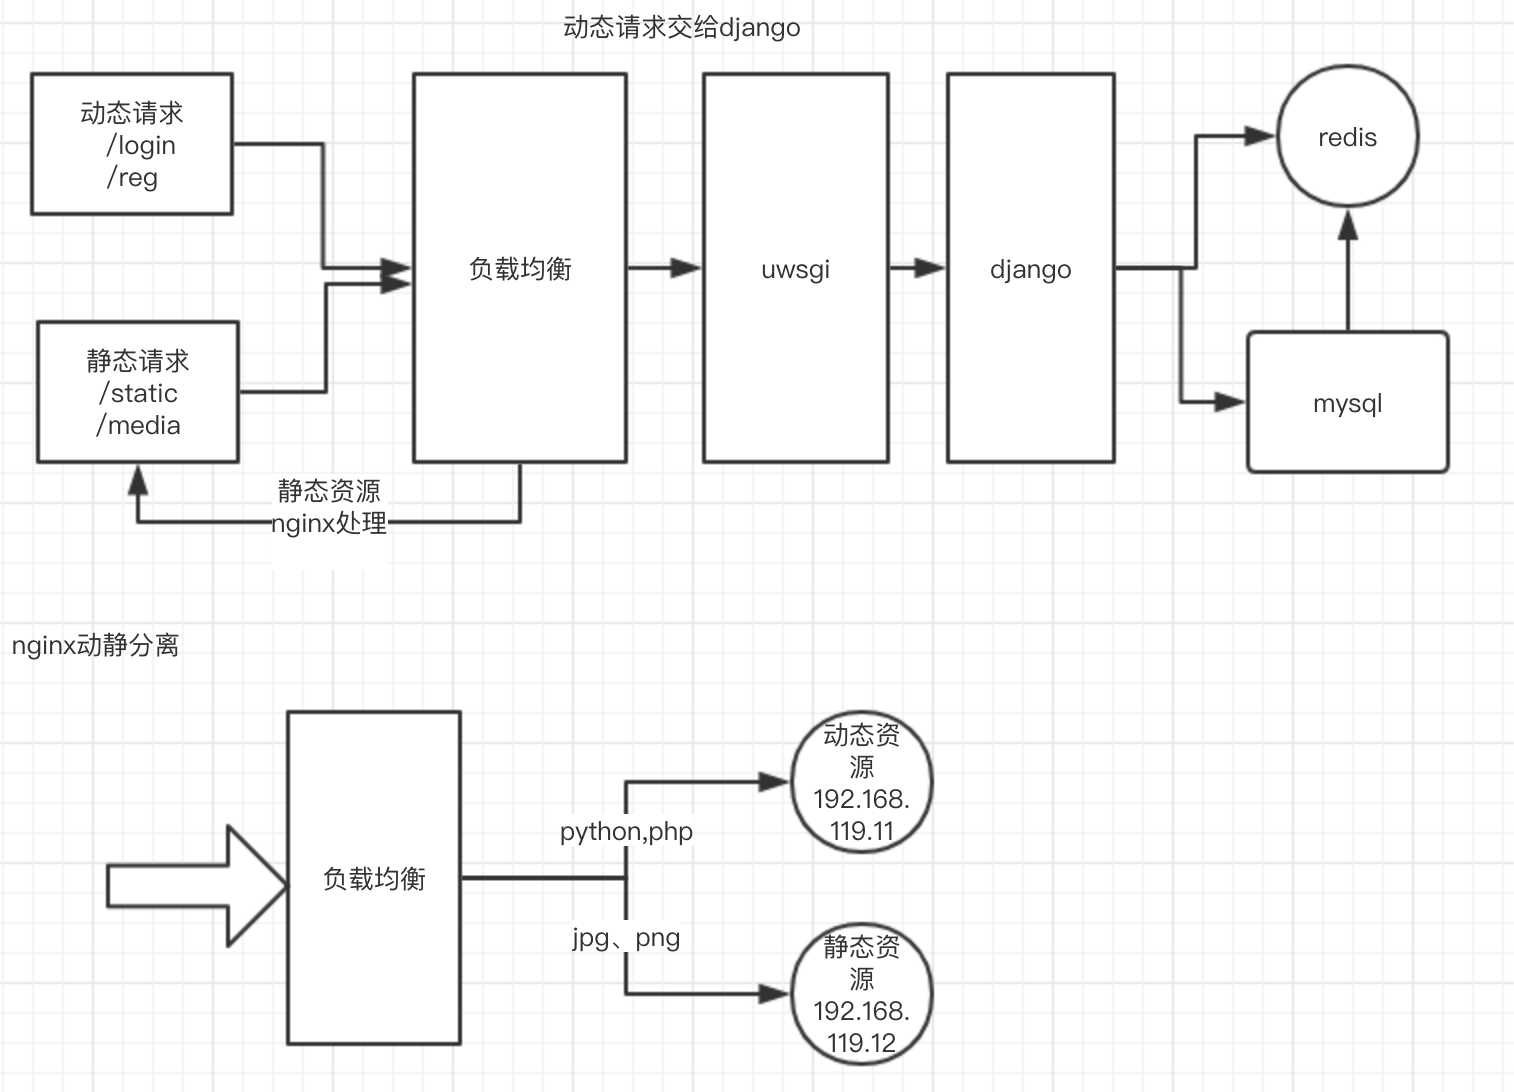
环境准备
系统                 服务                软件                ip地址
centos7(lb01)                负载均衡            nginx proxy        192.168.119.10
centos7(web01)                静态资源            nginx静态资源        192.168.119.11
centos7(web02)                动态资源            django            192.168.119.12
一、在web01机器上,配置静态资源,图片等
cat nginx.conf


server {
        listen       80;
        server_name  192.168.119.11;
        #定义网页根目录
         root /code;
        #定义了静态资源
        index index.html;
#域名匹配,所有的png、jpg、gif请求资源,都去/root/code/images底下找
         location ~* .*\.(png|jpg|gif)$ {
                root /code/images;
        }

#重启nginx
./sbin/nginx
#创建目录
mkdir -p /code/images
#准备首页文件
[root@web01  /code]$cat index.html
static files...
#准备静态文件,图片
[root@web01  /code/images]$wget http://pythonav.cn/av/girlone.jpg^C
[root@web01  /code/images]$ls
girlone.jpg
二、在web02配置动态请求,准备一个flask程序和静态资源转发
cat  nginx.conf

#静态资源地址
upstream static {
server 192.168.119.11:80;
}
#flask动态请求
upstream flask {
server 192.168.119.12:8080;
}

    server {
        listen       80;
        server_name  192.168.119.12;
      #当请求到达192.168.119.12:80/时,转发给flask的8080应用
        location / {
            proxy_pass http://flask;
            include proxy_params;
        }
      #当判断资源请求是 192.168.119.12/girl.jpg时候,转发请求给static地址池的服务器192.168.119.11/
        location ~ .*\.(png|jpg|gif)$ {
        proxy_pass http://static;
include proxy_params;
}
准备flask应用,flask.py
from flask import Flask
app=Flask(__name__)
@app.route(‘/‘)
def hello():
    return "i am flask....from nginx"
if __name__=="__main__":
    app.run(host=‘0.0.0.0‘,port=8080)
后台运行flask程序
python flask-web.py &
三、在负载均衡服务器lb01上测试访问192.168.119.10


