标签:comm recursion nsf efault block 从服务器 roots 51cto beijing
1、简述DNS服务器原理,并搭建主-辅服务器。DNS服务器原理
1、本机发出DNS请求到本地DNS服务器。本地DNS服务器一般都是你的网络接入服务器商提供,比如中国电信,中国移动。
2、本地DNS服务器会首先查询它的缓存记录,如果缓存中有此条记录,就可以直接返回结果。如果没有,本地DNS服务器还要向DNS根服务器进行查询。
3、根DNS服务器没有记录具体的域名和IP地址的对应关系,而是告诉本地DNS服务器,可以到域服务器上去继续查询,并给出域服务器的地址。
4、本地DNS服务器继续向域服务器发出请求,如果请求对象是.com域服务器。.com域服务器收到请求之后,也不会直接返回域名和IP地址的对应关系,而是告诉本地DNS服务器,你的域名的解析服务器的地址。
5、最后,本地DNS服务器向域名的解析服务器发出请求,这时就能收到一个域名和IP地址对应关系;
6、本地DNS服务器不仅要把IP地址返回给用户电脑,还要把这个对应关系保存在缓存中,以备下次别的用户查询时,可以直接返回结果,加快网络访问。
主--辅实验:
主:192.168.43.107
辅:192.168.43.127
主dns服务器:
1、安装bind
[root@dns1~]#yum -y install bind
2、改配置
[root@dns1~]#vim /etc/named.conf
listen-on port 53 { localhost; }; #监听本机所有ip
allow-query { any; }; #允许所有主机访问
allow-transfer { 192.168.43.127; }; #可以向192.168.43.127传送数据
dnssec-enable no; # 关闭dnssec功能
dnssec-validation no;
编辑 /etc/named.rfc1912.zones ,添加域配置
[root@dns1~]#vim /etc/named.rfc1912.zones
zone "thunisoft.com" {
type master;
file "thunisoft.com.zone";
};
编辑/var/named/thunisoft.com.zone ,添加解析库文件;
[root@dns1~]#vim /var/named/thunisoft.com.zone$TTL 1D @ IN SOA ns1 admin.thunisoft.com. ( 15 1D 5M 2D 5h ) NS ns1 NS ns2 ns1 A 192.168.43.107 ns2 A 192.168.43.127 ----> 从服务器需要再此添加 www CNAME websrv websrv A 1.1.1.1 websrv A 4.4.4.4 ftp A 2.2.2.2 mailsrv MX 10 3.3.3.3 @ A 192.168.43.107 wang A 192.168.43.1改权限和属主
[root@dns1]#chown root.named /var/named/thunisoft.com.zone
[root@dns1]#chmod 640 /var/named/thunisoft.com.zone
[root@dns1]#ll /var/named/thunisoft.com.zone
-rw-r----- 1 root named 107 Mar 12 01:23 /var/named/thunisoft.com.zone3、重启服务
[root@dns1~]#systemctl restart named
从服务器配置:
1、安装bind
[root@dns2~]#yum -y install bind
2、改配置
[root@dns2~]#vim /etc/named.conf
listen-on port 53 { localhost; }; #监听本机所有ip
allow-query { any; }; #允许所有主机访问
allow-transfer {none;}; #不可以向任何主机传数据
dnssec-enable no; # 关闭dnssec功能
dnssec-validation no;
编辑 /etc/named.rfc1912.zones ,添加域配置
[root@dns2~]#vim /etc/named.rfc1912.zones
zone "thunisoft.com" {
type slave;
masters {192.168.43.107;};
file "slaves/thunisoft.com.zone.slaves";
};3、重启服务:
[root@dns2~]#systemctl restart named
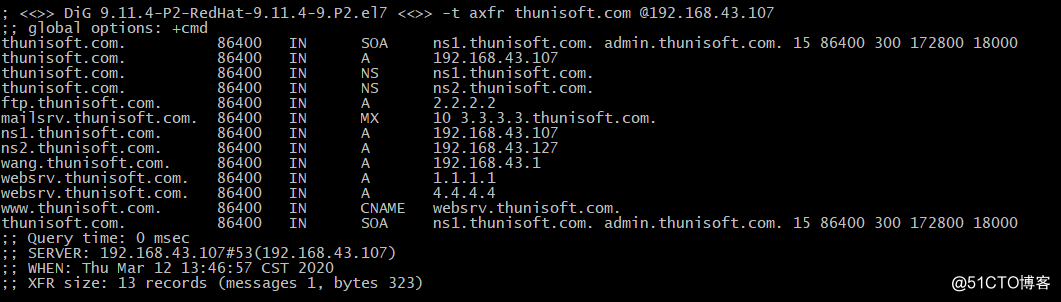
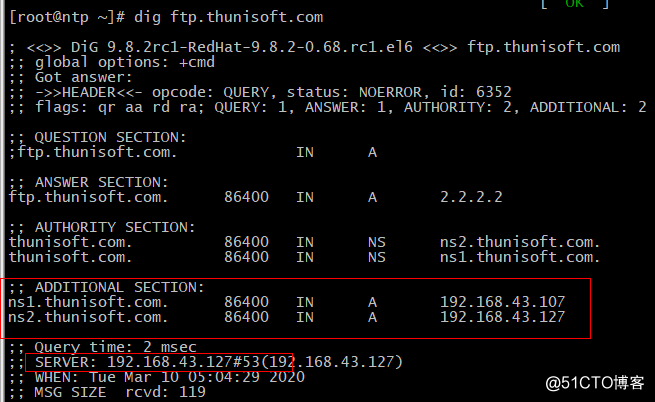
3、测试:
[root]#dig -t axfr thunisoft.com @192.168.43.107
1、安装bind
yum -y install bind
2、改配置
vim /etc/named.conf
options {
// listen-on port 53 { 127.0.0.1; };
listen-on-v6 port 53 { ::1; };
directory "/var/named";
dump-file "/var/named/data/cache_dump.db";
statistics-file "/var/named/data/named_stats.txt";
memstatistics-file "/var/named/data/named_mem_stats.txt";
recursing-file "/var/named/data/named.recursing";
secroots-file "/var/named/data/named.secroots";
// allow-query { localhost; };
/*
- If you are building an AUTHORITATIVE DNS server, do NOT enable recursion.
- If you are building a RECURSIVE (caching) DNS server, you need to enable
recursion.If your recursive DNS server has a public IP address, you MUST enable access
control to limit queries to your legitimate users. Failing to do so will
cause your server to become part of large scale DNS amplification
attacks. Implementing BCP38 within your network would greatly
reduce such attack surface
*/
recursion yes;//dnssec-enable yes; //dnssec-validation yes; ** dnssec-enable no;** **dnssec-validation no;** /* Path to ISC DLV key */ bindkeys-file "/etc/named.iscdlv.key"; managed-keys-directory "/var/named/dynamic"; pid-file "/run/named/named.pid"; session-keyfile "/run/named/session.key";};
logging {
channel default_debug {
file "data/named.run";
severity dynamic;
};
};//zone "." IN {
// type hint;
// file "named.ca";
//};acl beijingnet {
192.168.43.0/24;
192.168.44.0/24;
};acl zhengzhounet {
172.16.0.0/24;
172.17.0.0/16;
};acl othernet {
any;
};view view_beijing {
match-clients { beijingnet; };
include "/etc/named.rfc1912.zones.bj";
};view view_zhengzhou {
match-clients { zhengzhounet; };
include "/etc/named.rfc1912.zones.zz";
};view view_other {
match-clients { othernet; };
include "/etc/named.rfc1912.zones";
};//include "/etc/named.rfc1912.zones";
include "/etc/named.root.key";
#vim /etc/named.rfc1912.zones
zone "thunisoft.com" {
type master;
file "thunisoft.com.zone.other";
};
#vim /etc/named.rfc1912.zones.bj
zone "thunisoft.com" {
type master;
file "thunisoft.com.zone.bj";
};
#vim /etc/named.rfc1912.zones.zz
zone "thunisoft.com" {
type master;
file "thunisoft.com.zone.zz";
};
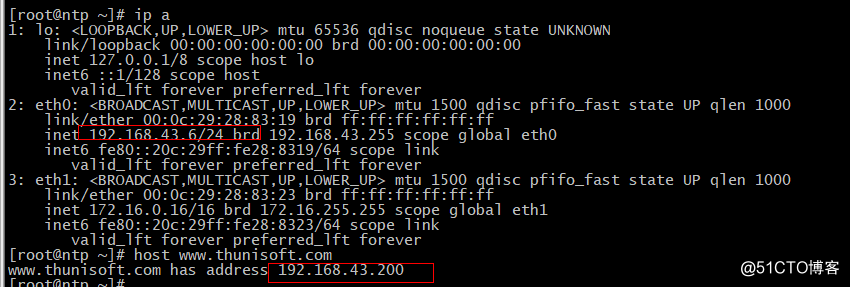
vim /var/named/thunisoft.com.zone.bj
> $TTL 1D
> @ IN SOA ns1 admin.thunisoft.com. ( 15 1D 5M 2D 5h )
> NS ns1
> ns1 A 192.168.43.147
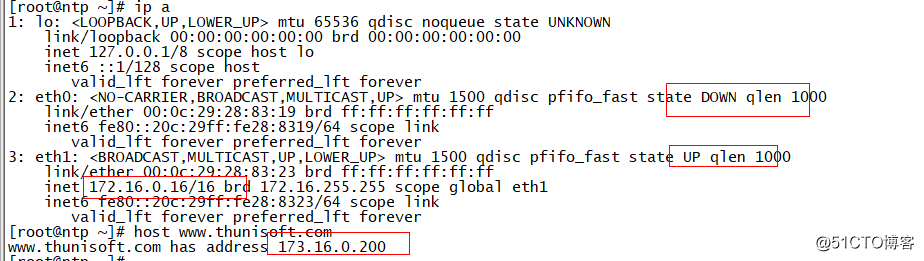
> www A 192.168.43.200vim /var/named/thunisoft.com.zone.zz
 $TTL 1D
 @       IN      SOA     ns1     admin.thunisoft.com. ( 15 1D 5M 2D 5h )
                 NS      ns1
 ns1             A       192.168.43.147
 www             A       173.16.0.200
vim /var/named/thunisoft.com.zone.other
 $TTL 1D
 @       IN      SOA     ns1     admin.thunisoft.com. ( 15 1D 5M 2D 5h )
                 NS      ns1
 ns1             A       192.168.43.147
 www             A       9.9.9.9
3、更改属主和权限
[root@ka2 ~]#chown root.named /etc/named.rfc1912.
[root@ka2 ~]#chmod 640 /etc/named.rfc1912.zones
[root@ka2 ~]#chown root.named /var/named/thunisoft.com.zone.
[root@ka2 ~]#chmod 640 /var/named/thunisoft.com.zone.[root@ka2 ~]#ll /etc/named.rfc1912.zones*
-rw-r----- 1 root named 89 Mar 12 15:37 /etc/named.rfc1912.zones
-rw-r----- 1 root named 71 Mar 12 14:38 /etc/named.rfc1912.zones.bj
-rw-r----- 1 root named 86 Mar 12 14:39 /etc/named.rfc1912.zones.zz[root@ka2 ~]#ll /var/named/thunisoft.com.zone.*
-rw-r----- 1 root named 186 Mar 12 14:44 /var/named/thunisoft.com.zone.bj
-rw-r----- 1 root named 181 Mar 12 14:44 /var/named/thunisoft.com.zone.other
-rw-r----- 1 root named 185 Mar 12 14:44 /var/named/thunisoft.com.zone.zz
4、重启named服务
[root@ka2 ~]#systemctl restart named
5、验证
[root@ntp ~]# cat /etc/resolv.conf
nameserver 192.168.43.147
nameserver 172.16.0.128
1、安装相关依赖包
yum install bison bison-devel zlib-devel libcurl-devel libarchive-devel boostdevel gcc gcc-c++ cmake ncurses-devel gnutls-devel libxml2-devel openssldevel libevent-devel libaio-devel libdb-css-devel openssl-devel
2、创建用户和数据目录,以及准备源码包
[root@ka1 apps]useradd –r –s /sbin/nologin –d /data/mysql/ mysql
[root@ka1 apps] mkdir /data/mysql
[root@ka1 apps] chown mysql.mysql /data/mysql
[root@ka1 apps]#tar xvf mariadb-10.2.25.tar.gz
3、cmake 编译
#cmake . -DCMAKE_INSTALL_PREFIX=/app/mysql -DMYSQL_DATADIR=/data/mysql/ -DSYSCONFDIR=/etc/ -DMYSQL_USER=mysql -DWITH_INNOBASE_STORAGE_ENGINE=1 -DWITH_ARCHIVE_STORAGE_ENGINE=1 -DWITH_BLACKHOLE_STORAGE_ENGINE=1 -DWITH_PARTITION_STORAGE_ENGINE=1 -DWITHOUT_MROONGA_STORAGE_ENGINE=1 -DWITH_DEBUG=0 -DWITH_READLINE=1 -DWITH_SSL=system -DWITH_ZLIB=system -DWITH_LIBWRAP=0 -DENABLED_LOCAL_INFILE=1 -DMYSQL_UNIX_ADDR=/data/mysql/mysql.sock -DDEFAULT_CHARSET=utf8 -DDEFAULT_COLLATION=utf8_general_ci
#make && make install
4、执行建库脚本:
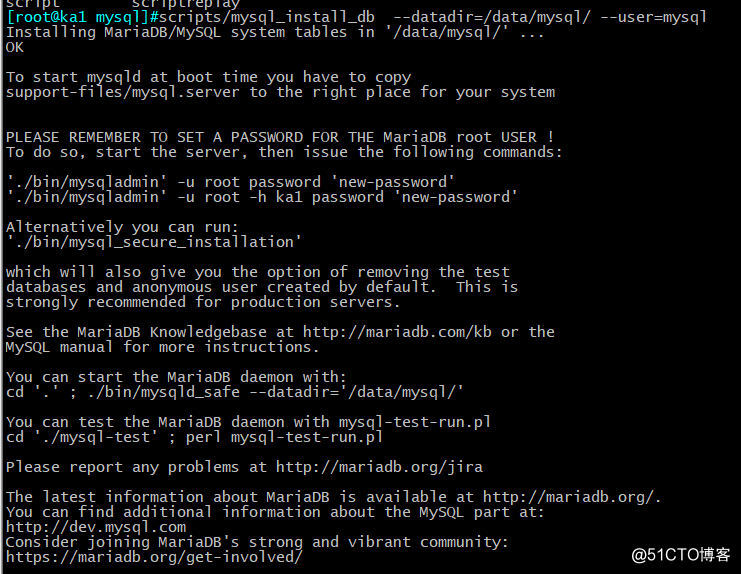
[root@ka1 mysql]#scripts/mysql_install_db --datadir=/data/mysql/ --user=mysql
Installing MariaDB/MySQL system tables in ‘/data/mysql/‘ ...
OKTo start mysqld at boot time you have to copy
support-files/mysql.server to the right place for your systemPLEASE REMEMBER TO SET A PASSWORD FOR THE MariaDB root USER !
To do so, start the server, then issue the following commands:‘./bin/mysqladmin‘ -u root password ‘new-password‘
‘./bin/mysqladmin‘ -u root -h ka1 password ‘new-password‘Alternatively you can run:
‘./bin/mysql_secure_installation‘which will also give you the option of removing the test
databases and anonymous user created by default. This is
strongly recommended for production servers.See the MariaDB Knowledgebase at http://mariadb.com/kb or the
MySQL manual for more instructions.You can start the MariaDB daemon with:
cd ‘.‘ ; ./bin/mysqld_safe --datadir=‘/data/mysql/‘You can test the MariaDB daemon with mysql-test-run.pl
cd ‘./mysql-test‘ ; perl mysql-test-run.plPlease report any problems at http://mariadb.org/jira
The latest information about MariaDB is available at http://mariadb.org/.
You can find additional information about the MySQL part at:
http://dev.mysql.com
Consider joining MariaDB‘s strong and vibrant community:
https://mariadb.org/get-involved/
5、准备配置文件
[root@ka1 mysql]#cp /app/mysql/support-files/my-huge.cnf /etc/my.cnf
6、将mysql服务添加到服务列表:
[root@ka1 mysql]#cp /app/mysql/support-files/mysql.server /etc/init.d/mysqld
cp: overwrite ‘/etc/init.d/mysqld’? y
You have new mail in /var/spool/mail/root
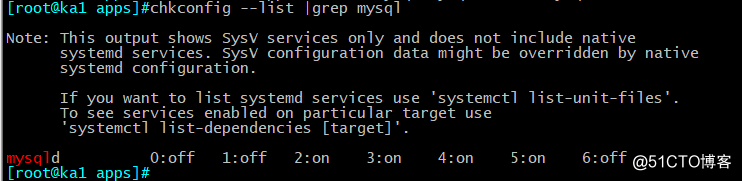
[root@ka1 mysql]#chkconfig --add mysqld

7、启动服务:
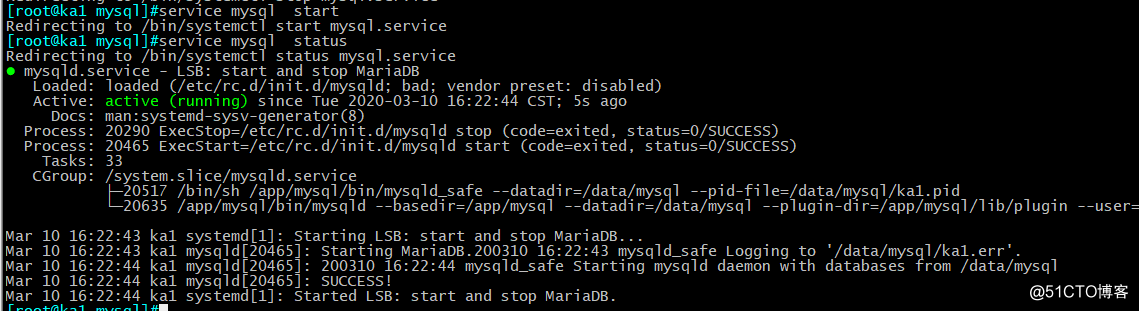
[root@ka1 mysql]#service mysql start
Redirecting to /bin/systemctl start mysql.service
[root@ka1 mysql]#service mysql status
Redirecting to /bin/systemctl status mysql.servicemysqld.service - LSB: start and stop MariaDB
Loaded: loaded (/etc/rc.d/init.d/mysqld; bad; vendor preset: disabled)
Active: active (running) since Tue 2020-03-10 16:22:44 CST; 5s ago
Docs: man:systemd-sysv-generator(8)
…….省略
8、无密码登录:
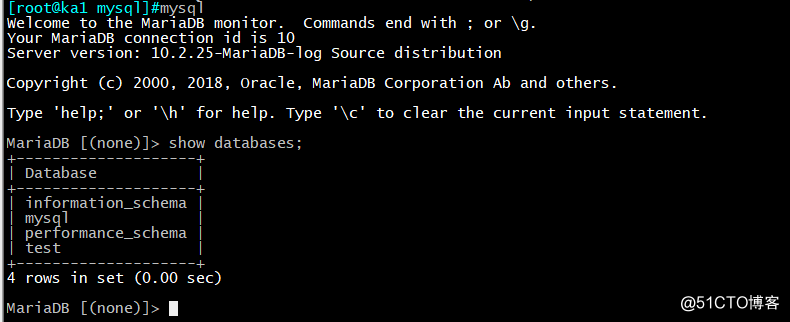
[root@ka1 mysql]#mysql
Welcome to the MariaDB monitor. Commands end with ; or \g.
Your MariaDB connection id is 10
Server version: 10.2.25-MariaDB-log Source distributionCopyright (c) 2000, 2018, Oracle, MariaDB Corporation Ab and others.
Type ‘help;‘ or ‘\h‘ for help. Type ‘\c‘ to clear the current input statement.
MariaDB [(none)]> show databases;
+--------------------+
| Database |
+--------------------+
| information_schema |
| mysql |
| performance_schema |
| test |
+--------------------+
4 rows in set (0.00 sec)MariaDB [(none)]>
9、设置root密码:
[root@ka1 mysql]#mysqladmin -u root password ‘123456‘
密码登录
[root@ka1 mysql]#mysql -p123456
Welcome to the MariaDB monitor. Commands end with ; or \g.
Your MariaDB connection id is 17
Server version: 10.2.25-MariaDB-log Source distributionCopyright (c) 2000, 2018, Oracle, MariaDB Corporation Ab and others.
Type ‘help;‘ or ‘\h‘ for help. Type ‘\c‘ to clear the current input statement.
MariaDB [(none)]> show databases;
+--------------------+
| Database |
+--------------------+
| information_schema |
| mysql |
| performance_schema |
| test |
+--------------------+
4 rows in set (0.00 sec)MariaDB [(none)]> SELECT VERSION();
+---------------------+
| VERSION() |
+---------------------+
| 10.2.25-MariaDB-log |
+---------------------+
1 row in set (0.00 sec)
10、允许root远程登录:
MariaDB [mysql]> grant all on . to ‘root‘@‘%‘ identified by ‘123456‘;
Query OK, 0 rows affected (0.00 sec)MariaDB [mysql]> flush privileges;
Query OK, 0 rows affected (0.00 sec)11、 远程登录:
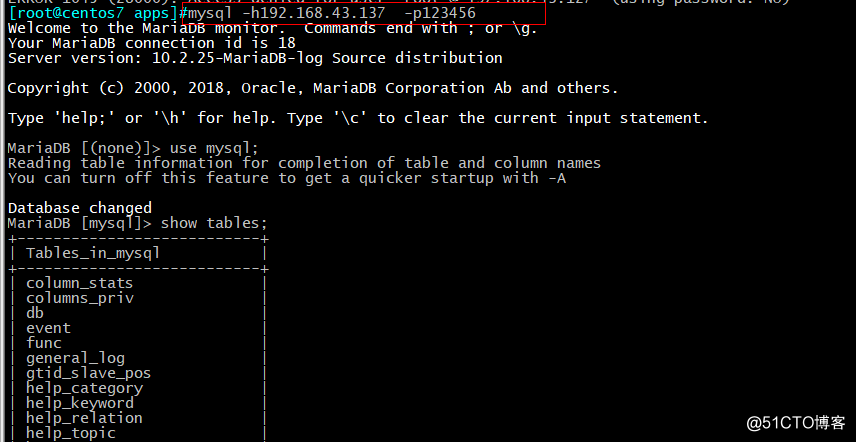
[root@centos7 apps]#mysql -h192.168.43.137 -p123456
Welcome to the MariaDB monitor. Commands end with ; or \g.
Your MariaDB connection id is 18
Server version: 10.2.25-MariaDB-log Source distributionCopyright (c) 2000, 2018, Oracle, MariaDB Corporation Ab and others.
Type ‘help;‘ or ‘\h‘ for help. Type ‘\c‘ to clear the current input statement.
MariaDB [(none)]>
架构班的小伙伴作业看这里哦:
1、配置jenkins实现代码自动发布部署,回滚。
2、实现jenkins对代码自动扫描
标签:comm recursion nsf efault block 从服务器 roots 51cto beijing
原文地址:https://blog.51cto.com/5440126/2477998