标签:ssm running context 中标 sub 保存加载 对话框 int creat
接着上次的继续
上次我们使用逆向工程创建出mapper与bean,然后我们发现 里面的文件都有很多注释, 所以我们可以将它们删除,然后重新生成一遍没有注释的
把之前刚生成的都先删除,就是生成的bean,还有dao中和mapper中的文件,直接删除。
然后只需要在mgb.xml中加入一段代码即可 具体在该网址http://mybatis.org/generator/running/runningWithJava.html
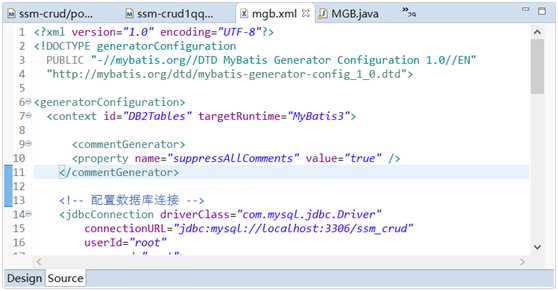
    <commentGenerator>
      <property name="suppressAllComments" value="true" />
    </commentGenerator>
然后我们来重新生成一遍 生成的就是没有注释的了 记得生成了要刷新

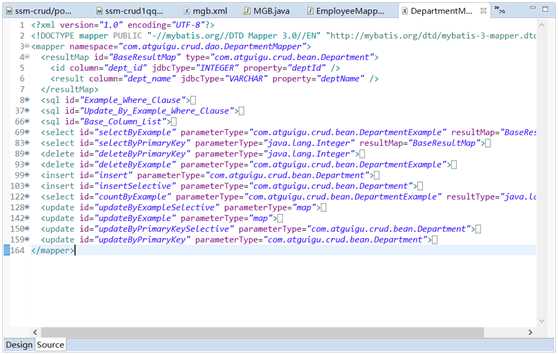
这就大概生成了所有的方法啦,到时候我们可以修改一些我们需要用的。
首先我们的EmployeeMapper.xml里面文件过多 我们可以进行缩小便于整理
然后我们发现,少了联合查询这个功能,我们只能自己写,于是来到EmployeeMapper,新增两个方法
 //新增兩個
    List<Employee> selectByExampleWithDept(EmployeeExample example);

    Employee selectByPrimaryKeyWithDept(Integer empId);

然后需要为Employee增加department字段 并且生成get set方法
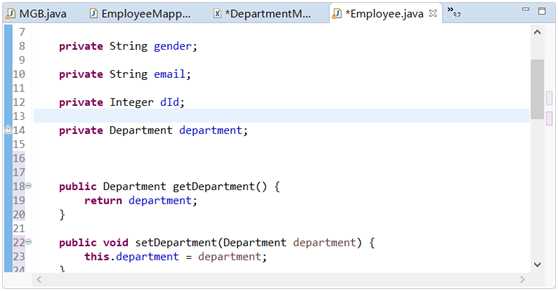
 private Department department;
    public Department getDepartment() {
        return department;
    }

    public void setDepartment(Department department) {
        this.department = department;
    }
定义好了EmployeeMapper 和 bean 那么就需要去定义xml的映射sql语句
来到EmployeeMapper.xml 插入
<!--     List<Employee> selectByExampleWithDept(EmployeeExample example);

    Employee selectByPrimaryKeyWithDept(Integer empId);
   -->
   <select id="selectByExampleWithDept" >
           select
        <if test="distinct">
          distinct
        </if>
        <include refid="Base_Column_List" />
        from tbl_emp
        <if test="_parameter != null">
          <include refid="Example_Where_Clause" />
        </if>
        <if test="orderByClause != null">
          order by ${orderByClause}
        </if>
   </select>
然后再进行修改 之后我们发现那个Base_Column_List 中定义的sql语句并不包含新增加的department,所以我们再冲洗写一个sql语句

  <sql id="WithDept_Column_List">
       emp_id, emp_name, gender, email, d_id,dept_id,dept_name
  </sql>
然后将原来的Base_Column_List 改成我们新定义的id,然后因为原来的语句是从emp表查询,而我们需要查出department的属性,那就肯定需要联合查询了。
那我这里就直接放代码了

<sql id="WithDept_Column_List">
       e.emp_id, e.emp_name, e.gender, e.email, e.d_id,d.dept_id,d.dept_name
  </sql>
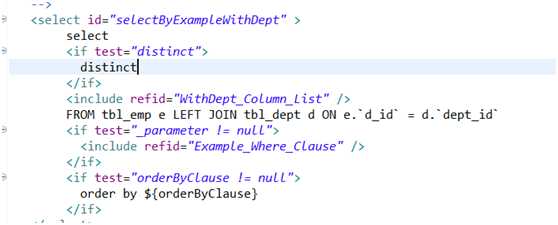
  <!--     List<Employee> selectByExampleWithDept(EmployeeExample example);

    Employee selectByPrimaryKeyWithDept(Integer empId);
   -->
   <select id="selectByExampleWithDept" >
           select
        <if test="distinct">
          distinct
        </if>
        <include refid="WithDept_Column_List" />
        FROM tbl_emp e LEFT JOIN tbl_dept d ON e.`d_id` = d.`dept_id`
        <if test="_parameter != null">
          <include refid="Example_Where_Clause" />
        </if>
        <if test="orderByClause != null">
          order by ${orderByClause}
        </if>
   </select>
将上述信息定义好后,还需要定义一个返回的类型,因为我们使用了别名,就使用resultMap
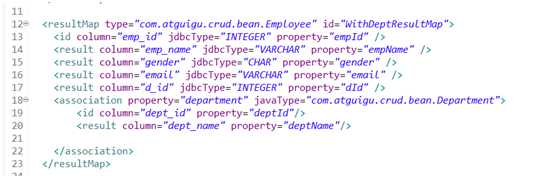
<resultMap type="com.atguigu.crud.bean.Employee" id="WithDeptResultMap">
      <id column="emp_id" jdbcType="INTEGER" property="empId" />
    <result column="emp_name" jdbcType="VARCHAR" property="empName" />
    <result column="gender" jdbcType="CHAR" property="gender" />
    <result column="email" jdbcType="VARCHAR" property="email" />
    <result column="d_id" jdbcType="INTEGER" property="dId" />
    <association property="department" javaType="com.atguigu.crud.bean.Department">
        <id column="dept_id" property="deptId"/>
        <result column="dept_name" property="deptName"/>

    </association>
  </resultMap>
然后将id传回之前的select

然后我们来开始写第二个方法 根据主键查询 并且将resultMap设为刚才的id 其他的都与上一个一样
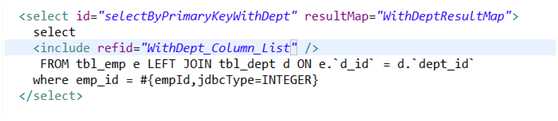
  <select id="selectByPrimaryKeyWithDept" resultMap="WithDeptResultMap">
      select
    <include refid="WithDept_Column_List" />
     FROM tbl_emp e LEFT JOIN tbl_dept d ON e.`d_id` = d.`dept_id`
    where emp_id = #{empId,jdbcType=INTEGER}
  </select>
Mapper搭建完成后,我们开始去测试mapper
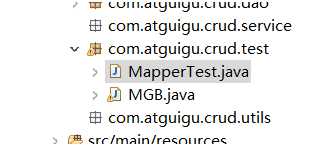
这里我们直接使用Spring的单元测试,则需要导入Spring单元测试的包
<!-- Spring单元测试 -->
    <!-- https://mvnrepository.com/artifact/org.springframework/spring-test -->
<dependency>
    <groupId>org.springframework</groupId>
    <artifactId>spring-test</artifactId>
    <version>4.3.7.RELEASE</version>
    <!-- <scope>test</scope> -->
</dependency>
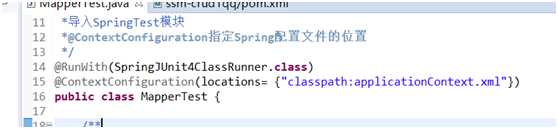
然后使用@ContextConfiguration 代表可以使用Spring测试类并制定Spring配置文件的位置
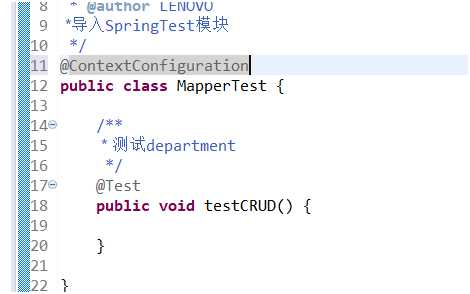
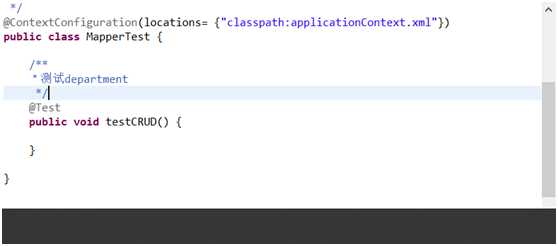
然后加上RunWith 表示使用Spring的单元测试模块
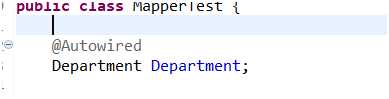
然后用autowired 引入我们的Department类
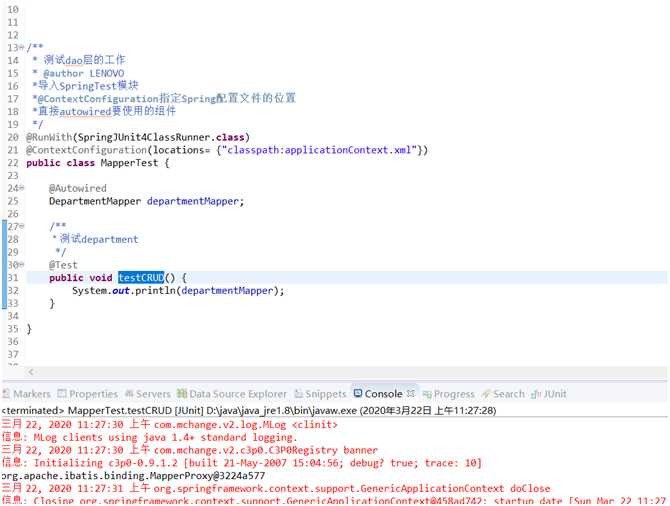
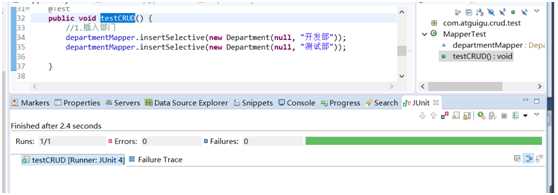
然后我们进行测试一下结果如下就是成功了
然后我们要去给department表中插入数据,首先要给department赋值,我们建立一个构造方法来方便复制,来到department实体类
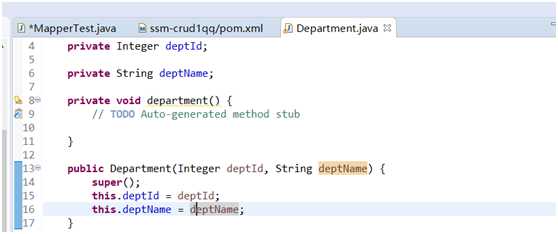
    private void department() {
        // TODO Auto-generated method stub

    }

    public Department(Integer deptId, String deptName) {
        super();
        this.deptId = deptId;
        this.deptName = deptName;
    }
然后我们开始插入部门信息 数据库也成了。
    @Test
    public void testCRUD() {
        //1.插入部门
        departmentMapper.insertSelective(new Department(null, "开发部"));
        departmentMapper.insertSelective(new Department(null, "测试部"));

    }
然后部门插入完毕以后,我们可以插入Employee的具体信息,为了方便,还是一样去Employee实体类增加有参构造和无参构造器。 有参构造器先不要department
    private void employee() {
        // TODO Auto-generated method stub

    }

    public Employee(Integer empId, String empName, String gender, String email, Integer dId) {
        super();
        this.empId = empId;
        this.empName = empName;
        this.gender = gender;
        this.email = email;
        this.dId = dId;
}
然后我们再插入用户信息试试
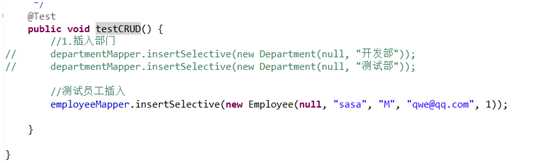
    @Test
    public void testCRUD() {
        //1.插入部门
//        departmentMapper.insertSelective(new Department(null, "开发部"));
//        departmentMapper.insertSelective(new Department(null, "测试部"));

        //测试员工插入
        employeeMapper.insertSelective(new Employee(null, "sasa", "M", "qwe@qq.com", 1));

    }
运行成功后可以去数据库里看看。
然后我们可以进行批量的插入数据。
那么既然要批量的插入数据,那么我们就需要返回applicationContext.xml中去定义可以批量插入的sqlSession了。 其中SqlSessionTemplate 就是跟Spring整合时使用的,更详细的内容大家可以去看视频哦

    <!-- 配置一个可以执行批量的SqlSession   executorType 执行器类型改为批量-->
    <bean id="sqlSession" class="org.mybatis.spring.SqlSessionTemplate">
        <constructor-arg name="sqlSessionFactory" ref="sqlSessionFactory"></constructor-arg>
        <constructor-arg name="executorType" value="BATCH"></constructor-arg>
    </bean>
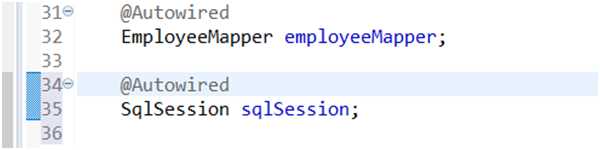
配置好以后就可以在测试页面注入sqlsession了。
然后我们来编写代码

    @Test
    public void testCRUD() {
        //1.插入部门
//        departmentMapper.insertSelective(new Department(null, "开发部"));
//        departmentMapper.insertSelective(new Department(null, "测试部"));

        //测试员工插入
        //employeeMapper.insertSelective(new Employee(null, "sasa", "M", "qwe@qq.com", 1));

//        for() {
//            employeeMapper.insertSelective(new Employee(null, empName, gender, email, dId))
//        }
        //只有通过sqlSession来插入才是批量 直接for循环那就不是批量插入了
        EmployeeMapper mapper = sqlSession.getMapper(EmployeeMapper.class);
        for(int i=0;i<1000;i++) {
            String uid = UUID.randomUUID().toString().substring(0,5)+i;
            mapper.insertSelective(new Employee(null, uid, "M", uid+"@qq.com", 1));
        }
    }

然后插入就完成了。
后面就是正式开始做项目了。这里先理一理流程。
SSM -CRUD  Create(创建)  Retrieve(查询)  Update(更新)  Delete(删除)
    *功能:1.分页  2.数据校验:jquery前端校验 + JSR303后端校验  3 ajax  4 Rest风格的URI 使用HTTP协议请求方式的动词,来标识对资源的操作
    *技术点:  基础框架-ssm   数据库-Mysql  前端框架-bootstrap 快速搭建简洁美观的页面  项目的依赖管理:Maven  分页 pagehelper 逆向工程

*操作过程:1 搭建maven工程
    2. 引入项目依赖的jar包 :spring springmvc mybatic 数据库连接池驱动包  其他(jstl servlet-api  junit)
    3.引入bootstrap 前端框架
*编写ssm整合的关键配置文件
    *web.xml spring  springmvc  mybatis  使用mybatis的逆向工程生成对应的bean以及mapper
    *测试mapper

*验证完成后首先做主页

查询    URI:/emps
1.访问index.jsp页面
2.index.jsp页面发送出查询员工列表请求
3.EmployeeController来接收请求,查出员工数据
4.来到list.jsp页面进行展示

查询通过Ajax
1.index.jsp页面直接发送ajax请求进行员工分页数据的查询
2.服务器将查出的数据 以json字符串的形式返回给浏览器
3.浏览器收到js字符串 可以使用js对json进行解析 使用js通过dom增删改查改变页面
4.返回json 实现客户端的无关性

*新增  逻辑
    1.在index.jsp页面点击新增
    2.弹出新增对话框
    3.去数据库查询部门列表,显示在对话框中
    4.用户输入数据进行校验,完成保存 (重要数据后端校验:JSR303,唯一约束)
规定URI
 /emp/{id}  GET 查询员工
/emp POST 保存员工
/emp/{id} PUT 修改员工
/emp/{id} DELETE 删除员工

*修改-逻辑
    1.点击编辑
    2.弹出用户修改的模态框(显示用户信息)
    3.点击更新,完成用户修改

*删除-逻辑
1.单个删除
URI:/emp/id
在成功的测试了Departmentmapper的功能与在EmployeeMapper中插入1000条数据后,我们可以正式的开始写项目类。首先要完成的是一个分页的操作,首先我们要进入员工信息表格的话需要先将员工的信息全部查找出来放在页面上,需要一个通道进入controller查找,于是我们将index.jsp改造一下,变成一个跳板,去到我们的Controller。
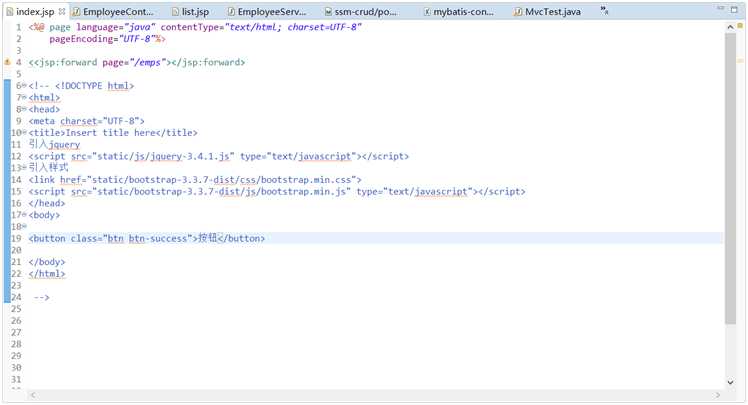
在将index.jsp设置好跳板后,我们就需要写一个后续接收的地方(controller)层

在设置好以后进入,因为这是要接收页面通过Springmvc的请求,之前在SpringMVC中标注了只扫描@Controller的包,那么就给这个class标注@Controller

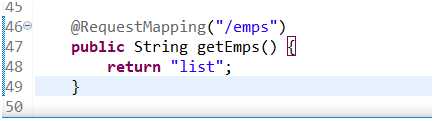
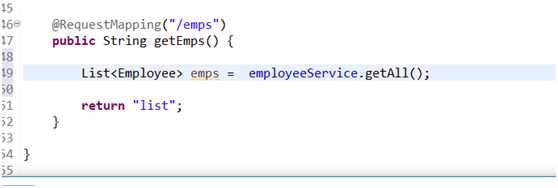
标注好后,我们需要写一个方法来接收之前传输来的/emp 请求,创建一个getEmps方法 并标注@RequestMapping(“/emps”)接收页面传来的指令
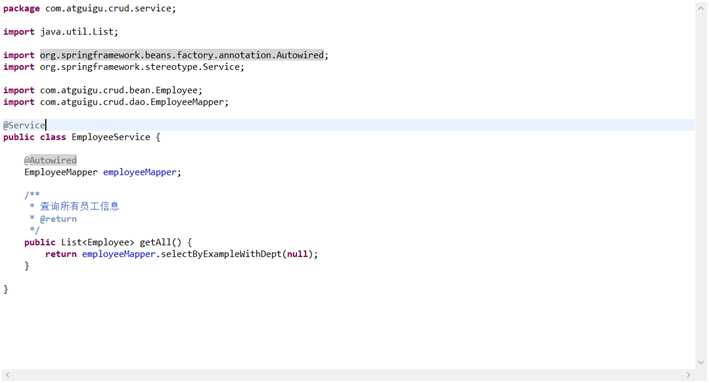
然后我们要去数据库中获取员工的信息,所以我们要去Service层进行数据库操作,在service中创建一个EmployeeService

创好以后先给EmployeeService标注上@Service注解,表示被Spring包扫描,之后需要引用EmployeeMapper来进行引用dao层方法进行数据库操作

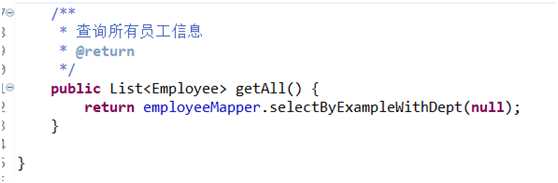
然后建立一个查询所有员工的方法。暂时先标注为null
现在EmployeeService的样子是这样的
然后就回到EmployeeController 在上方引入EmployeeService

并引入getAll()方法并用一个List接收
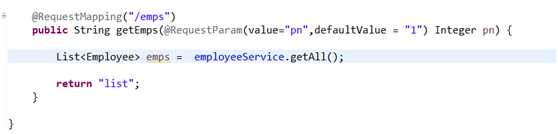
但是由于我们做的是分页查询,需要对每一页进行判别,参数会传来需要获取哪一页的信息,于是我们需要在getEmps()中写入可能会传来的参数并赋给一个值
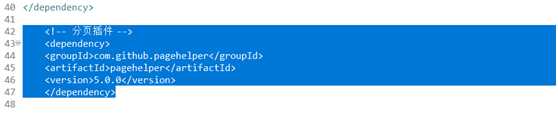
再然后我们可以通过分页的插件对分页进行处理,需要引入PageHelper插件 来到pom.xml
传入
<!-- 分页插件 -->
    <dependency>
    <groupId>com.github.pagehelper</groupId>
    <artifactId>pagehelper</artifactId>
    <version>5.0.0</version>
    </dependency>
传入后保存加载,回到EmployeeController
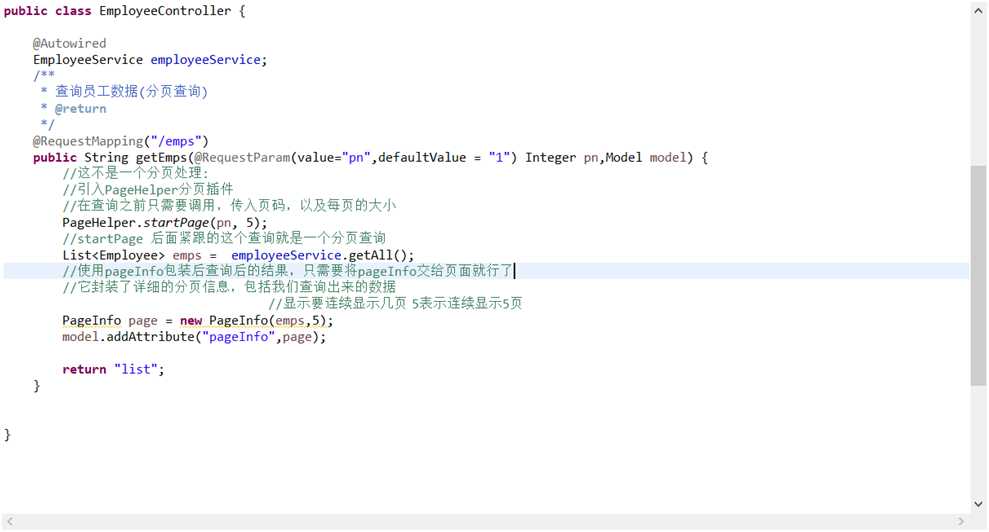
这时就可以引用传入的插件了,首先在查询之前先调用startPage() 传入页码以及每页需要多少的数据我们规定为5

然后要注意了,这个分页查询的PageHelper的下一行一定是分页查询,之后我们通过new一个PageInfo对查询后的结果进行包装,只需要将pageInfo交给页面就行了
PageInfo(emps,num) 将查询后的结果传入 num代表一个页码连续显示几页 比如传入的是第3页 那么就从3开始连续显示num页。
最后用model接收这个pageinfo,这时要在标题处传入Model model

最后将model传到request请求中
最后的页面是这样的:
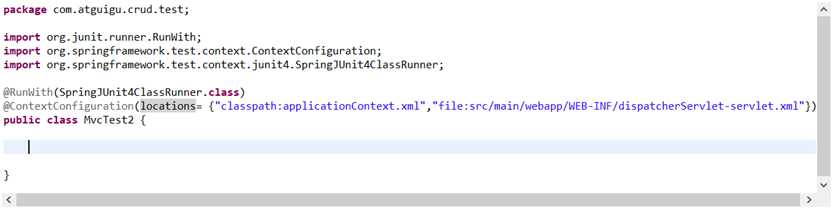
好的当我们已经将分页的步骤基本设计好以后,那么就先去测试中测试一下。在test包下建立一个MvcTest

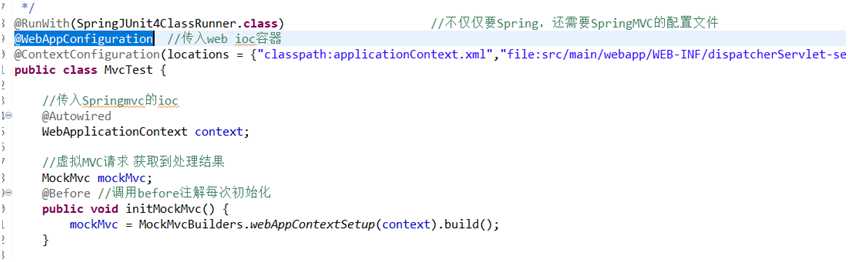
当我们建好以后,还是跟上次一样通过Spring进行测试那么先引入注解
@RunWith(SpringJUnit4ClassRunner.class)        和
@ContextConfiguration(locations = {"classpath:applicationContext.xml","file:src/main/webapp/WEB-INF/dispatcherServlet-servlet.xml"})
因为这次我们测试用到了Springmvc 所以需要它的配置文件,我们也顺带一起引入
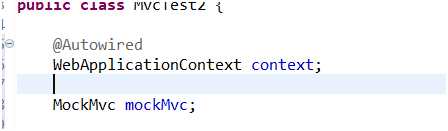
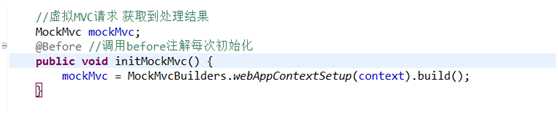
引入后因为我们这次要配合SpringMVC一起测试,那么先传入SpringMvc的ioc WebApplicationContext,然后虚拟MVC请求并获取处理结果在这里我们使用MockMvc(详细见图)
然后我们写一个初始化MockMvc的方法(可能某些地方解释的不清楚,以为我也是刚学,还需要各位自己去查啦)
建立好后呢我们就可以开始写Test方法,首先先建立一个testPage方法并标注@Test
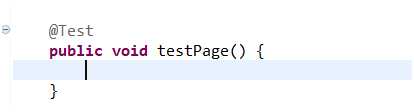
然后在方法中设置MvcResult result 用来接收处理的结果,并使用刚初始化的mockMvc执行模拟进入/emps 并传入参数pn为1的参数返回

在获取之后创建一个MockHttpServletRequest request 获取结果中的请求信息。
然后再从请求信息中获取pageInfo

(之前忘了一个在initMockMvc前加上一个@Before注解表示最先执行记住引入的是测试的包)并且在类上方加入@WebAppConfiguration注解表示传入web ioc容器
做到这一步后,之后就是从pageInfo中获取信息啦,就不一一阐述了直接上图
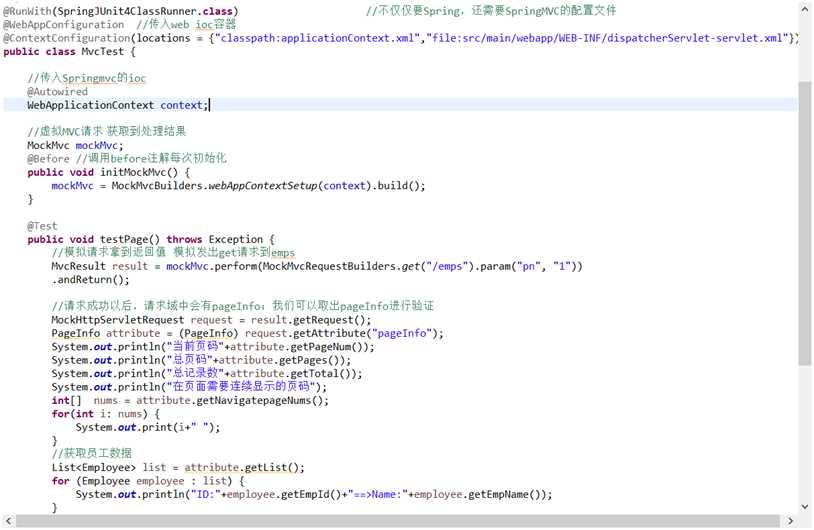
输出的结果是这样的 我们的测试也就完成了

标签:ssm running context 中标 sub 保存加载 对话框 int creat
原文地址:https://www.cnblogs.com/chengzhangriji/p/12557089.html