标签:lan proc alias ESS base project 扣图 color hub
本项目根据DeepLabv3+模型一键抠图示例,主要采用PaddleHub DeepLabv3+模型(deeplabv3p_xception65_humanseg)和python图像处理库opencv、PIL等完成。在最新作中,作者通过encoder-decoder进行多尺度信息的融合,同时保留了原来的空洞卷积和ASSP层, 其骨干网络使用了Xception模型,提高了语义分割的健壮性和运行速率,在 PASCAL VOC 2012 dataset取得新的state-of-art performance,该PaddleHub Module使用百度自建数据集进行训练,可用于人像分割,支持任意大小的图片输入。在完成一键抠图之后,通过图像合成,实现扣图比赛任务。
PaddleHub 是基于 PaddlePaddle 开发的预训练模型管理工具,可以借助预训练模型更便捷地开展迁移学习工作,目前的预训练模型涵盖了图像分类、目标检测、词法分析、语义模型、情感分析、视频分类、图像生成、图像分割、文本审核、关键点检测等主流模型。
PaddleHub官网:PaddleHub官网
PaddleHub项目地址:PaddleHub github
更多PaddleHub预训练模型应用可见:教程合集课程
NOTE: 如果您在本地运行该项目示例,需要首先安装PaddleHub。如果您在线运行,需要首先fork该项目示例。之后按照该示例操作即可。
!pip install paddlehub==1.6.0 -i https://pypi.tuna.tsinghua.edu.cn/simple
!hub install deeplabv3p_xception65_humanseg==1.0.0
import matplotlib.pyplot as plt
import matplotlib.image as mpimg
from matplotlib import animation
import cv2
import paddlehub as hub
from PIL import Image, ImageSequence
from IPython.display import display, HTML
import numpy as np
import imageio
import os
# 测试图片路径和输出路径
test_path = ‘image/test/‘
output_path = ‘image/blend_out/‘
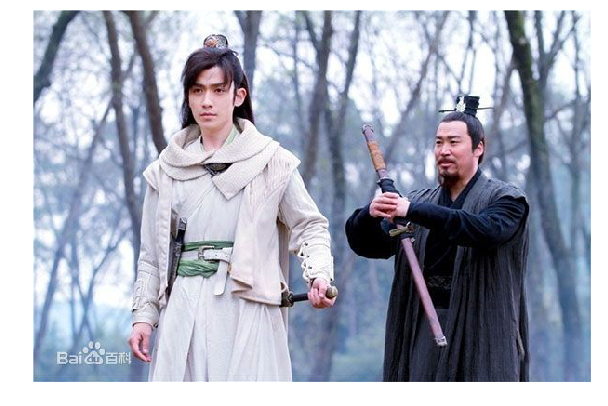
# 待预测图片
test_img_path = ["test.jpg"]
test_img_path = [test_path + img for img in test_img_path]
img = mpimg.imread(test_img_path[0])
# 展示待预测图片
plt.figure(figsize=(10,10))
plt.imshow(img)
plt.axis(‘off‘)
plt.show()
通过加载PaddleHub DeepLabv3+模型(deeplabv3p_xception65_humanseg)实现一键抠图
module = hub.Module(name="deeplabv3p_xception65_humanseg")
input_dict = {"image": test_img_path}

# execute predict and print the result
results = module.segmentation(data=input_dict)
for result in results:
    print(result)

# 预测结果展示
out_img_path = ‘humanseg_output/‘ + os.path.basename(test_img_path[0]).split(‘.‘)[0] + ‘.png‘
img = mpimg.imread(out_img_path)
plt.figure(figsize=(10,10))
plt.imshow(img)
plt.axis(‘off‘)
plt.show()
[32m[2020-04-01 22:40:09,064] [ INFO] - Installing deeplabv3p_xception65_humanseg module[0m
[32m[2020-04-01 22:40:09,100] [ INFO] - Module deeplabv3p_xception65_humanseg already installed in /home/aistudio/.paddlehub/modules/deeplabv3p_xception65_humanseg[0m
[32m[2020-04-01 22:40:09,814] [ INFO] - 0 pretrained paramaters loaded by PaddleHub[0m
{‘origin‘: ‘image/test/test.jpg‘, ‘processed‘: ‘humanseg_output/test.png‘}

# 合成函数
def blend_images(fore_image, base_image, output_path):
    """
    将抠出的人物图像换背景
    fore_image: 前景图片,抠出的人物图片
    base_image: 背景图片
    """
    # 读入图片
    base_image = Image.open(base_image).convert(‘RGB‘)
    fore_image = Image.open(fore_image).resize(base_image.size)

    # 图片加权合成
    scope_map = np.array(fore_image)[:,:,-1] / 255
    scope_map = scope_map[:,:,np.newaxis]
    scope_map = np.repeat(scope_map, repeats=3, axis=2)
    res_image = np.multiply(scope_map, np.array(fore_image)[:,:,:3]) + np.multiply((1-scope_map), np.array(base_image))

    #保存图片
    res_image = Image.fromarray(np.uint8(res_image))
    res_image.save(output_path)
output_path_img = output_path + ‘blend_res_img.jpg‘
blend_images(‘humanseg_output/test.png‘, ‘image/test/bg.jpg‘, output_path_img)

# 展示合成图片
plt.figure(figsize=(10,10))
img = mpimg.imread(output_path_img)
plt.imshow(img)
plt.axis(‘off‘)
plt.show()

output_path_img = output_path + ‘blend_res_img2.jpg‘
blend_images(‘humanseg_output/test.png‘, ‘image/test/bg1.jpg‘, output_path_img)

# 展示合成图片
plt.figure(figsize=(10,10))
img = mpimg.imread(output_path_img)
plt.imshow(img)
plt.axis(‘off‘)
plt.show()

# 完整流程来一张
test_img_path = ["xcd.jpg"]
test_img_path = [test_path + img for img in test_img_path]
img = mpimg.imread(test_img_path[0])

module = hub.Module(name="deeplabv3p_xception65_humanseg")
input_dict = {"image": test_img_path}

# execute predict and print the result
results = module.segmentation(data=input_dict)

output_path_img = output_path + ‘blend_res_img2.jpg‘
blend_images(‘humanseg_output/xcd.png‘, ‘image/test/bg.jpg‘, output_path_img)

# 展示合成图片
plt.figure(figsize=(10,10))
img = mpimg.imread(output_path_img)
plt.imshow(img)
plt.axis(‘off‘)
plt.show()
[32m[2020-04-01 22:40:28,805] [ INFO] - Installing deeplabv3p_xception65_humanseg module[0m
[32m[2020-04-01 22:40:28,821] [ INFO] - Module deeplabv3p_xception65_humanseg already installed in /home/aistudio/.paddlehub/modules/deeplabv3p_xception65_humanseg[0m
[32m[2020-04-01 22:40:29,497] [ INFO] - 0 pretrained paramaters loaded by PaddleHub[0m

def create_gif(gif_name, path, duration=0.3):
    ‘‘‘
    生成gif文件,原始图片仅支持png格式
    gif_name : 字符串,所生成的 gif 文件名,带 .gif 后缀
    path :      需要合成为 gif 的图片所在路径
    duration :  gif 图像时间间隔
    ‘‘‘

    frames = []
    pngFiles = os.listdir(path)
    image_list = [os.path.join(path, f) for f in pngFiles]
    for image_name in image_list:
        frames.append(imageio.imread(image_name))
    # 保存为 gif
    imageio.mimsave(gif_name, frames, ‘GIF‘, duration=duration)
    return

def split_gif(gif_name, output_path, resize=False):
    ‘‘‘
    拆分gif文件,生成png格式,便于生成
    gif_name :  gif 文件路径,带 .gif 后缀
    path :      拆分图片所在路径
    ‘‘‘
    gif_file = Image.open(gif_name)
    name = gif_name.split(‘/‘)[-1].split(‘.‘)[0]
    if not os.path.exists(output_path):                        # 判断该文件夹是否存在,如果存在再创建则会报错
        os.mkdir(output_path)

    for i, frame in enumerate(ImageSequence.Iterator(gif_file), 1):
        if resize:
            frame = frame.resize((300, 168), Image.ANTIALIAS)
        frame.save(‘%s/%s_%d.png‘ % (output_path, name, i))                       # 保存在等目录的output文件夹下

def plot_sequence_images(image_array):
    ‘‘‘ Display images sequence as an animation in jupyter notebook

    Args:
        image_array(numpy.ndarray): image_array.shape equal to (num_images, height, width, num_channels)
    ‘‘‘
    dpi = 72.0
    xpixels, ypixels = image_array[0].shape[:2]
    fig = plt.figure(figsize=(ypixels/dpi, xpixels/dpi), dpi=dpi)
    im = plt.figimage(image_array[0])

    def animate(i):
        im.set_array(image_array[i])
        return (im,)

    anim = animation.FuncAnimation(fig, animate, frames=len(image_array), interval=500, repeat_delay=1, repeat=True)
    display(HTML(anim.to_html5_video()))
# 拆GIF文件为png帧
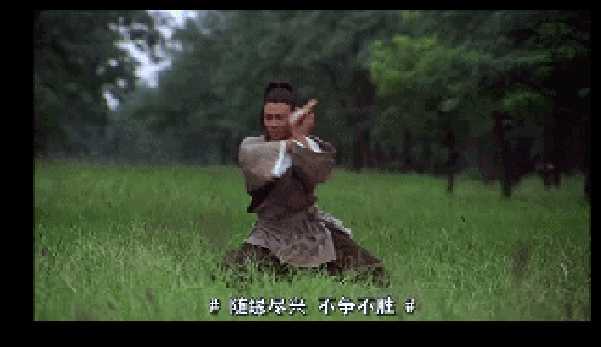
split_gif(‘image/test_gif/wushu.gif‘, ‘image/test_gif/wushu_frame‘, True)
imgs = []
for i, fname in enumerate(os.listdir(‘image/test_gif/wushu_frame‘)):
img = cv2.imread(‘image/test_gif/wushu_frame/‘ + fname)
img_rgb = cv2.cvtColor(img, cv2.COLOR_BGR2RGB)
imgs.append(img_rgb)
plot_sequence_images(imgs)

# 测试图片路径和输出路径
test_path = ‘image/test_gif/wushu_frame/‘
output_path = ‘image/blend_out/‘

# 待预测图片
test_img_path = os.listdir(test_path)
test_img_path = [test_path + i for i in test_img_path]
img = mpimg.imread(test_img_path[0])

# 展示待预测图片
plt.figure(figsize=(10,10))
plt.imshow(img)
plt.axis(‘off‘)
plt.show()
input_dict = {"image": test_img_path}
# execute predict and print the result
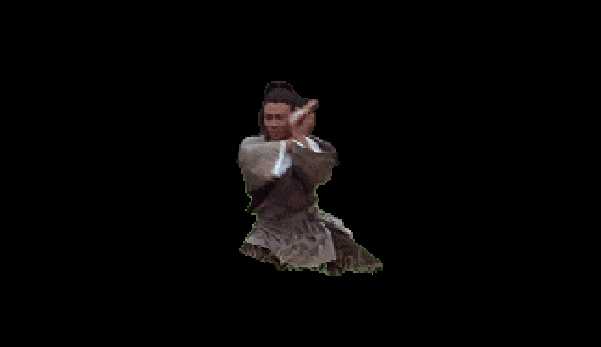
results = module.segmentation(data=input_dict)
# 预测结果展示
out_img_path = ‘humanseg_output/‘ + os.path.basename(test_img_path[0]).split(‘.‘)[0] + ‘.png‘
img = mpimg.imread(out_img_path)
plt.figure(figsize=(10,10))
plt.imshow(img)
plt.axis(‘off‘)
plt.show()
# 合成图片
humanseg_wushu = [filename for filename in os.listdir(‘humanseg_output/‘) if filename.startswith("wushu")]

for i, img in enumerate(humanseg_wushu):
    img_path = os.path.join(‘humanseg_output/wushu_%d.png‘ % (i+1))
    output_path_img = output_path + ‘wushu/%d.png‘ % i
    blend_images(img_path, ‘image/test/bg1.jpg‘, output_path_img)
# 合成GIF
create_gif(‘image/blend_out/blend_res_wushu.gif‘, ‘image/blend_out/wushu/‘, duration=0.5)

imgs = []
for i, fname in enumerate(os.listdir(‘image/blend_out/wushu/‘)):
    img = cv2.imread(‘image/blend_out/wushu/‘ + fname)
    img_rgb = cv2.cvtColor(img, cv2.COLOR_BGR2RGB)
    imgs.append(img_rgb)
plot_sequence_images(imgs)
有时间再写……
标签:lan proc alias ESS base project 扣图 color hub
原文地址:https://www.cnblogs.com/fahaihappy/p/12616795.html