标签:package nbsp string mic bsp unit 服务器 add ext
1)用户(User)
2)用户存根(User-Stub)
3)RPC通信包(被称为RPCRuntime)
4)服务器存根(Server)
5)服务器(Server)
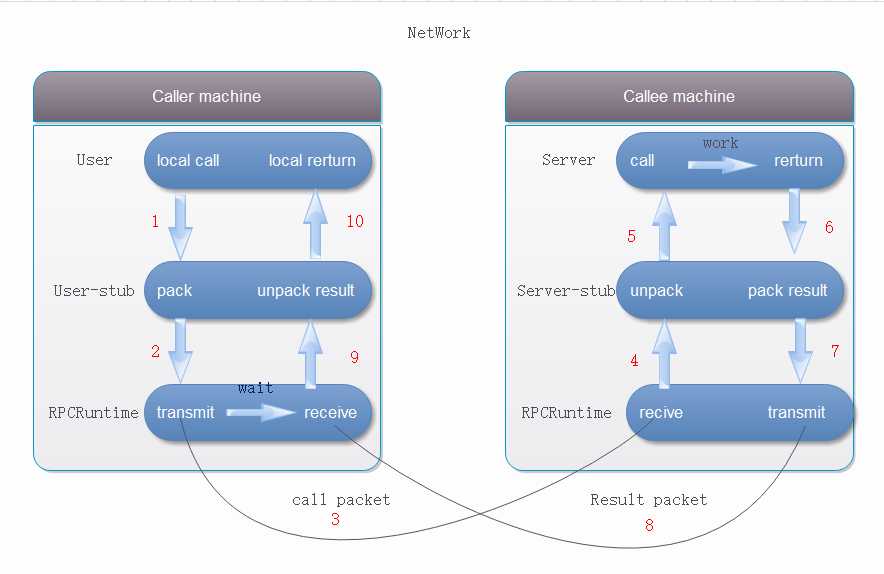
当用户发起一个远程CALL的时候,远程如下:
<?xml version="1.0" encoding="UTF-8"?>

<project xmlns="http://maven.apache.org/POM/4.0.0" xmlns:xsi="http://www.w3.org/2001/XMLSchema-instance"
  xsi:schemaLocation="http://maven.apache.org/POM/4.0.0 http://maven.apache.org/xsd/maven-4.0.0.xsd">
  <modelVersion>4.0.0</modelVersion>

  <groupId>com.blb</groupId>
  <artifactId>Avro_RPC</artifactId>
  <version>1.0-SNAPSHOT</version>

  <name>Avro_RPC</name>
  <!-- FIXME change it to the project‘s website -->
  <url>http://www.example.com</url>

  <properties>
    <project.build.sourceEncoding>UTF-8</project.build.sourceEncoding>
    <maven.compiler.source>1.7</maven.compiler.source>
    <maven.compiler.target>1.7</maven.compiler.target>
  </properties>

  <dependencies>
    <dependency>
      <groupId>junit</groupId>
      <artifactId>junit</artifactId>
      <version>4.11</version>
      <scope>test</scope>
    </dependency>
    <!-- https://mvnrepository.com/artifact/org.apache.avro/avro -->
    <dependency>
      <groupId>org.apache.avro</groupId>
      <artifactId>avro</artifactId>
      <version>1.8.2</version>
    </dependency>
    <!-- https://mvnrepository.com/artifact/org.apache.avro/avro-tools -->
    <dependency>
      <groupId>org.apache.avro</groupId>
      <artifactId>avro-tools</artifactId>
      <version>1.8.2</version>
    </dependency>
    <dependency>
      <groupId>org.apache.avro</groupId>
      <artifactId>avro-maven-plugin</artifactId>
      <version>1.8.2</version>
    </dependency>
    <dependency>
      <groupId>org.apache.avro</groupId>
      <artifactId>avro-compiler</artifactId>
      <version>1.8.2</version>
    </dependency>
    <dependency>
      <groupId>org.apache.avro</groupId>
      <artifactId>avro-ipc</artifactId>
      <version>1.8.2</version>
    </dependency>
  </dependencies>

  <build>
    <plugins>
      <plugin>
        <groupId>org.apache.avro</groupId>
        <artifactId>avro-maven-plugin</artifactId>
        <version>1.8.2</version>
        <executions>
          <execution>
            <phase>generate-sources</phase>
            <goals>
              <goal>schema</goal>
            </goals>
            <configuration>
              <sourceDirectory>${project.basedir}/src/main/avro/</sourceDirectory>
              <outputDirectory>${project.basedir}/src/main/java/</outputDirectory>
            </configuration>
          </execution>
        </executions>
      </plugin>
      <plugin>
        <groupId>org.apache.maven.plugins</groupId>
        <artifactId>maven-compiler-plugin</artifactId>
        <configuration>
          <source>1.8</source>
          <target>1.8</target>
        </configuration>
      </plugin>
    </plugins>
    <pluginManagement><!-- lock down plugins versions to avoid using Maven defaults (may be moved to parent pom) -->
      <plugins>
        <!-- clean lifecycle, see https://maven.apache.org/ref/current/maven-core/lifecycles.html#clean_Lifecycle -->
        <plugin>
          <artifactId>maven-clean-plugin</artifactId>
          <version>3.1.0</version>
        </plugin>
        <!-- default lifecycle, jar packaging: see https://maven.apache.org/ref/current/maven-core/default-bindings.html#Plugin_bindings_for_jar_packaging -->
        <plugin>
          <artifactId>maven-resources-plugin</artifactId>
          <version>3.0.2</version>
        </plugin>
        <plugin>
          <artifactId>maven-compiler-plugin</artifactId>
          <version>3.8.0</version>
        </plugin>
        <plugin>
          <artifactId>maven-surefire-plugin</artifactId>
          <version>2.22.1</version>
        </plugin>
        <plugin>
          <artifactId>maven-jar-plugin</artifactId>
          <version>3.0.2</version>
        </plugin>
        <plugin>
          <artifactId>maven-install-plugin</artifactId>
          <version>2.5.2</version>
        </plugin>
        <plugin>
          <artifactId>maven-deploy-plugin</artifactId>
          <version>2.8.2</version>
        </plugin>
        <!-- site lifecycle, see https://maven.apache.org/ref/current/maven-core/lifecycles.html#site_Lifecycle -->
        <plugin>
          <artifactId>maven-site-plugin</artifactId>
          <version>3.7.1</version>
        </plugin>
        <plugin>
          <artifactId>maven-project-info-reports-plugin</artifactId>
          <version>3.0.0</version>
        </plugin>
      </plugins>
    </pluginManagement>
  </build>
</project>
@namespace("rpc.service")
protocol AddService{
int add(int i,int y);
}
@namespace("rpc.service")
protocol TransferService{
import schema "User.avsc";
void parseUser(avro.domain.User user);
}
@namespace("rpc.service")
protocol MapService{
import schema "User.avsc";
void parseUserMap(map<avro.domain.User> userMap);
}
@namespace("com.service")
protocol AddService{
import schema "user.avsc";
int add(int x , int y);
void parseUser(com.domain.User user);
}


package com.blb.service;

import com.blb.pojo.User;
import org.apache.avro.AvroRemoteException;

public class AddServiceImpl implements AddService {
    @Override
    public int add(int x, int y) throws AvroRemoteException {
        System.out.println(x+y);
        return x+y;
    }

    @Override
    public Void parseUser(User user) throws AvroRemoteException {
        System.out.println(user);
        return null;
    }
}
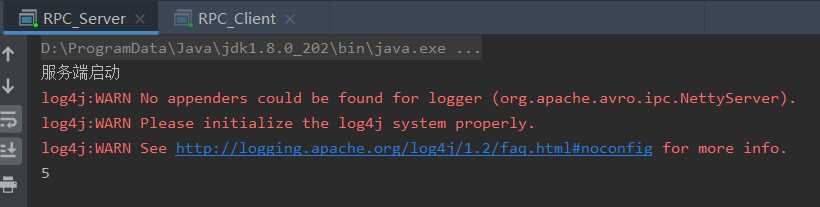
package com.blb.server;

import com.blb.service.AddService;
import com.blb.service.AddServiceImpl;
import org.apache.avro.ipc.NettyServer;
import org.apache.avro.ipc.specific.SpecificResponder;

import java.net.InetSocketAddress;

public class RPC_Server {

    public static void main(String[] args) {
        NettyServer server = new NettyServer(
                new SpecificResponder(AddService.class,new AddServiceImpl()),
                new InetSocketAddress(9999)
        );
        System.out.println("服务端启动");
    }
}
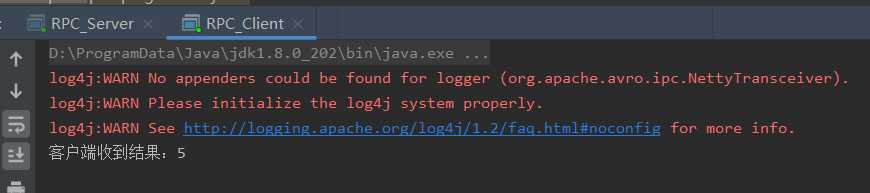
package com.blb.client;

import com.blb.service.AddService;
import org.apache.avro.ipc.NettyTransceiver;
import org.apache.avro.ipc.specific.SpecificRequestor;

import java.io.IOException;
import java.net.InetSocketAddress;

public class RPC_Client {

    public static void main(String[] args) throws IOException {
        NettyTransceiver client = new NettyTransceiver(
                new InetSocketAddress("127.0.0.1",9999)
        );
        //--因为接口不能直接使用,avro底层是通过jdk动态代理生成接口的代理对象
        AddService proxy = SpecificRequestor.getClient(AddService.class,client);
        int result = proxy.add(2,3);
        System.out.println("客户端收到结果:"+result);
    }

}
标签:package nbsp string mic bsp unit 服务器 add ext
原文地址:https://www.cnblogs.com/IT_CH/p/12702226.html