标签:href 访问 enable null net 目录 others combine 使用
1、部署分离的LAMP,部署到二台服务器上,php加载xcache模块1)在c2服务器安装httpd, php, php-mysql
[root@c2 ~]# yum install httpd php php-mysql -y2)在mariadb服务器安装数据库 mariadb-server
[root@mariadb ~]# yum install mariadb-server -y3)启动服务
[root@c2 ~]# systemctl start httpd
[root@mariadb ~]# systemctl start mariadb.service
4)测试
[root@c2 html]# ll -lh
total 3.6M
-rw-r--r-- 1 root root   16 May 14 20:43 index.html
-rw-r--r-- 1 root root 3.6M May 10 21:45 npp
[root@c2 html]# pwd
/var/www/html
在c1安装httpd-tools才能使用ab命令
[root@c1 ~]# yum install httpd-tools-2.4.6-93.el7.centos.x86_64 -y
[root@c1 ~]# ab -c10 -n 100 http://c1/npp
This is ApacheBench, Version 2.3 <$Revision: 1430300 $>
Copyright 1996 Adam Twiss, Zeus Technology Ltd, http://www.zeustech.net/
Licensed to The Apache Software Foundation, http://www.apache.org/
Benchmarking 10.0.1.243 (be patient).....done
Server Software: Apache/2.4.6
Server Hostname: 10.0.1.243
Server Port: 80
Document Path: /npp
Document Length: 3760568 bytes
Concurrency Level: 10
Time taken for tests: 0.742 seconds
Complete requests: 100
Failed requests: 0
Write errors: 0
Total transferred: 376080800 bytes
HTML transferred: 376056800 bytes
Requests per second: 134.82 [#/sec] (mean)
Time per request: 74.173 [ms] (mean)
Time per request: 7.417 [ms] (mean, across all concurrent requests)
Transfer rate: 495148.38 [Kbytes/sec] received
Connection Times (ms)
min mean[+/-sd] median max
Connect: 0 0 0.4 0 3
Processing: 37 72 20.3 74 113
Waiting: 1 26 18.7 36 57
Total: 38 72 20.2 74 113
Percentage of the requests served within a certain time (ms)
50% 74
66% 80
75% 83
80% 87
90% 103
95% 110
98% 113
99% 113
100% 113 (longest request)5)在c2上安装xcache加速
a.编译安装
[root@c2 html]# yum -y install php-develb.官网下载xcache-3.2.0.tar.bz2;上传到/usr/local/src/目录并解压缩
[root@c2 src]# tar -xvf xcache-3.2.0.tar.gzc.用命令phpize 生成预编译脚本
[root@c2 xcache-3.2.0]# phpize
Configuring for:
PHP Api Version:         20100412
Zend Module Api No:      20100525
Zend Extension Api No:   220100525
[root@c2 xcache-3.2.0]# ll configure
-rwxr-xr-x 1 root root 414469 May 14 21:00 configure
d.预编译
[root@c2 src]# cd xcache-3.2.0/
[root@c2 xcache-3.2.0]# ./configure --enable-xcache
e.编译和安装
[root@c2 xcache-3.2.0]# make -j 4 && make install[root@c2 xcache-3.2.0]# ls /usr/lib64/php/modules/
curl.so mysqli.so pdo.so sqlite3.so
fileinfo.so mysql.so pdo_sqlite.so xcache.so
json.so pdo_mysql.so phar.so zip.so
f.加载xcache模块并重启httpd服务
[root@c2 xcache-3.2.0]# cp xcache.ini /etc/php.d/
[root@c2 xcache-3.2.0]# ls /etc/php.d/
curl.ini      mysqli.ini  pdo_mysql.ini   sqlite3.ini
fileinfo.ini  mysql.ini   pdo_sqlite.ini  xcache.ini
json.ini      pdo.ini     phar.ini        zip.ini
[root@c2 xcache-3.2.0]# systemctl restart httpd.serviceg.测试
[root@c1 ~]# ab -c10 -n 100 http://c2/npp
This is ApacheBench, Version 2.3 <$Revision: 1430300 $>
Copyright 1996 Adam Twiss, Zeus Technology Ltd, http://www.zeustech.net/
Licensed to The Apache Software Foundation, http://www.apache.org/

Benchmarking c2 (be patient).....done

Server Software:        Apache/2.4.6
Server Hostname:        c2
Server Port:            80

Document Path:          /npp
Document Length:        3760568 bytes

Concurrency Level:      10
Time taken for tests:   0.604 seconds
Complete requests:      100
Failed requests:        0
Write errors:           0
Total transferred:      376080800 bytes
HTML transferred:       376056800 bytes
Requests per second:    165.64 [#/sec] (mean)
Time per request:       60.371 [ms] (mean)
Time per request:       6.037 [ms] (mean, across all concurrent requests)
Transfer rate:          608345.02 [Kbytes/sec] received

Connection Times (ms)
              min  mean[+/-sd] median   max
Connect:        0    0   0.1      0       1
Processing:    32   59  15.4     57      89
Waiting:        1   25  11.6     26      46
Total:         32   59  15.4     57      89

Percentage of the requests served within a certain time (ms)
  50%     57
  66%     70
  75%     71
  80%     74
  90%     80
  95%     84
  98%     89
  99%     89
 100%     89 (longest request)
2、部署wordpress论坛,并实现正常访问登录论坛
2.1 在第1小节的lamp基础上实现此场景。
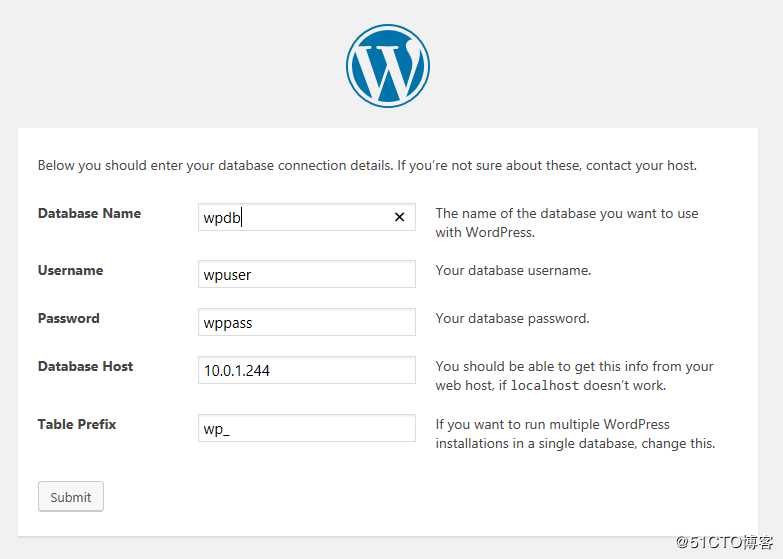
2.2 在数据库服务器新建wpdb库和wpuser远程连接用户
[root@mariadb ~]# mysql
Welcome to the MariaDB monitor.  Commands end with ; or \g.
Your MariaDB connection id is 2
Server version: 5.5.65-MariaDB MariaDB Server

Copyright (c) 2000, 2018, Oracle, MariaDB Corporation Ab and others.

Type ‘help;‘ or ‘\h‘ for help. Type ‘\c‘ to clear the current input statement.

MariaDB [(none)]> create database wpdb;
Query OK, 1 row affected (0.00 sec)

MariaDB [(none)]> grant all privileges on wpdb.* to wpuser@‘%‘ identified by "wppass";
Query OK, 0 rows affected (0.00 sec)

MariaDB [(none)]> flush privileges;
Query OK, 0 rows affected (0.00 sec)
###测试远程连接数据库
[root@c2 ~]# mysql -uwpuser -pwppass -hc3
Welcome to the MariaDB monitor. Commands end with ; or \g.
Your MariaDB connection id is 3
Server version: 5.5.65-MariaDB MariaDB Server
Copyright (c) 2000, 2018, Oracle, MariaDB Corporation Ab and others.
Type ‘help;‘ or ‘\h‘ for help. Type ‘\c‘ to clear the current input statement.
MariaDB [(none)]> 2.3 官网下载并解压缩WordPress博客程序到网页站点目录下
[root@c2 html]# ls
wordpress  wordpress-5.0.3.tar.gz
[root@c2 html]# pwd
/var/www/html
2.4 设置wordpress目录权限
[root@c2 html]# setfacl -R -m u:apache:rwx wordpress2.5 打开http://c3/wordpress进行页面安装
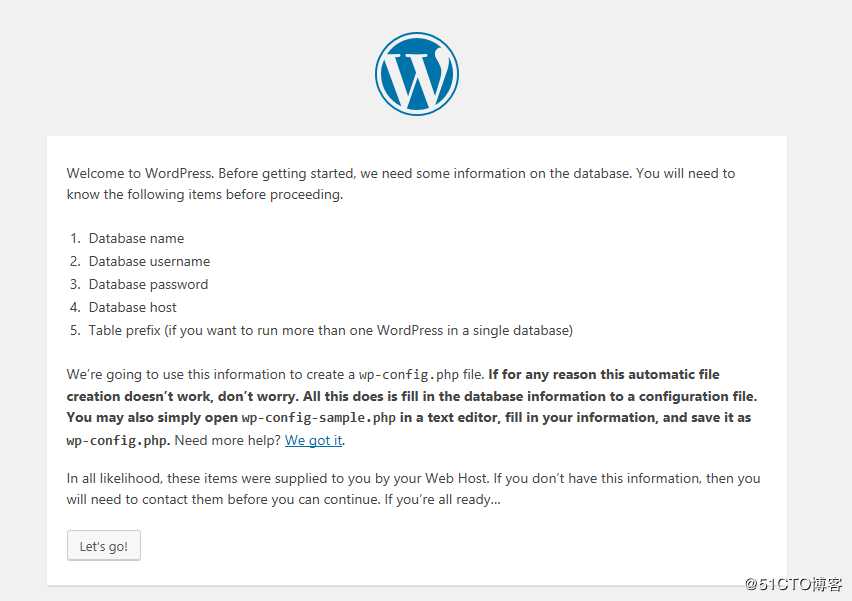
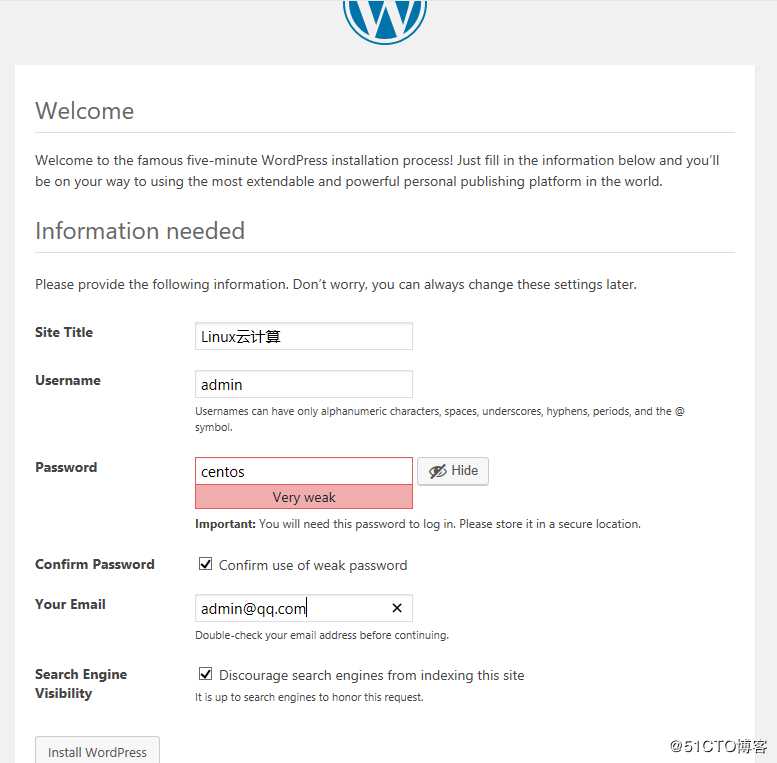
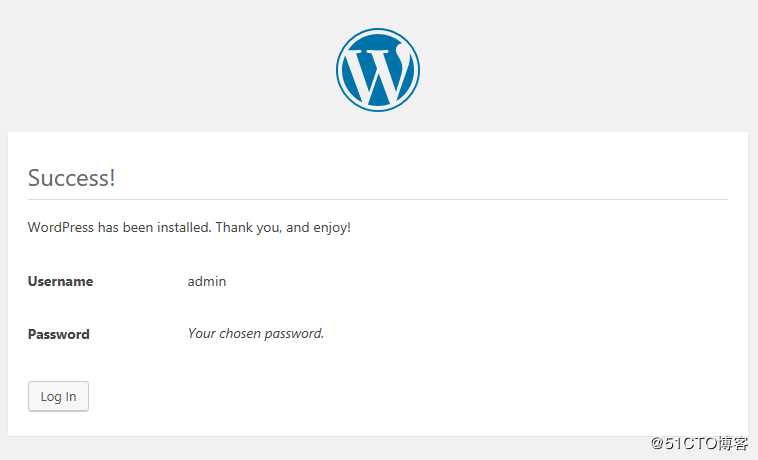
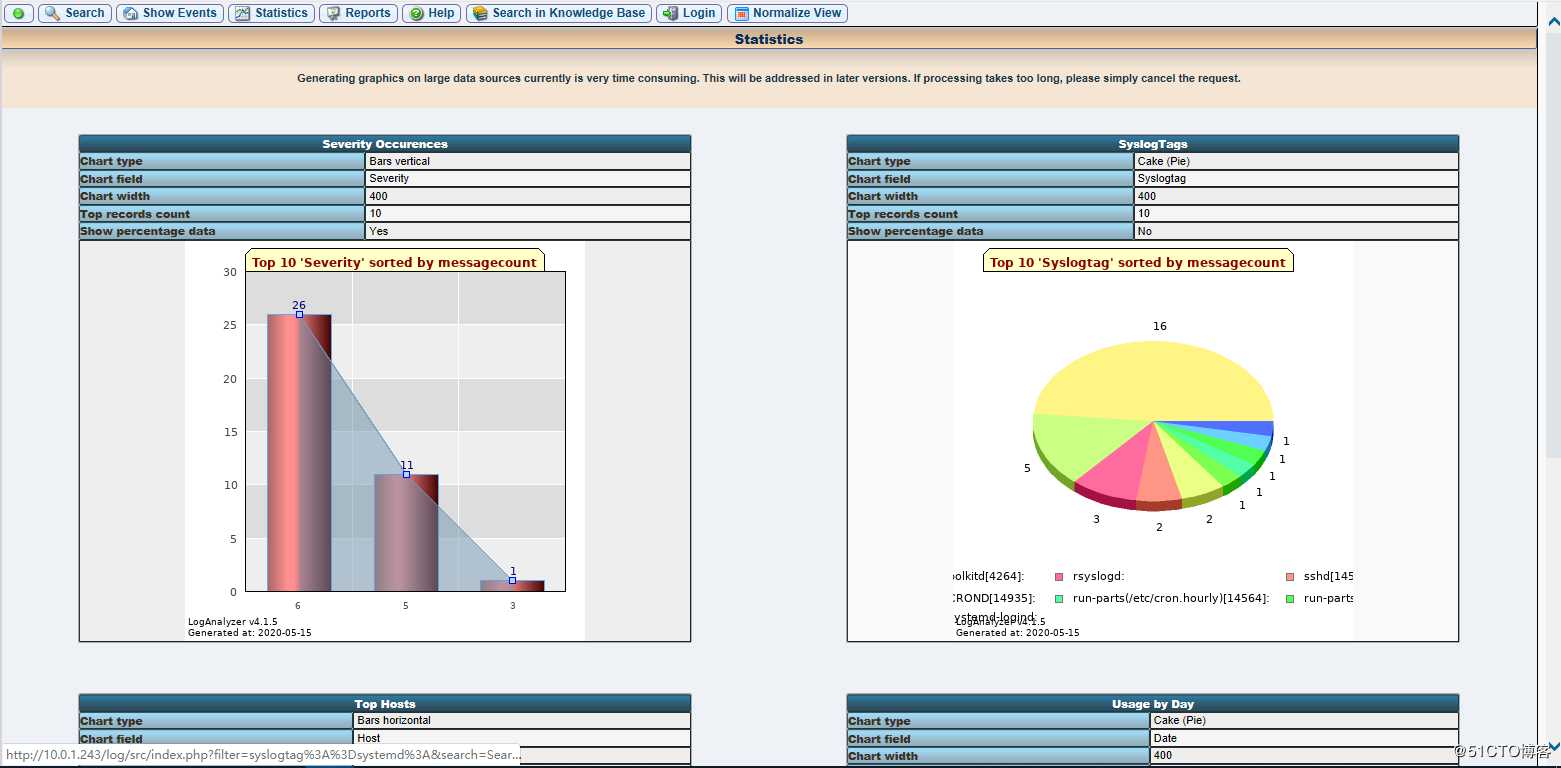
3、收集apache访问日志,并实现图形化展示。
3.1 rsyslog收集apache访问日志
3.1.1 修改apache配置文件
[root@c2 ~]# vim /etc/httpd/conf/httpd.conf
#CustomLog "logs/access_log" combined
CustomLog "|/usr/bin/logger -p local6.info" combined
3.1.2 修改rsyslog的配置文件
[root@c2 ~]# vim /etc/rsyslog.conf
local6.*                                               /var/log/apache_access_log
3.1.3 重启rsyslog和apache服务
[root@c2 ~]# systemctl restart rsyslog.service httpd.service3.2 rsyslog将日志记录于MySQL中
3.2.1 在mysql server上授权rsyslog能连接至数据库服务器
[root@mariadb ~]# mysql
Welcome to the MariaDB monitor.  Commands end with ; or \g.
Your MariaDB connection id is 59
Server version: 5.5.65-MariaDB MariaDB Server

Copyright (c) 2000, 2018, Oracle, MariaDB Corporation Ab and others.

Type ‘help;‘ or ‘\h‘ for help. Type ‘\c‘ to clear the current input statement.

MariaDB [(none)]> grant all on Syslog.* to ‘apache‘@‘%‘ identified by ‘centos‘;
Query OK, 0 rows affected (0.01 sec)

MariaDB [(none)]> flush privileges;
Query OK, 0 rows affected (0.00 sec)
3.2.2 在rsyslog服务器上安装mysql模块相关的程序包
[root@c2 ~]# yum install rsyslog-mysql -y3.2.3 为rsyslog创建数据库及表
[root@c2 ~]# mysql -uapache -pcentos -h c3 < /usr/share/doc/rsyslog-8.24.0/mysql-createDB.sql[root@c2 ~]# mysql -uapache -pcentos -h c3 -e "show databases;"
+--------------------+
| Database |
+--------------------+
| information_schema |
| Syslog |
| test |
+--------------------+3.2.4 配置rsyslog将日志保存到mysql中
[root@c2 ~]# vim /etc/rsyslog.conf
local6.* :ommysql:10.0.1.244,Syslog,apache,centos
3.2.5 重启rsyslogd服务
[root@c2 ~]# systemctl restart rsyslog.service3.2.6 验证数据库是否有日志记录
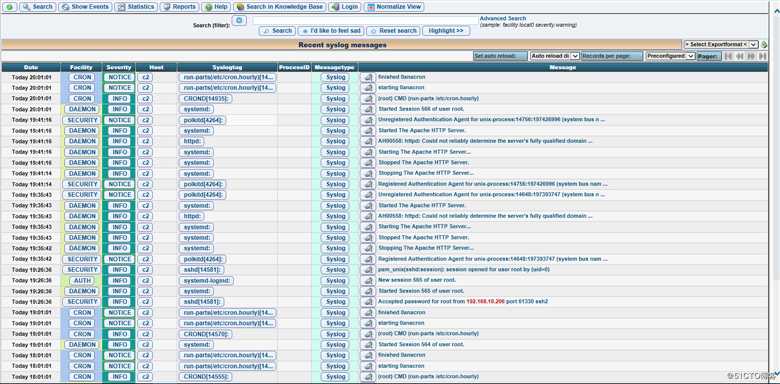
MariaDB [(none)]> select * from Syslog.SystemEvents order by DeviceReportedTime DESC limit 1\G
*************************** 1. row ***************************
ID: 172
CustomerID: NULL
ReceivedAt: 2020-05-15 20:20:52
DeviceReportedTime: 2020-05-15 20:20:52
Facility: 22
Priority: 6
FromHost: c2
Message: 192.168.10.206 - - [15/May/2020:20:20:50 +0800] "GET /log/src/chartgenerator.php?type=1&byfield=syslogtag&width=400&maxrecords=10&showpercent=0&defaultfilter= HTTP/1.1" 200 987 "http://10.0.1.243/log/src/statistics.php" "Mozilla/5.0 (Windows NT 10.0; WOW64; Trident/7.0; rv:11.0) like Gecko Core/1.70.3722.400 QQBrowser/10.5.3751.400"
NTSeverity: NULL
Importance: NULL
EventSource: NULL
EventUser: NULL
EventCategory: NULL
EventID: NULL
EventBinaryData: NULL
MaxAvailable: NULL
CurrUsage: NULL
MinUsage: NULL
MaxUsage: NULL
InfoUnitID: 1
SysLogTag: root:
EventLogType: NULL
GenericFileName: NULL
SystemID: NULL
processid:
checksum: 0
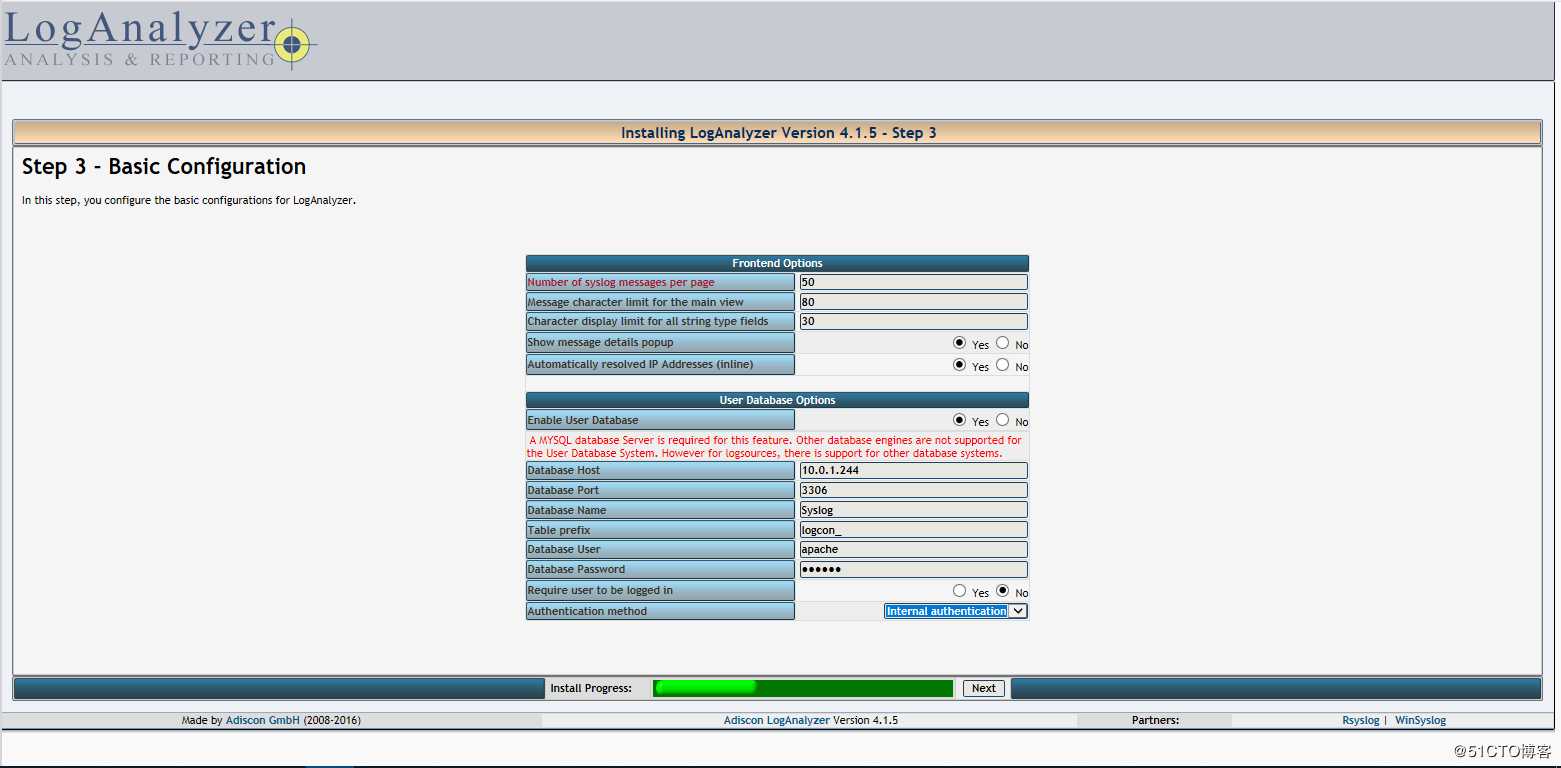
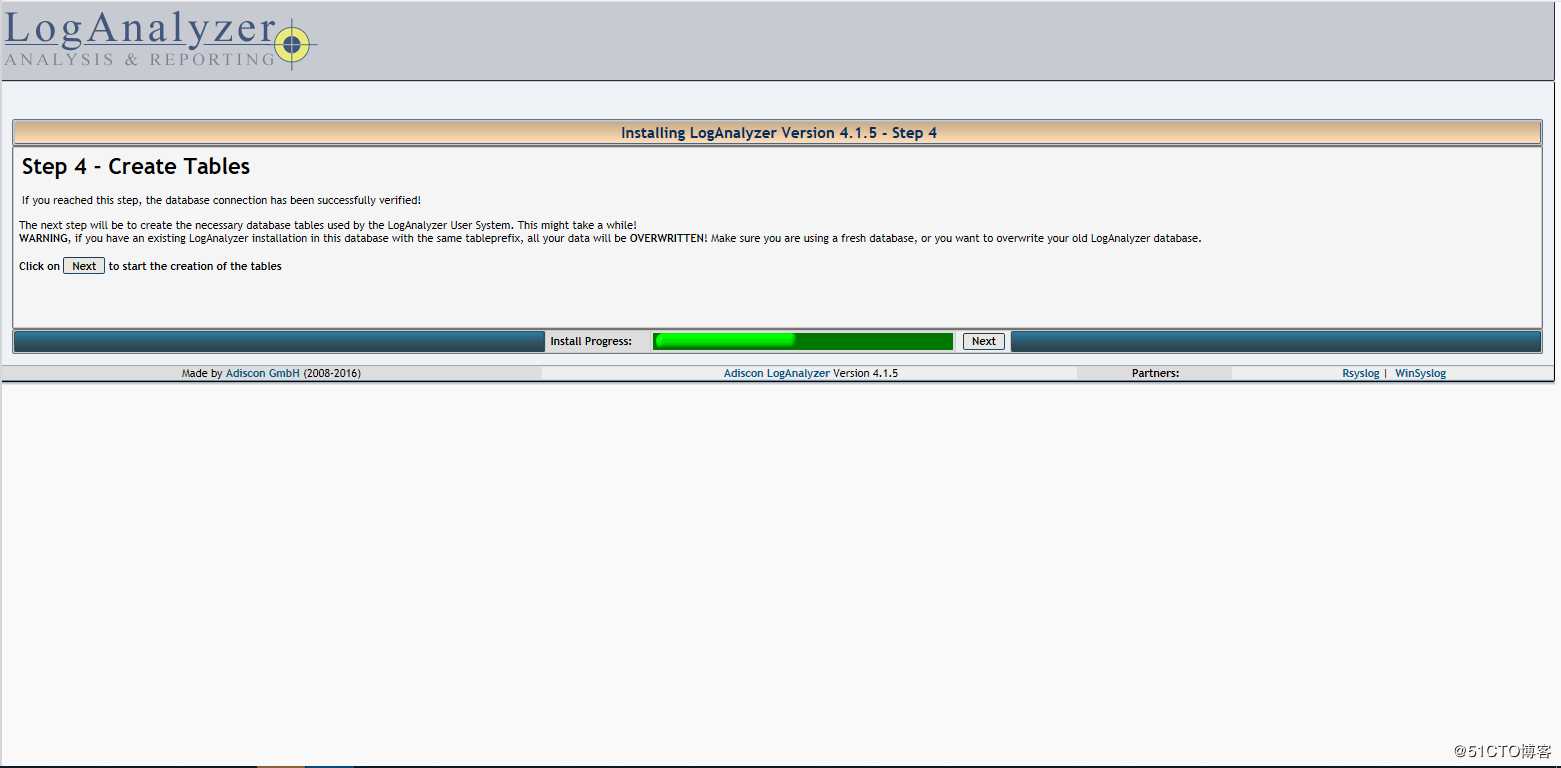
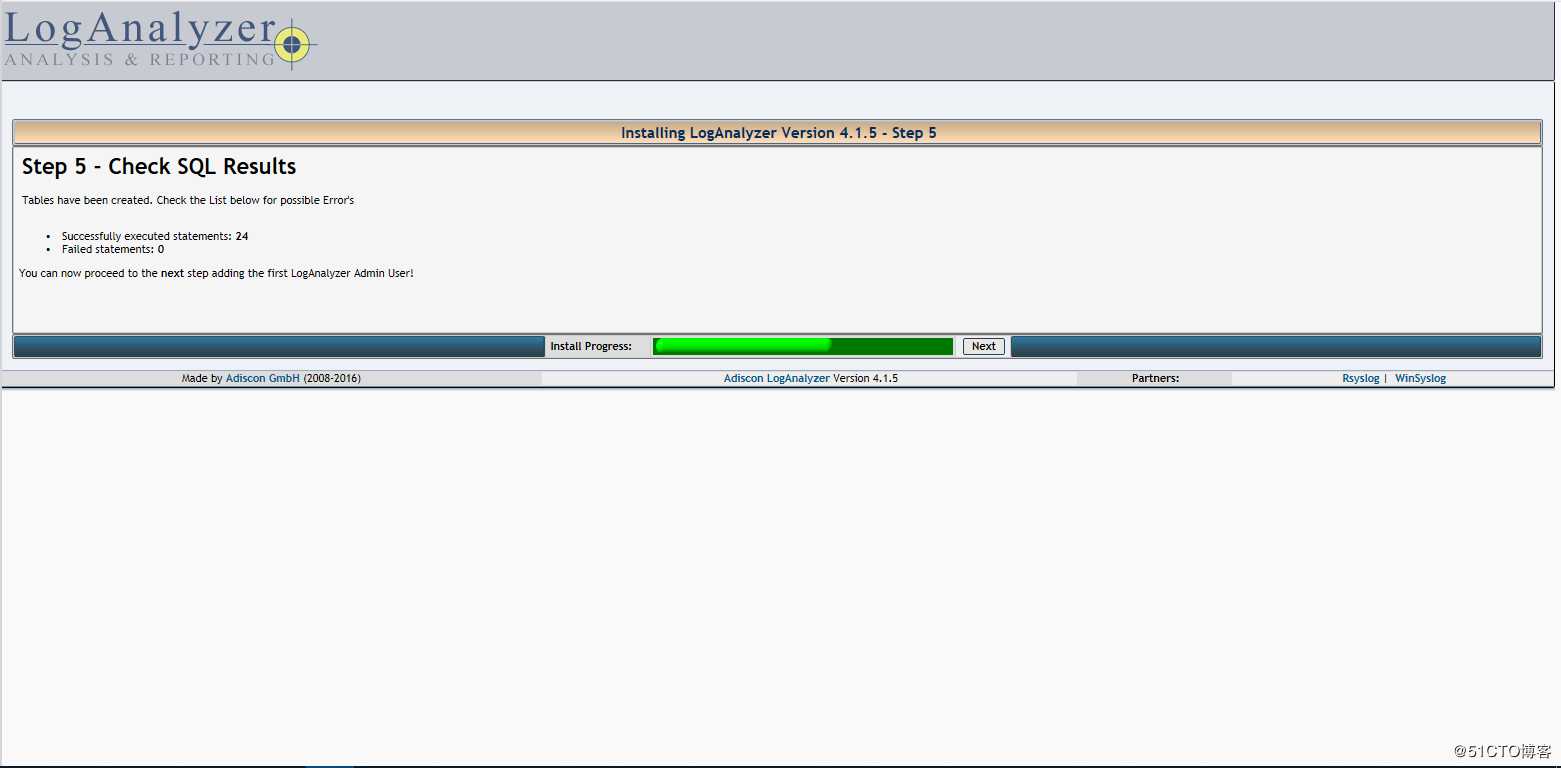
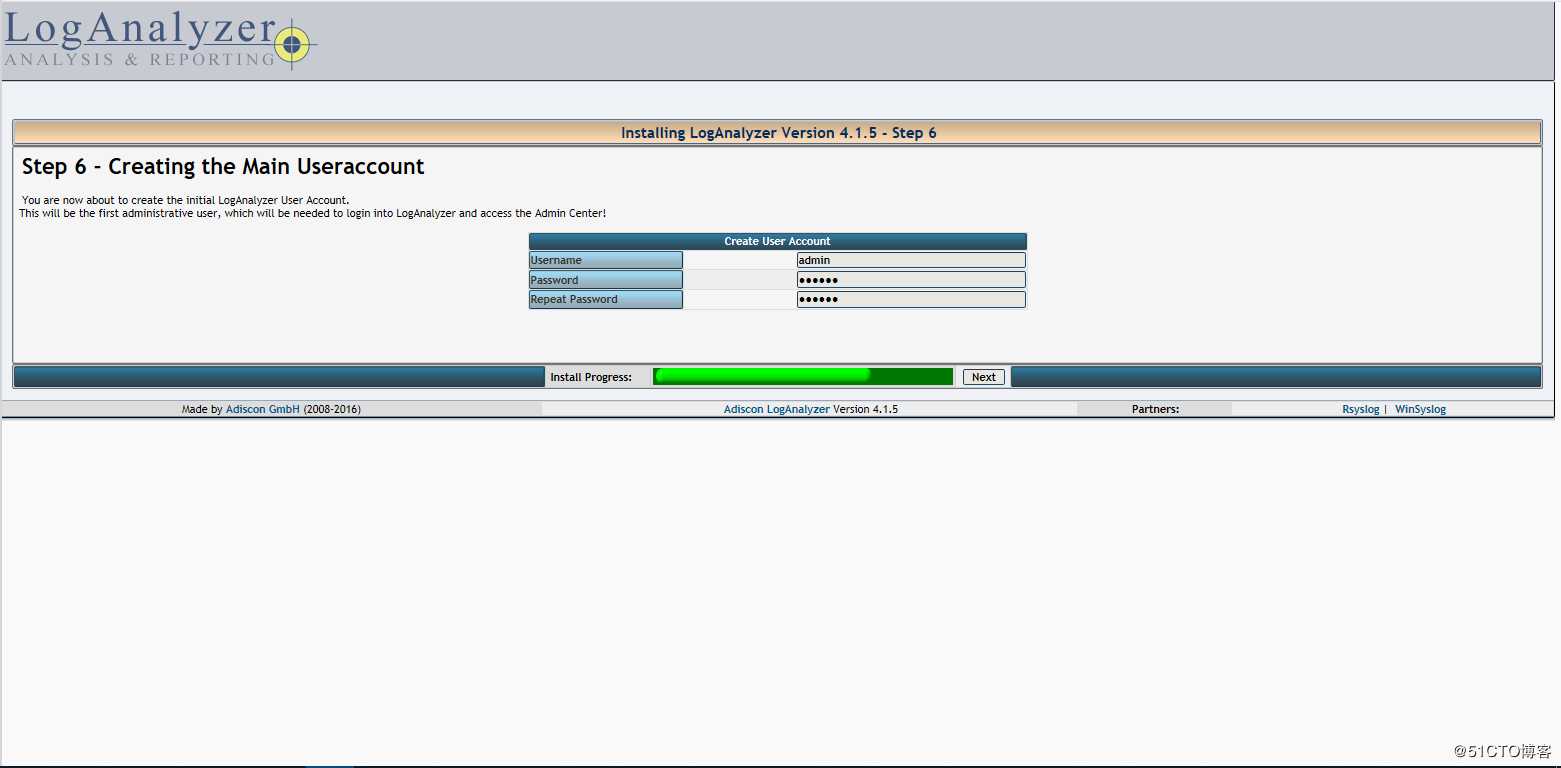
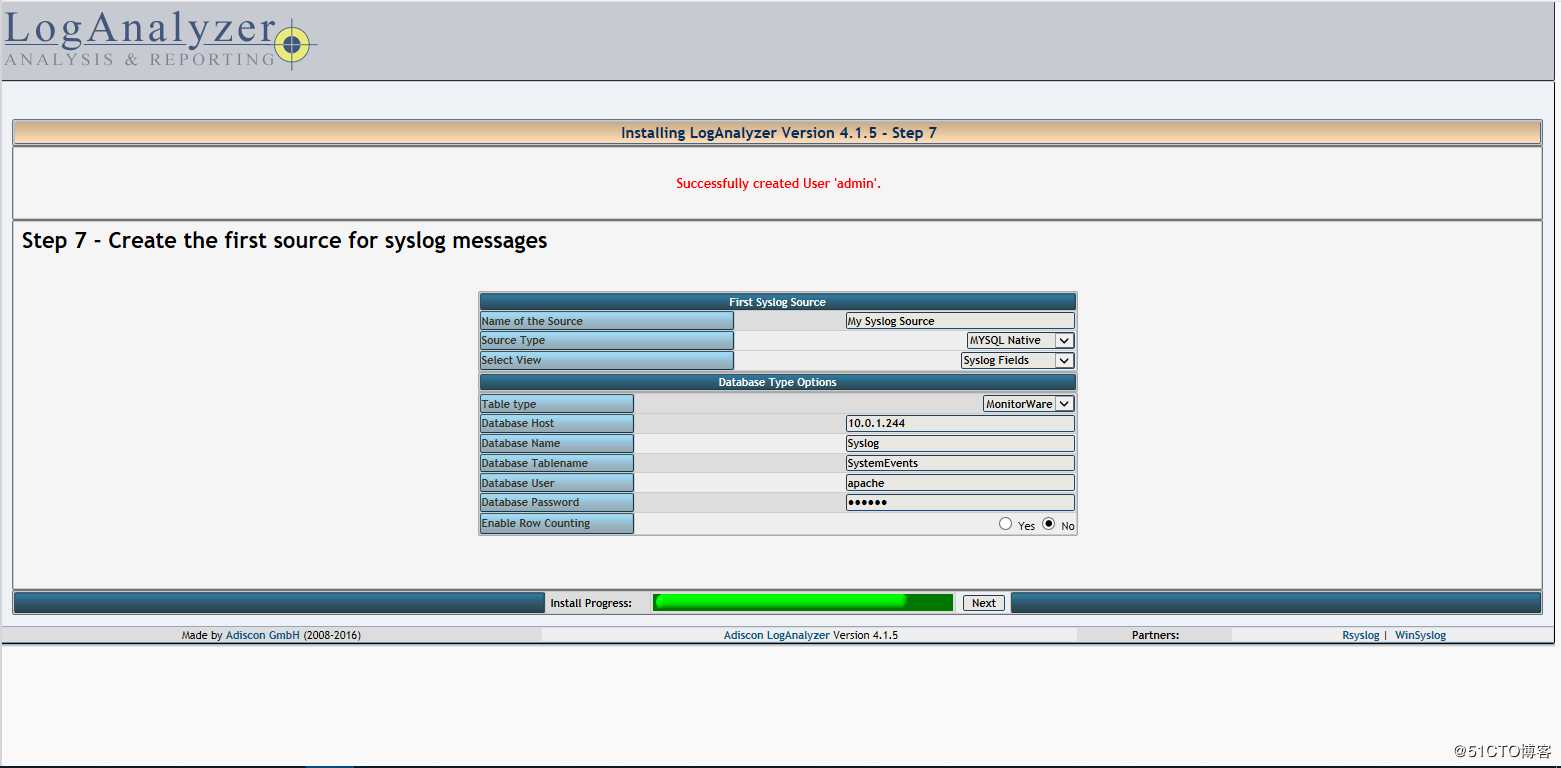
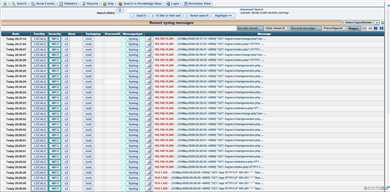
1 row in set (0.01 sec)3.3 通过loganalyzer展示数据库中的日志
3.3.1 在rsyslog服务器上安装绘图工具php-gd
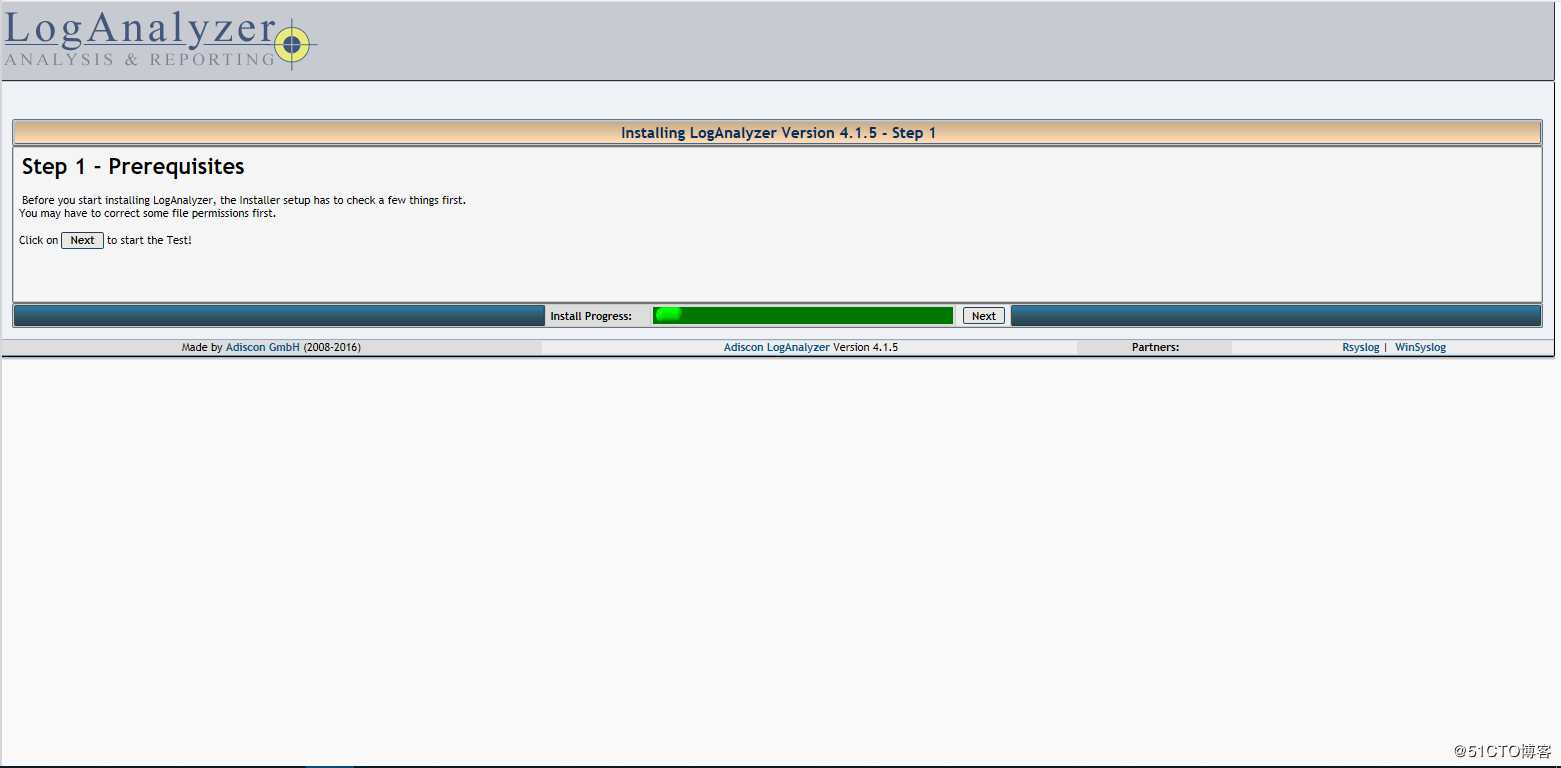
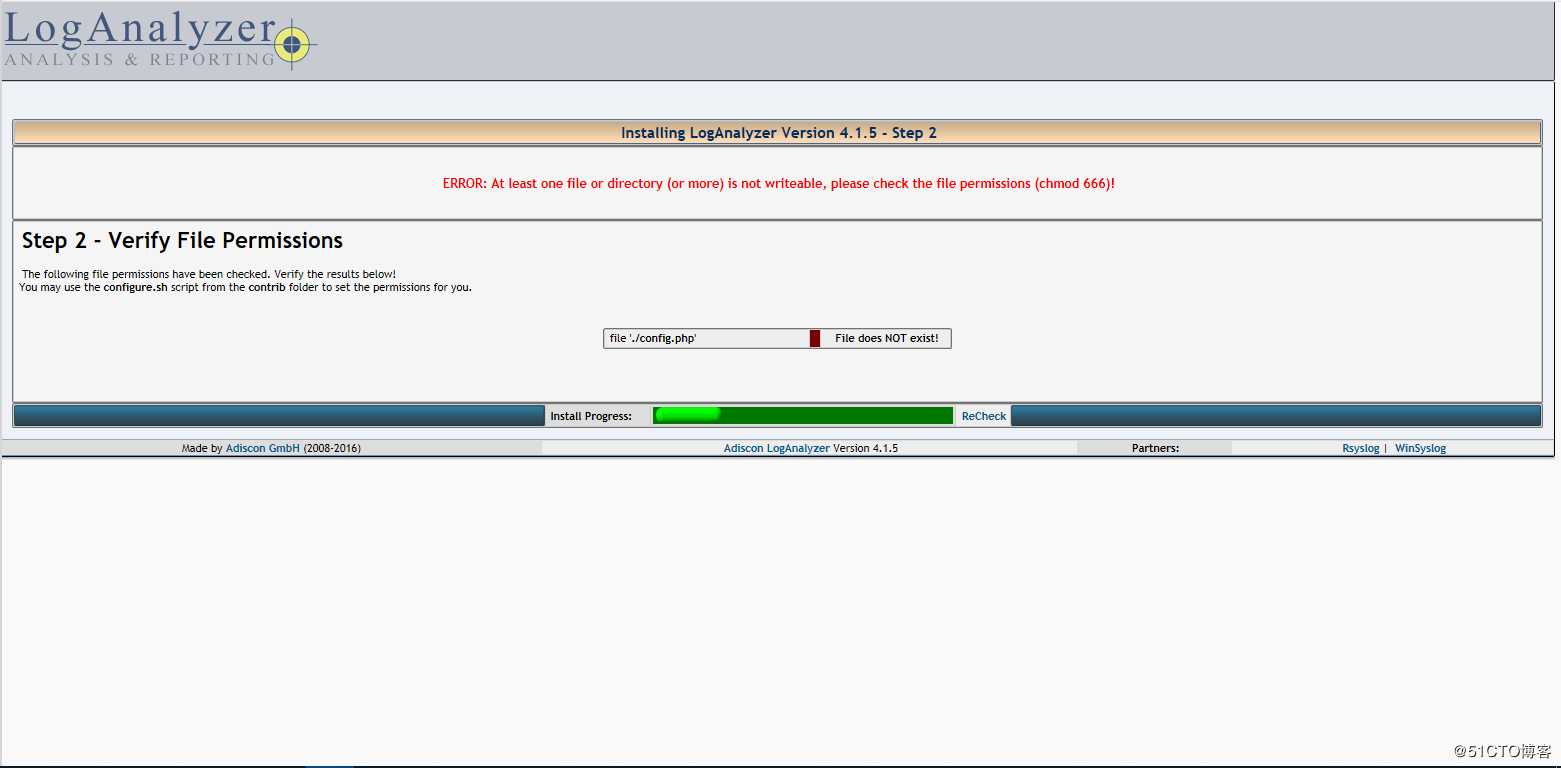
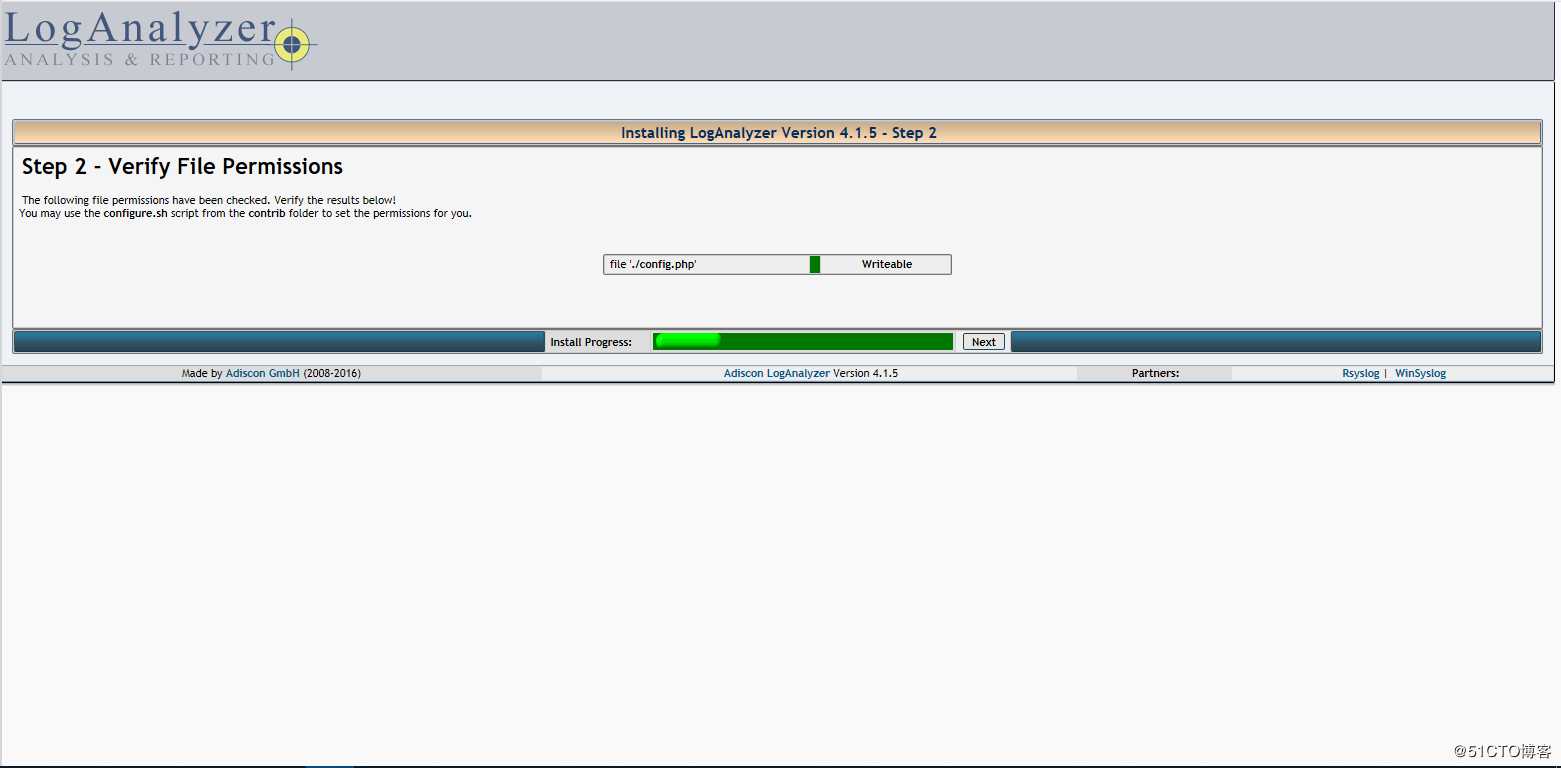
[root@c2 ~]# yum install php-gd -y3.3.2 安装LogAnalyzer
[root@c2 html]# tar xvf loganalyzer-4.1.5.tar.gz
[root@c2 html]# mv loganalyzer-4.1.5 log
[root@c2 html]# cd loganalyzer/
[root@c2 loganalyzer]# touch config.php
[root@c2 loganalyzer]# chmod 666 config.php
3.3.3 配置loganalyzer
[root@c2 html]# setfacl -Rm u:apache:rwx loganalyzer
[root@c2 loganalyzer]# systemctl restart httpd.service 在浏览器地址栏输入:http://10.0.1.243/log

点击src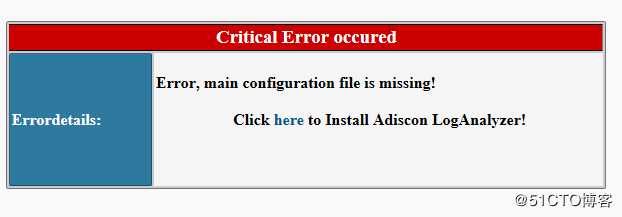

3.3.4 安全加强
[root@c2]#cd /var/www/html/loganalyzer
[root@c2]#chmod 644 config.php标签:href 访问 enable null net 目录 others combine 使用
原文地址:https://blog.51cto.com/rickzhu/2495758