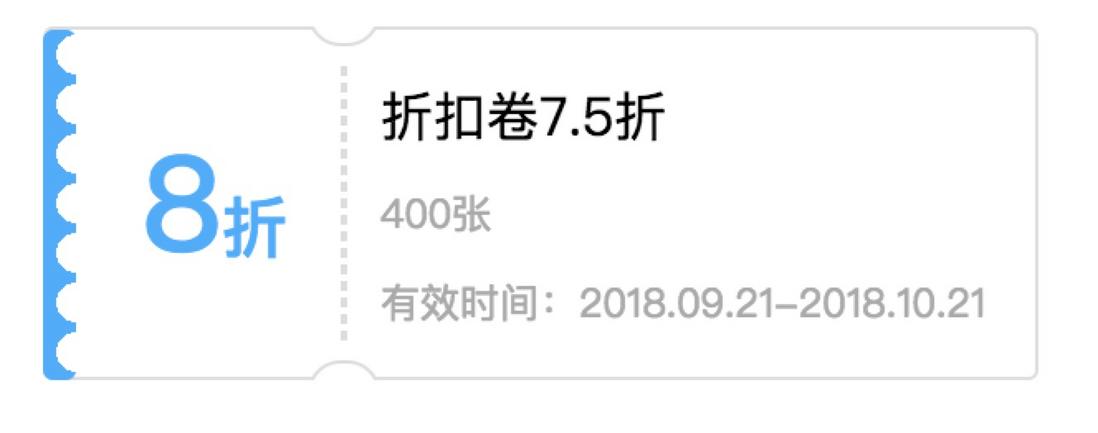
先看效果图
由于是截图,大小有些失真
实现分析
看到这个图,思考一下,就能明白,其实就两个难点:
- 左边的锯齿状是如何实现
- 中间的凹陷是如何实现
上述两个难点解决了,相信有css基础的都能写出这个组件。
实现锯齿效果
方法一:伪元素before和after
.sawtooth {
  /* 相对定位,方便让before和after伪元素绝对定位偏移 */
  position: relative;
  background:#e24141;
  width:400px;
  height:170px;
}

.sawtooth:before, .sawtooth:after {
    content: ‘ ‘;
    width: 0;
    height: 100%;
    /* 绝对定位进行偏移 */
    position: absolute;
    top: 0;
}

.sawtooth:before {
    /* 圆点型的border */
    border-right: 10px dotted white;
    /* 偏移一个半径,让圆点的一半覆盖div */
    left: -5px;
}

.sawtooth:after {
    /* 圆点型的border */
    border-left: 10px dotted white;
    /* 偏移一个半径,让圆点的一半覆盖div */
    right: -5px;
}


<div class="sawtooth"></div>
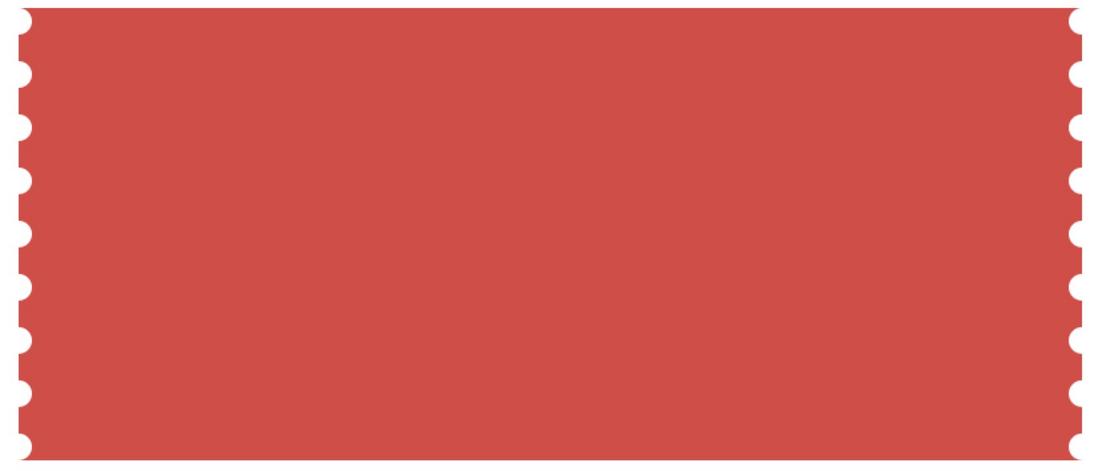
效果如下:
讲解
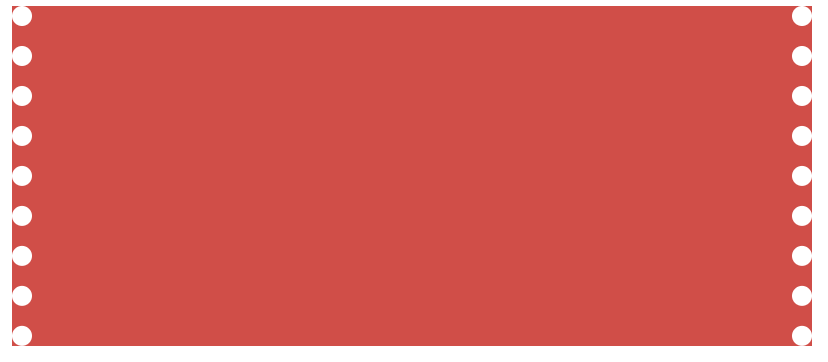
这个就是在开头和最后画了一个点状边框,然后平移边框,让边框的一部分覆盖原来的边框,利用圆点的颜色和背景色一样的特点,制作锯齿效果。如果不平移边框效果如下:
.sawtooth:before {
    /* 圆点型的border */
    border-right: 10px dotted white;
    /* 偏移一个半径,让圆点的一半覆盖div */
    left:0;
}

.sawtooth:after {
    /* 圆点型的border */
    border-left: 10px dotted white;
    /* 偏移一个半径,让圆点的一半覆盖div */
    right: 0px;
}
看了上图实现原理是不是一目了然了。但这也有一些缺点:
1.锯齿的颜色必须和背景色一样
2.无法画锯齿朝里的方式
方法二radial-gradient设置背景
radial-gradient讲解
用径向渐变创建图像。
简单语法:radial-gradient(circle, red 10px, blue 20px, yellow 30px);
形状是圆(也可以是椭圆),开始位置的颜色是red,中间颜色是blue,最后颜色是黄色。
10px表示从圆心开始10px范围内都是红色;
20px表示距离圆心20px的位置为blue,然后向两边扩散,直到里面10px的红色区域,和向外30px地方的yellow区域;
30px表示从30px开始往外都是yellow。
.div{
  margin:20px;
  height:100px;
  width:100px;
  background-image:radial-gradient(circle,red 10px,blue 20px,yellow 30px)
}
使用radial-gradient画圆点背景
- 圆心设置成透明
- 把过度颜色都设置成锯齿的颜色
- 通过背景尺寸属性设置背景图的颜色,然后repeate
.div{
  margin:20px;
  height:106px;
  width:140px;
  background-image: radial-gradient(circle at center, transparent 6px,#28ACFF 7px);
  background-size: 20px 15px;
}
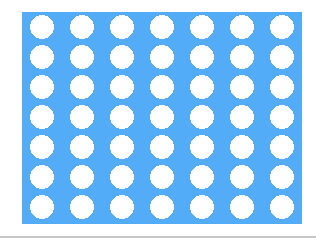
这样一个带圆点背景的div就出来了。然后通过设置宽度,只显示半个圆,左边的锯齿就出来了。width设置成10px如下效果
上边凹槽的实现
这个实现就比较简单了,通过绝对定位,用一个圆形元素覆盖父元素的边框。
问题:子元素无法覆盖父元素
在实现时遇到一个问题,就是子元素移动过去了,但是无法覆盖父元素的边框。这时,需要在组件外再套一层div,这个div设置成相对定位,然后把圆div设置成相对定义,再移动位置就能覆盖里面的组件div了。
开发优惠卷
通过上述的讲解,需要实现优惠卷所需要的知识点就都讲完了,下面让我们来实现开始效果的优惠卷吧。
结构分析
- 一个div顶级容器,设置成相对定位。(解决无法覆盖问题)
- 一个div组件容器,放到上面的div中
- 锯齿div(放到2中的的div)
- 粗体显示折扣的div(放到2中的的div)
- 虚线div(放到2中的的div)
- 折扣详情div(放到2中的的div)
- 两个圆形div,放到1或2中div都可以。
code
.parentContainer {
    position:relative;
    margin:20px;
    overflow:hidden;
}
.container {
    display:flex;
    border:1px solid #ddd;
    border-radius:3px;
    width:300px;
    height:105px;
    border-left:0;
}
.left {
    width:10px;
    height:106px;
    left:-1px;
    border:0px solid #ddd;
    border-radius:3px;
    background-image:radial-gradient(circle at center,transparent 6px,#28ACFF 4px);
    background-size:20px 15px;
    z-index:1
}
.couponName {
    text-align:center;
    border:0px solid red;
    line-height:106px;
    font-size:40px;
    font-family:PingFangSC-Medium;
    font-weight:500;
    color:rgba(40,172,255,1);
    margin-left:20px;
    margin-right:16px;
}
.subName {
    font-size:20px;
}
.topSemicircle {
    width:20px;
    height:20px;
    border:1px solid #ddd;
    border-radius:10px;
    position:absolute;
    left:80px;
    top:-16px;
    padding:0;
    background-color:#fff;
}
.bottomSemicircle {
    width:20px;
    height:20px;
    border:1px solid #ddd;
    border-radius:10px;
    position:absolute;
    left:80px;
    bottom:-16px;
    padding:0;
    background-color:#fff;
}
.dashed {
    border:1px dashed #ddd;
    margin-top:11px;
    margin-bottom:11px;
}
.right {
    display:flex;
    flex-direction:column;
    justify-content:center;
    align-items:flex-start;
    padding-left:10px;
}
.desc {
    font-size:10px;
    font-family:PingFangSC-Regular;
    font-weight:400;
    color:rgba(170,170,170,1);
    margin-top:10px;
}


<div class="parentContainer">
  <div class="container">
    <div class="left"></div>
    <div class="couponName">8<span class="subName">折</span></div>
    <div class="dashed"></div>
    <div class="right">
      <div>折扣卷7.5折</div>
      <div class="desc">400张</div>
      <div class="desc">有效时间:2018.09.21-2018.10.21</div></div>
    <div class="topSemicircle"></div>
    <div class="bottomSemicircle"></div>
  </div>
</div>
可以把代码赋值到下面的在线工具中看下效果
https://c.runoob.com/front-en...
React Code
根据自己需要再写成react版本,就易如反掌了。
//less
.parentContainer {
  position: relative;
  margin: 20px;
  overflow: hidden;
}

.container {
  display: flex;
  border: 1px solid #ddd;
  border-radius: 3px;
  width: 312px;
  height: 105px;
  border-left: 0;
}

.left {
  width: 10px;
  height: 106px;
  left: -1px;
  border: 0px solid #ddd;
  border-radius: 3px;
  background-image: radial-gradient(
    circle at center,
    transparent 6px,
    #28acff 4px
  );
  background-size: 20px 15px;
  z-index: 1;
}

.leftInvalid {
  .left;
  background-image: radial-gradient(
    circle at center,
    transparent 6px,
    #aaaaaa 4px
  );
}

.couponName {
  text-align: center;
  border: 0px solid red;
  line-height: 106px;
  font-size: 40px;
  font-family: PingFangSC-Medium;
  font-weight: 500;
  color: rgba(40, 172, 255, 1);
  min-width: 62px;
  margin-left: 20px;
  margin-right: 16px;
}

.couponNameInvalid {
  .couponName;
  color: #aaaaaa;
}

.title {
  font-size: 16px;
  font-weight: 400;
  color: rgba(51, 51, 51, 1);
}

.invalidTitle {
  .title;
  color: rgba(170, 170, 170, 1);
}

.subName {
  font-size: 20px;
}

.semicircle {
  width: 20px;
  height: 20px;
  border: 1px solid #ddd;
  border-radius: 10px;
  position: absolute;
  left: 98px;
  padding: 0;
  background-color: #fff;
}

.topSemicircle {
  .semicircle;
  top: -16px;
}

.bottomSemicircle {
  .semicircle;
  bottom: -16px;
}

.dashed {
  border: 1px dashed #ddd;
  margin-top: 11px;
  margin-bottom: 11px;
}

.right {
  display: flex;
  flex-direction: column;
  justify-content: center;
  align-items: flex-start;
  padding-left: 10px;
}

.desc {
  font-size: 10px;
  font-family: PingFangSC-Regular;
  font-weight: 400;
  color: rgba(170, 170, 170, 1);
  margin-top: 10px;
}

//组件代码
import React, { PureComponent } from ‘react‘
import styles from ‘./index.less‘

export default class CouponCard extends PureComponent {
  render() {
    const {
      valid = true,
      data = {
        id: 2323,
        couponDescription: ‘折扣卷8.5折‘,
        validDate: ‘2018.08.22-2018.09.12‘,
        number: 23,
        amount: 8.5,
        unit: ‘折‘,
      },
    } = this.props
    const amounts = data.amount.toString().split(‘.‘)
    return (
      <div className={styles.parentContainer}>
        <div className={styles.container}>
          <div className={valid ? styles.left : styles.leftInvalid} />
          <div className={valid ? styles.couponName : styles.couponNameInvalid}>
            {amounts[0]}
            <span className={styles.subName}>
              {amounts[1] ? `.${amounts[1]}` : ‘‘}
              {data.unit}
            </span>
          </div>
          <div className={styles.dashed} />
          <div className={styles.right}>
            <div className={valid ? styles.title : styles.invalidTitle}>
              折扣卷{data.amount}
              {data.unit}
            </div>
            <div className={styles.desc}>{data.number}张</div>
            <div className={styles.desc}>有效时间:{data.validDate}</div>
          </div>
          <div className={styles.topSemicircle} />
          <div className={styles.bottomSemicircle} />
        </div>
      </div>
    )
  }
}


