标签:显示 定义 sts pts 包含 lam 历史 命令 路由
博文目录
一、Nagios
1、Nagios介绍
2、Nagios主要功能
3、Nagios的作用
4、Nagios常见的监控状态
5、Nagios的原理
二、安装LAMP环境
三、安装Nagios
1、安装Nagios组件
2、配置Apache支持Nagios
3、配置SendMail邮件
四、Nagios监控Linux客户端
1、安装依赖程序
2、安装Nagios-plugins插件
3、安装NRPE插件
Nagios是一款开源的免费网络监视工具,能有效监控Windows、Linux和Unix的主机状态,交换机路由器等网络设备,打印机等。在系统或服务状态异常时发出邮件或短信报警第一时间通知网站运维人员,在状态恢复后发出正常的邮件或短信通知。
网络服务监控(SMTP、POP3、HTTP、NNTP、ICMP、SNMP、FTP、SSH);
主机资源监控(CPU load、disk usage、system logs),也包括Windows主机(使用NSClient++ plugin);
可以指定自己编写的Plugin通过网络收集数据来监控任何情况(温度、警告……);
可以通过配置Nagios远程执行插件远程执行脚本;
远程监控支持SSH或SSL加通道方式进行监控;
简单的plugin设计允许用户很容易的开发自己需要的检查服务,支持很多开发语言(shell scripts、C++、Perl、ruby、Python、PHP、C#等);
包含很多图形化数据Plugins(Nagiosgraph、Nagiosgrapher、PNP4Nagios等);
可并行服务检查;
能够定义网络主机的层次, 允许逐级检查, 就是从父主机开始向下检查;
当服务或主机出现问题时发出通告,可通过email, pager, sms 或任意用户自定义的plugin>
进行通知;能够自定义事件处理机制重新激活出问题的服务或主机;
自动日志循环;
支持冗余监控;
包括Web界面可以查看当前网络状态,通知,问题历史,日志文件等。
监控计算机硬件;监控网络;支持邮件或者短信发送警报。
OK状态:运行正常状态显示颜色为绿色,监控级别0;
WARNING:警告状态,监控状态颜色为黄色,监控级别1;
CRITICL:出现故障或者严重问题,监控状态颜色为红色,监控级别2;
UNKNOWN:未知错误,监控状态颜色为深黄色,监控级别3;
LAMP环境;
nrpe组件远程管理使用;
Nagios执行check_nrpe插件通知或者检测计算机的服务或者进程;
将采集的进程状态保存到消息队列中;
通过Nagios图形化管理界面展示给用户;
此环境用到的软件包及镜像请访问:https://pan.baidu.com/s/1Q0WoV7bBUYUB8F_JMtDaOw
提取码:b0ah
[root@centos01 ~]# yum -y install httpd php mariadb mariadb-server php-mysql openssl-devel  <!--安装LAMP依赖程序-->
[root@centos01 ~]# vim /var/www/html/index.php   <!--创建php测试页-->
<?php
phpinfo();
?>
[root@centos01 ~]# systemctl start httpd    <!--启动Apache-->
[root@centos01 ~]# systemctl enable httpd  <!--开机自动启动-->
[root@centos01 ~]# systemctl start mariadb    <!--启动Mariadb-->
[root@centos01 ~]# systemctl enable mariadb    <!--开机自动启动-->
[root@centos01 ~]# useradd -M -s /sbin/nologin nagios   <!--创建管理Nagios用户-->
<!--(切换Linux光盘)-->
[root@centos01 ~]# tar zxvf /mnt/nagios-4.0.1.tar.gz -C /usr/src/   <!--解压缩Nagios压缩包-->
[root@centos01 ~]# cd /usr/src/nagios-4.0.1/   <!--进入Nagios目录-->
[root@centos01 nagios-4.0.1]# ./configure --prefix=/usr/local/nagios --with-nagios-user=nagios --with-nagios-group=nagios  <!-配置Nagios--->
[root@centos01 nagios-4.0.1]# make all && make install && make install-init
           <!--编译安装Nagios-->
[root@centos01 nagios-4.0.1]# make install-commandmode && make install-config
             <!--编译安装Nagios-->
[root@centos01 ~]# chown -R nagios:nagios /usr/local/nagios   <!--设置目录的所有者-->
[root@centos01 ~]# chkconfig --add nagios    <!--添加系统服务-->
[root@centos01 ~]# chkconfig --level 35 nagios on   <!--设置开机自动启动-->
客户端访问php页面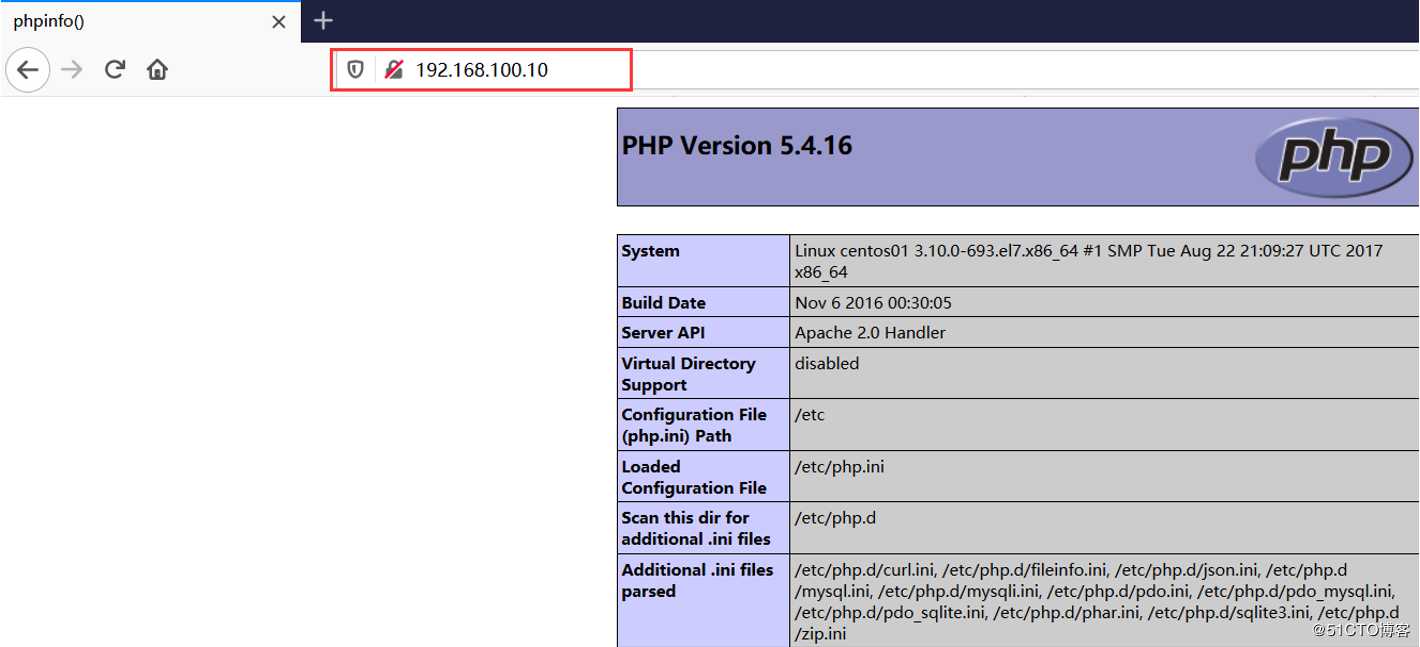
[root@centos01 ~]# tar zxvf /mnt/nagios-plugins-1.5.tar.gz -C /usr/src/
          <!--解压缩nagios-plugins组件压缩包-->
[root@centos01 ~]# cd /usr/src/nagios-plugins-1.5/   <!--进入nagios-plugins组件目录-->
[root@centos01 nagios-plugins-1.5]# ./configure --prefix=/usr/local/nagios
                <!--配置nagios-plugins组件-->
[root@centos01 nagios-plugins-1.5]# make && make install<!--编译安装nagios-plugins组件-->
[root@centos01 ~]# tar zxvf /mnt/nrpe-2.15.tar.gz -C /usr/src/   <!--解压缩nrpe压缩包-->
[root@centos01 ~]# cd /usr/src/nrpe-2.15/     <!--进入nrpe目录-->
[root@centos01 nrpe-2.15]# ./configure && make all && make install-plugin
<!--配置编译安装nrpe组件-->[root@centos01 ~]# vim /etc/httpd/conf/httpd.conf <!--编辑Apache主配置文件-->
354 ScriptAlias /nagios/cgi-bin "/usr/local/nagios/sbin"
355
356 <Directory "/usr/local/nagios/sbin">
357 Options ExecCGI
358 AllowOverride None
359 Order allow,deny
360 Allow from all
361 AuthName "Nagios Access"
362 AuthType Basic
363 AuthUserFile "/usr/local/nagios/etc/htpasswd.users"
364 Require valid-user
365 </Directory>
366
367 Alias /nagios "/usr/local/nagios/share"
368
369 <Directory "/usr/local/nagios/share">
370 Options None
371 AllowOverride None
372 Order allow,deny
373 Allow from all
374 AuthName "Nagios Access"
375 AuthType Basic
376 AuthUserFile "/usr/local/nagios/etc/htpasswd.users"
377 Require valid-user
378 </Directory>
[root@centos01 ~]# htpasswd -c /usr/local/nagios/etc/htpasswd.users nagiosadmin
<!--配置身份验证,账户为nagiosadmin,密码为pwd@123-->
[root@centos01 ~]# systemctl restart httpd <!--重新启动Apache服务-->[root@centos01 ~]# tar zxvf /mnt/sendEmail-v1.55.tar.gz <!--解压SendMail包-->
[root@centos01 ~]# mv sendEmail-v1.55/sendEmail /usr/local/bin/
<!--剪切SendMail到/usr/local/bin/目录-->
[root@centos01 ~]# vim /usr/local/nagios/etc/nagios.cfg <!--添加存储监控主机配置文件-->
36 cfg_dir=/usr/local/nagios/etc/conf
[root@centos01 ~]# mkdir /usr/local/nagios/etc/conf/ <!--创建存储监控主机目录-->
[root@centos01 ~]# vim /usr/local/nagios/etc/objects/commands.cfg <!--定义Nagios命令-->
239 define command{
240 command_name notify-host-by-sendEmail
241 command_line /usr/bin/printf "%b" "***** Nagios *****\n\nNotification Type: $NOTIFICATIONTYPE$\nHost: $HOSTNAME$\nState : $HOSTSTATE$\nAddress: $HOSTADDRESS$\nInfo: $HOSTOUTPUT$\n\nDate/Time: $LONGDATETIME$\n" | /usr/local/bin/sendEmail -o fqdn=FQND -f 2807489749@qq.com -t $CONTACTEMAIL$ -s smtp.qq.com -u "** $NOTIFICATIONTYPE$ Host Alert: $HOSTNAME$ is $HOSTSTATE$ **" -xu 8214 09986 -xp hehe
242
243 }
244 define command{
245 command_name notify-service-by-sendEmail
246 command_line /usr/bin/printf "%b" "***** Nagios *****\n\nNotification Type: $NOTIFICATIONTYPE$\n\nService: $SERVICEDESC $\nHost: $HOSTALIAS$\nAddress: $HOSTADDRESS$\nState: $SERVICESTATE$\n\nDate/Time: $LONGDATETIME$\n\nAdditional Info:\n\n$SERVICEOU TPUT$\n" | /usr/local/bin/sendEmail -o fqdn=FQDN -f 821409986@qq.com -t $CONTACTEMAIL$ -s smtp.qq.com -u "** $NOTIFICATIONTYPE$ Se rvice Alert: $HOSTALIAS$/$SERVICEDESC$ is $SERVICESTATE$ **" -xu 2807489749 -xp hehe
247 }
248 define command{
249 command_name check_nrpe
250 command_line $USER1$/check_nrpe -H $HOSTADDRESS$ -c $ARG1$
251 }
[root@centos01 ~]# vim /usr/local/nagios/etc/objects/contacts.cfg <!--定义联系人-->
55 define contact{
56 contact_name 821409986
57 alias 821409986
58 service_notification_period 24x7
59 host_notification_period 24x7
60 service_notification_options w,u,c,r
61 host_notification_options d,u,r
62 service_notification_commands notify-service-by-sendEmail
63 host_notification_commands notify-host-by-sendEmail
64 email 821409986@qq.com
65 }
66 define contactgroup{
67 contactgroup_name 821409986
68 alias Nagios admin
69 members 821409986
70 }
[root@centos01 ~]# vim /usr/local/nagios/etc/conf/hostgroups.cfg <!--定义监控主机-->
define hostgroup{
hostgroup_name web-server
alias web-server
members 192.168.100.20 <!--被监控IP地址-->
}
[root@centos01 ~]# vim /usr/local/nagios/etc/conf/192.168.100.20.cfg <!-编辑配置文件-->
define host{
host_name 192.168.100.20
alias web-server
address 192.168.100.20
check_command check-host-alive
max_check_attempts 5
check_period 24x7
notification_period 24x7
notification_options d,u,r
contact_groups 821409986
}
define service{
host_name 192.168.100.20
service_description check-host-alive
check_command check-host-alive
max_check_attempts 3
normal_check_interval 2
retry_check_interval 2
check_period 24x7
# notification web-server_interval 10
notification_period 24x7
notification_options w,u,c,r
contact_groups 821409986
}
define service{
host_name 192.168.100.20
service_description check-procs
check_command check_nrpe!check_total_procs
max_check_attempts 3
normal_check_interval 2
retry_check_interval 2
check_period 24x7
notification_interval 10
notification_period 24x7
notification_options w,u,c,r
contact_groups 821409986
}
define service{
host_name 192.168.100.20
service_description check-load
check_command check_nrpe!check_load
max_check_attempts 3
normal_check_interval 2
retry_check_interval 2
check_period 24x7
notification_interval 10
notification_period 24x7
notification_options w,u,c,r
contact_groups 821409986
}
[root@centos01 ~]# systemctl restart httpd <!--重新启动Apache服务-->
[root@centos01 ~]# systemctl restart nagios <!--重新启动nagios-->客户端访问nagios的WEB界面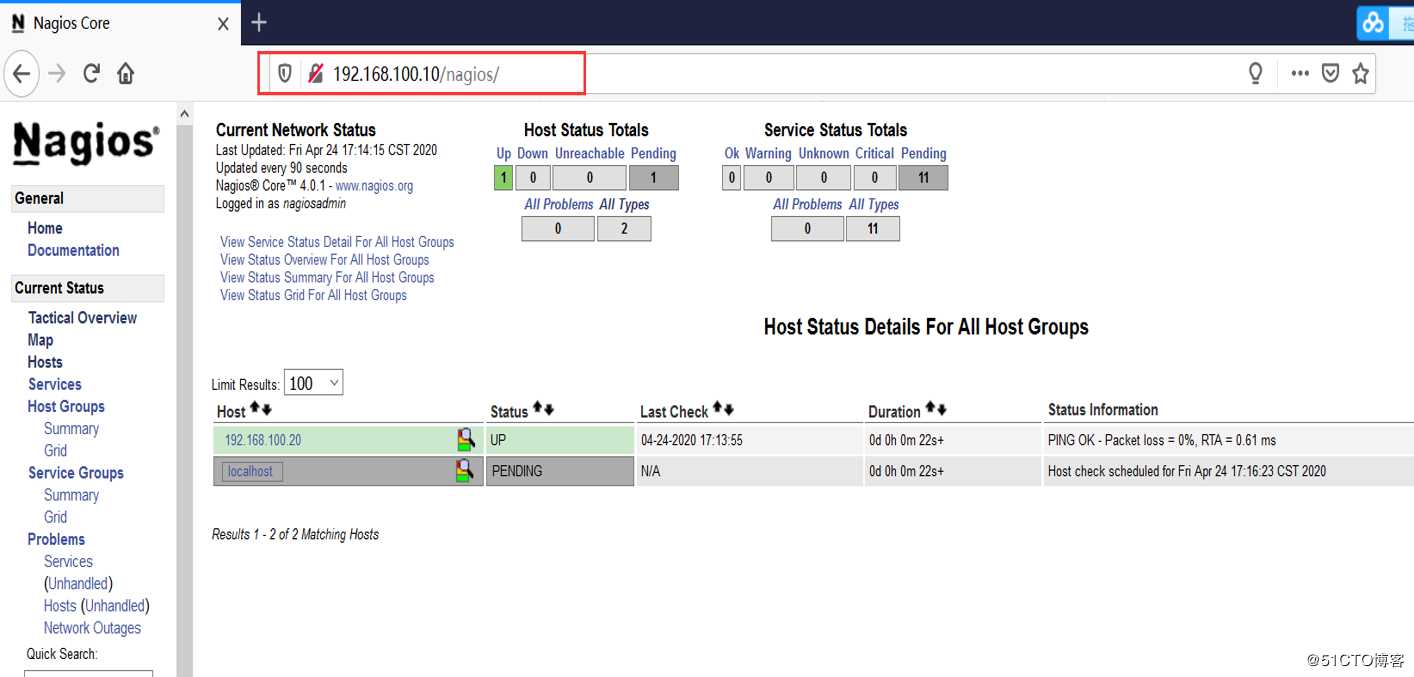
[root@centos02 ~]# yum -y install openssl-devel openssl    <!--安装依赖程序-->
[root@centos02 ~]# useradd -M -s /sbin/nologin nagios <!--创建管理nagios用户-->[root@centos02 ~]# scp root@192.168.100.10:/mnt/nagios-plugins-1.5.tar.gz /root/
<!--远程复制plugins插件压缩包-->
[root@centos02 ~]# tar zxvf nagios-plugins-1.5.tar.gz -C /usr/src/ <!--解压缩plugins插件-->
[root@centos02 ~]# cd /usr/src/nagios-plugins-1.5/ <!--进入plugins插件目录-->
[root@centos02 nagios-plugins-1.5]# ./configure --prefix=/usr/local/nagios --with-nagios-user=nagios --with-nagios-group=nagios <!--编译plugins插件-->
[root@centos02 nagios-plugins-1.5]# make && make install <!--编译安装nagios-plugins插件-->[root@centos02 ~]# scp root@192.168.100.10:/mnt/nrpe-2.15.tar.gz /root <!--远程复制压缩包-->
[root@centos02 ~]# tar zxvf nrpe-2.15.tar.gz -C /usr/src/ <!--解压缩nrpe压缩包-->
[root@centos02 ~]# cd /usr/src/nrpe-2.15/ <!--进入nrpe目录-->
[root@centos02 nrpe-2.15]# ./configure --prefix=/usr/local/nagios --with-nagios-user=nagios --with-nagios-group=nagios <!--配置nrpe插件-->
[root@centos02 nrpe-2.15]# make all && make install-plugin && make install-daemon && make install-daemon-config <!--编译安装nrpe插件-->
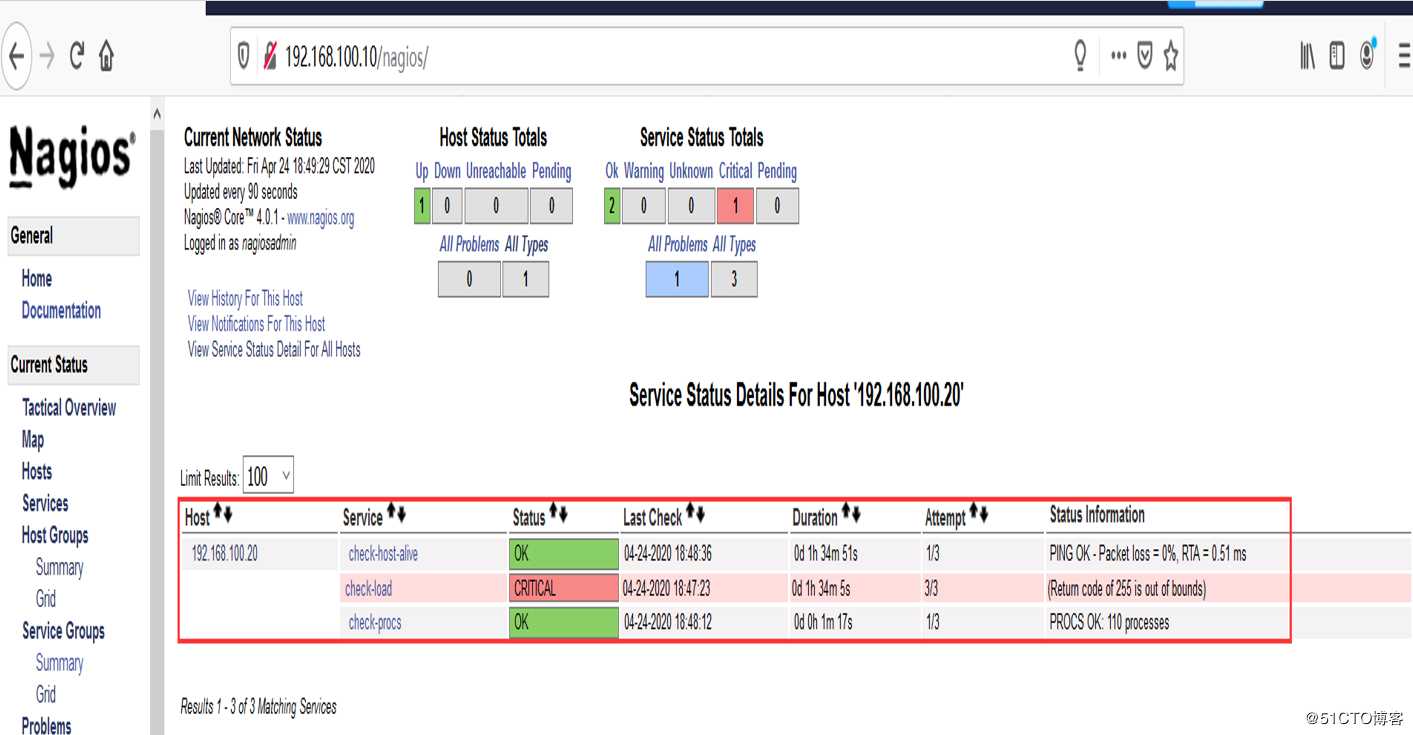
[root@centos02 ~]# vim /usr/local/nagios/etc/nrpe.cfg <!--修改nrpe配置文件-->
81 allowed_hosts=127.0.0.1,192.168.100.10 <!--Nagios服务器IP地址-->
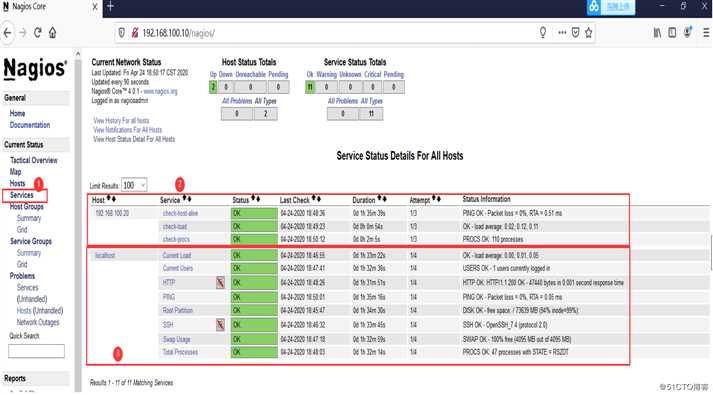
[root@centos02 ~]# /usr/local/nagios/bin/nrpe -c /usr/local/nagios/etc/nrpe.cfg -d 客户端访问nagios的WEB界面
———————— 本文至此结束,感谢阅读 ————————
标签:显示 定义 sts pts 包含 lam 历史 命令 路由
原文地址:https://blog.51cto.com/14156658/2501209