标签:select 编译安装nginx 更新 RKE web服务 配置方法 安装 访问时间 nbsp
一、web服务器以及web服务软件介绍
web服务器也是HTTP服务器,主要用于提供网上信息浏览。web网络服务是一种被动访问的服务程序,即只有接收到互联网中其他主机发出的请求后才会响应,最终用于提供服务程序的web服务器会通过HTTP(超文本传输协议)或者HTTPS(安全超文本传输协议)把请求的内容传送给用户。
1. 常用来提供静态Web服务的软件有如下三种
? Apache: 这是中小型Web服务的主流,Web服务器中的老大哥。优势在于开放源代码,开发维护团队强大、支持跨平台应用,强大的移植性等优点,但是功能以模块化定制,消耗内存较高,性能稍弱于其他轻量级web服务器。Apache使用的网络IO模型是传统的select模型,以Prefork多进程模式运转,需要经常派生子进程,消耗系统资源要比nginx高的多,且一个进程在同一时间只会处理一个请求。
? Nginx:是一款高性能的HTTP和反向代理服务器。Nginx以高效的epoll、kqueue、eventport作为网络IO模型,在高并发场景下,Nginx能够轻松支持5w并发连接数的响应,并且消耗的服务器内存、CPU等系统资源消耗却很低,运行稳定。 大型网站Web服务的主流,Nginx的分支Tengine(http://tengine.taobao.org/)目前也在飞速发展。
? Lighttpd:是一款高安全性、快速,且灵活的web服务器产品,专为高性能环境而设计的。相比其他web服务器,内存占用量小,能够有效管理CPU负载,支持(FastCGI,SCGI,Auth)等重要功能。在Nginx流行前,它是大并发静态业务的首选,国内百度贴吧、豆瓣等众多网站都有Lighttpd奋斗的身影。
2. 常用来提供动态服务的软件
? PHP(FastCGI):大中小型网站都会使用,动态网页语言PHP程序的解析容器。它可配合Apache解析动态程序,不过,这里的PHP不是FastCGI守护进程模式,而是mod_php5.so(module)。也可配合Nginx解析动态程序,此时的PHP常用FastCGI守护进程模式提供服务。
? Tomcat:是一个开源、运行基于java的web应用软件的容器,Tomcat Server和JSP规范执行,但是Tomcat对于平台文件、高并发处理较弱。中小企业动态Web服务主流,互联网Java容器主流(如jsp、do)。
? Resin:大型动态Web服务主流,互联网Java容器主流(如jsp、do)。
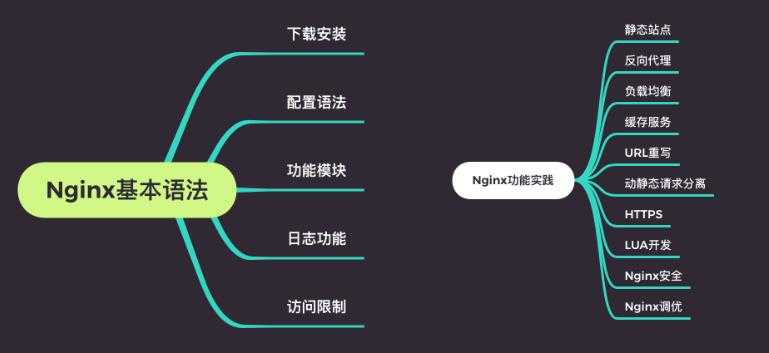
二、 nginx软件功能介绍
1 作为web服务软件(处理用户访问静态请求)
2 反向代理或者负载均衡服务
3 前端业务数据缓存服务
三、nginx软件特征介绍
1. 支持高并发:能支持几万并发连接(特别是静态小文件业务环境)
2. 消耗资源少:在3万并发连接下,开启10个nginx线程消耗的内存不到200MB
3. 支持异步网络I/O事件模型epoll(Linux 2.6+)
四、nginx架构组成
五、nginx安装
1. Linux系统安装软件方式
1)rpm安装:优点—简单、快速;缺点—需要rpm包,解决依赖关系很困难,无法定制化
2)yum安装:优点—简单、易用、高效。自动解决依赖关系; 缺点—不能选择软件版本或者软件存放的路径,无法定制化
3)编译安装:优点—可以自定义安装(选择版本、软件路径、针对性优化);缺点—很慢、安装复杂、需要GCC编译器等环境
4)二进制安装:MySQL软件一般会提供这种二进制安装方式,其他软件很少用
2. 编译安装nginx
第一个里程:软件依赖包安装
pcre-devel: perl语言正则表达式兼容软件包
openssl-devel:使系统支持https方式访问
[root@web01 ~]# yum install -y pcre-devel openssl-devel
[root@web01 ~]# rpm -qa pcre-devel openssl-devel
第二个里程:创建一个管理Nginx进程的虚拟用户
[root@web01 ~]# useradd www -s /sbin/nologin -M
[root@web01 ~]# id www
uid=1001(www) gid=1001(www) groups=1001(www)
第三个里程:下载Nginx源码包、上传到web01的/server/tools目录并解压
[root@web01 ~]# cd /server/tools/
[root@web01 tools]# wget http://nginx.org/download/nginx-1.12.2.tar.gz
[root@web01 tools]# tar zxf nginx-1.12.2.tar.gz
第四个里程:软件编译安装
软件编译安装三部曲:
①. 编译配置
./configure --prefix=/application/nginx-12.2 --user=www --group=www --with-http_ssl_module --with-http_stub_status_module
其中:
--prefix=PATH 指定软件安装在什么目录下
--user=USER 指定软件worker进程管理用户,利用www虚拟用户管理worker进程
--group=USER
--with-http_ssl_module 使nginx程序可以支持HTTPsF访问功能
--with-http_stub_status_module 用于监控用户访问nginx服务情况
②. 编译过程 make
③. 编译安装 make install
[root@web01 tools]# cd nginx-1.12.2/
[root@web01 nginx-1.12.2]# ./configure --prefix=/application/nginx-1.12.2 --user=www --group=www --with-http_ssl_module --with-http_stub_status_module
[root@web01 nginx-1.12.2]# echo $? ##查看配置过程是否正确,0表示没有问题
0
[root@web01 nginx-1.12.2]# make && make install
[root@web01 nginx-1.12.2]# echo $?
0
第五个里程:为nginx程序软件创建链接目录,便于网站更新和维护
[root@web01 ~]# ln -s /application/nginx-1.12.2/ /application/nginx
第六个里程:启动Nginx服务
[root@web01 nginx-1.12.2]# /application/nginx/sbin/nginx
[root@web01 nginx-1.12.2]# ps -ef|grep nginx
root 9184 1 0 21:24 ? 00:00:00 nginx: master process /application/nginx/sbin/nginx
www 9185 9184 0 21:24 ? 00:00:00 nginx: worker process
root 9187 6520 0 21:24 pts/0 00:00:00 grep --color=auto nginx
[root@web01 nginx-1.12.2]# lsof -i:80
COMMAND PID USER FD TYPE DEVICE SIZE/OFF NODE NAME
nginx 9184 root 6u IPv4 37758 0t0 TCP *:http (LISTEN)
nginx 9185 www 6u IPv4 37758 0t0 TCP *:http (LISTEN)
第七个里程:为方便管理可以修改PATH环境变量
[root@web01 nginx-1.12.2]# echo "PATH=$PATH:/application/nginx/sbin" >> /etc/profile
[root@web01 nginx-1.12.2]# tail -1 /etc/profile
PATH=/usr/local/sbin:/usr/local/bin:/usr/sbin:/usr/bin:/root/bin: /application/nginx/sbin
[root@web01 nginx-1.12.2]# source /etc/profile
[root@web01 nginx-1.12.2]# echo $PATH
/usr/local/sbin:/usr/local/bin:/usr/sbin:/usr/bin:/root/bin: /application/nginx/sbin
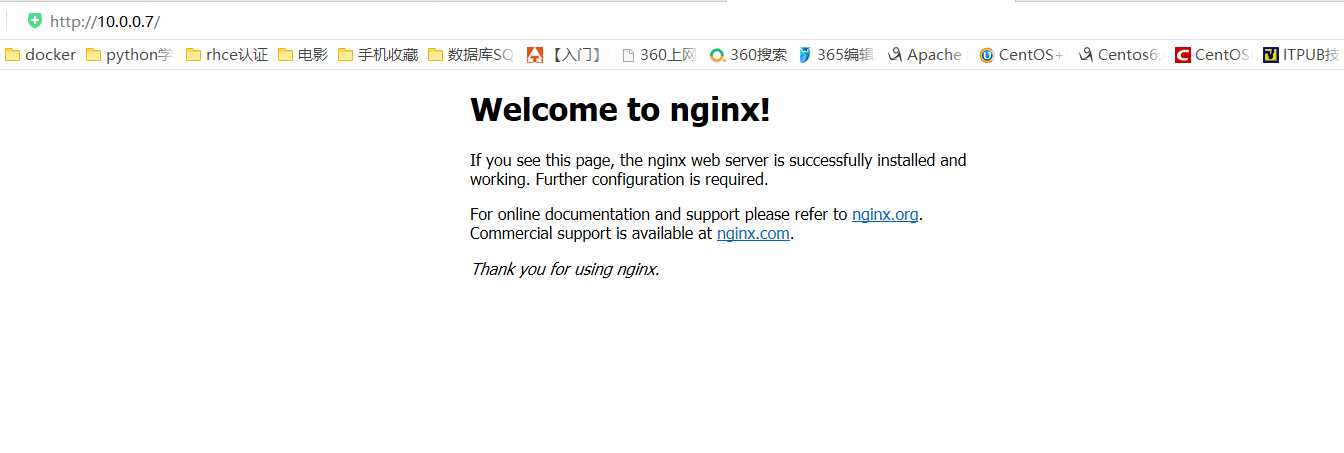
第八个里程:检查nginx启动实际效果
在windows下通过浏览器检测方法:
打开浏览器输入:http://10.0.0.7,然后回车,结果如图所示
六、nginx软件的目录结构说明
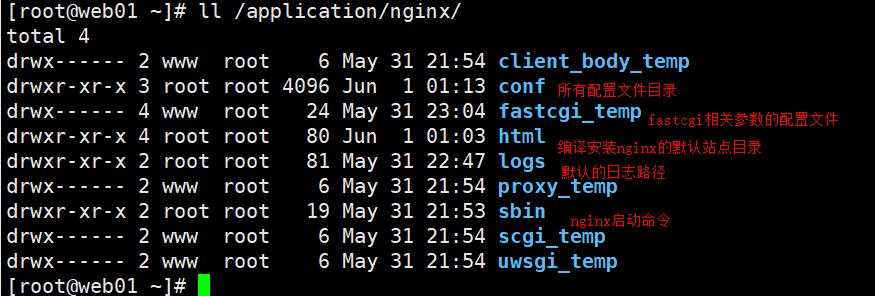
conf --- nginx程序所有配置文件保存目录
html --- nginx程序站点目录
logs --- nginx程序日志文件保存目录
sbin --- nginx程序命令所在目录
nginx命令参数说明:
-V --- 查看nginx软件编译配置参数
-t --- 检查nginx配置文件语法格式是否正确
-s --- 用于管理nginx服务运行状态
stop 停止nginx服务
reload 平滑重启nginx服务器
重启nginx服务:
nginx -s stop 先停止
nginx 再启动
nginx.conf nginx程序主配置文件
1. 精简nginx.conf配置文件内容:
grep -Ev "#|^$" nginx.conf.default >nginx.conf
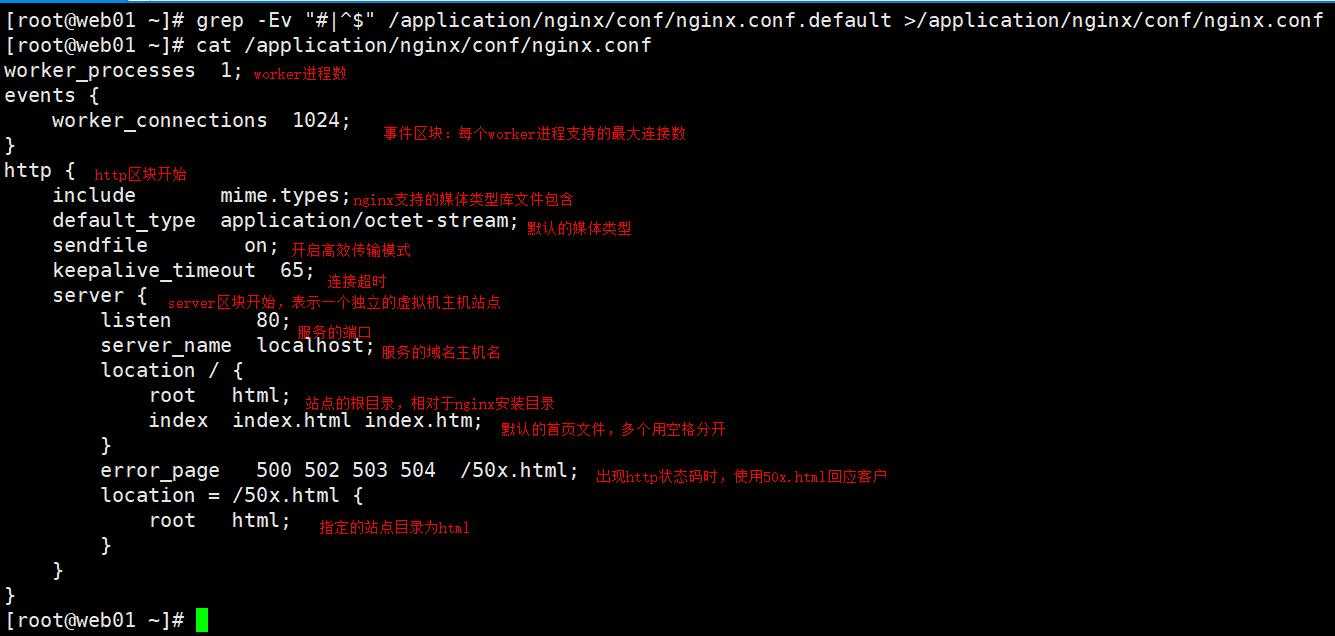
2. nginx配置文件
1)nginx配置文件组成:
①. main nginx主区块,位于整个配置文件最上层。
②. event nginx事件区块
③. http nginx http功能区块
④. server nginx 网站主机区块
⑤. location nginx 匹配或者定位区块
2)nginx配置文件语法格式说明:
①. 大括号要成对出现
②. 每一行指令后面要用分号结尾
③. 每一个指令要放置在指定的区块中
3)虚拟主机配置文件编写方法:
①. 基于域名的虚拟主机配置方法(最常用)
②. 基于端口的虚拟主机配置方法
说明:当你访问的网站域名在虚拟主机配置中不存在时,默认会将第一个虚拟主机的配置页面响应给用户
③. 基于IP地址的虚拟主机配置方法
说明:nginx服务中只要涉及IP地址的修改,都需要重启nginx服务,而不能采用平滑重启
4)实践
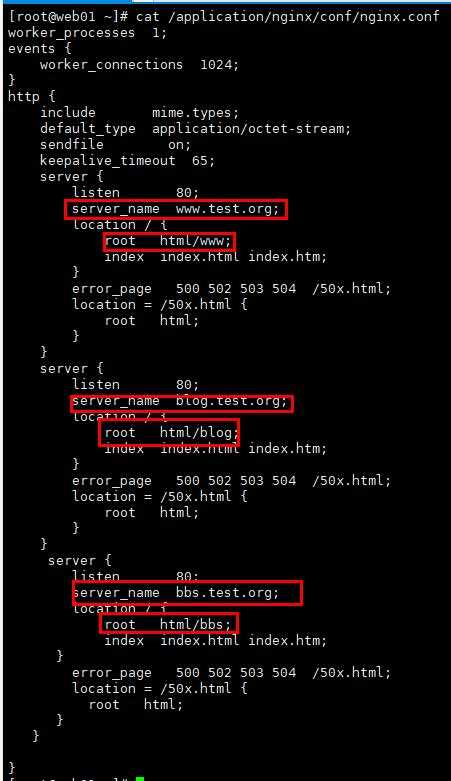
(1)实现编写一个或多个网站页面(基于域名)
第一个里程:编写配置文件
[root@web01 ~]# vim /application/nginx/conf/nginx.conf
[root@web01 ~]# cat /application/nginx/conf/nginx.conf
第二个里程:创建站点目录
[root@web01 ~]# mkdir /application/nginx/html/{www,blog,bbs}
第三个里程:创建站点目录下首页文件
[root@web01 ~]# for i in www blog bbs;do echo "10.0.0.7 $i.test.org" >/application/nginx/html/$i/test.html;done
[root@web01 ~]# for i in www blog bbs;do cat /application/nginx/html/$i/test.html;done
10.0.0.7 www.test.org
10.0.0.7 blog.test.org
10.0.0.7 bbs.test.org
第四个里程:进行访问测试
[root@web01 ~]# curl -H host:www.test.org 10.0.0.7/test.html
10.0.0.7 www.test.org
[root@web01 ~]# curl -H host:bbs.test.org 10.0.0.7/test.html
10.0.0.7 bbs.test.org
[root@web01 ~]# curl -H host:blog.test.org 10.0.0.7/test.html
10.0.0.7 blog.test.org
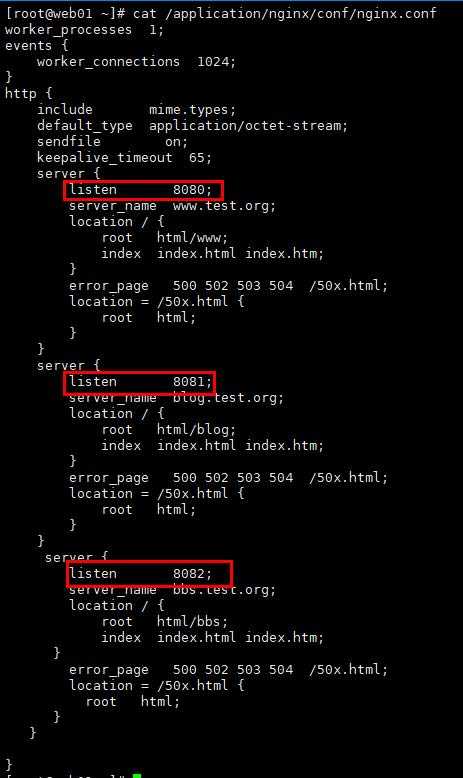
(2)实现编写一个或多个网站页面(基于端口)
第一个里程:编写配置文件,更改端口
[root@web01 ~]# vim /application/nginx/conf/nginx.conf
检测nginx配置文件语法
[root@web01 ~]# nginx -t
nginx: the configuration file /application/nginx-1.12.2/conf/nginx.conf syntax is ok
nginx: configuration file /application/nginx-1.12.2/conf/nginx.conf test is successful
第二个里程:进行访问测试
[root@web01 ~]# curl -H host:bbs.test.org:8080 10.0.0.7:8080/test.html
10.0.0.7 www.test.org
[root@web01 ~]# curl -H host:bbs.test.org:8081 10.0.0.7:8081/test.html
10.0.0.7 blog.test.org
[root@web01 ~]# curl -H host:bbs.test.org:8082 10.0.0.7:8082/test.html
10.0.0.7 bbs.test.org
(3)实现编写一个或多个网站页面(基于IP地址)
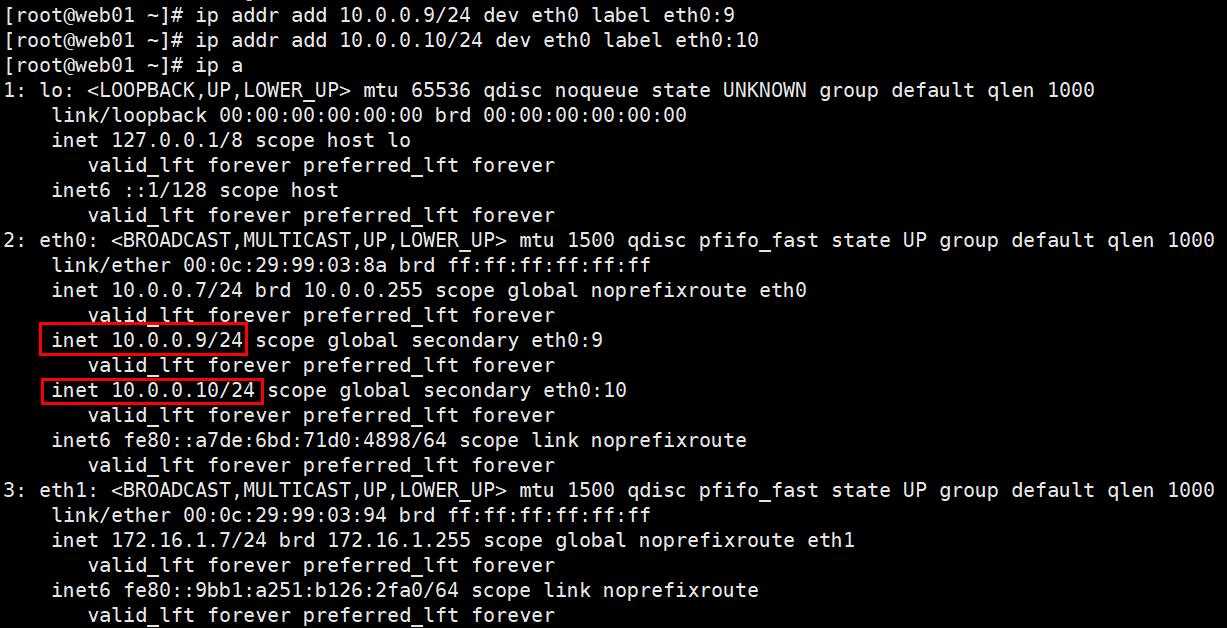
第一个里程:在服务器网卡上配置多个IP
每个主机上有不同的虚拟IP地址,此处以增加辅助IP的形式临时在eth0网卡上添加2个不同的ip地址
[root@web01 ~]# ip addr add 10.0.0.9/24 dev eth0 label eth0:9
[root@web01 ~]# ip addr add 10.0.0.10/24 dev eth0 label eth0:10
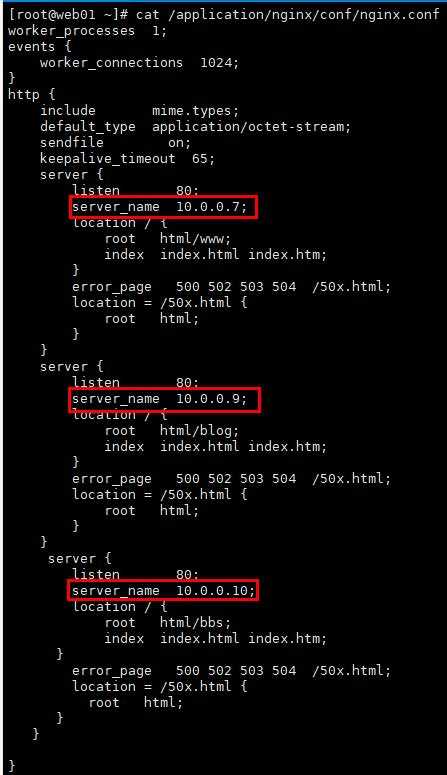
第二个里程:编写配置文件
[root@web01 ~]# vim /application/nginx/conf/nginx.conf
[root@web01 ~]# cat /application/nginx/conf/nginx.conf
检查配置文件语法
[root@web01 ~]# nginx -t
nginx: the configuration file /application/nginx-1.12.2/conf/nginx.conf syntax is ok
nginx: configuration file /application/nginx-1.12.2/conf/nginx.conf test is successful
重启nginx
[root@web01 ~]# nginx -s stop
[root@web01 ~]# nginx
[root@web01 ~]# ps -ef |grep nginx
root 23595 1 0 17:13 ? 00:00:00 nginx: master process nginx
www 23596 23595 0 17:13 ? 00:00:00 nginx: worker process
root 23598 6775 0 17:13 pts/0 00:00:00 grep --color=auto nginx
第三个里程:进行访问测试
[root@web01 ~]# curl 10.0.0.7/test.html
10.0.0.7 www.test.org
[root@web01 ~]# curl 10.0.0.9/test.html
10.0.0.7 blog.test.org
[root@web01 ~]# curl 10.0.0.10/test.html
10.0.0.7 bbs.test.org
(4)企业实用案例:每个网站目录配置文件进行分割
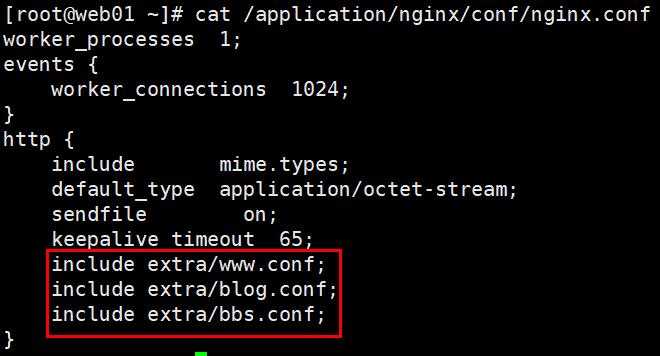
规范优化nginx配置文件,nginx的主配置文件为nginx.conf,主配置文件包含的所有虚拟主机的子配置文件会统一放入extra目录中,虚拟主机的配置文件按照网站的域名或功能取名,如www.conf等。
这里使用的参数是include
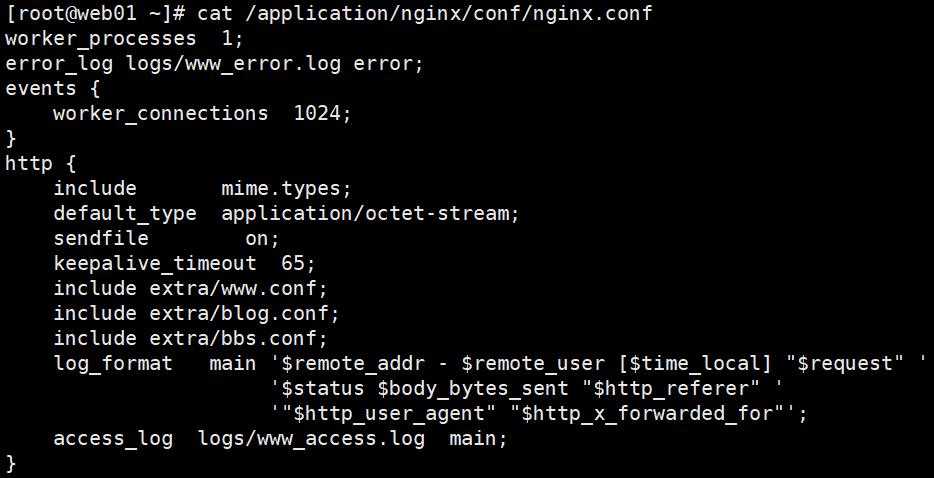
第一个里程:编写主配置文件
[root@web01 ~]# vim /application/nginx/conf/nginx.conf
[root@web01 ~]# cat /application/nginx/conf/nginx.conf
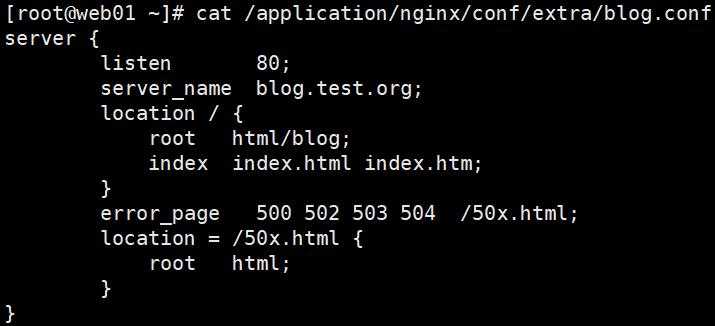
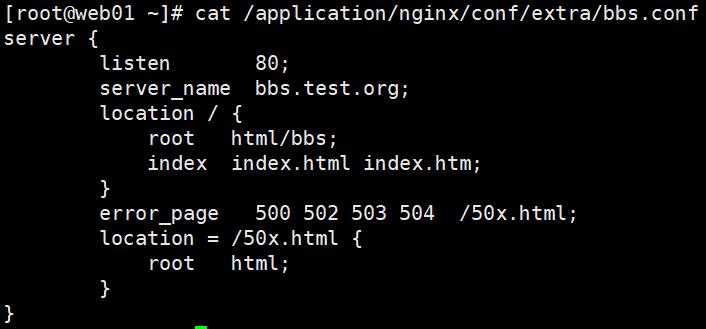
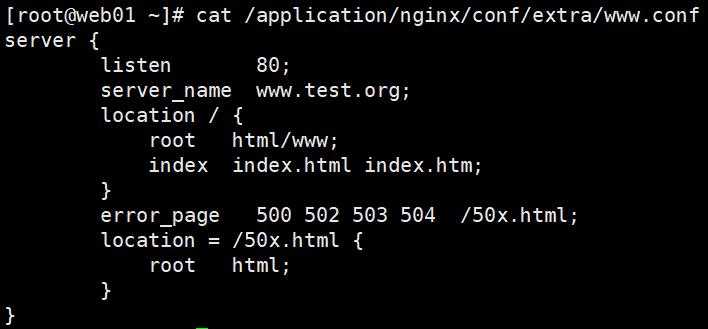
第二个里程:虚拟主机子配置文件
[root@web01 ~]# vim /application/nginx/conf/extra/blog.conf
[root@web01 ~]# vim /application/nginx/conf/extra/bbs.conf
[root@web01 ~]# vim /application/nginx/conf/extra/www.conf
检测nginx配置文件语法,并平滑重启nginx
[root@web01 ~]# nginx -t
nginx: the configuration file /application/nginx-1.12.2/conf/nginx.conf syntax is ok
nginx: configuration file /application/nginx-1.12.2/conf/nginx.conf test is successful
[root@web01 ~]# nginx -s reload
[root@web01 ~]# netstat -lntup |grep nginx
tcp 0 0 0.0.0.0:80 0.0.0.0:* LISTEN 23595/nginx: master
第三个里程:进行访问测试
[root@web01 ~]# curl -H host:www.test.org 10.0.0.7/test.html
10.0.0.7 www.test.org
[root@web01 ~]# curl -H host:bbs.test.org 10.0.0.7/test.html
10.0.0.7 bbs.test.org
[root@web01 ~]# curl -H host:blog.test.org 10.0.0.7/test.html
10.0.0.7 blog.test.org
3. nginx日志文件
1)error_log 级别分为 debug, info, notice, warn, error, crit 默认为crit
该级别在日志名后边定义格式如下:
error_log /your/path/error.log crit;
crit 记录的日志最少,而debug记录的日志最多
如果nginx遇到一些问题,比如502比较频繁出现,但是看默认的error_log并没有看到有意义的信息,那么就可以调一下错误日志的级别,当你调成error级别时,错误日志记录的内容会更加丰富。
2)语法格式:
Syntax:error_log file [level];
示例:
error_log logs/www_error.log error;
3)访问日志
官方链接:http://nginx.org/en/docs/http/ngx_http_log_module.html#access_log
log_format main ‘$remote_addr - $remote_user [$time_local] "$request" ‘ --- 定义日志信息要记录的内容格式
‘$status $body_bytes_sent "$http_referer" ‘
‘"$http_user_agent" "$http_x_forwarded_for"‘;
access_log logs/access.log main; --- 调用定义格式信息,生成访问日志
$remote_addr 10.0.0.1 --- 访问客户端的源地址信息
$remote_user - --- 访问客户端认证用户信息 ???
[$time_local] --- 显示访问时间
$request GET / HTTP/1.1 --- 请求行信息
$status 304 --- 状态码信息(304状态码利用缓存显示页面信息)
$body_bytes_sent --- 服务端响应客户端的数据大小信息
$http_referer -- 记录链接到网站的域名信息 ???
$http_user_agent --- 用户访问网站客户端软件标识信息
$http_x_forwarded_for --- 反向代理
编写脚本,配置访问日志
[root@web01 ~]# vim /application/nginx/conf/nginx.conf
检测配置脚本语法
[root@web01 ~]# nginx -t
nginx: the configuration file /application/nginx-1.12.2/conf/nginx.conf syntax is ok
nginx: configuration file /application/nginx-1.12.2/conf/nginx.conf test is successful
重新加载nginx
[root@web01 ~]# nginx -s reload
[root@web01 ~]# netstat -lntup |grep nginx
tcp 0 0 0.0.0.0:80 0.0.0.0:* LISTEN 23595/nginx: master
测试访问
[root@web01 ~]# curl -H host:blog.test.org 10.0.0.7/test.html
10.0.0.7 blog.test.org
查看访问日志
[root@web01 ~]# cat /application/nginx/logs/www_access.log
10.0.0.7 - - [06/Jun/2020:20:19:54 +0800] "GET /test.html HTTP/1.1" 200 23 "-" "curl/7.29.0" "-"
有时因日志文件数据过大,需进行日志分割
利用shell脚本实现日志切割
[root@web01 ~]# cat /server/scripts/cut_log.sh
#!/bin/bash
data_info=$(date +%F-%H:%M)
mv /application/nginx/logs/www_access.log /application/nginx/logs/access.log.$data_info
/application/nginx/sbin/nginx -s reload
检测脚本
[root@web01 ~]# bash /server/scripts/cut_log.sh
[root@web01 ~]# ls /application/nginx/logs/
access.log access.log.2020-06-06-20:26 blog_access.log error.log nginx.pid www_access.log www_error.log
设置定时任务
[root@web01 ~]# crontab -e
crontab: installing new crontab
[root@web01 ~]# crontab -l
#crond-id-0001:time sync by test
*/5 * * * * /usr/sbin/ntpdate pool.ntp.org >/dev/null 2>&1
#crond-id-0002: cut nginx access log
* */6 * * * /bin/sh /server/scripts/cut_log.sh >/dev/null 2 >&1
标签:select 编译安装nginx 更新 RKE web服务 配置方法 安装 访问时间 nbsp
原文地址:https://www.cnblogs.com/jiawei2527/p/13028145.html