标签:out 网络服务 lazy mic root inf net dns config
1、一台centos7虚拟机,四张网卡,网卡1和网卡2为桥接模式,网卡3和网卡4为仅主机模式。分两组,先做绑定,然后再把绑定后的网卡配置成桥接。

2、第一组配置,将eth0和eth1绑定为bond0,然后桥接到br0
2.1 创建bond0配置文件;
[root@centos7 ~]#cd /etc/sysconfig/network-scripts/
[root@centos7 network-scripts]#vim ifcfg-bond0
[root@centos7 network-scripts]#cat ifcfg-bond0
TYPE=Bond
DEVICE=bond0
NAME=bond0
BONDING_MASTER=yes
ONBOOT=yes
BONDING_OPTS="miimon=100 mode=1"
BRIDGE=br0 #桥接到br0
[root@centos7 network-scripts]#
2.2 创建br0配置文件
[root@centos7 network-scripts]#vim ifcfg-br0
[root@centos7 network-scripts]#cat ifcfg-br0
TYPE=Bridge
BOOTPROTO=static
DEFROUTE=yes
NAME=br0
DEVICE=br0
ONBOOT=yes
IPADDR=192.168.0.7
NETMASK=255.255.255.0
GATEWAY=192.168.0.1
DNS1=223.5.5.5
[root@centos7 network-scripts]#
2.3 修改etth0网卡配置文件
[root@centos7 network-scripts]#vim ifcfg-eth0
[root@centos7 network-scripts]#cat ifcfg-eth0
TYPE="Ethernet"
DEFROUTE="yes"
NAME="eth0"
DEVICE="eth0"
ONBOOT="yes"
MASTER=bond0
SLAVE=yes
2.4 修改eth1网卡配置文件
[root@centos7 network-scripts]#cat ifcfg-eth1
TYPE="Ethernet"
DEFROUTE="yes"
NAME="eth1"
DEVICE="eth1"
ONBOOT="yes"
MASTER=bond0
SLAVE=yes
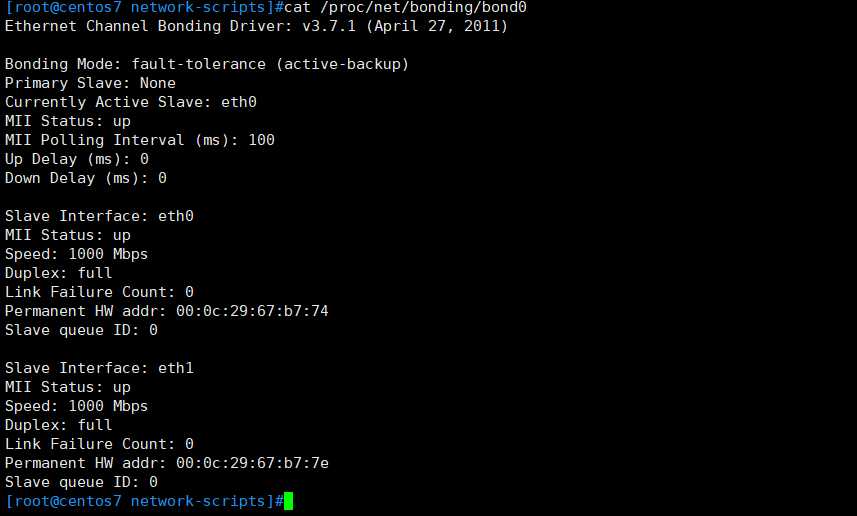
2.5重新启动网络服务,验证修改后的配置

3、第二组配置:将eth2和eth3绑定为bond1,然后桥接到br1
3.1复制ifcfg-bond0为bond1,进行修改
[root@centos7 network-scripts]#cp ifcfg-bond0 ifcfg-bond1
[root@centos7 network-scripts]#vim ifcfg-bond1
[root@centos7 network-scripts]#cat ifcfg-bond1
TYPE=Bond
DEVICE=bond1
NAME=bond1
BONDING_MASTER=yes
ONBOOT=yes
BONDING_OPTS="miimon=100 mode=1"
BRIDGE=br1 #桥接到br1
3.2 配置br1
[root@centos7 network-scripts]#cp ifcfg-br0 ifcfg-br1
[root@centos7 network-scripts]#vim ifcfg-br1
[root@centos7 network-scripts]#cat ifcfg-br1
TYPE=Bridge
BOOTPROTO=static
DEFROUTE=yes
NAME=br1
DEVICE=br1
ONBOOT=yes
IPADDR=10.20.4.18
NETMASK=255.255.0.0
GATEWAY=10.20.0.1
DNS1=223.5.5.5
3.3网卡eth2的修改
[root@centos7 network-scripts]#cp ifcfg-eth0 ifcfg-eth2
[root@centos7 network-scripts]#vim ifcfg-eth2
[root@centos7 network-scripts]#cat ifcfg-eth2
TYPE="Ethernet"
DEFROUTE="yes"
NAME="eth2"
DEVICE="eth2"
ONBOOT="yes"
MASTER=bond1
SLAVE=yes
3.4网卡eth3的修改
[root@centos7 network-scripts]#cp ifcfg-eth0 ifcfg-eth3
[root@centos7 network-scripts]#vim ifcfg-eth3
[root@centos7 network-scripts]#cat ifcfg-eth3
TYPE="Ethernet"
DEFROUTE="yes"
NAME="eth3"
DEVICE="eth3"
ONBOOT="yes"
MASTER=bond1
SLAVE=yes
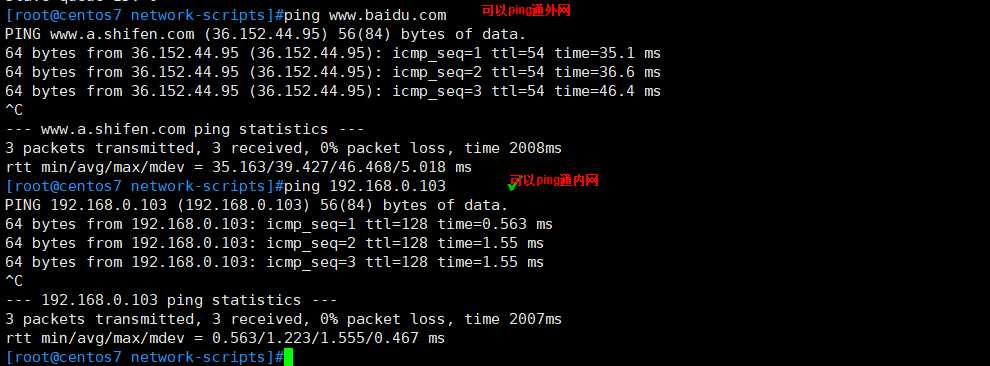
3.5重启网络服务,测试网络

4、设置开机启动项
vim /etc/rc.d/rc.local
ifenslave eth0 eth1
ifenslave eth2 eth3
chmod a+x /etc/rc.d/rc.local
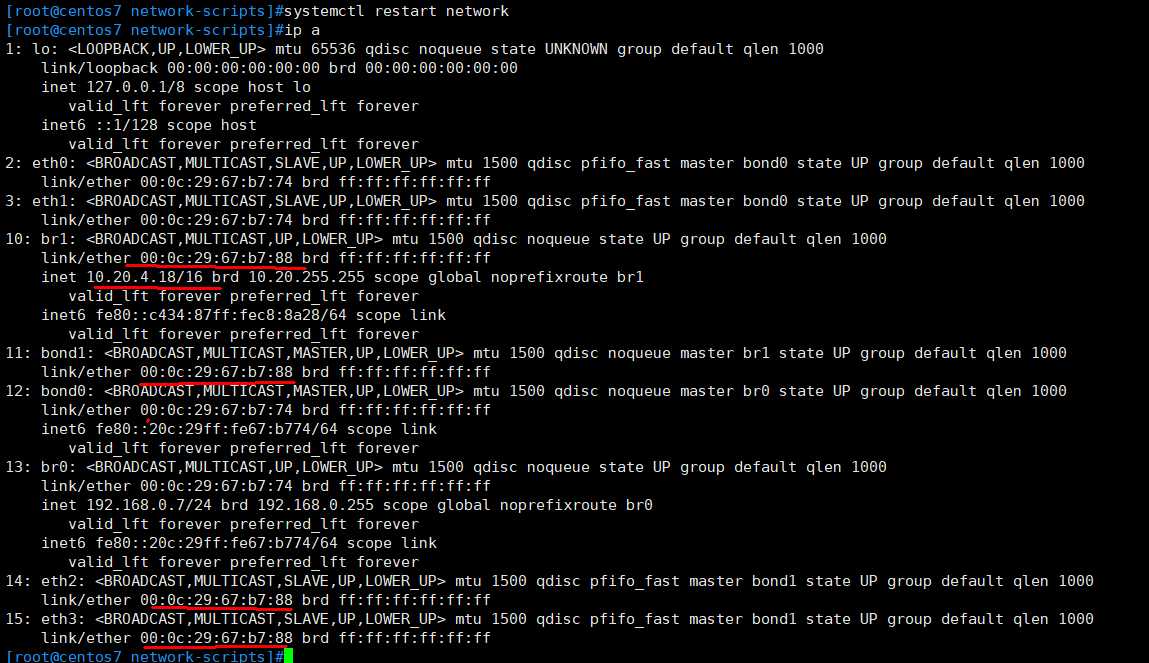
5、重新启动,验证网络
标签:out 网络服务 lazy mic root inf net dns config
原文地址:https://www.cnblogs.com/zengwen003/p/13184235.html