码迷,mamicode.com
首页 > 其他好文 > 详细

004Docker学习__Dockerfile_build命令构建docker镜像

时间:2020-06-29 13:34:49      阅读:51      评论:0      收藏:0      [点我收藏+]

标签:ZKM   mic   lfs   avl   指令   jic   bmc   sid   docker镜像   

Dockerfile介绍


  Dockerfile 是一个文本文件,记录了镜像构建的所有步骤。
 

第一个Dockerfile,构建镜像的过程详解


  用 Dockerfile 创建 centos-vim,就是编写Dockerfile文件,在基础镜像centos:centos7.4.1708上安装vim,镜像构建的重要部分
[root@docker ~]# docker build -t centos-vim-file .
Sending build context to Docker daemon  49.66kB
Step 1/2 : FROM centos:centos7.4.1708
 ---> 9f266d35e02c
Step 2/2 : RUN yum -y update && yum -y install vim
 ---> Running in 88ac2e84751b
......
......
Removing intermediate container 88ac2e84751b
 ---> cc0a0d552187
Successfully built cc0a0d552187
Successfully tagged centos-vim-file:latest

镜像构建步骤详解


1、查看本机已有的镜像,可看出已将镜像centos:centos7.4.1708下载到本地
[root@docker ~]# docker images
REPOSITORY          TAG                 IMAGE ID            CREATED             SIZE
centos              centos7.4.1708      9f266d35e02c        11 months ago       197MB
2、当前目录为/root
[root@docker ~]# pwd
/root
3、在/root目录下新创建Dockerfile文件,将上述两行内容写入文件
vim Dockerfile
FROM centos:centos7.4.1708
RUN yum -y update && yum -y install vim
4、运行 docker build 命令,-t 将新镜像命名为 centos-vim-file,命令末尾的 " . " 
指明 build context 为当前目录。Docker默认会从 build context 中查找Dockerfile文件,我们
也可以通过 -f 参数指定 Dockerfile 的位置。
[root@docker ~]# docker build -t centos-vim-file .
5、从这步开始就是镜像真正的构建过程。 首先 Docker 将 build context 中的所有文件发送给 Docker daemon。
 build context 为镜像构建提供所需要的文件或目录。Dockerfile 中的 ADD、COPY 等命令可以将
 build context 中的文件添加到镜像。此例中,build context 为当前目录 /root,该目录下的所有文件和子
 目录都会被发送给 Docker daemon。
 注意:使用 build context 就得小心了,不要将多余文件放到 build context,特别不要把/、/usr 作为 build context,否则构建过程会相当缓慢甚至失败。
Sending build context to Docker daemon  49.66kB
6、Step 1:执行 FROM,将 centos:centos7.4.1708 作为 base 镜像。
centos:centos7.4.1708 镜像 ID 为 9f266d35e02c。
Step 1/2 : FROM centos:centos7.4.1708
---> 9f266d35e02c
7、Step 2:执行 RUN,安装 vim,接下来具体步骤。
Step 2/2 : RUN yum -y update && yum -y install vim
8、启动 ID 为 88ac2e84751b 的临时容器,在容器中通过 yum 安装 vim。
---> Running in 88ac2e84751b

。。。。。。

9、删除临时容器88ac2e84751b

Removing intermediate container 88ac2e84751b
10、保存ID为cc0a0d552187
---> cc0a0d552187
11、安装成功后,将容器保存为镜像,其 ID 为 cc0a0d552187。
     这一步底层使用的是类似 docker commit 的命令。
Successfully built cc0a0d552187
12、给镜像打一个标签
Successfully tagged centos-vim-file:latest
13、镜像构建完成后查看本地镜像,与第11步的ID号相同
技术图片
注意:在上面的构建过程中,我们要特别注意指令 RUN 的执行过程
Docker 会在启动的临时容器中执行操作,并通过 commit 保存为新的镜像。

查看镜像分层结构


centos-vim-file 是通过在 base 镜像的顶部添加一个新的镜像层而得到的。
技术图片
这个新镜像层的内容由 RUN yum -y update && yum -y install vim 生成。这一点我们可以通过 docker history 命令验证。
docker history 会显示镜像的构建历史,也就是 Dockerfile 的执行过程。
技术图片

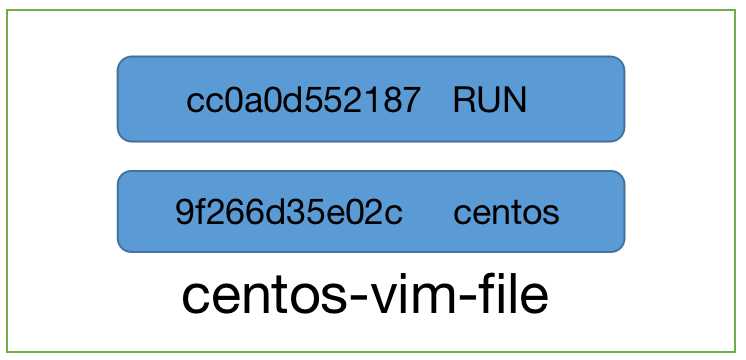
centos-vim-file 与 centos:centos7.4.1708 镜像相比,确实只是多了顶部的一层 cc0a0d552187,由 yum 命令创建,大小为 326MB。docker history 也向我们展示了镜像的分层结构,每一层由上至下排列。


004Docker学习__Dockerfile_build命令构建docker镜像

标签:ZKM   mic   lfs   avl   指令   jic   bmc   sid   docker镜像   

原文地址:https://www.cnblogs.com/lizhi199322/p/13207377.html

(0)
(0)
   
举报
评论 一句话评论(0
登录后才能评论!
© 2014 mamicode.com 版权所有  联系我们:gaon5@hotmail.com
迷上了代码!