标签:discovery 文件 java 功能 gateway 模拟 随机 cat 源码
我们现在有两个服务, 一个getway服务, 另一个是order服务. 使用的是nacos管理配置文件和服务注册中心
假如我现在product服务要调用order服务. product服务有1台, order服务有3台. 那么是如何实现负载均衡的呢?
下面我们来模拟一下负载均衡的实现.
package com.lxl.www.gateway.controller;
import org.springframework.beans.factory.annotation.Autowired;
import org.springframework.cloud.client.ServiceInstance;
import org.springframework.cloud.client.discovery.DiscoveryClient;
import org.springframework.web.bind.annotation.GetMapping;
import org.springframework.web.bind.annotation.RestController;
import org.springframework.web.client.RestTemplate;
import java.util.List;
@RestController
public class UserController {
@Autowired
private DiscoveryClient discoveryClient;
@Autowired
private RestTemplate restTemplate;
@GetMapping("get/order")
public String getOrder() {
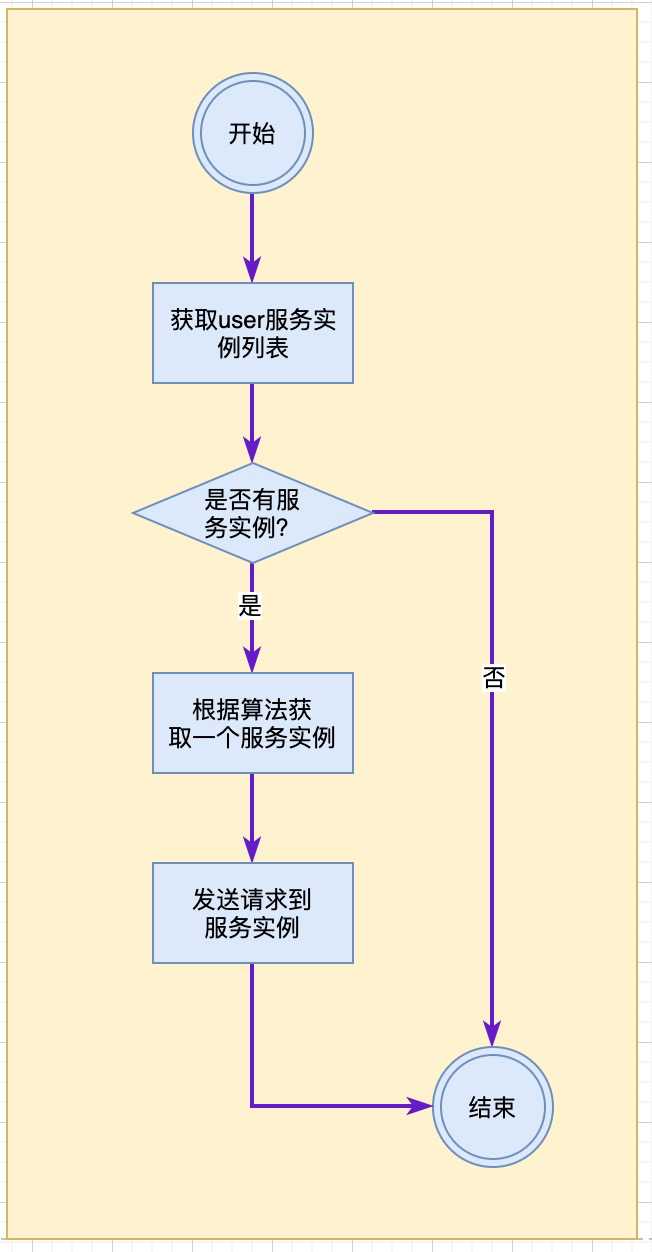
// 获取要调用的服务实例列表
List<ServiceInstance> userServices = discoveryClient.getInstances("order");
if (null == userServices || 0 == userServices.size()) {
return "用户微服务没有对应的实例可用";
}
// 获取列表第一个服务实例---这里可以设置一个负载均衡算法,轮询,随机等
String targetUri = userServices.get(0).getUri().toString();
// 发送请求到第一个服务实例
String forObject = restTemplate.getForObject(targetUri + "/config", String.class);
System.out.println(forObject);
return forObject;
}
}
这里服务注册发现使用的是谁呢? 使用的是nacos, nacos提供了自己的open api. 也封装了接口. 通过DiscoveryClient就可以调用接口
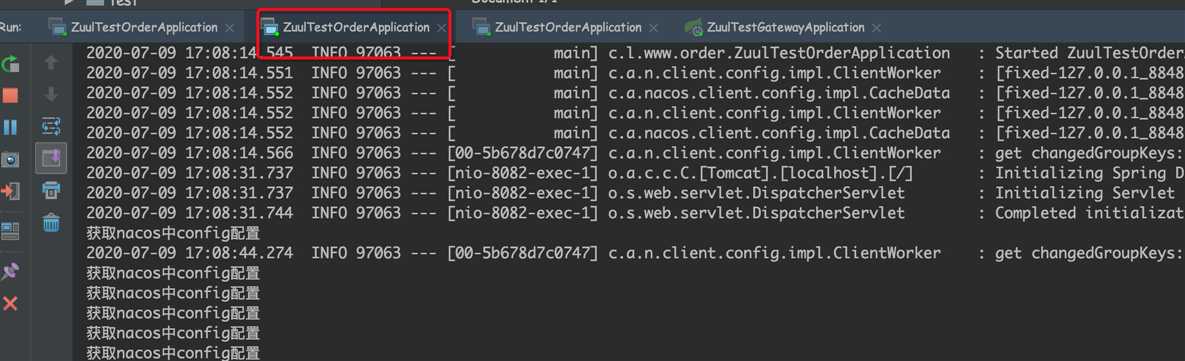
验证启动效果
启动一个getway服务, 端口号是 8080
启动3台order服务. 8081, 8082, 8083
启动order服务的时候有一个技巧, 之前都是使用的动态端口号, 这次使用另一种方式, 更简单
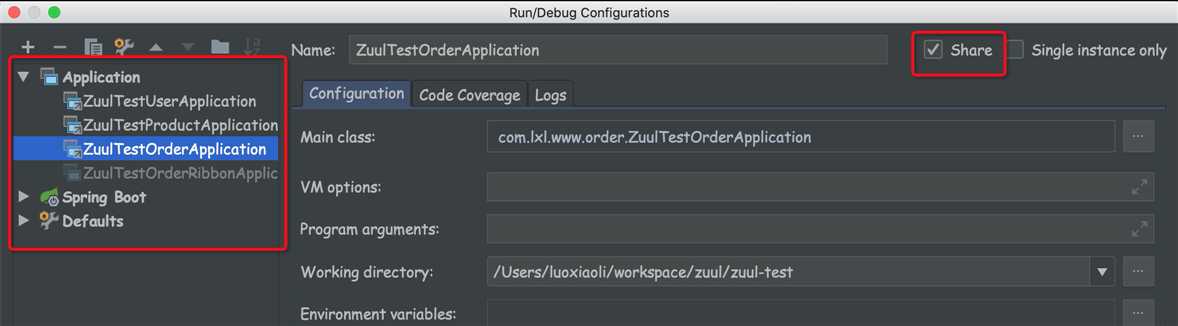
打开配置->选择要启动的Application(这里选择的是order服务)->勾选右上角的Share共享, 就可以给这个应用启动多个客户端了. 注意端口不能一样哈.
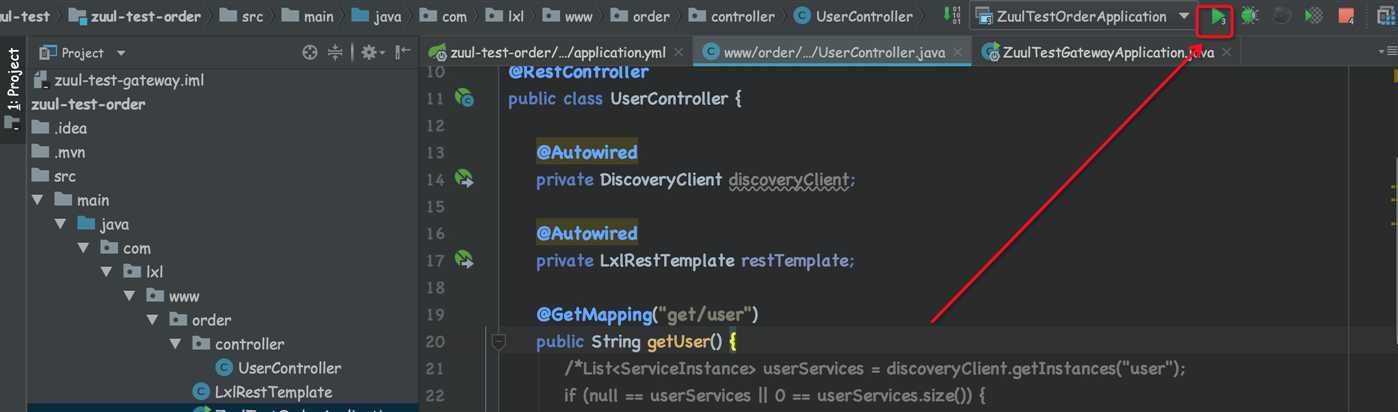
如上图, 看到启动按钮下标有个3么?表示当前服务启动了3台

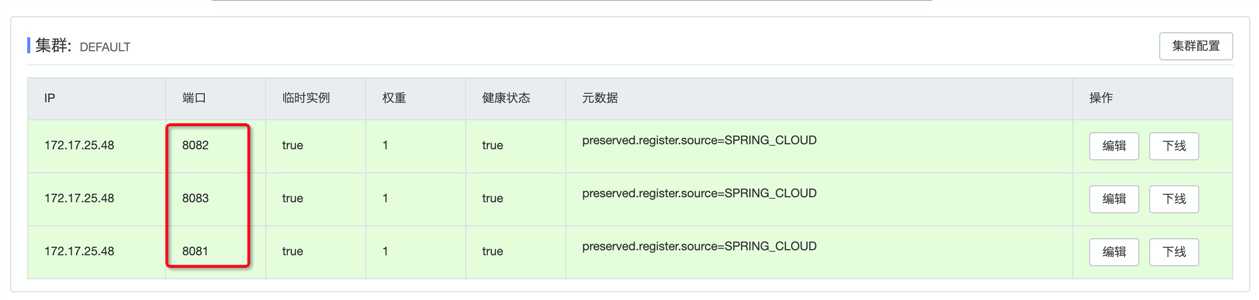
我们看到, 一个由两个服务, 一个是order, 共有3个实例; 另一个是gateway
order三台实例的具体详情如下: 端口号分别是8081,8082,8083
接下来,我们访问gateway的接口. 在接口里面模拟调用order服务的实例, 请求的是获取的第一个服务实例
http://localhost:8080/get/order
发送了五次请求,流量全部打到了第二个服务实例上
上面这个方法的简单模拟了如何在一个服务的多个实例中完成调用. 那么最终使用的是RestTemplate. 那么接下来我们来看一看RestTemplate的源码
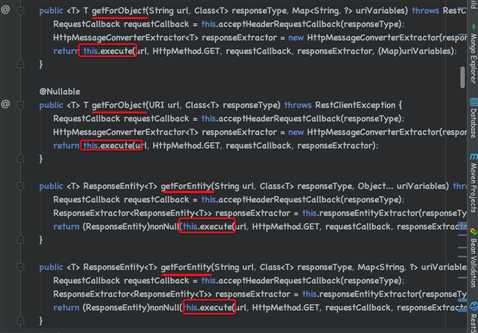
我们看到在RestTemplate中有各种各样的方法调用, get, post ,put,delete等等. 他们最终调用的是this.execute(....)方法, 那么我们来看看this.execute(...)方法的实现.
我们发现在execute(...)方法里直接调用了doExecute(...)
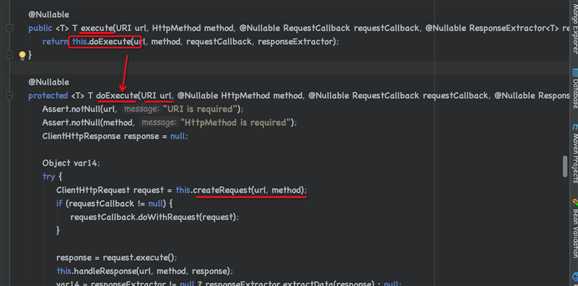
最终实现跳转的url是在doExecute方法里. 而我们可以在这里对url进行一个包装. 如何包装了, 前端传过来的是服务名, 我根据服务名查询对应的服务列表. 然后通过负载均衡算法, 确定要定位的服务器.
我们可以来重写一下RestTemplate方法
package com.lxl.www.order;

import lombok.extern.slf4j.Slf4j;
import org.springframework.beans.factory.annotation.Autowired;
import org.springframework.cloud.client.ServiceInstance;
import org.springframework.cloud.client.discovery.DiscoveryClient;
import org.springframework.http.HttpMethod;
import org.springframework.lang.Nullable;
import org.springframework.stereotype.Component;
import org.springframework.web.client.RequestCallback;
import org.springframework.web.client.ResponseExtractor;
import org.springframework.web.client.RestClientException;
import org.springframework.web.client.RestTemplate;

import java.net.URI;
import java.net.URISyntaxException;
import java.util.List;

@Slf4j
@Component
public class LxlRestTemplate extends RestTemplate {

    @Autowired
    private DiscoveryClient discoveryClient;

    @Override
    protected <T> T doExecute(URI url, @Nullable HttpMethod method, @Nullable RequestCallback requestCallback, @Nullable ResponseExtractor<T> responseExtractor) throws RestClientException {

        // 替换url
        try {
            url = replaceUrl(url);
        } catch (URISyntaxException e) {
            e.printStackTrace();
        }
        return super.doExecute(url, method, requestCallback, responseExtractor);
    }

    private URI replaceUrl(URI url) throws URISyntaxException {
        // 通过URI获取服务名
        String serviceName = url.getHost();
        log.info("调用的服务名是:{}", serviceName);

        // 获取请求路径path
        String path = url.getPath();
        log.info("[调用的服务路径是:{}]", path);

        // 调用nacos查找服务实例列表
        List<ServiceInstance> instances = discoveryClient.getInstances(serviceName);
        String targetHost = instances.get(0).getUri().toString();

        String source = targetHost + path;
        return new URI(source);

    }
}
第一: LxlRestTemplate继承自RestTemplate
第二: 重写了doExecute方法. 在里面重新包装了url, 根据服务名找到对应的服务实例列表, 然后选择一台服务器, 重新构建一个新的URI,
第三: 调用父类方法doExecute();
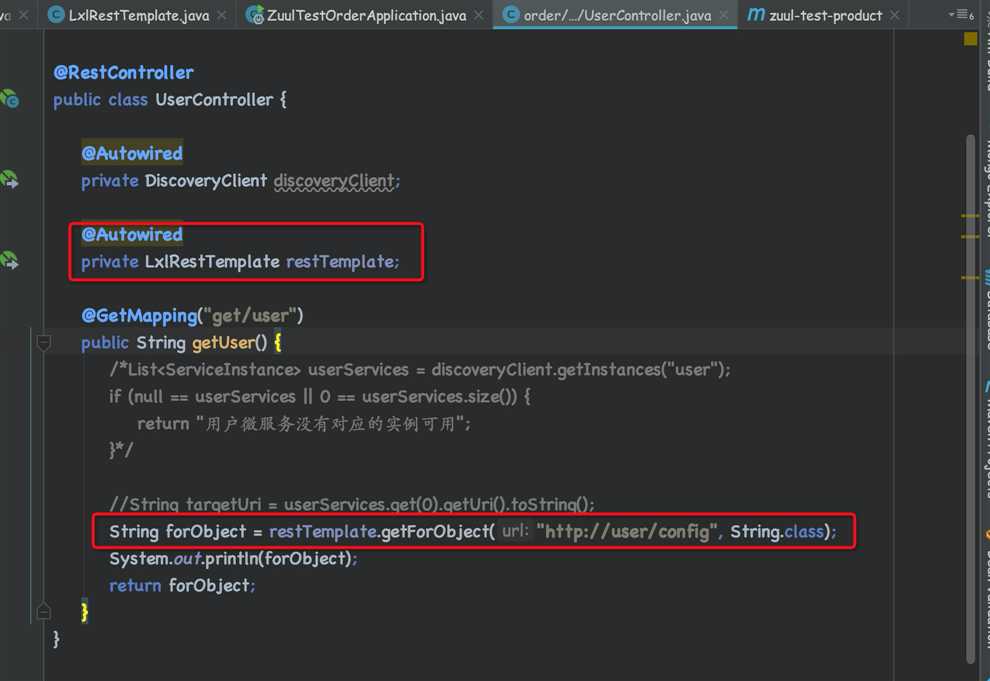
接下来使用我们自定义的RestTemplate
这样就实现了根据服务名+负载均衡策略 定向到指定服务了
后面要学习的ribbon最终也是通过RestTemplate调用的远程服务. 其原理和这个是类似, 但功能实现要比这个复杂得多.
标签:discovery 文件 java 功能 gateway 模拟 随机 cat 源码
原文地址:https://www.cnblogs.com/ITPower/p/13277329.html