标签:content pool tun params group 成熟 -o 日志格式 eric
PV : Page Visit 页面独立浏览量,查看日志生成条数可以看到PV数量。
PV全称Page View,中文翻译即页面浏览。其具体的度量方法是从浏览器发出一个对网络服务器的请求(Request),网络服务器接到该请求后,会将请求对应的网页(Page)发送给浏览器,从而产生一个PV。只要是请求发送给了浏览器,无论页面是否完全打开(下载完成),都计为1个PV。
UV : 独立设备,访问的次数。
IP : 同一个ip访问的次数,比如宽带入网,只有一个公网IP,内网有n个用户访问同一个页面,那么也只有1个IP
假设公司一座大厦,大厦有100人,每个人有一台电脑和一部手机,上网都是通过nat转换出口,每个人点击网站两次,请问对应的pv,uv,ip分别是多少?
pv:400
uv:200
ip:1
把网页功能模块化。
静态服务
1. 浏览器缓存
2. 防盗链
3. 资源分类
4. 资源压缩
5. 资源缓存
6. 跨域访问
代理服务
1、协议类型
2、正想代理
3、反向代理
4、负载均衡
5、代理缓存
6、动静分离
安全服务
1、访问控制
2、访问限制
3、流量限制
4、拦截攻击
5、拦截异常请求
6、拦截sql注入
流行架构
nginx+php	lnmp
nginx+java	lnmt
nginx+python
静态和动态的区别,主要是看是否调用了数据库。
静态服务器:nginx、apache、IIs、lighttpd、tengine、openresty-nginx他们没有办法直接连接数据库。
动态服务器:tomcat、resin、php、weblogic、jboss
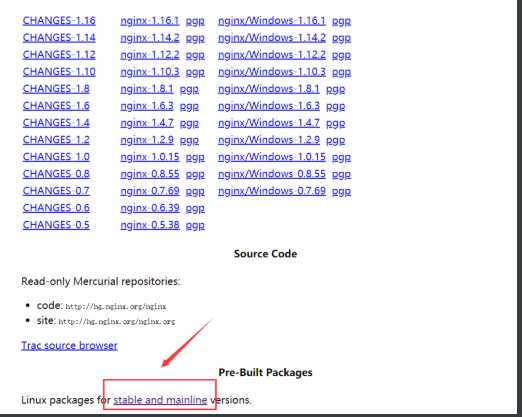
nginx官网下载地址http://nginx.org/en/download.html ; 在网页最下面,应尽量使用稳定版网页中已经标注。
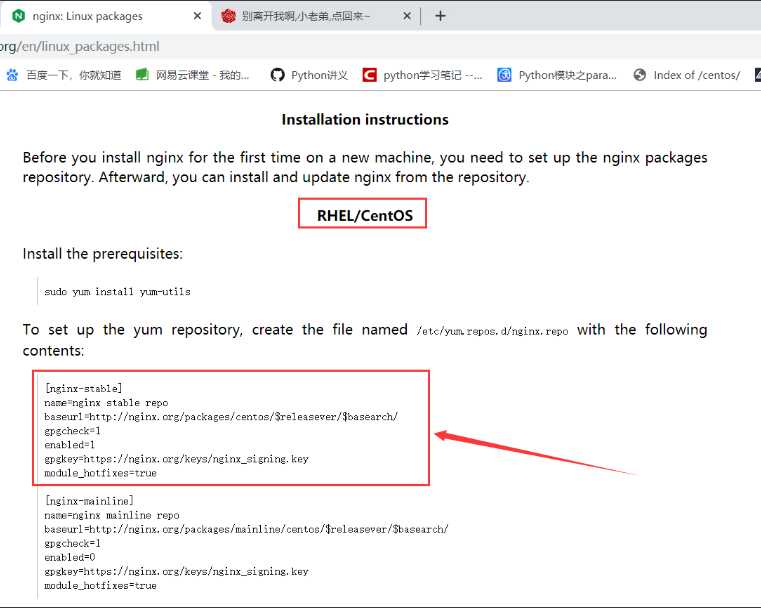
选择相应的版本然后复制红色部分到yum仓库中即可。
yum安装
#  1、修改nginx的yum源。
[root@web01 ~]# vi /etc/yum.repos.d/nginx.repo
[nginx-stable]
name=nginx stable repo
baseurl=http://nginx.org/packages/centos/$releasever/$basearch/
gpgcheck=1
enabled=1
gpgkey=https://nginx.org/keys/nginx_signing.key
module_hotfixes=true

# 2、安装
[root@web01 ~]# yum -y install nginx

# 3、启动服务,开机自启
[root@web01 ~]# systemctl start nginx
[root@web01 ~]# systemctl enable nginx

# 4、检测nginx是否安装成功
检查端口:
[root@web01 ~]# netstat -lntup |grep 80
检查进程:
[root@web01 ~]# ps -ef | grep [n]ginx

# 检查nginx的版本
[root@web01 ~]# nginx -v

# 检查安装时的功能
[root@web01 ~]# nginx -V
nginx version: nginx/1.18.0
built by gcc 4.8.5 20150623 (Red Hat 4.8.5-39) (GCC)
built with OpenSSL 1.0.2k-fips  26 Jan 2017
TLS SNI support enabled
configure arguments: --prefix=/etc/nginx --sbin-path=/usr/sbin/nginx --modules-path=/usr/lib64/nginx/modules --conf-path=/etc/nginx/nginx.conf --error-log-path=/var/log/nginx/error.log --http-log-path=/var/log/nginx/access.log --pid-path=/var/run/nginx.pid --lock-path=/var/run/nginx.lock --http-client-body-temp-path=/var/cache/nginx/client_temp --http-proxy-temp-path=/var/cache/nginx/proxy_temp --http-fastcgi-temp-path=/var/cache/nginx/fastcgi_temp --http-uwsgi-temp-path=/var/cache/nginx/uwsgi_temp --http-scgi-temp-path=/var/cache/nginx/scgi_temp --user=nginx --group=nginx --with-compat --with-file-aio --with-threads --with-http_addition_module --with-http_auth_request_module --with-http_dav_module --with-http_flv_module --with-http_gunzip_module --with-http_gzip_static_module --with-http_mp4_module --with-http_random_index_module --with-http_realip_module --with-http_secure_link_module --with-http_slice_module --with-http_ssl_module --with-http_stub_status_module --with-http_sub_module --with-http_v2_module --with-mail --with-mail_ssl_module --with-stream --with-stream_realip_module --with-stream_ssl_module --with-stream_ssl_preread_module --with-cc-opt=‘-O2 -g -pipe -Wall -Wp,-D_FORTIFY_SOURCE=2 -fexceptions -fstack-protector-strong --param=ssp-buffer-size=4 -grecord-gcc-switches -m64 -mtune=generic -fPIC‘ --with-ld-opt=‘-Wl,-z,relro -Wl,-z,now -pie‘

# nginx的启动、停止、重启、重新加载配置文件
[root@web01 ~]# systemctl restart nginx    在配置文件配置错误的时候容易导致服务起不起来。
[root@web01 ~]# systemctl start nginx
[root@web01 ~]# systemctl stop nginx
[root@web01 ~]# systemctl reload nginx

# 二进制包nginx的管理
/app/nginx/sbin/nginx -s stop		# 停止
/app/nginx/sbin/nginx -s reload		# 重新加载配置文件
/app/nginx/sbin/nginx				# 启动
通过官方源,yum安装的nginx,配置文件已经被优化过。
| /etc/nginx/conf.d/ | 用户配置的配置文件目录 |
|---|---|
| /etc/nginx/nginx.conf | 主配置文件 |
nginx代理文件
/etc/nginx/scgi_params		# ajax
/etc/nginx/uwsgi_params		# python
/etc/nginx/fastcgi_params   # php
和字符集编码相关的文件
[root@web01 ~]# ll /etc/nginx/koi-utf
-rw-r--r-- 1 root root 2837 Apr 21 23:07 /etc/nginx/koi-utf
[root@web01 ~]# ll /etc/nginx/koi-win
-rw-r--r-- 1 root root 2223 Apr 21 23:07 /etc/nginx/koi-win
[root@web01 ~]# ll /etc/nginx/win-utf
-rw-r--r-- 1 root root 3610 Apr 21 23:07 /etc/nginx/win-utf
浏览器支持直接打开的格式
[root@web01 ~]# ll /etc/nginx/mime.types
-rw-r--r-- 1 root root 5231 Apr 21 23:07 /etc/nginx/mime.types
Content-Type:与扩展名
nginx相关命令文件
[root@web01 ~]# /usr/sbin/nginx
[root@web01 ~]# /usr/sbin/nginx-debug
日志相关文件,logrotate是一个系统工具,可以自动的切割日志。
[root@web01 ~]# ll /etc/logrotate.d/nginx
[root@web01 ~]# ll /var/log/nginx/
total 8
-rw-r----- 1 nginx adm 412 May 14 11:04 access.log
-rw-r----- 1 nginx adm 246 May 14 11:04 error.log
主要分为三个模块:核心模块、事件驱动模块、http模块。
[root@web01 ~]# cat /etc/nginx/nginx.conf
########## 核心模块 ##########
user  nginx;
worker_processes  1;

error_log  /var/log/nginx/error.log warn;
pid        /var/run/nginx.pid;

########## 事件驱动模块 ##########
events {
    worker_connections  1024;
}

########## http模块 ##########
http {
    include       /etc/nginx/mime.types;
    default_type  application/octet-stream;

    log_format  main  ‘$remote_addr - $remote_user [$time_local] "$request" ‘
                      ‘$status $body_bytes_sent "$http_referer" ‘
                      ‘"$http_user_agent" "$http_x_forwarded_for"‘;

    access_log  /var/log/nginx/access.log  main;

    sendfile        on;
    #tcp_nopush     on;

    keepalive_timeout  65;

    #gzip  on;

    include /etc/nginx/conf.d/*.conf;
}
[root@web01 ~]# cat /etc/nginx/nginx.conf
########## 核心模块 ##########
# nginx的启动用户
user  nginx;
# worker的进程数量,子进程,通常使用auto。
worker_processes  1;

# 错误日志的存放路径和记录日志的级别-info、error、warn、debug
error_log  /var/log/nginx/error.log warn;
# pid文件的路径
pid        /var/run/nginx.pid;

########## 事件驱动模块 ##########
events {
	# 每个worker进程,允许可连接的数量
    worker_connections  1024;
}

########## http模块 ##########
http {
	# 包含指定文件的内容;浏览器可加载的文件:html、jpeg、text、txt。。。。
    include       /etc/nginx/mime.types;
    # 默认要下载的类型,在/etc/nginx/mime.types中浏览器直接下载的。
    default_type  application/octet-stream;

	# 日志格式
    log_format  main  ‘$remote_addr - $remote_user [$time_local] "$request" ‘
                      ‘$status $body_bytes_sent "$http_referer" ‘
                      ‘"$http_user_agent" "$http_x_forwarded_for"‘;

	# 指定的日志存放路径和定义的日志格式
    access_log  /var/log/nginx/access.log  main;

	# 高效传输文件,性能优化的时候用。
    sendfile        on;
    #tcp_nopush     on;

	# 长连接的超时时间
    keepalive_timeout  65;

	# 是否开启gzip压缩,打开之后传输更快
    #gzip  on;

	# 在/etc/nginx/conf.d/以conf结尾的文件
    include /etc/nginx/conf.d/*.conf;
}
使用下面的方法自定义日志格式
在此配置文件中的设置是全局的
http {
    include       /etc/nginx/mime.types;
    default_type  application/octet-stream;

    log_format  main  ‘$remote_addr - $remote_user [$time_local] "$request" ‘
                      ‘$status $body_bytes_sent "$http_referer" ‘
                      ‘"$http_user_agent" "$http_x_forwarded_for"‘;

    log_format  zidingyi  ‘"访问的IP:"$remote_addr‘;

    access_log  /var/log/nginx/access.log  main;
										# 日志格式的名字
    access_log  /var/log/nginx/zidingyi.log  zidingyi;

    sendfile        on;
    #tcp_nopush     on;

    keepalive_timeout  65;

    #gzip  on;

    include /etc/nginx/conf.d/*.conf;
}
# =====================================================================
可以调用主配置文件中的日志格式
[root@web01 ~]# vi /etc/nginx/conf.d/gong.conf
server{
        listen 80;
        server_name www.gong.com;
        root /code;
        index index.html;

        access_log  /var/log/nginx/zidingyi.log  zidingyi;
}
标签:content pool tun params group 成熟 -o 日志格式 eric
原文地址:https://www.cnblogs.com/gshelldon/p/13289048.html