标签:pen off post date tco 编码格式 ase 运行 href
2:好处,功能,技术,开发规范http://jeesite.com/docs/
JDK1.8+Eclipse+Maven +MYSQL
具体步骤可参考我以前的:《番外篇:因为一个固态导致的——系统重装与JAVA软件环境下载安装配置》
注意:
1)Eclipse修改默认编码格式
Window——Preference——General——Workspace 面板TextFileEncoding选择UTF-8
Window——Preference——General——Content Type——Text——JSP 最下边设置为UTF-8
Window——Preference——Web——JspFiles 面板选择UTF-8
2)配置Maven环境
Window——Preference——Maven——installation,右侧点击Add
设置Maven安装目录,然后finish
选中Maven,并Apply
打开Window——Preference——Maven——User Settings 并Apply
前往码云下载稳定版本:https://gitee.com/thinkgem/jeesite4/tree/v4.1.9/源码,或则使用Git克隆到本地
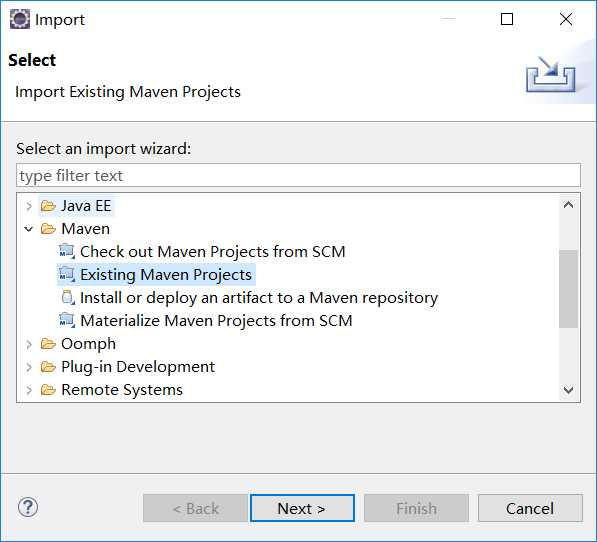
开发Eclipse,导入已存在的Maven项目
1:打开MYSQL
1)添加配置
show global variables like "innodb_large_prefix";
show global variables like "innodb_file_format";
show global variables like "innodb_file_per_table";
set global innodb_large_prefix=ON;
set global innodb_file_format=Barracuda;
set global innodb_file_per_table=ON;
2)创建用户和授权
set global read_only=0;
set global optimizer_switch=‘derived_merge=off‘;
create user ‘jeesite‘@‘%‘ identified by ‘jeesite‘;
create database jeesite DEFAULT CHARSET ‘utf8‘ COLLATE ‘utf8_unicode_ci‘;
grant all privileges on jeesite.* to ‘jeesite‘@‘%‘ identified by ‘jeesite‘;
flush privileges;
2:打开项目
1)jeesite-Web项目下/src/main/resources/config/application.yml,将数据库用户名和密码改成自己的
2)执行脚本,初始化数据库
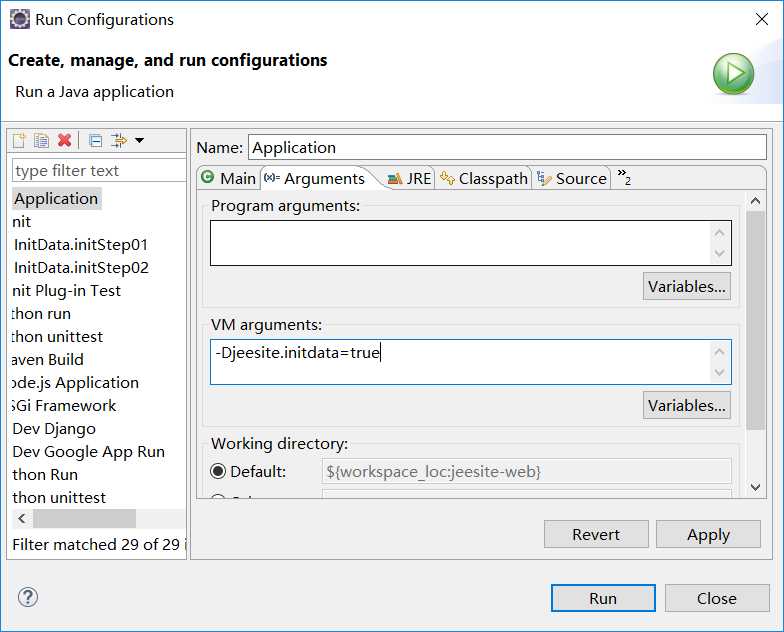
com.jeesite.test.InitCoreData.java)文件并打开,然后在空白处右键,点击 Run As -> JUnit Test 运行单元测试,进行初始化数据库脚本
为了防止误操作,你还需要:打开 Run Configurations 找到 Arguments 选项卡,在 VM arguments 里增加 “-Djeesite.initdata=true” 参数,
点击Run运行,执行完成后建议将该单元测试 Run Configuration 删除掉,防止误操作
3:如果没有开启auto build的,还需要在导入后,初始化数据库前
打开jeesite-root模块的pom.xml,然后。Run as maven install 下载相关jar包
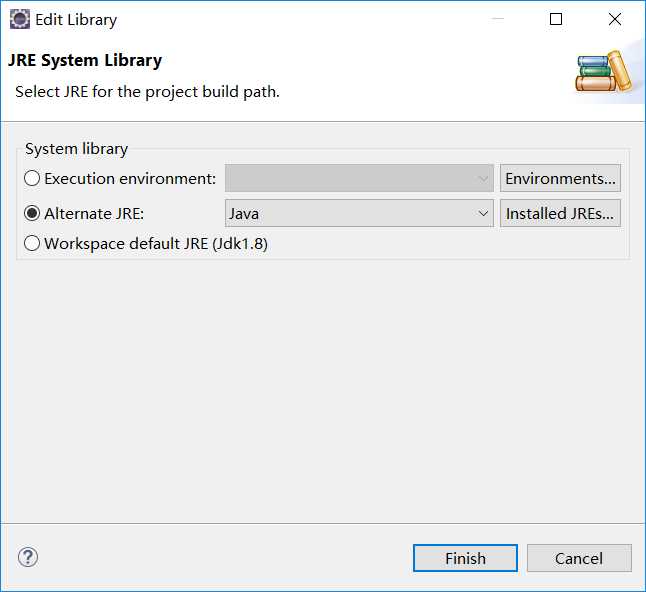
注意:此时可能会出现错误
No compiler is provided in this environment. Perhaps you are running on a JRE rather than a JDK?
这个问题你只要将他的jdk换成你自己的就可以了
右键——build Path——Configuration Build Path——Library——选中jdk——Edit
jeesite的是基于SpringBoot的,故同SpringBoot,在Jeesite-Web中选择/jeesite-web/src/main/java/com/jeesite/modules/Application.java
右键Run As Application
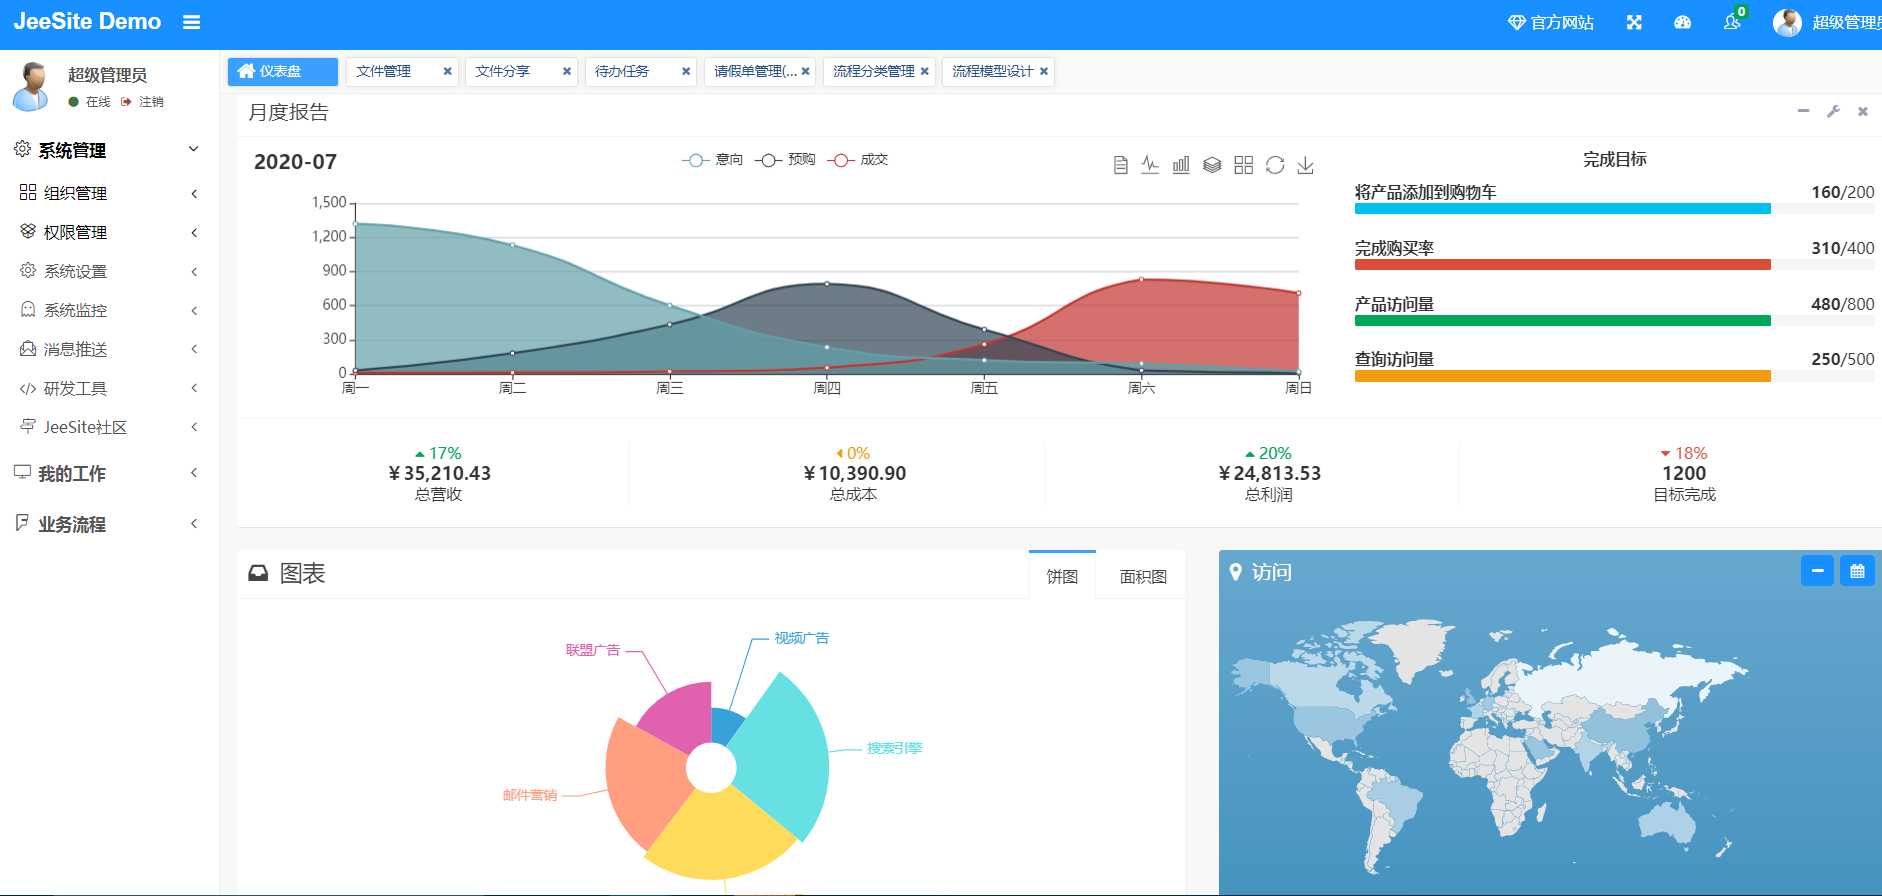
访问:http://localhost:8980/js/即可
默认最高管理员账号:system 密码:admin
jeesite提供了模板模块jeesite-module-template模块,若新建模块为jeesite-module-test
1:到E:\ProjectSourceCode\jeesite\thinkgem-jeesite4-v4.1.9\jeesite4\modules复制template文件夹,并粘贴至本地,改名为test
2:3、打开 /modules/test/pom.xml 文件,找到 jeesite-module-template 的 artifactId 元素,修改为你的模块名,如:jeesite-module-test

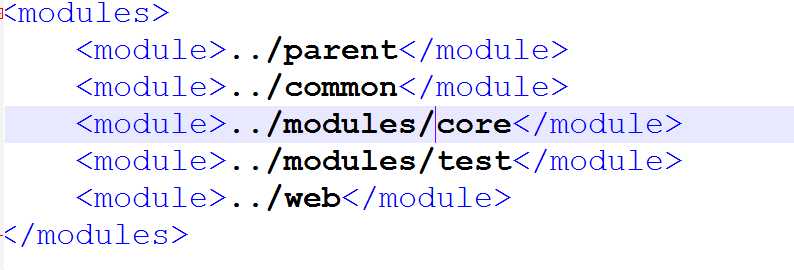
3:4、打开 /root/pom.xml 文件,拷贝 <module>../modules/core</module> 到新一行,修改为你的模块名,如:<module>../modules/test</module>
4:在你需要用到的项目引入你的新模块,如,在 web 项目下用,则打开 /web/pom.xml 文件,加入:
<dependency> <groupId>com.jeesite</groupId> <artifactId>jeesite-module-test</artifactId> <version>${project.parent.version}</version> </dependency>
5:Eclipse将该模块导入
6:继续开发即可
目标:增加用户管理模块
1:数据库建表
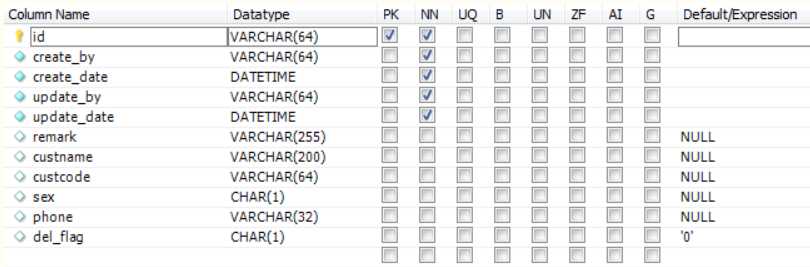
增加一张 demo_customer表,其中必不可少的字段有:
use jeesite;
create table demo_customer(
id varchar(64) primary key,
create_by varchar(64) not null,
create_date datetime not null,
update_by varchar(64) not null,
remarks varchar(255),status char(1)
);
其它字段按需增加(客户名称、客户编号、性别、电话、删除标志):
2:使用代码生成工具
标签:pen off post date tco 编码格式 ase 运行 href
原文地址:https://www.cnblogs.com/nullering/p/13336812.html