标签:ota lazy handle 地方 methods pair addm 路径配置 ati
由于前后端分离,前端或者后端无法做到及时协商,最终导致问题爆发,所以程序猿写代码时都是很暴躁的。
这个时候,就可以用到Swagger了,它号称世界上最流行的API框架,Restful Api文档在线自动生成器。还可以在线测试API接口,不必特意去下载Postman,ApiPost去测试接口。还支持多种语言,如:Java,PHP(PHP是世界上最好的语言!)等
贴个官网:https://swagger.io/
集成Swagger需要引入pom依赖,下面是代码
<!-- https://mvnrepository.com/artifact/io.springfox/springfox-swagger2 -->
<dependency>
<groupId>io.springfox</groupId>
<artifactId>springfox-swagger2</artifactId>
<version>2.9.2</version>
</dependency>
<!-- https://mvnrepository.com/artifact/io.springfox/springfox-swagger-ui -->
<dependency>
<groupId>io.springfox</groupId>
<artifactId>springfox-swagger-ui</artifactId>
<version>2.9.2</version>
</dependency>
添加后编写HelloController,再新建一个Config文件夹,在里面新建一个SwaggerConfig配置java文件,确保运行成功。(下面是SwaggerConfig的代码)
@Configuration //配置类
@EnableSwagger2// 开启Swagger2的自动配置
public class SwaggerConfig {
}
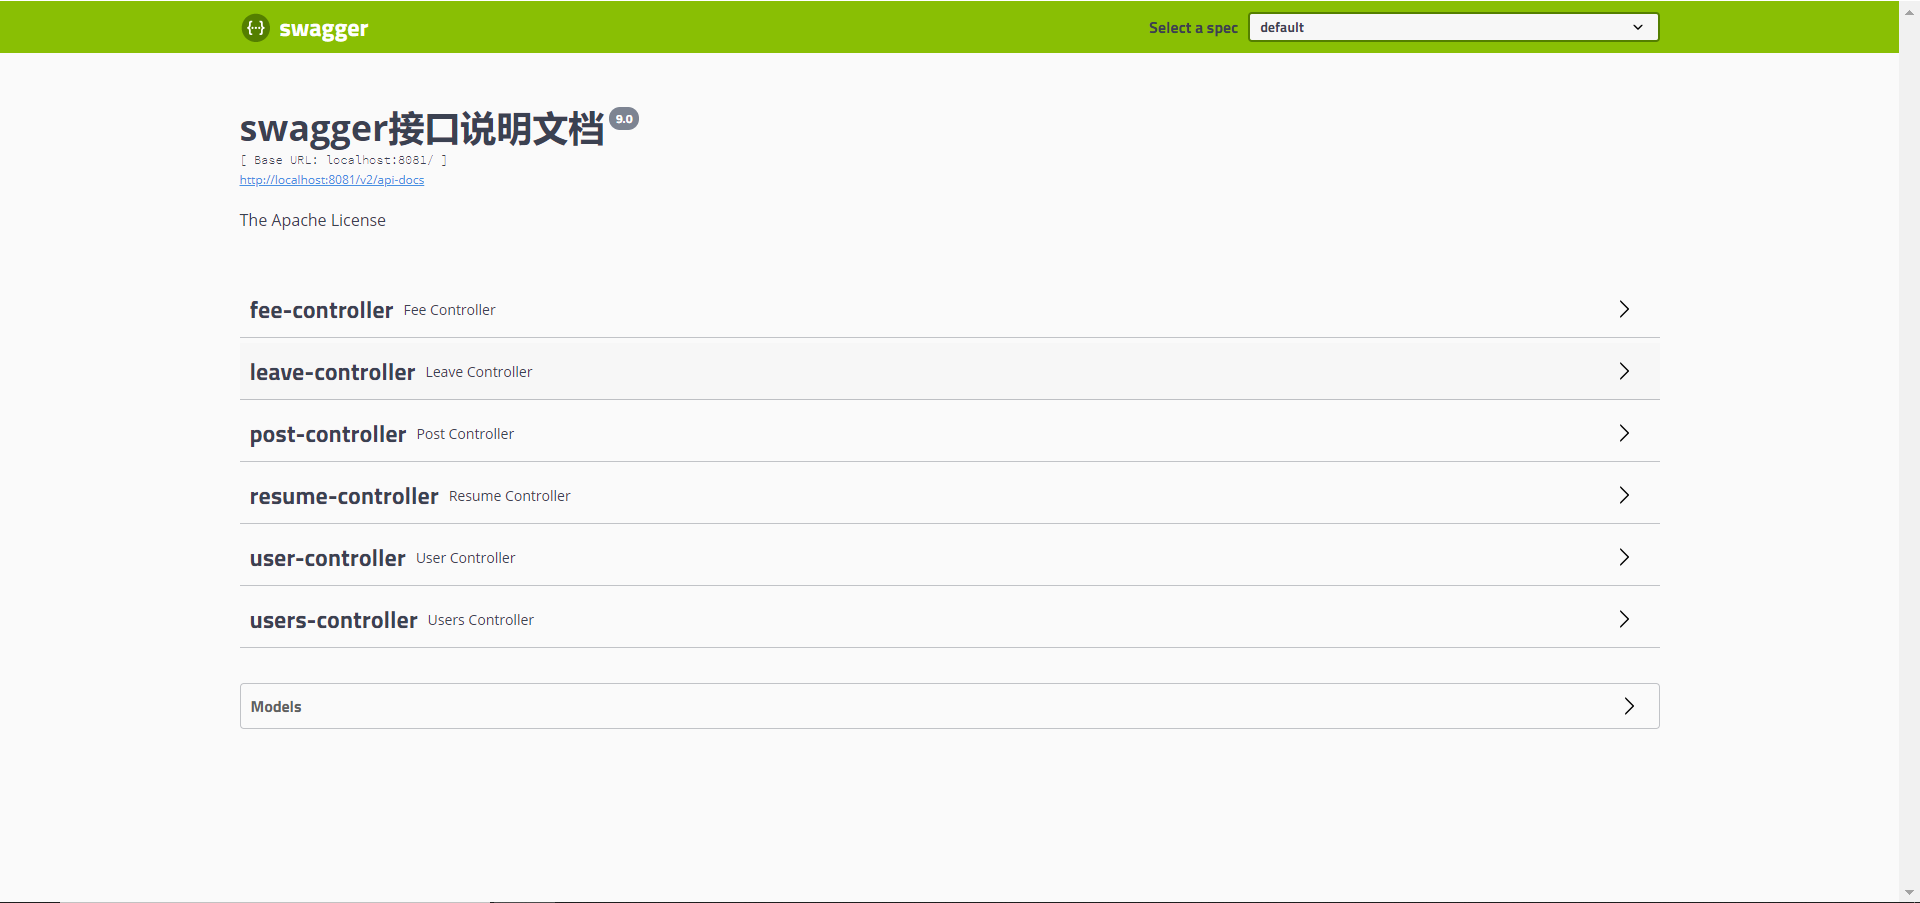
访问:
@Configuration
// @EnableWebMvc
public class CorsConfig extends WebMvcConfigurationSupport {


    @Override
    public void addResourceHandlers(ResourceHandlerRegistry registry) {
        registry.addResourceHandler("swagger-ui.html")
                .addResourceLocations("classpath:/META-INF/resources/");

        registry.addResourceHandler("/**")
                .addResourceLocations("classpath:/resource/")
                .addResourceLocations("classpath:/static/")
                .addResourceLocations("classpath:/public");
        registry.addResourceHandler("/webjars/**")
                .addResourceLocations("classpath:/META-INF/resources/webjars/");
    }


    @Override
    public void addCorsMappings(CorsRegistry registry) {
        // 设置允许跨域的路径
        registry.addMapping("/**")
                // 设置允许跨域请求的域名
                .allowedOrigins("*")
                // 是否允许证书 不再默认开启
                .allowCredentials(true)
                // 设置允许的方法
                .allowedMethods("*")
                // 跨域允许时间
                .maxAge(3600);
    }
}
1、Swagger实例Bean是Docket,所以通过配置Docket实例来配置Swaggger。
写在SwaggerConfig里
@Bean //配置docket以配置Swagger具体参数
public Docket docket() {
   return new Docket(DocumentationType.SWAGGER_2);
}
2、还可以通过apiInfo()属性配置文档信息
//配置文档信息
private ApiInfo apiInfo() {
   Contact contact = new Contact("联系人名字", "http://xxx.xxx.com/联系人访问链接", "联系人邮箱");
   return new ApiInfo(
           "Swagger学习", // 标题
           "学习演示如何配置Swagger", // 描述
           "v1.0", // 版本
           "http://terms.service.url/组织链接", // 组织链接
           contact, // 联系人信息
           "Apach 2.0 许可", // 许可
           "许可链接", // 许可连接
           new ArrayList<>()// 扩展
  );
}
3.配置了的话需要Docket关联上apiInfo()
@Bean
public Docket docket() {
   return new Docket(DocumentationType.SWAGGER_2).apiInfo(apiInfo());
}
1、构建Docket时通过select()方法配置扫描接口。
@Bean
public Docket docket() {
   return new Docket(DocumentationType.SWAGGER_2)
      .apiInfo(apiInfo())
      .select()// 通过.select()方法,去配置扫描接口,RequestHandlerSelectors配置如何扫描接口
      .apis(RequestHandlerSelectors.basePackage("com.example.application.controller"))
      .build();
}
2、重启项目测试,由于我们配置根据包的路径扫描接口,所以我们只能看到一个Controller类。
3、除了通过包路径配置扫描接口外,还可以通过配置其他方式扫描接口,这里注释一下所有的配置方式:
any() // 扫描所有,项目中的所有接口都会被扫描到
none() // 不扫描接口
// 通过方法上的注解扫描,如withMethodAnnotation(GetMapping.class)只扫描get请求
withMethodAnnotation(final Class<? extends Annotation> annotation)
// 通过类上的注解扫描,如.withClassAnnotation(Controller.class)只扫描有controller注解的类中的接口
withClassAnnotation(final Class<? extends Annotation> annotation)
basePackage(final String basePackage) // 根据包路径扫描接口
4、除此之外,还可以配置接口扫描过滤:
@Bean
public Docket docket() {
   return new Docket(DocumentationType.SWAGGER_2)
      .apiInfo(apiInfo())
      .select()// 通过.select()方法,去配置扫描接口,RequestHandlerSelectors配置如何扫描接口
      .apis(RequestHandlerSelectors.basePackage("com.example.application.controller"))
       // 配置如何通过path过滤,即这里只扫描请求以/post开头的接口
      .paths(PathSelectors.ant("/post/**"))
      .build();
}
5、这里的可选值还有:
any() // 任何请求都扫描
none() // 任何请求都不扫描
regex(final String pathRegex) // 通过正则表达式控制
ant(final String antPattern) // 通过ant()控制
Swagger可以自动生成接口文档,他是怎样生成的呢?你之需要根据Swagger的规范添加注释就可以了。
常用注解:
| Swagger注解 | 简单说明 |
|---|---|
| @Api(tags = "xxx模块说明") | 作用在模块类上 |
| @ApiOperation("xxx接口说明") | 作用在接口方法上 |
| @ApiModel("xxxPOJO说明") | 作用在模型类上:如VO、BO |
| @ApiModelProperty(value = "xxx属性说明",hidden = true) | 作用在类方法和属性上,hidden设置为true可以隐藏该属性 |
| @ApiParam("xxx参数说明") | 作用在参数、方法和字段上,类似@ApiModelProperty |
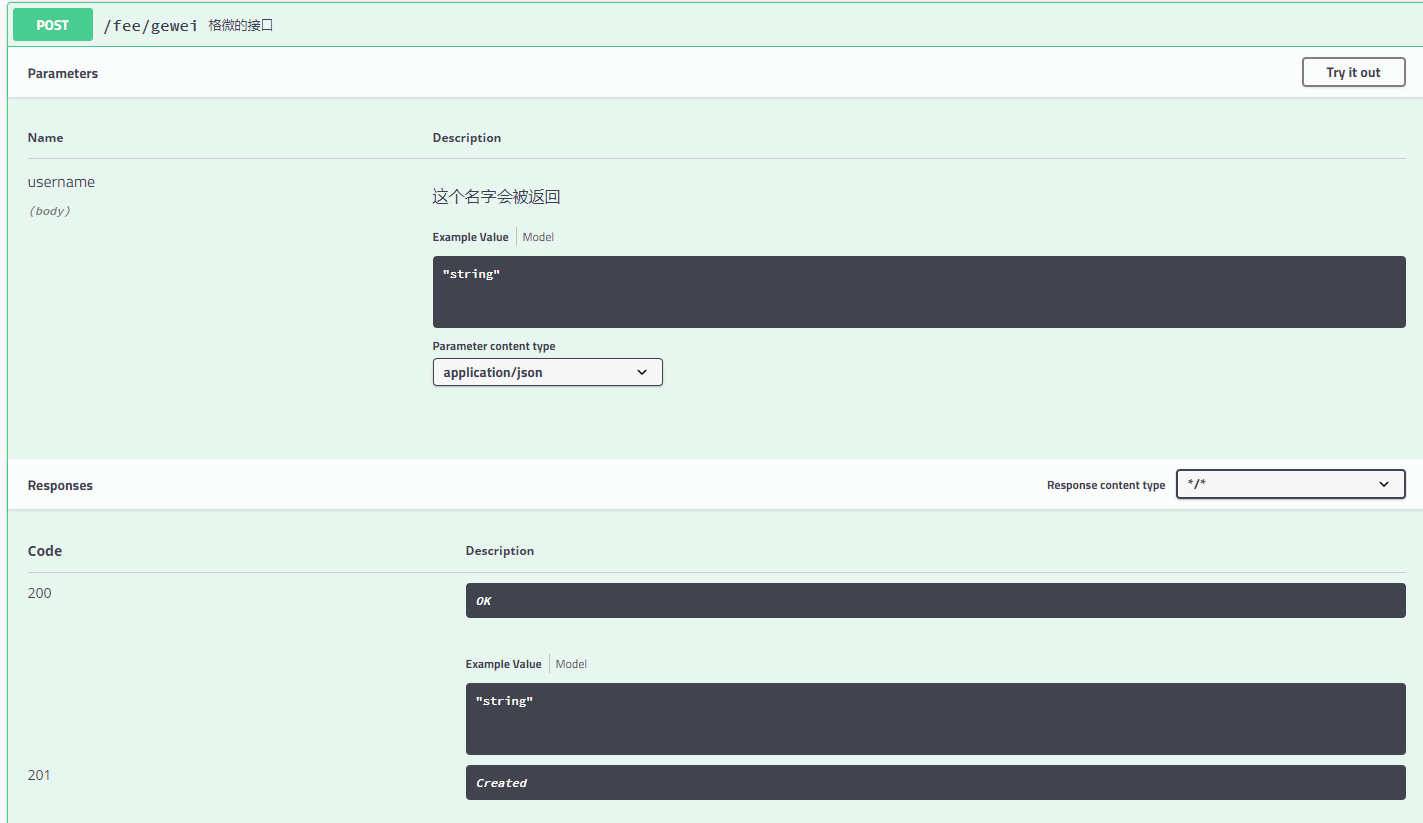
示例:
@ApiOperation("格微的接口")
@PostMapping("/gewei")
@ResponseBody
public String gewei(@ApiParam("这个名字会被返回")String username){
   return username;
}
才疏学浅,如果有不对的地方请指正。感谢B站遇见狂神说。
标签:ota lazy handle 地方 methods pair addm 路径配置 ati
原文地址:https://www.cnblogs.com/brzm/p/13722751.html