标签:general rom 用户名 required org -- lib receive address
拉取镜像:
docker pull registry.cn-hangzhou.aliyuncs.com/helowin/oracle_11g
下载完成后 查看镜像:
docker images
创建容器:
docker run -d -p 1521:1521 --name oracle11g --restart=always registry.cn-hangzhou.aliyuncs.com/helowin/oracle_11g
如果空间不足可以清理数据:
# 删除所有dangling数据卷(即无用的Volume):
docker volume rm $(docker volume ls -qf dangling=true)
开启1521端口,启动容器
docker start oracle11g
进入镜像进行配置
# 进入oracle的命令环境中。
docker exec -it oracle11g bash
# 切换到oracle数据库的root用户下
su root
# 密码:helowin
# 编辑文件配置ORACLE环境变量
vi etc/profile
# 追加如下内容
export ORACLE_HOME=/home/oracle/app/oracle/product/11.2.0/dbhome_2
export ORACLE_SID=helowin
export PATH=$ORACLE_HOME/bin:$PATH
# 重启配置文件服务
source /etc/profile
# 创建软连接
ln -s $ORACLE_HOME/bin/sqlplus /usr/bin
# 切换到oracle 用户(中间的内条 - 必须要,否则软连接无效)
su - oracle
# 登录sqlplus
sqlplus /nolog
conn /as sysdba
# 修改sys、system用户密码
alter user system identified by system;
alter user sys identified by sys;
ALTER PROFILE DEFAULT LIMIT PASSWORD_LIFE_TIME UNLIMITED;
# 创建用户
create user test identified by test;
# 给用户赋予权限
grant connect,resource,dba to test;
# 过程中出现的报错需要输入以下内容:
alter database mount;
alter database open;
exit
# 用户名/密码:system/system或sys/sys或test/test
# sid:helowin
配置环境变量:
变量名:ORACLE_HOME
变量值:E:\instantclient_11_2
变量名:TNS_ADMIN
变量值:E:\instantclient_11_2
变量名:NLS_LANG
变量值:SIMPLIFIED CHINESE_CHINA.ZHS16GBK
修改Path变量:在后面添加 E:\instantclient_11_2
安装 plsqldev11.0.4.exe(选择安装路径,其他全部默认)
破解 PLSQL Developer10.0.3.1701_keygen.exe
配置plsql与客户端 instantclient的连接
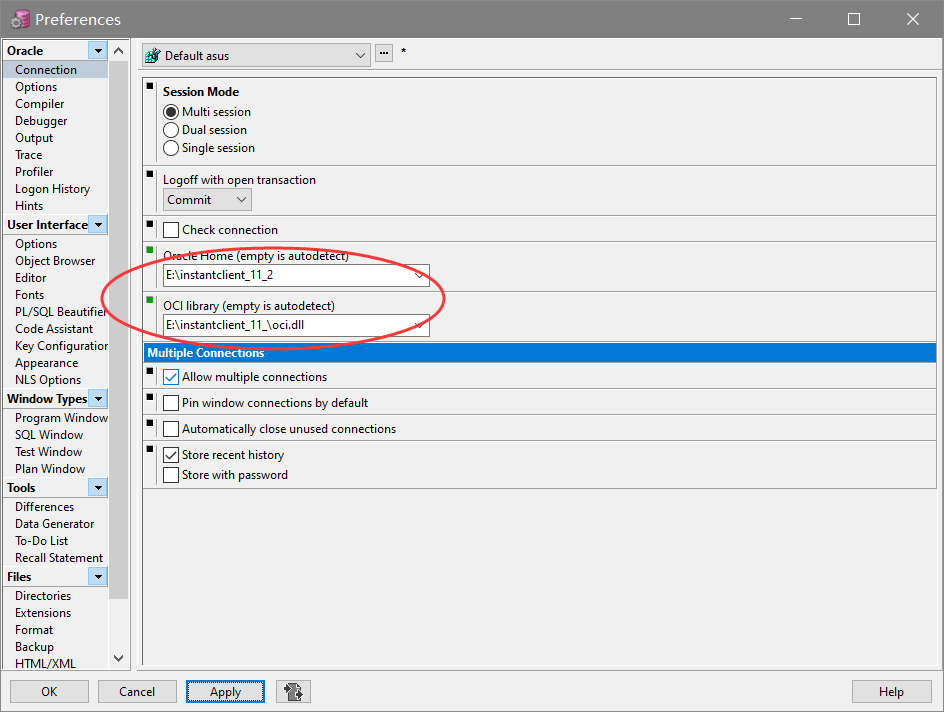
将instantclient_11_2/ADMIN文件夹中的连接配置文件( tnsnames.ora)复制进入instantclient_11_2根目录,并修改连接配置。(起作用的是拷贝出来的这份)
# host:指代服务所在ip地址。port指代:端口号 SERVICE_NAME 指代服务名
docker_oracle11g =
(DESCRIPTION =
      (ADDRESS_LIST =
            (ADDRESS = (PROTOCOL = TCP)(HOST = 106.75.32.166)(PORT = 1521))
       )
      (CONNECT_DATA =
            (SERVICE_NAME = helowinXDB)
       )
)
登录
system/system 或 sys/sys 或 test/test
connect as登录方式 sysdba
查看sid
select name from V$database;
select instance_name from V$instance;
数据库安全:密码、权限
To recover your lost databases and avoid leaking it: visit http://hn4wg4o6s5nc7763.onion and enter your unique token 4f64c839212d85d6 and pay the required amount of Bitcoin to get it back. Databases that we have: mybatis, ssmbuild. Your databases are downloaded and backed up on our servers. If we dont receive your payment in the next 9 Days, we will sell your database to the highest bidder or use them otherwise. To access this site you have use the tor browser https://www.torproject.org/projects/torbrowser.html
https://www.cnblogs.com/xys1228/p/6185301.html待续

mkdir -p /home/app/mysql8_docker/cert

docker run -p 3306:3306 -e MYSQL_ROOT_PASSWORD=root -v /home/app/mysql8_docker/data:/var/lib/mysql:rw -v /home/app/mysql8_docker/log:/var/log/mysql:rw -v /home/app/mysql8_docker/config/my.cnf:/etc/mysql/my.cnf:rw -v /home/app/mysql8_docker/cert:/etc/mysql/cert -v /etc/localtime:/etc/localtime:ro --name mysql8 --restart=always -d mysql

ssl-ca=/etc/mysql/ca-cert.pem
ssl-cert=/etc/mysql/server-cert.pem
ssl-key=/etc/mysql/server-key.pem
拉取Mysql8.0 镜像
docker pull mysql # 指定版本docker pull mysql:8.0.18
创建挂载目录
mkdir -p /home/app/mysql8_docker/config
mkdir -p /home/app/mysql8_docker/data
mkdir -p /home/app/mysql8_docker/log
配置文件my.cnf
vi /home/app/mysql8_docker/config/my.cnf
内容
# Copyright (c) 2017, Oracle and/or its affiliates. All rights reserved.
#
# This program is free software; you can redistribute it and/or modify
# it under the terms of the GNU General Public License as published by
# the Free Software Foundation; version 2 of the License.
#
# This program is distributed in the hope that it will be useful,
# but WITHOUT ANY WARRANTY; without even the implied warranty of
# MERCHANTABILITY or FITNESS FOR A PARTICULAR PURPOSE. See the
# GNU General Public License for more details.
#
# You should have received a copy of the GNU General Public License
# along with this program; if not, write to the Free Software
# Foundation, Inc., 51 Franklin St, Fifth Floor, Boston, MA 02110-1301 USA

#
# The MySQL Server configuration file.
#
# For explanations see
# http://dev.mysql.com/doc/mysql/en/server-system-variables.html

[mysqld]
pid-file = /var/run/mysqld/mysqld.pid
socket = /var/run/mysqld/mysqld.sock
datadir = /var/lib/mysql
secure-file-priv= NULL
# Disabling symbolic-links is recommended to prevent assorted security risks
symbolic-links=0

# Custom config should go here
!includedir /etc/mysql/conf.d/

default_authentication_plugin= mysql_native_password
启动容器
docker run -p 3306:3306 -e MYSQL_ROOT_PASSWORD=root -v /home/app/mysql8_docker/data:/var/lib/mysql:rw -v /home/app/mysql8_docker/log:/var/log/mysql:rw -v /home/app/mysql8_docker/config/my.cnf:/etc/mysql/my.cnf:rw -v /etc/localtime:/etc/localtime:ro --name mysql8 --restart=always -d mysql
添加用户
#进入容器
docker exec -it mysql bash
docker exec -it mysql8 /bin/bash
FLUSH PRIVILEGES;
分配权限
#登录mysql
mysql -u root -p
ALTER USER ‘root‘@‘localhost‘ IDENTIFIED BY ‘qwer1234!‘;
#添加远程登录用户
CREATE USER ‘xiaoming‘@‘%‘ IDENTIFIED WITH mysql_native_password BY ‘qwer1234‘;
GRANT ALL PRIVILEGES ON *.* TO ‘xiaoming‘@‘%‘;
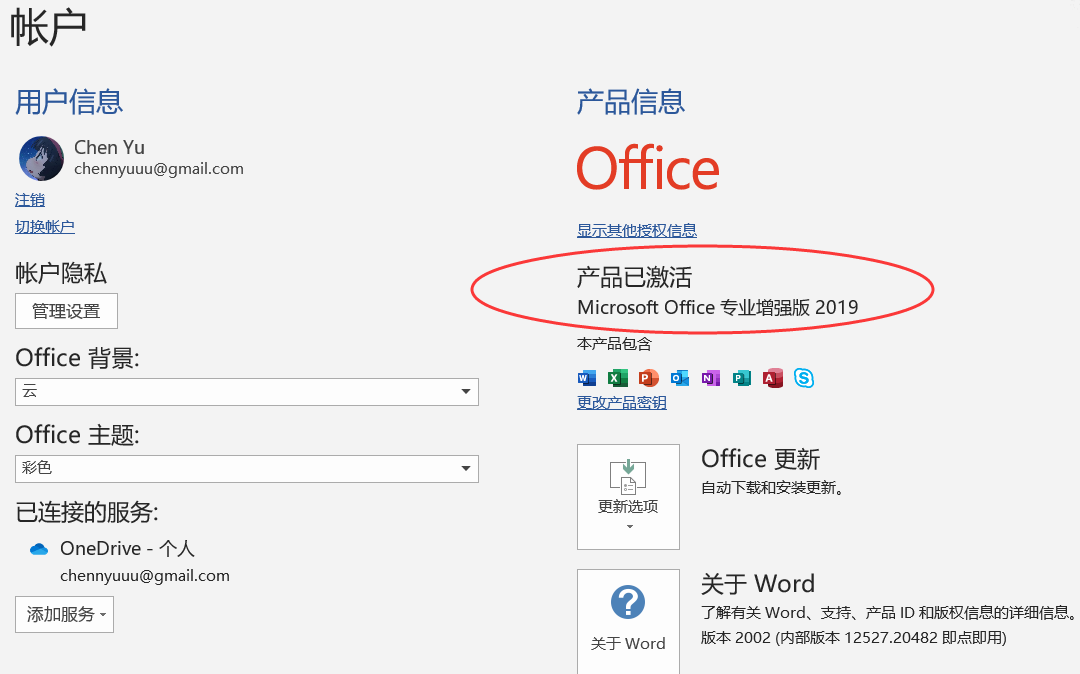
kms破解方式.bat(关闭“windows安全中心各种保护”)
@echo off
(cd /d "%~dp0")&&(NET FILE||(powershell start-process -FilePath ‘%0‘ -verb runas)&&(exit /B)) >NUL 2>&1
title Office 2019 Activator r/Piracy
echo Converting... & mode 40,25
(if exist "%ProgramFiles%\Microsoft Office\Office16\ospp.vbs" cd /d "%ProgramFiles%\Microsoft Office\Office16")&(if exist "%ProgramFiles(x86)%\Microsoft Office\Office16\ospp.vbs" cd /d "%ProgramFiles(x86)%\Microsoft Office\Office16")&(for /f %%x in (‘dir /b ..\root\Licenses16\ProPlus2019VL*.xrm-ms‘) do cscript ospp.vbs /inslic:"..\root\Licenses16\%%x" >nul)&(for /f %%x in (‘dir /b ..\root\Licenses16\ProPlus2019VL*.xrm-ms‘) do cscript ospp.vbs /inslic:"..\root\Licenses16\%%x" >nul)
cscript //nologo ospp.vbs /unpkey:6MWKP >nul&cscript //nologo ospp.vbs /inpkey:NMMKJ-6RK4F-KMJVX-8D9MJ-6MWKP >nul&set i=1
:server
if %i%==1 set KMS_Sev=kms7.MSGuides.com
if %i%==2 set KMS_Sev=kms8.MSGuides.com
if %i%==3 set KMS_Sev=kms9.MSGuides.com
cscript //nologo ospp.vbs /sethst:%KMS_Sev% >nul
echo %KMS_Sev% & echo Activating...
cscript //nologo ospp.vbs /act | find /i "successful" && (echo Complete) || (echo Trying another KMS Server & set /a i+=1 & goto server)
pause >nul
exit
效果图
命令
docker pull redis
mkdir /usr/local/redis666
mkdir /usr/local/redis666/redis
cd /usr/local/redis666/redis
vi docker-compose.yml
内容如下
version: ‘3.7‘
services:
  master:
    image: redis
    container_name: redis-master
    restart: always
    command: redis-server --port 6379 --requirepass 123456  --appendonly yes
    ports:
      - 6379:6379
    volumes:
      - ./data:/data

  slave1:
    image: redis
    container_name: redis-slave-1
    restart: always
    command: redis-server --slaveof 106.75.32.166 6379 --port 6380  --requirepass 123456 --masterauth 123456  --appendonly yes
    ports:
      - 6380:6380
    volumes:
      - ./data:/data


  slave2:
    image: redis
    container_name: redis-slave-2
    restart: always
    command: redis-server --slaveof 106.75.32.166 6379 --port 6381  --requirepass 123456 --masterauth 123456  --appendonly yes
    ports:
      - 6381:6381
    volumes:
      - ./data:/data
启动
docker-compose up -d
docker ps
docker logs -f redis-slave-2
docker logs -f redis-master
docker exec -it redis-master bash
redis-cli
ping
auth 123456
info replication

docker exec -it redis-slave-1 bash
redis-cli -p 6380
ping
auth 123456
info replication

docker exec -it redis-slave-2 bash
redis-cli -p 6381
ping
auth 123456
info replication

docker-compose down
docker-compose up -d

docker stop $(docker ps -a -q)
docker rm $(docker ps -a -q)
exit
主从复制得到验证,客户端连接也没有问题,数据持久化成功!开始部署哨兵
mkdir /usr/local/redis666/sentinel
cd /usr/local/redis666/sentinel
vi docker-compose.yml
内容如下
version: ‘3.7‘
services:
  sentinel1:
    image: redis
    container_name: redis-sentinel-1
    command: redis-sentinel /usr/local/etc/redis/sentinel.conf
    restart: always
    ports:
      - 26379:26379
    volumes:
      - ./sentinel1.conf:/usr/local/etc/redis/sentinel.conf

  sentinel2:
    image: redis
    container_name: redis-sentinel-2
    command: redis-sentinel /usr/local/etc/redis/sentinel.conf
    restart: always
    ports:
      - 26380:26379
    volumes:
      - ./sentinel2.conf:/usr/local/etc/redis/sentinel.conf

  sentinel3:
    image: redis
    container_name: redis-sentinel-3
    command: redis-sentinel /usr/local/etc/redis/sentinel.conf
    restart: always
    ports:
      - 26381:26379
    volumes:
      - ./sentinel3.conf:/usr/local/etc/redis/sentinel.conf
编写sentinel.conf
vi sentinel.conf
内容如下
port 26379
dir /tmp
# 自定义集群名,其中 106.75.32.166 为 redis-master 的 ip,6379 为 redis-master 的端口,2 为最小投票数(因为有 3 台 Sentinel 所以可以设置成 2)
sentinel monitor mymaster 106.75.32.166 6379 2
sentinel down-after-milliseconds mymaster 30000
sentinel parallel-syncs mymaster 1
sentinel auth-pass mymaster 123456
sentinel failover-timeout mymaster 180000
sentinel deny-scripts-reconfig yes
复制3份
cp sentinel.conf sentinel1.conf
cp sentinel.conf sentinel2.conf
cp sentinel.conf sentinel3.conf
启动
docker-compose up -d
docker exec -it redis-sentinel-1 bash
redis-cli -p 26379
sentinel master mymaster
sentinel slaves mymaster
验证哨兵模式,在上面的基础上,停掉主redis
docker logs -f redis-sentinel-1

docker stop redis-master

docker exec -it redis-slave-1 bash
redis-cli -p 6380
ping
auth 123456
info replication

docker exec -it redis-slave-2 bash
redis-cli -p 6381
ping
auth 123456
info replication
一小会之后,发现6380被扶正了!
全套命令
docker pull redis
docker images
mkdir /usr/local/redis
wget -P /usr/local/redis http://download.redis.io/redis-stable/redis.conf
vi /usr/local/redis/redis.conf
# 修改配置文件:输入/bind 127.0.0.1按N查找下一个,注释掉它,它是限制了只能本地访问
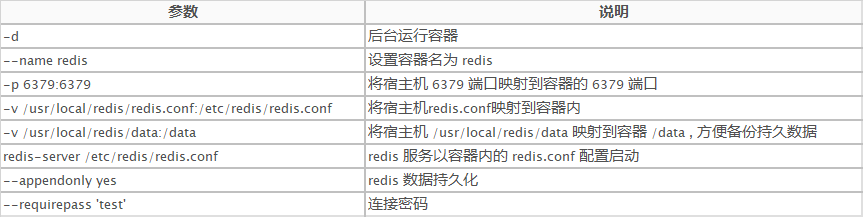
docker run -d --name redis -p 6379:6379 -v /usr/local/redis/redis.conf:/etc/redis/redis.conf redis redis-server /etc/redis/redis.conf --appendonly yes --requirepass ‘test‘
启动命令参数
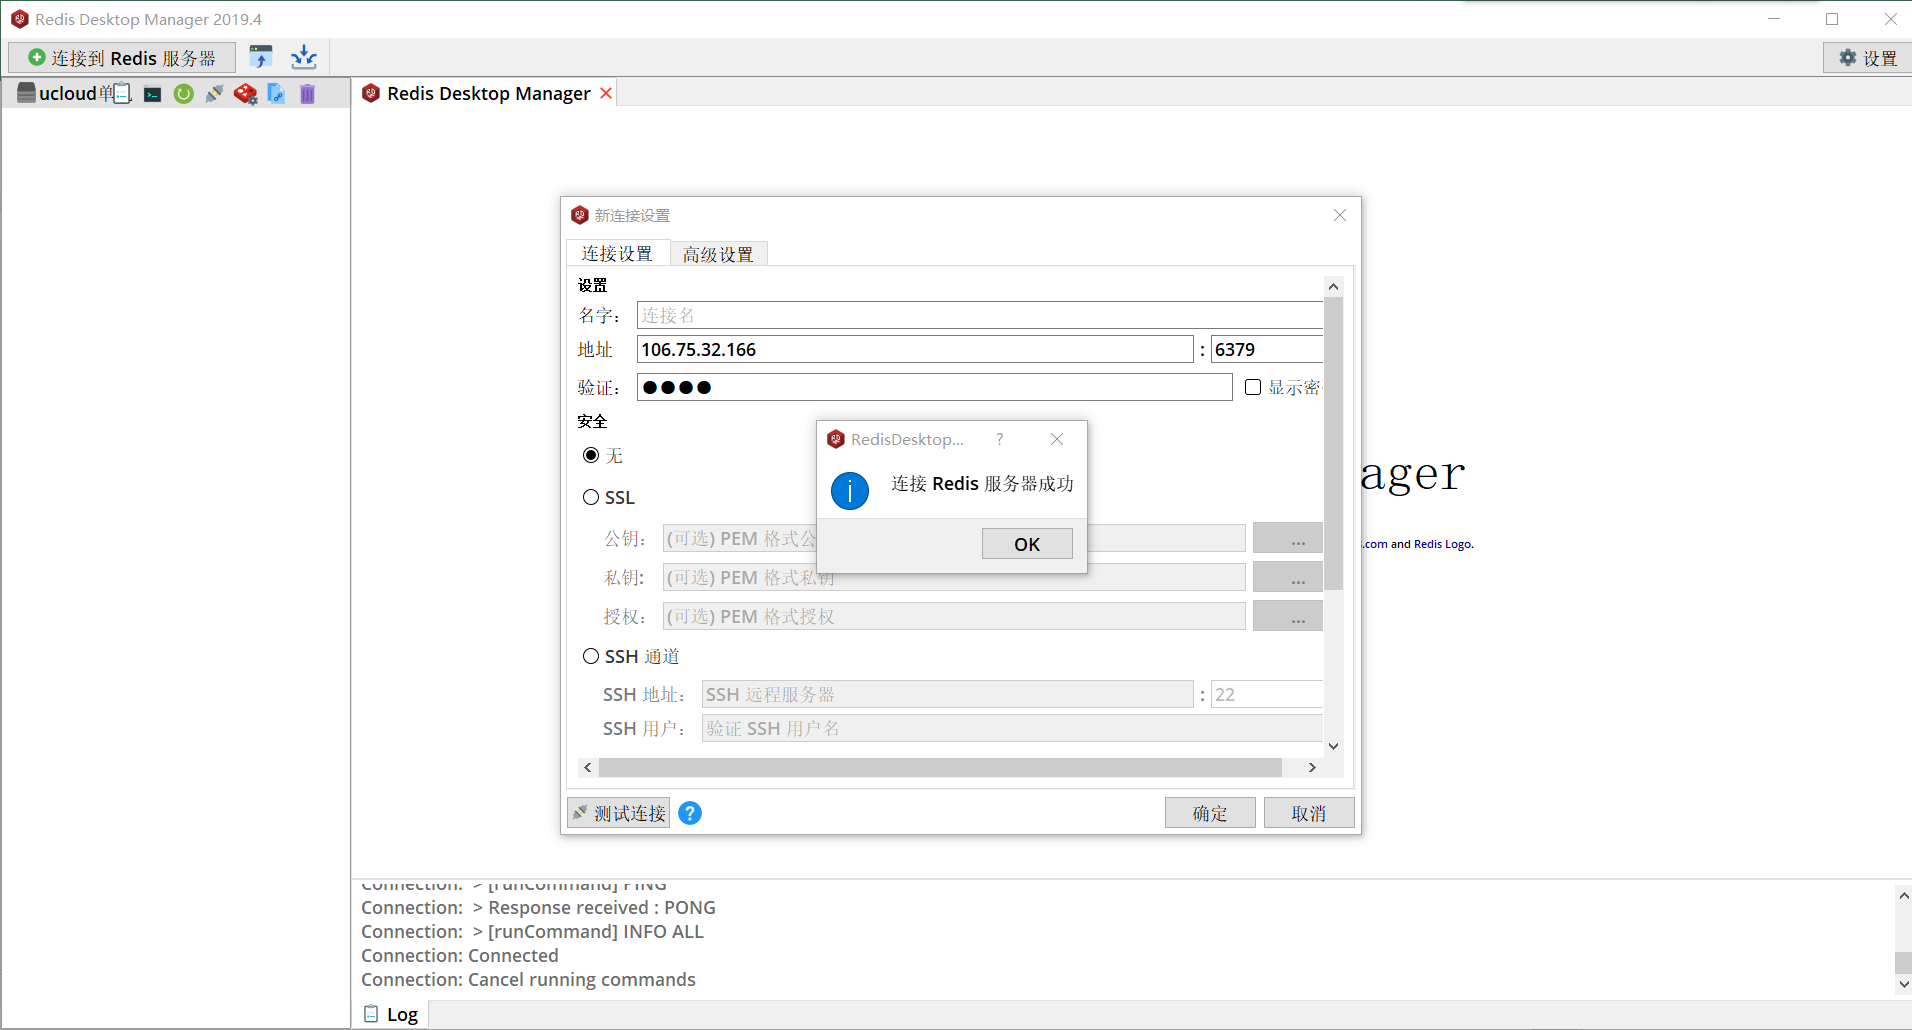
连接测试
标签:general rom 用户名 required org -- lib receive address
原文地址:https://www.cnblogs.com/rain2020/p/14088065.html