标签:raft class seq png gabor softmax 流程 生产 for
import os
import scipy
import array
filename = ‘<Malware_File_Name_Here>‘;
f = open(filename,‘rb‘);
ln = os.path.getsize(filename);
width = 256;
rem = ln%width;
a = array.array("B");
a.fromfile(f,ln-rem);
f.close();
g = numpy.reshape(a,(len(a)/width,width));
g = numpy.uint8(g);
scipy.misc.imsave(‘<Malware_File_Name_Here>.png‘,g);

# gist作为特征输入
import Image
Import leargist
 image = Image.open(‘<Image_Name_Here>.png‘);
 New_im = image.resize((64,64));
des = leargist.color_gist(New_im);
Feature_Vector = des[0:320];

# 构建CNN网络
import keras
 from keras.models import Sequential,Input,Model
 from keras.layers import Dense, Dropout, Flatten
 from keras.layers import Conv2D, MaxPooling2D
 from keras.layers.normalization import BatchNormalization
 from keras.layers.advanced_activations import LeakyReLU

train_X = train_X.reshape(-1, 32,32, 1)
test_X = test_X.reshape(-1, 32,32, 1) We will train our network with these parameters: batch_size = 64
epochs = 20
num_classes = 25 To build the architecture, with regards to its format, use the following: Malware_Model = Sequential()
Malware_Model.add(Conv2D(32, kernel_size=(3,3),activation=‘linear‘,input_shape=(32,32,1),padding=‘same‘))
Malware_Model.add(LeakyReLU(alpha=0.1))
Malware_model.add(MaxPooling2D(pool_size=(2, 2),padding=‘same‘))
Malware_Model.add(Conv2D(64, (3, 3), activation=‘linear‘,padding=‘same‘))
Malware_Model.add(LeakyReLU(alpha=0.1))
Malware_Model.add(Dense(1024, activation=‘linear‘))
Malware_Model.add(LeakyReLU(alpha=0.1))
Malware_Model.add(Dropout(0.4))
Malware_Model.add(Dense(num_classes, activation=‘softmax‘)) To compile the model, use the following: Malware_Model.compile(loss=keras.losses.categorical_crossentropy, optimizer=keras.optimizers.Adam(),metrics=[‘accuracy‘]) Fit and train the model: Malware_Model.fit(train_X, train_label, batch_size=batch_size,epochs=epochs,verbose=1,validation_data=(valid_X, valid_label)) As you noticed, we are respecting the flow of training a neural network that was discussed in previous chapters. To evaluate the model, use the following code: Malware_Model.evaluate(test_X, test_Y_one_hot, verbose=0)
print(‘The accuracy of the Test is:‘, test_eval[1])
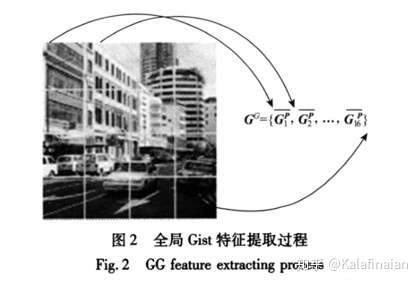
(1) 一种宏观意义的场景特征描述
(2) 只识别“大街上有一些行人”这个场景,无需知道图像中在那些位置有多少人,或者有其他什么对象。
(3) Gist特征向量可以一定程度表征这种宏观场景特征
GIST定义下列五种对空间包络的描述方法
自然度(Degree of Naturalness)
场景如果包含高度的水平和垂直线,这表明该场景有明显的人工痕迹,通常自然景象具有纹理区域和起伏的轮廓。所以,边缘具有高度垂直于水平倾向的自然度低,反之自然度高。|
开放度(Degree of Openness)
空间包络是否是封闭(或围绕)的。封闭的,例如:森林、山、城市中心。或者是广阔的,开放的,例如:海岸、高速公路。
粗糙度(Degree of Roughness)
主要指主要构成成分的颗粒大小。这取决于每个空间中元素的尺寸,他们构建更加复杂的元素的可能性,以及构建的元素之间的结构关系等等。粗糙度与场景的分形维度有关,所以可以叫复杂度。
膨胀度(Degree of Expansion)
平行线收敛,给出了空间梯度的深度特点。例如平面视图中的建筑物,具有低膨胀度。相反,非常长的街道则具有高膨胀度。
险峻度(Degree of Ruggedness)
即相对于水平线的偏移。(例如,平坦的水平地面上的山地景观与陡峭的地面)。险峻的环境下在图片中生产倾斜的轮廓,并隐藏了地平线线。大多数的人造环境建立了平坦地面。因此,险峻的环境大多是自然的。
2.1 LMgist算法主流程
2.2 G2 对输入图片进行Prefilt处理
2.2.1 Pad images to reduce boundary artifacts (扩边+去伪影)
2.2.2 Filter (构造滤波器)
2.2.3 Whitening (白化)
2.2.4 Local contrast normalization (局部对比度归一化)
2.2.5 Local contrast normalization (局部对比度归一化)
2.3 计算图片的Gist向量
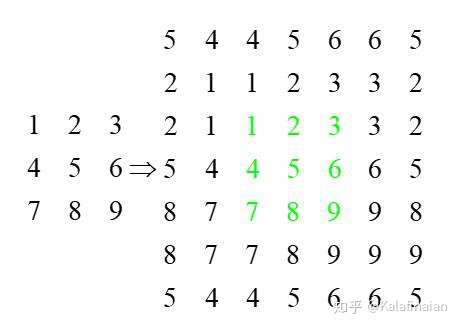
2.3.1 Pading
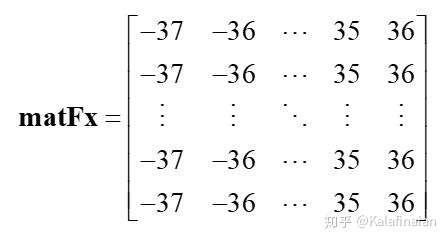
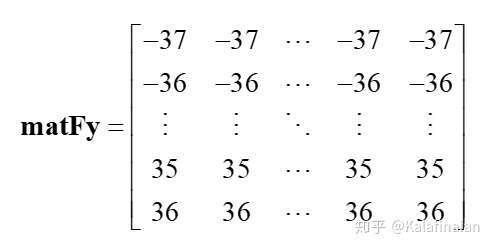
2.3.2 FFT
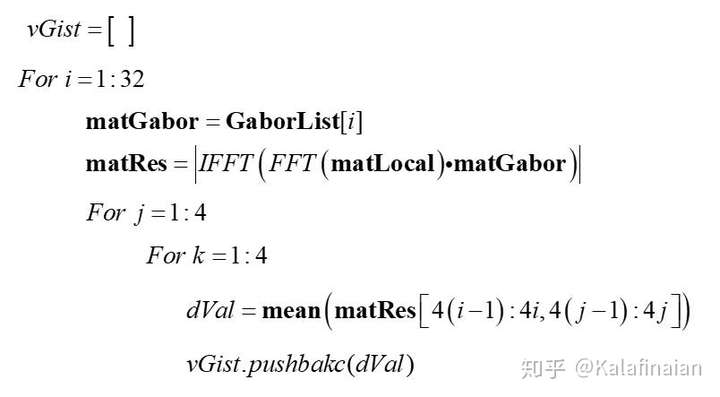
2.3.3 遍历每个Gabor核函数
LMgist Matlab代码的使用
% 读取图片
img = imread(‘demo2.jpg‘);

% 设置GIST参数
clear param
param.orientationsPerScale = [8 8 8 8]; % number of orientations per scale (from HF to LF)
param.numberBlocks = 4;
param.fc_prefilt = 4;

% 计算GIST
[gist, param] = LMgist(img, ‘‘, param);
Kalafinaian/python-img_gist_featuregithub.com
4.1 提取Gist特征
from img_gist_feature.utils_gist import *

s_img_url = "./test/A.jpg"
gist_helper = GistUtils()
np_img = preproc_img(s_img_url)
np_gist = gist_helper.get_gist_vec(np_img)

print(np_gist)
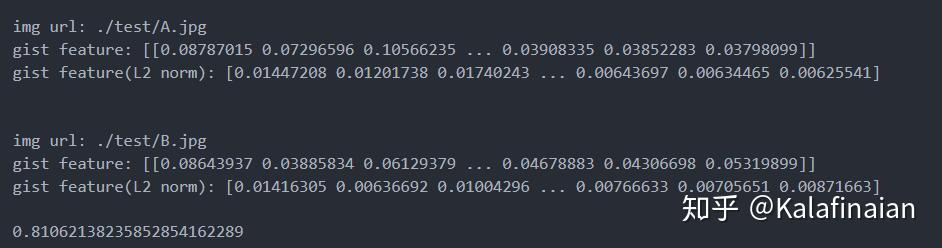
运行得到的gist特征为
[[0.08787015 0.07296596 0.10566235 ... 0.03908335 0.03852283 0.03798099]]
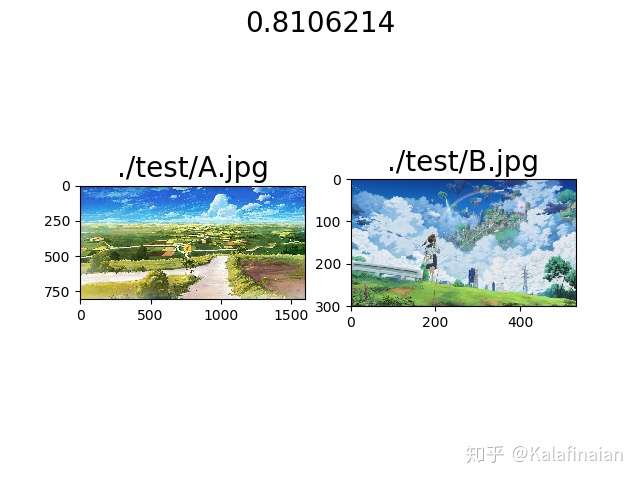
4.2 Gist特征余弦相似距离
下载好github中的代码项目,运行python _test_get_cossim.py
参考资料:
GIST特征描述符使用 - Justany_WhiteSnow - 博客园www.cnblogs.com GIST 空间包络特征 推荐论文 简介blog.csdn.net
GIST特征和LMGIST包的python实现(有github)——使用gist特征检测恶意文件
标签:raft class seq png gabor softmax 流程 生产 for
原文地址:https://www.cnblogs.com/bonelee/p/14922746.html