标签:android style http io ar color os sp 文件
首先上个图, 就一不了然了, 下图左边是自己效果, 右边是QQ效果
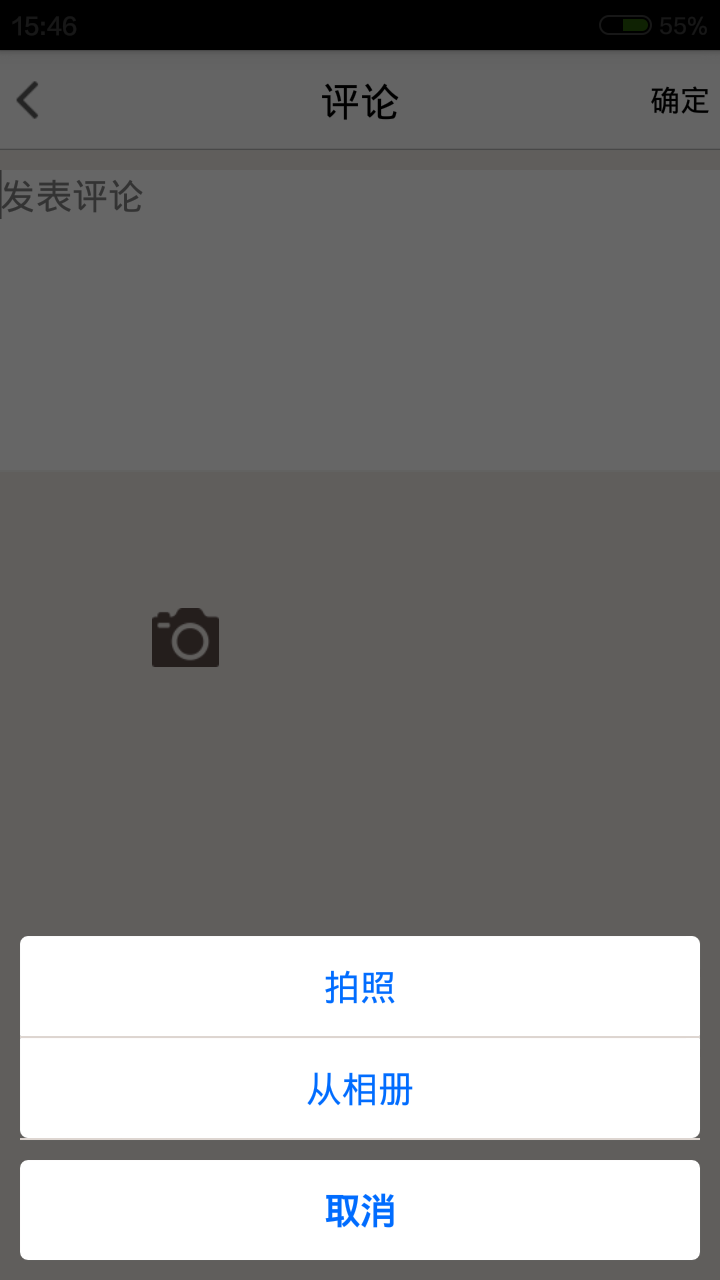

OK, 看到这里应该明白我标题的意思了吧.哈哈.
首先, 来个布局(activity_select_pic.xml)
 <?xml version="1.0" encoding="utf-8"?>
<RelativeLayout xmlns:android="http://schemas.android.com/apk/res/android"
    android:layout_width="fill_parent"
    android:layout_height="fill_parent"
    android:gravity="center_horizontal" >
    <LinearLayout
        android:id="@+id/pop_layout_select_pic"
        android:layout_width="fill_parent"
        android:layout_height="wrap_content"
        android:layout_alignParentBottom="true"
        android:gravity="center_horizontal"
        android:orientation="vertical" >
        <TextView
            android:id="@+id/text_take_photo"
            android:layout_width="fill_parent"
            android:layout_height="50.0dip"
            android:layout_marginLeft="10.0dip"
            android:layout_marginRight="10.0dip"
            android:gravity="center"
            android:orientation="horizontal"
            android:text="拍照"
            android:background="@drawable/shape_popup_top" //这里, 需要讲
            android:textColor="#ff006cff"
            android:textSize="18.0sp" />

        <View
            android:layout_width="fill_parent"
            android:layout_height="1.0dip"
            android:layout_marginLeft="10.0dip"
            android:layout_marginRight="10.0dip"
            android:background="@color/liuliu_border" />

        <TextView
            android:id="@+id/text_pick_photo"
            android:layout_width="fill_parent"
            android:layout_height="50.0dip"
            android:layout_marginLeft="10.0dip"
            android:layout_marginRight="10.0dip"
            android:gravity="center"
            android:background="@drawable/shape_popup_bottom"//这里, 需要讲
            android:orientation="horizontal"
            android:text="从相册"
            android:textColor="#ff006cff"
            android:textSize="18.0sp" />
        <View
            android:layout_width="fill_parent"
            android:layout_height="1.0dip"
            android:layout_marginLeft="10.0dip"
            android:layout_marginRight="10.0dip"
            android:background="@color/liuliu_border" />
        <TextView
            android:id="@+id/text_cancle"
            android:layout_width="fill_parent"
            android:layout_height="50.0dip"
            android:layout_margin="10.0dip"
            android:background="@drawable/shape_popup"//这里, 需要讲
            android:gravity="center"
            android:orientation="horizontal"
            android:text="取消"
            android:textColor="#ff006cff"
            android:textSize="18.0sp"
            android:textStyle="bold" />
    </LinearLayout>
</RelativeLayout>
上面已经标注了3个地方需要讲一下, 就是TextView上面的拍照, 选取, 取消的这个三个的背景
分别是下面三个在drawable-hdpi里面的文件
shape_popup_top.xml, 就是长方形的上边的两个角是圆润的(左上角, 右上角)
 <?xml version="1.0" encoding="utf-8"?>
<layer-list
  xmlns:android="http://schemas.android.com/apk/res/android">
    <item>
        <shape>
            <solid android:color="#ffffffff" />
            <!-- 左上角 右上角-->
            <corners android:topLeftRadius="4.0dip" android:topRightRadius="4.0dip" android:bottomLeftRadius="0.100000024dip" android:bottomRightRadius="0.100000024dip" />
        </shape>
    </item>
</layer-list>
shape_popup_bottom.xml, 就是长方形的下边的两个角是圆润的(左下角, 右下角)
 <?xml version="1.0" encoding="utf-8"?>
<layer-list
  xmlns:android="http://schemas.android.com/apk/res/android">
    <item>
        <shape>
        <!-- 白色-->
            <solid android:color="#ffffffff" />
            <!-- 左下角, 右下角-->
            <corners
                android:topLeftRadius="0.100000024dip"
                android:topRightRadius="0.100000024dip"
                android:bottomLeftRadius="4.0dip"
                android:bottomRightRadius="4.0dip" />
        </shape>
    </item>
</layer-list>
shape_popup.xml
 <?xml version="1.0" encoding="utf-8"?>
<layer-list
  xmlns:android="http://schemas.android.com/apk/res/android">
    <item>
        <shape>
            <solid android:color="#ffffffff" />
            <!--四个角都是圆的-->
            <corners android:radius="4.0dip" />
        </shape>
    </item>
</layer-list>
OK, 到这里之后, 就完成了布局. 但是还没完, 还有调出方式, 我们要放在下面, 而且要是透明的, 这个就要在manifest中去规定了
 <activity
            android:name="com.gdut.pet.ui.ActivitySelectPic"
            android:label="@string/personal_central"
            android:theme="@style/DialogStyleBottom"
            >
<!--这个是在manifest中定义的一个activity, 规定了他的theme是DialogStyleBottom-->
上面这个这个是在manifest中定义的一个activity, 规定了他的theme是DialogStyleBottom,
DialogStyleBottom如下(在values文件夹下的styles.xml)
 <style name="AnimBottom" parent="@android:style/Animation">
        <item name="android:windowEnterAnimation">@anim/push_bottom_in</item>
        <item name="android:windowExitAnimation">@anim/push_bottom_out</item>
    </style>
    <style name="DialogStyleBottom" parent="android:Theme.Dialog">
        <item name="android:windowAnimationStyle">@style/AnimBottom</item>
        <item name="android:windowFrame">@null</item>
        <!-- 边框 -->
        <item name="android:windowIsFloating">false</item>
        <!-- 是否浮现在activity之上 -->
        <item name="android:windowIsTranslucent">true</item>
        <!-- 半透明 -->
        <item name="android:windowNoTitle">true</item>
        <!-- 无标题 -->
        <item name="android:windowBackground">@android:color/transparent</item>
        <!-- 背景透明 -->
        <item name="android:backgroundDimEnabled">true</item>
        <!-- 模糊 -->
    </style>
上面的应该能看得明白了
OK, 还差最后一部了, 就是出来的方式, 这里用到animation,
文件在anim文件夹下面
push_bottom_in.xml
<?xml version="1.0" encoding="utf-8"?>
<!-- 上下滑入式 -->
<set xmlns:android="http://schemas.android.com/apk/res/android" >
    <translate
        android:duration="200"
        android:fromYDelta="100%p"
        android:toYDelta="0"
     />
</set>
push_bottom_out.xml
 <?xml version="1.0" encoding="utf-8"?>
<!-- 上下滑出式 -->
<set xmlns:android="http://schemas.android.com/apk/res/android" >

    <translate
        android:duration="200"
        android:fromYDelta="0"
        android:toYDelta="50%p" />
</set>
ok, 到这里就完成了, 去调用吧
发表图片, 弹出界面, 类似QQ发说说时候添加照片的界面(不太会说,见谅)
标签:android style http io ar color os sp 文件
原文地址:http://my.oschina.net/u/1377657/blog/350068