标签:des style blog http io ar color os 使用
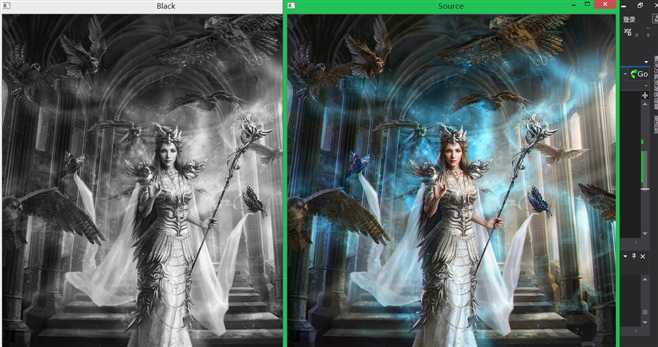
图像显示并转化为黑白输出到新文件
code:
 1 #include <opencv2\opencv.hpp>
 2 #include <iostream>
 3 #include <string>
 4
 5 #pragma comment( linker, "/subsystem:\"windows\" /entry:\"mainCRTStartup\"" )
 6
 7 using namespace std;
 8 using namespace cv;
 9
10 int main()
11 {
12     Mat img = imread("test.jpg",1);
13     if (img.empty())
14     {
15         return -1;
16     }
17     Mat gray_img;
18     cvtColor(img, gray_img, CV_BGR2GRAY);
19     imwrite("./black.jpg", gray_img);
20
21     namedWindow("Source", CV_WINDOW_AUTOSIZE);
22     imshow("Source", img);
23     namedWindow("Black", CV_WINDOW_AUTOSIZE);
24     imshow("Black", gray_img);
25
26     waitKey();
27     return 0;
28 }
结果:
Mat数据结构:
 1 #include <opencv2\opencv.hpp>
 2 #include <iostream>
 3 #include <string>
 4
 5 #pragma comment( linker, "/subsystem:\"windows\" /entry:\"mainCRTStartup\"" )
 6
 7 using namespace std;
 8 using namespace cv;
 9
10 void Show(std::string name,Mat img)
11 {
12     namedWindow(name, CV_WINDOW_AUTOSIZE);
13     imshow(name, img);
14 }
15
16 int main()
17 {
18     Mat A, C;
19     A = imread("test.jpg", 1);
20     Mat B(A);
21     C = A;
22     Mat D(A, Rect(10, 10, 100, 100));
23     Mat E = A(Range::all(), Range(1, 3));
24     Show("A", A);
25     Show("B", B);
26     Show("C", C);
27     Show("D", D);
28     Show("E", E);
29     waitKey();
30     return 0;
31 }
结果:

以上显示的是浅拷贝,就是除了headers不同之外,其余的数据都是从一块数据块中取得的。
要实现深拷贝:
 1 #include <opencv2\opencv.hpp>
 2 #include <iostream>
 3 #include <string>
 4
 5 #pragma comment( linker, "/subsystem:\"windows\" /entry:\"mainCRTStartup\"" )
 6
 7 using namespace std;
 8 using namespace cv;
 9
10 void Show(std::string name,Mat img)
11 {
12     namedWindow(name, CV_WINDOW_AUTOSIZE);
13     imshow(name, img);
14 }
15
16 int main()
17 {
18     Mat img = imread("test.jpg", 1);
19     Show("Source", img);
20     Mat dest = img.clone();
21     Show("Dest", dest);
22     waitKey();
23     return 0;
24 }
或是:
 1 #include <opencv2\opencv.hpp>
 2 #include <iostream>
 3 #include <string>
 4
 5 #pragma comment( linker, "/subsystem:\"windows\" /entry:\"mainCRTStartup\"" )
 6
 7 using namespace std;
 8 using namespace cv;
 9
10 void Show(std::string name,Mat img)
11 {
12     namedWindow(name, CV_WINDOW_AUTOSIZE);
13     imshow(name, img);
14 }
15
16 int main()
17 {
18     Mat img = imread("test.jpg", 1);
19     Show("Source", img);
20     Mat dest;
21     img.copyTo(dest);
22     Show("Dest", dest);
23     waitKey();
24     return 0;
25 }
构建Mat对象:
 1 #include <opencv2\opencv.hpp>
 2 #include <iostream>
 3 #include <string>
 4
 5 //#pragma comment( linker, "/subsystem:\"windows\" /entry:\"mainCRTStartup\"" )
 6
 7 using namespace std;
 8 using namespace cv;
 9
10 void Show(std::string name,Mat img)
11 {
12     namedWindow(name, CV_WINDOW_AUTOSIZE);
13     imshow(name, img);
14 }
15
16 int main()
17 {
18     Mat M(2, 2, CV_8UC3, Scalar(0, 0, 255));
19     cout << "M=" << endl << "" << M << endl << endl;
20     system("pause");
21     return 0;
22 }
构造器参数,行+列+图像类型+填充数据。
模仿MatLab的函数:
 1 #include <opencv2\opencv.hpp>
 2 #include <iostream>
 3 #include <string>
 4
 5 //#pragma comment( linker, "/subsystem:\"windows\" /entry:\"mainCRTStartup\"" )
 6
 7 using namespace std;
 8 using namespace cv;
 9
10 void Show(std::string name,Mat img)
11 {
12     namedWindow(name, CV_WINDOW_AUTOSIZE);
13     imshow(name, img);
14 }
15
16 int main()
17 {
18     Mat E = Mat::eye(4, 4, CV_64F);
19     cout << E << endl;
20     Mat O = Mat::ones(2, 2, CV_32F);
21     cout << O << endl;
22     Mat Z = Mat::zeros(3, 3, CV_8UC1);
23     cout << Z << endl;
24     system("pause");
25     return 0;
26 }
因为默认重载了流运算符,因此可以直接输出;
对于小矩阵使用逗号初始化:
 1 #include <opencv2\opencv.hpp>
 2 #include <iostream>
 3 #include <string>
 4
 5 //#pragma comment( linker, "/subsystem:\"windows\" /entry:\"mainCRTStartup\"" )
 6
 7 using namespace std;
 8 using namespace cv;
 9
10 void Show(std::string name,Mat img)
11 {
12     namedWindow(name, CV_WINDOW_AUTOSIZE);
13     imshow(name, img);
14 }
15
16 int main()
17 {
18     Mat C = (Mat_<double>(3, 3) << 0, -1, 0, -1, 5, -1, 0, -1, 0);
19     cout << C << endl;
20     system("pause");
21     return 0;
22 }
可以按行列复制图像的色值:
 1 #include <opencv2\opencv.hpp>
 2 #include <iostream>
 3 #include <string>
 4
 5 //#pragma comment( linker, "/subsystem:\"windows\" /entry:\"mainCRTStartup\"" )
 6
 7 using namespace std;
 8 using namespace cv;
 9
10 void Show(std::string name,Mat img)
11 {
12     namedWindow(name, CV_WINDOW_AUTOSIZE);
13     imshow(name, img);
14 }
15
16 int main()
17 {
18     Mat C = (Mat_<double>(3, 3) << 0, -1, 0, -1, 5, -1, 0, -1, 0);
19     Mat Row = C.col(1).clone();
20     cout << Row << endl;
21     system("pause");
22     return 0;
23 }
随机生成矩阵方式:
 1 #include <opencv2\opencv.hpp>
 2 #include <iostream>
 3 #include <string>
 4
 5 #pragma comment( linker, "/subsystem:\"windows\" /entry:\"mainCRTStartup\"" )
 6
 7 using namespace std;
 8 using namespace cv;
 9
10 void Show(std::string name,Mat img)
11 {
12     namedWindow(name, CV_WINDOW_AUTOSIZE);
13     imshow(name, img);
14 }
15
16 int main()
17 {
18     Mat img;
19     img = Mat(400, 400, CV_8UC3);
20     randu(img, Scalar::all(0), Scalar::all(255));
21     Show("Img", img);
22     waitKey();
23     return 0;
24 }
randu后两个参数是取值范围;
矩阵值的输出格式:
 1 #include <opencv2\opencv.hpp>
 2 #include <iostream>
 3 #include <string>
 4
 5 //#pragma comment( linker, "/subsystem:\"windows\" /entry:\"mainCRTStartup\"" )
 6
 7 using namespace std;
 8 using namespace cv;
 9
10 void Show(std::string name,Mat img)
11 {
12     namedWindow(name, CV_WINDOW_AUTOSIZE);
13     imshow(name, img);
14 }
15
16 int main()
17 {
18     Mat img;
19     img = Mat(4, 4, CV_8UC3,Scalar::all(25));
20     cout << img << endl;
21     cout << format(img, "python") << endl;
22     cout << format(img, "csv") << endl;
23     cout << format(img, "numpy") << endl;
24     cout << format(img, "C") << endl;
25     system("pause");
26     return 0;
27 }
其他可以直接用流输出的数据类型是
 1 #include <opencv2\opencv.hpp>
 2 #include <iostream>
 3 #include <string>
 4
 5 //#pragma comment( linker, "/subsystem:\"windows\" /entry:\"mainCRTStartup\"" )
 6
 7 using namespace std;
 8 using namespace cv;
 9
10 void Show(std::string name,Mat img)
11 {
12     namedWindow(name, CV_WINDOW_AUTOSIZE);
13     imshow(name, img);
14 }
15
16 int main()
17 {
18     Point2f p2(5, 1);
19     cout << p2 << endl;
20     Point3f p3(2, 6, 7);
21     cout << p3 << endl;
22     vector<float> v;
23     v.push_back((float)CV_PI);
24     v.push_back(2);
25     v.push_back(3.01f);
26     cout << Mat(v) << endl;
27     vector<Point2f> vPoints(20);
28     for (size_t i = 0; i < vPoints.size(); ++i)
29         vPoints[i] = Point2f((float)(i * 5), (float)(i % 7));
30     cout << vPoints << endl;
31     system("pause");
32     return 0;
33 }
计算算法运行时间:
 1 #include <opencv2\opencv.hpp>
 2 #include <iostream>
 3 #include <string>
 4 #include <sstream>
 5
 6 //#pragma comment( linker, "/subsystem:\"windows\" /entry:\"mainCRTStartup\"" )
 7
 8 using namespace std;
 9 using namespace cv;
10
11 void Show(std::string name,Mat img)
12 {
13     namedWindow(name, CV_WINDOW_AUTOSIZE);
14     imshow(name, img);
15 }
16
17 int main()
18 {
19     double t = getTickCount();
20     //do somethings
21     t = ((double)getTickCount() - t) / getTickFrequency();
22     cout << t << endl;
23     system("pause");
24     return 0;
25 }
下篇待续。。。
以上。
标签:des style blog http io ar color os 使用
原文地址:http://www.cnblogs.com/lhyz/p/4138712.html