标签:
在iOS中,可以使用剪贴板实现应用程序之中以及应用程序之间实现数据的共享。比如你可以从iPhone QQ复制一个url,然后粘贴到safari浏览器中查看这个链接的内容。
一、在iOS中下面三个控件,自身就有复制-粘贴的功能:
1、UITextView
2、UITextField
3、UIWebView
二、UIKit framework提供了几个类和协议方便我们在自己的应用程序中实现剪贴板的功能。
1、UIPasteboard:我们可以向其中写入数据,也可以读取数据
2、UIMenuController:显示一个快捷菜单,用来复制、剪贴、粘贴选择的项。
3、UIResponder中的 canPerformAction:withSender:用于控制哪些命令显示在快捷菜单中。
4、当快捷菜单上的命令点击的时候,UIResponderStandardEditActions将会被调用。
三、下面这些项能被放置到剪贴板中
1、UIPasteboardTypeListString — 字符串数组, 包含kUTTypeUTF8PlainText
2、UIPasteboardTypeListURL — URL数组,包含kUTTypeURL
3、UIPasteboardTypeListImage — 图形数组, 包含kUTTypePNG 和kUTTypeJPEG
4、UIPasteboardTypeListColor — 颜色数组
四、剪贴板的类型分为两种:
系统级:使用UIPasteboardNameGeneral和UIPasteboardNameFind创建,系统级的剪贴板,当应用程序关闭,或者卸载时,数据都不会丢失。
应用程序级:通过设置,可以让数据在应用程序关闭之后仍然保存在剪贴板中,但是应用程序卸载之后数据就会失去。我们可用通过pasteboardWithName:create:来创建。
UIMenuController的使用,对UILabel拷贝以及定制菜单
1. Menu所处的View必须实现 – (BOOL)canBecomeFirstResponder, 且返回YES
2. Menu所处的View必须实现 – (BOOL)canPerformAction:withSender, 并根据需求返回YES或NO
3. 使Menu所处的View成为First Responder (becomeFirstResponder)
4. 定位Menu (- setTargetRect:inView:)
5. 展示Menu (- setMenuVisible:animated:)
- @implementation UICopyLabel
-
- - (BOOL)canBecomeFirstResponder{
- return YES;
- }
-
- -(BOOL)canPerformAction:(SEL)action withSender:(id)sender{
- return (action == @selector(copy:));
- }
- -(void)copy:(id)sender{
- UIPasteboard *pboard = [UIPasteboard generalPasteboard];
- pboard.string = self.text;
- }
-
- -(void)attachTapHandler{
- self.userInteractionEnabled = YES;
- UITapGestureRecognizer *touch = [[UITapGestureRecognizer alloc] initWithTarget:self action:@selector(handleTap:)];
- touch.numberOfTapsRequired = 2;
- [self addGestureRecognizer:touch];
- [touch release];
- }
- - (id)initWithFrame:(CGRect)frame
- {
- self = [super initWithFrame:frame];
- if (self) {
- [self attachTapHandler];
- }
- return self;
- }
- -(void)awakeFromNib{
- [super awakeFromNib];
- [self attachTapHandler];
- }
-
- -(void)handleTap:(UIGestureRecognizer*) recognizer{
- [self becomeFirstResponder];
- UIMenuController *menu = [UIMenuController sharedMenuController];
- [menu setTargetRect:self.frame inView:self.superview];
- [menu setMenuVisible:YES animated:YES];
- }
-
-
- @end
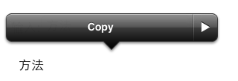
在view里添加一个UICopyLabel
现在可以使用UICopyLabel实现双击来对label的内容copy了
在你的view中
UICopyLabel *display = [[UICopyLabelalloc]initWithFrame:CGRectMake(30,100,250,30)];
awakeFromNib
在使用IB的时候才会涉及到此方法的使用,当.nib文件被加载的时候,会发送一个awakeFromNib的消息到.nib文件中的每个对象,每个对象都可以定义自己的awakeFromNib函数来响应这个消息,执行一些必要的操作。
看例子:
创建一个viewController with XIB
定义一个UIView的子类
打开xib,并把View的类型指定为上一步骤定义的子类
然后在TestView.m中加入 awakeFromNib方法,运行程序发现此方法被调用了!!!
下面我们来定制菜单
在attachTapHandler中添加长按压手势
- -(void)attachTapHandler{
- self.userInteractionEnabled = YES;
-
- UITapGestureRecognizer *touch = [[UITapGestureRecognizer alloc] initWithTarget:self action:@selector(handleTap:)];
- touch.numberOfTapsRequired = 2;
- [self addGestureRecognizer:touch];
- [touch release];
-
-
- UILongPressGestureRecognizer *press = [[UILongPressGestureRecognizer alloc]initWithTarget:self action:@selector(longPress:)];
- press.minimumPressDuration = 1.0;
- [self addGestureRecognizer:press];
- [press release];
-
- }
添加方法longPress
- - (void)longPress:(UILongPressGestureRecognizer *)recognizer {
- if (recognizer.state == UIGestureRecognizerStateBegan) {
- [self becomeFirstResponder];
- UIMenuItem *flag = [[UIMenuItem alloc] initWithTitle:@"Flag" action:@selector(flag:)];
- UIMenuItem *approve = [[UIMenuItem alloc] initWithTitle:@"Approve" action:@selector(approve:)];
- UIMenuItem *deny = [[UIMenuItem alloc] initWithTitle:@"Deny" action:@selector(deny:)];
-
- UIMenuController *menu = [UIMenuController sharedMenuController];
- [menu setMenuItems:[NSArray arrayWithObjects:flag, approve, deny, nil]];
- [menu setTargetRect:self.frame inView:self.superview];
- [menu setMenuVisible:YES animated:YES];
- NSLog(@"menuItems:%@",menu.menuItems);
- }
- }
-
- - (void)flag:(id)sender {
- NSLog(@"Cell was flagged");
- }
-
- - (void)approve:(id)sender {
- NSLog(@"Cell was approved");
- }
-
- - (void)deny:(id)sender {
- NSLog(@"Cell was denied");
- }
修改canPerformAction
- -(BOOL)canPerformAction:(SEL)action withSender:(id)sender{
- if (action == @selector(copy:)||action == @selector(flag:)||action == @selector(approve:)||action == @selector(deny:)) {
- return YES;
- }
- }
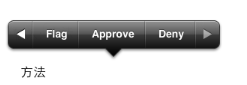
ok。。。效果如图
ios 复制黏贴板的使用
标签:
原文地址:http://www.cnblogs.com/ligun123/p/4228142.html