标签:
应用帮助界面简单实现
有的时候我们可能遇到一些关于应用中的技术或者信息不够明确,所以在使用应用的时候可能会遇到一些不知道所措的情况,比如关于一些难一点的游戏应用的操作,关于应用中一些比较隐藏的功能疑惑是操作完成后需要用户去根据需求做其他相应操作的的功能,所以这里我们就实现一个简单的帮组界面,也许跟实际开发中有一些区别,但是思路理解基本上就没有什么问题了。
我们知道平时帮助界面来说,可能是使用一个掩饰案例,可能是网络连接,也能是说明文档,这里我们就简单一点使用网页结合JSON数据来实现,网页实现也是使用最多的方法。
1:先来看简单的JSON数据格式
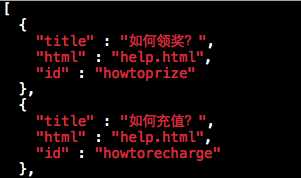
2:然后就是网页对应显示数据的格式


3:首先新建一个模型类用来加载对应网页信息(这里是根据网页中相应信息来创建的):
声明模型属性和对应的模型方法
 1 @property (nonatomic, copy) NSString *title; /**< 标题 */
 2
 3
 4
 5 @property (nonatomic, copy) NSString *html; /**< 网页文件名 */
 6
 7
 8
 9 @property (nonatomic, copy) NSString *ID; /**< id */
10
11
12
13
14
15 -(instancetype)initWithDict:(NSDictionary *)dict;
16
17 +(instancetype)helpWithDict:(NSDictionary *)dict;
实现模型方法
 1 -(instancetype)initWithDict:(NSDictionary *)dict{
 2
 3     if (self = [super init]) {
 4
 5         //获取key设置
 6
 7         self.title = dict[@"title"];
 8
 9         self.html = dict[@"html"];
10
11         self.ID = dict[@"id"];
12
13     }
14
15
16
17     return self;
18
19 }
20
21 +(instancetype)helpWithDict:(NSDictionary *)dict{
22
23     return [[self alloc] initWithDict:dict];
24
25 }
26
27
4:由于使用到了JSON数据,这里同样需要实现JSON数据的加载和序列化,
创建一个可变数据用来存放解析后的JSON数据
1 @property (nonatomic, strong) NSMutableArray *helps; /**< 数据源 */
懒加载数组,从Bundle中获取JSON文件并且解析出来放到可变数组中
 1 -(NSMutableArray *)helps{
 2
 3     if (!_helps) {
 4
 5         _helps = [NSMutableArray array];
 6
 7
 8
 9         // 1.把help.json数据转成模型,添加到数组
10
11         // 1.1获取help.json二进制数据
12
13         NSURL *jsonFilePath = [[NSBundle mainBundle] URLForResource:@"help.json" withExtension:nil];
14
15         NSData *data = [NSData dataWithContentsOfURL:jsonFilePath];
16
17
18
19         // 1.2把二进制转成数组
20
21         // NSJSONSerialization json 序列化:把json字符串转成对象
22
23         id obj = [NSJSONSerialization JSONObjectWithData:data options:0 error:nil];
24
25         // 为安全
26
27         if ([obj isKindOfClass:[NSArray class]]) {
28
29             for (NSDictionary *helpDict in obj) {
30
31                 // 把字典转模型
32
33                 iCocosHelp *help = [iCocosHelp helpWithDict:helpDict];
34
35                 [_helps addObject:help];
36
37             }
38
39         }
40
41
42
43     }
44
45
46
47     return _helps;
48
49 }
5:这里就不使用MVC了,直接使用模型加载,因为没有必要去自定义一个Cell(或者说我们在Cell中没有其他功能要实现,除了点击),如果还有其他功能需要实现或者拓展的建议结合MVC使用
所以我们就可以直接从存放解析出来的JSON数组中获取数据来现实到tableView中
 1 #pragma mark - Table view data source
 2
 3 - (NSInteger)tableView:(UITableView *)tableView numberOfRowsInSection:(NSInteger)section {
 4
 5 #warning Incomplete method implementation.
 6
 7     // Return the number of rows in the section.
 8
 9     return self.helps.count;
10
11 }
12
13
14
15
16
17 - (UITableViewCell *)tableView:(UITableView *)tableView cellForRowAtIndexPath:(NSIndexPath *)indexPath {
18
19
20
21     static NSString *ID = @"HelpCell";
22
23     UITableViewCell *cell = [tableView dequeueReusableCellWithIdentifier:ID];
24
25
26
27     if (!cell) {
28
29         cell = [[UITableViewCell alloc] initWithStyle:UITableViewCellStyleDefault reuseIdentifier:ID];
30
31         // 显示箭头
32
33         cell.accessoryType = UITableViewCellAccessoryDisclosureIndicator;
34
35     }
36
37
38
39     // 显示标题
40
41     iCocosHelp *help = self.helps[indexPath.row];
42
43     cell.textLabel.text = help.title;
44
45
46
47     return cell;
48
49 }
50
51
到这里我们就可以看到一些简单的TableView数据了

6:然后就是点击对应的行显示对应的数据,这里由于我们使用的网页,所以需要新建一个UIView控制器来专门显示网页信息(那么你可能问为什么不新建一个网页控制呢,sorry,没有这个控制器),
在控制器中创建一个用来显示帮助页面的模型属性
1 @property (nonatomic, strong) XMGHelp *help; /**< <#属性名#> */
设置控制器对应的属性
 1  // 添加背景
 2
 3     self.view.backgroundColor = [UIColor whiteColor];
 4
 5
 6
 7     // 显示标题
 8
 9     self.title = self.help.title;
10
11
在控制器的ViewDidLoad中创建一个UIWebView并且设置相应的属性,包括代理(后面会用到),然后添加到控制器的View上
 1     // 1.网页控件
 2
 3     UIWebView *webView = [[UIWebView alloc] init];
 4
 5
 6
 7     // 2.设置frm
 8
 9     webView.frame = self.view.bounds;
10
11
12
13     // 设置代理
14
15     webView.delegate = self;
16
17
18
19     // 3.添加webview
20
21     [self.view addSubview:webView];
22
23
从Bundle众加载对应的的网页,并且加载到webView上面显示(这里设置到了UIWebView的使用,其实很简单,一般就是三行代码,或者还有一些简单的代理方法)
 1     // .显示网页
 2
 3     // 域名 对应 IP 地址
 4
 5     // weibo.com = 123.125.104.197
 6
 7     // http://weibo.com/login.php  远程路径
 8
 9     // 获取网页的 "本地路径"
10
11     NSURL *htmlURL = [[NSBundle mainBundle] URLForResource:self.help.html withExtension:nil];
12
13
14
15     // 让UIWebView直接访问 "网页文件"
16
17     NSURLRequest *request = [NSURLRequest requestWithURL:htmlURL];
18
19     [webView loadRequest:request];
20
21
7:最后就是加载完成网页之后需要做一些相应的操作,那么什么操作呢?注意听了,这里才是重点,
由于可能我们不需要去实现每一个网页都需要点击对应的一行来实现显示,也就是说有些内容相似的可能会放到一个网页中去显示,所以这个时候我们点击对应的行系统默认是帮我们定位到最顶部,而我们需要实现的功能就是点击对应的行之后显示的网页要根据我们点击的行将行对应的网页信息置顶,这里就需要使用javascript相关知识,当然这里用到的连皮毛都不如,大致知道就可以了。
我们的混合网页中有一个标志符ID用来区别不同行对应的网页信息的,所以这里就使用这个ID来实现置顶(跳转)。
在网页加载完成的代码中去判断是否有这个ID,如果有就使用字符串拼接技术去生成javascript代码,然后使用系统为我们提供的方法(stringByEvaluatingJavaScriptFromString)去执行javascript,实现交互
 1 #pragma mark 整个网页加载完
 2
 3 -(void)webViewDidFinishLoad:(UIWebView *)webView{
 4
 5
 6
 7     // 有ID,才需要让网页 来到指定的位置
 8
 9     if (self.help.ID) {
10
11         NSString *js =  [NSString stringWithFormat:@"window.location.href = ‘#%@‘",self.help.ID];
12
13         NSLog(@"%@",js);
14
15
16
17         // 让网页执行 js代码
18
19         [webView stringByEvaluatingJavaScriptFromString:js];
20
21     }
这样就可以很简单的实现置顶效果


拓展:最后总结一些关于应用内部需要实现的其他技术,
有的时候我们可能还需要实现一些打电话或者对这个应用做相应的评论,其实也非常简单,一般这类的功能我们第一想到的都是单例UIApplication去实现
 1 -(void)tableView:(UITableView *)tableView didSelectRowAtIndexPath:(NSIndexPath *)indexPath{
 2
 3     if (indexPath.row == 0) {//跳转到appstore让用户去评分
 4
 5         // 网易彩票的appstore的(URL)地址是多少?
 6
 7         //https://itunes.apple.com/cn/app/id411654863?mt=8
 8
 9         NSString *openURL = @"http://itunes.apple.com/app/id411654863?mt=8";
10
11
12
13         [[UIApplication sharedApplication] openURL:[NSURL URLWithString:openURL]];
14
15     }else{//拨打电话
16
17         [[UIApplication sharedApplication] openURL:[NSURL URLWithString:@"tel://10086"]];
18
19     }
20
21 }
标签:
原文地址:http://www.cnblogs.com/iCocos/p/4733195.html